|
|
|
Acquista da IT |
|
|
|
|
|
|
 |
|
|
|

Nella lezione 2, abbiamo imparato come utilizzare un browser per inviare segnali di controllo a un dispositivo remoto e accendere/spegnere un LED. In questa lezione, ti mostreremo come leggere i dati del sensore remoto sulla tua APP per cellulare. Utilizzeremo un fotoresistore (sensore di luce) per leggere il valore della luce ambientale remota. Questo è molto utile nelle fattorie e nelle serre per controllare la luce delle piante.

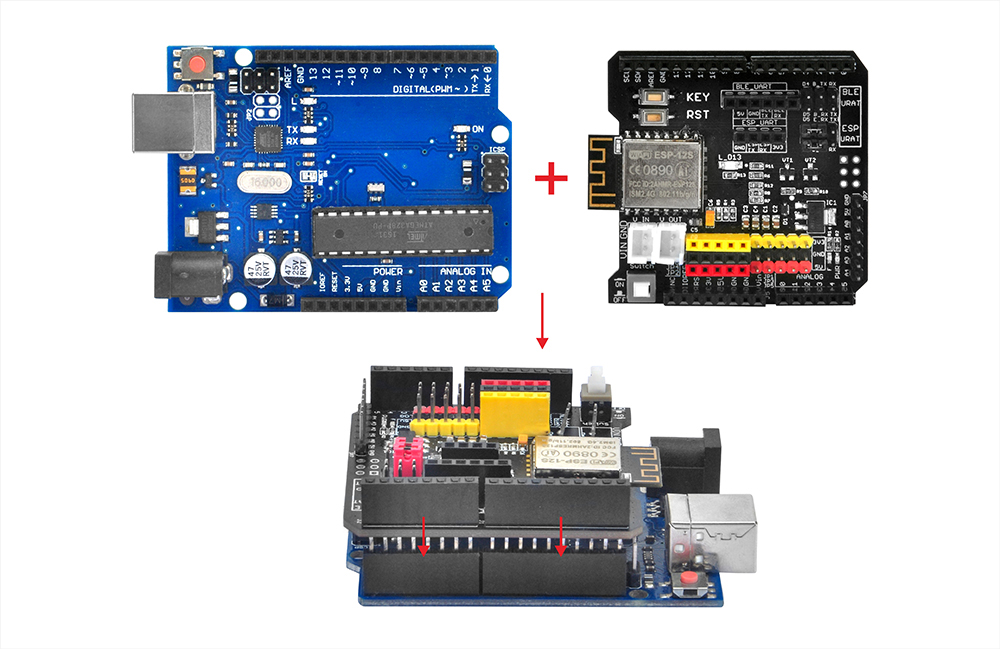
Scheda di base OSOYOO x 1
Shield WIFI ESP8266 OSOYOO x 1
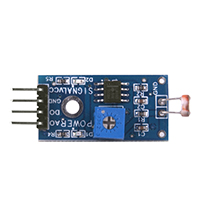
Modulo sensore fotoresistore x 1
Cavo USB x 1
Alcuni fili camper

Prima di tutto, inserisci lo Shield WiFi ESP8266 nella tua scheda di base.
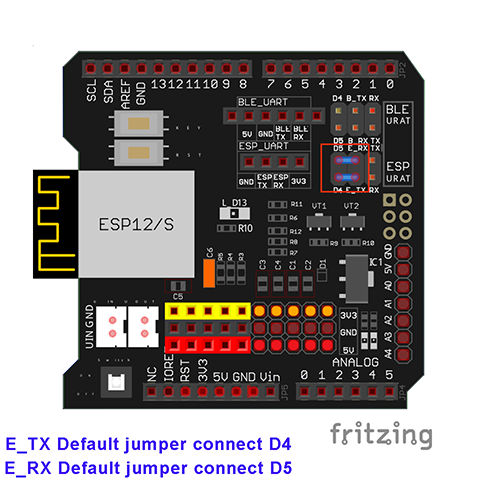
Assicurati che il camper cap sia collegato a E_TX su D4 ed E_RX su D5.
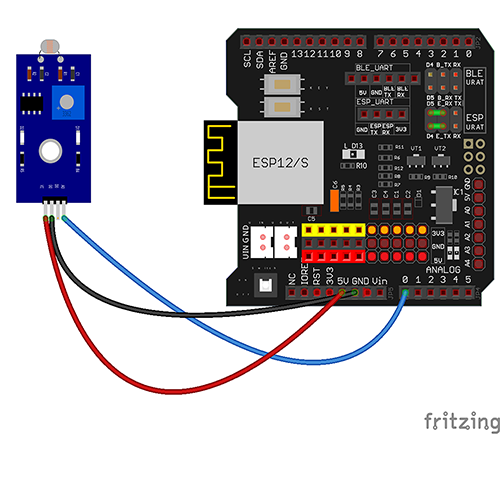
Connetti il tuo fotoresistore all’Uno come mostrato nel seguente diagramma.
Un paio di note prima di iniziare:
-
-
-
- Il fotoresistore utilizza l’uscita analogico, quindi dovrai utilizzare i pin analogici sulla scheda madre.
- In questo esempio, stiamo utilizzando un’alimentazione a 5V dalla scheda madre, ma potremmo utilizzare anche i 3,3V.
- Il diagramma fornito è solo un esempio di come collegare l’hardware. Ci sono molti modi per collegare i dispositivi, quindi prova quello che funziona meglio per te!
| Scheda base OSOYOO |
Modulo sensore a fotoresistenza |
| A0 |
S |
| GND |
– |
| 5V |
+ |

Passo A) Installa l’ultima versione dell’IDE da https://www.arduino.cc/en/Main/Software?setlang=en. Se hai una versione dell’IDE successiva alla 1.1.16, salta questo passaggio.
Passo B) Collega la scheda di base OSOYOO al computer tramite un cavo USB.
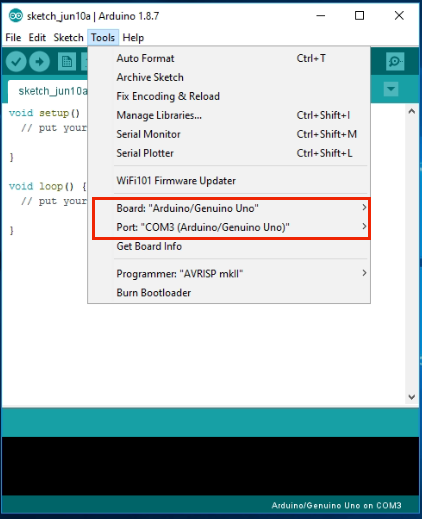
Passo C) Apri l’IDE e scegli il tipo di scheda e il tipo di porta corrispondenti per il tuo progetto.
-
-
- Board:”Arduino/Genuino UNO”
- Port: scegli la tua propria porta seriale per la tua scheda madre
Passo D) Scarica il file sketch da: https://osoyoo.com/driver/wifi-iot/lesson3/wifi-lesson3.zip.
Estrai il file scaricato ed entra nella cartella wifi-lesson3.
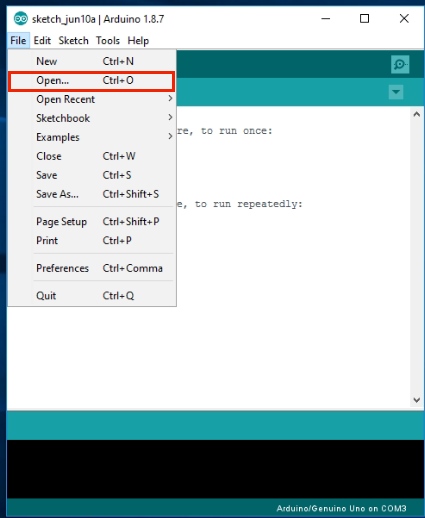
Passo E) IDE: fai clic su “File” -> fai clic su “Apri” -> scegli il codice “wifi-lesson3”, carica il tuo sketch nell’IDE.
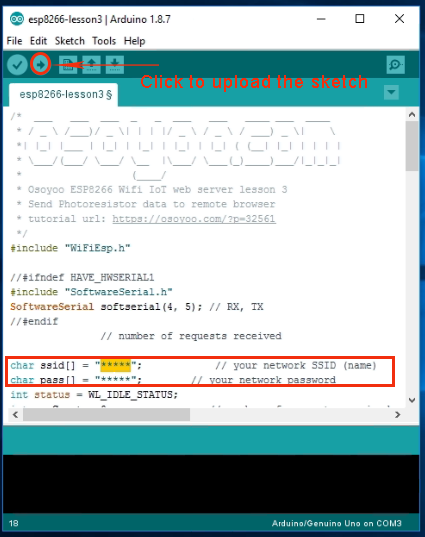
Nello sketch, trova le seguenti righe;
char ssid[] = "******"; // replace *** with your wifi network SSID (name)
char pass[] = "******"; // replace *** with your wifi network password
Sostituisci i ****** con il tuo SSID e la password wifi corretti, altrimenti il
tuo progetto non sarà in grado di connettersi a internet.
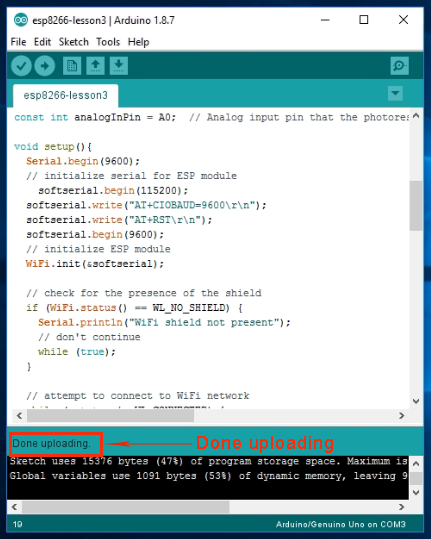
Passo F) Carica lo sketch nel tuo IDE.

Passo A) Aprire il monitor seriale. Vedrete che il vostro router ha assegnato un indirizzo IP al vostro IDE, come mostrato nell’esempio seguente:
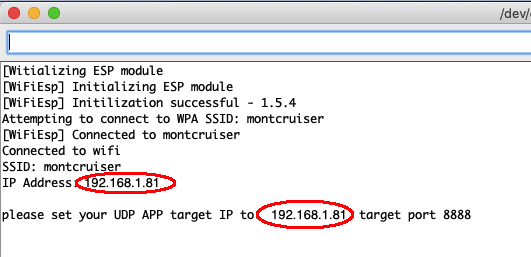
Nell’esempio sopra, 192.168.1.81 è l’indirizzo IP del mio IDE. Dovremo impostare questo indirizzo IP nella nostra APP nel prossimo passo.
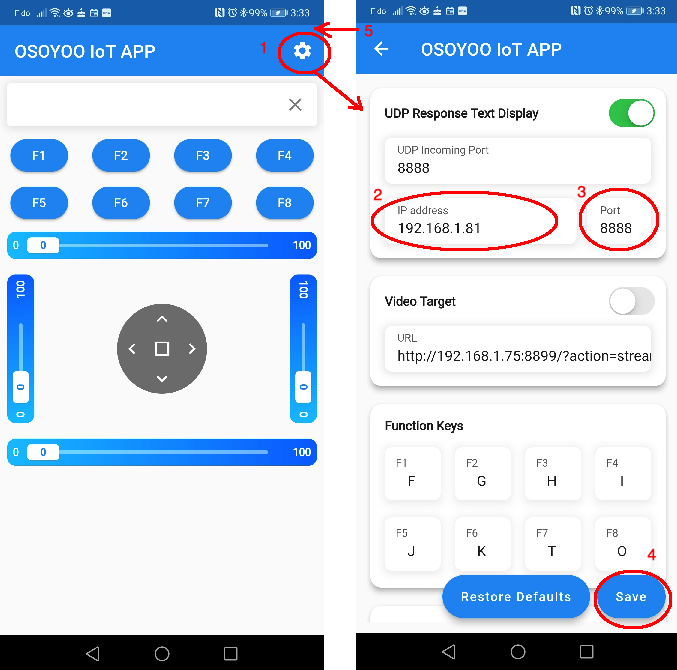
Passo B) Aprire l’applicazione OSOYOO IOT UDP Robot. Se non avete ancora installato questa APP, si prega di leggere la sezione di installazione dell’APP nella Lezione 2.
Passo C) Assicurarsi che il proprio cellulare sia nella stessa rete locale dell’Arduino. Aprire l’APP, cliccare su “Impostazioni”, inserire l’indirizzo IP dell’Arduino dal Passo A e il numero di porta 8888 nelle impostazioni.
Ora premere qualsiasi tasto sull’APP e il vostro schermo mostrerà qualcosa come l’immagine seguente:
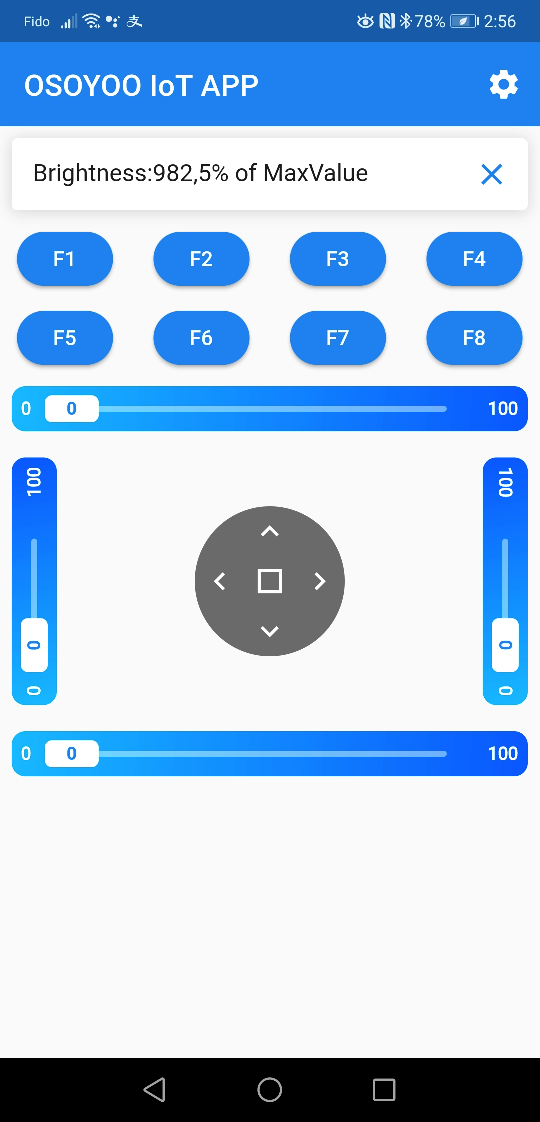
Il valore di 982, il 5% del valore massimo del sensore, significa che l’ambiente è molto buio.
PER SAPERNE DI PIÙ SULLE PARTI


Error Correction:
Step E) should direct to open/choose code for “wifi-lesson3” instead of “wifi-lesson2”.
hi, mark.g
you are right. It should be wifi-lesson3 in Step E. We just corrected the tutorial.
Thanks
For Step A, my program result stop as ” You’re connected to the network,press any key in APP to get remote data!”. I can not get the Step A result as you wrote.
My result is as below:
10:15:07.283 -> [Win APP to get remote data!
10:15:08.807 -> [WiFiEsp] Initializing ESP module
10:15:13.526 -> [WiFiEsp] Initilization successful – 1.5.4
10:15:13.590 -> Attempting to connect to WPA SSID: 23SS72BDFGDF
10:15:20.644 -> [WiFiEsp] Connected to 23SS72BDFGDF
10:15:20.678 -> You’re connected to the network,press any key in APP to get remote data!
I can not have IP address and target port mumber. Could you please confirm again that we can really get this result?