Introduction:
Blynk is an IoT cloud platform which supports many kinds of low cost open-source hardware such as Arduino, ESP8266, Raspberry Pi etc. It makes complex IoT technology simple and easy. Blynk is free for individual developers and this feature makes it the most popular IoT programming learning platform for school students and IoT beginners.
In this Lesson, we will teach students how to install Blynk APP and control an LED in OSOYOO Basic board.
How Blynk Works
Blynk is designed for the Internet of Things. It can control hardware remotely, it can display sensor data, it can store data, vizualize it and do many other cool things.
There are three major components in the platform:
-
Blynk App – allows to you create amazing interfaces for your projects using various widgets we provide.
-
Blynk Server – responsible for all the communications between the smartphone and hardware. You can use our Blynk Cloud or run your private Blynk server locally. It’s open-source, could easily handle thousands of devices and can even be launched on a Raspberry Pi.
-
Blynk Libraries – for all the popular hardware platforms – enable communication with the server and process all the incoming and outcoming commands.

Features
- Similar API & UI for all supported hardware & devices
- Connection to the cloud using:
- WiFi
- Bluetooth and BLE
- Ethernet
- USB (Serial)
- GSM
- …
- Set of easy-to-use Widgets
- Direct pin manipulation with no code writing
- Easy to integrate and add new functionality using virtual pins
- History data monitoring via History Graph widget
- Device-to-Device communication using Bridge Widget
- Sending emails, tweets, push notifications, etc.
- … new features are constantly added!
You can find example sketches covering basic Blynk Features. They are included in the library. All the sketches are designed to be easily combined with each other.
Hardwares in this lesson
Blynk supports many open source hardware such as Arduino, Raspberry Pi, or a similar development kit. In this lesson, we will use following hardwares
1. OSOYOO Basic board + OSOYOO WIFI Shield as following:
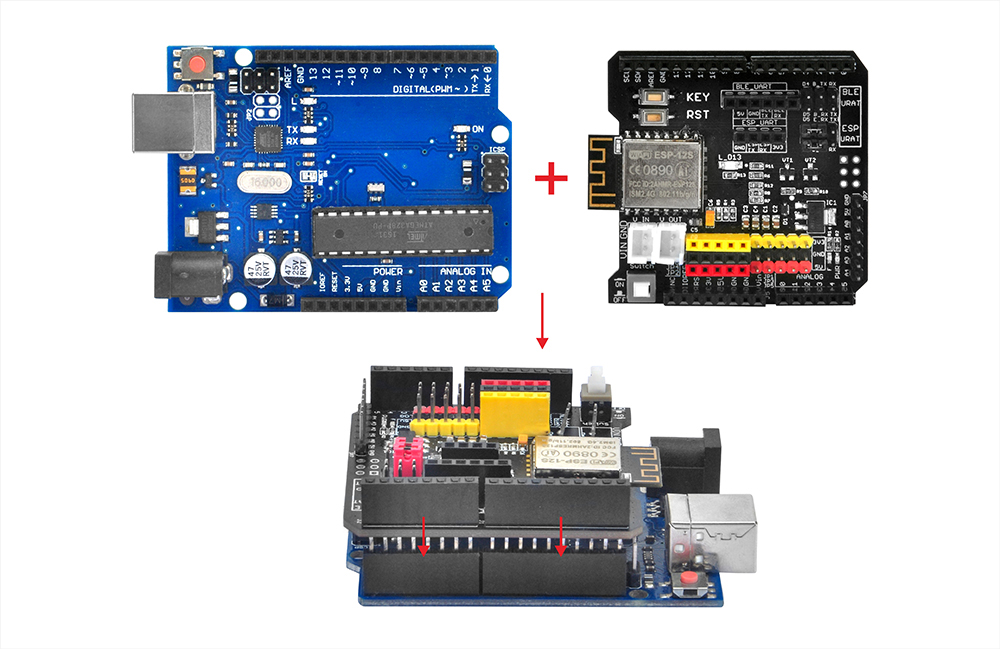
UNO board Purchase link:
OSOYOO UNO Board for Arduino (model#LACC200600)
OSOYOO WIFI Shield Purchase link:
https://osoyoo.store/products/esp8266-wifi-shield-for-arduino-robot-car-and-internet-of-things-learning-kit?variant=31930709770351
2. An LED connect to D7 pin through a 220Ω resistor
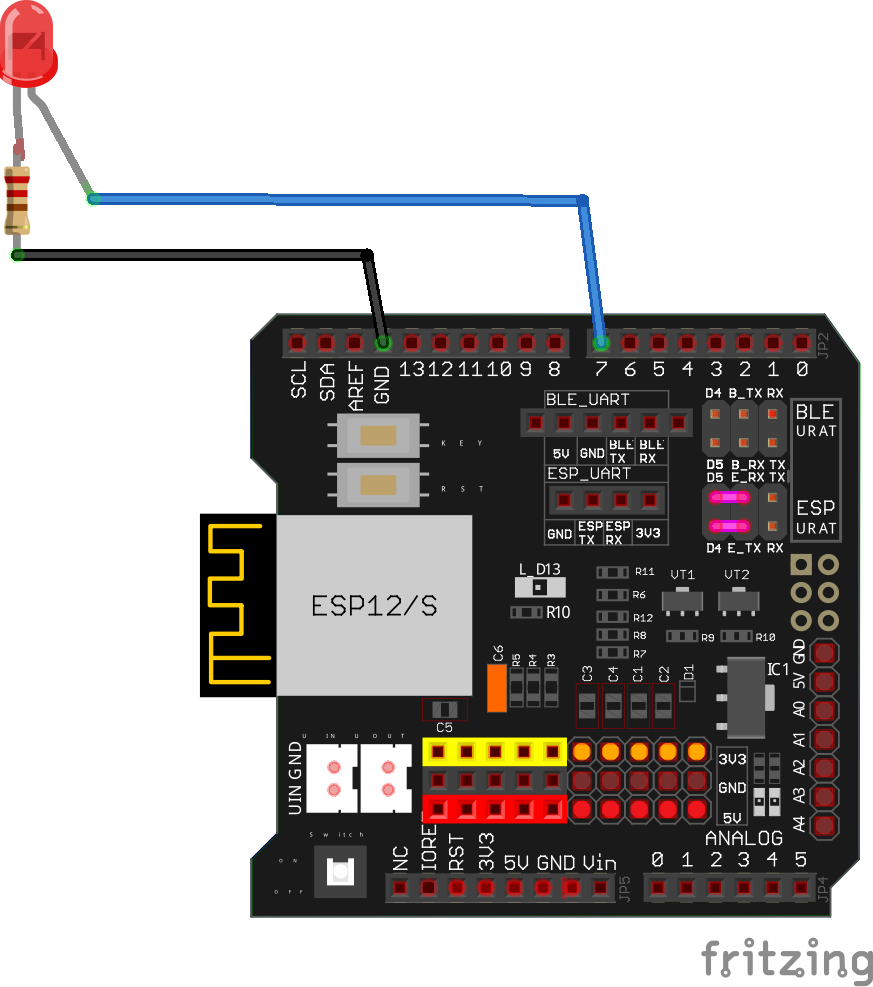
Make sure you have connected D4 to E_TX and D5 to E_RX with jumper caps , See pink lines in above picture.
3. A Smartphone
4. A Laptop or Desktop computer
Software Requirements:
1)Blynk Apps for iOS or Android,


2) IDE
If you haven’t installed IDE in your PC, please read following article to install the IDE
https://osoyoo.com/2017/05/08/download-and-install-arduino-ide/
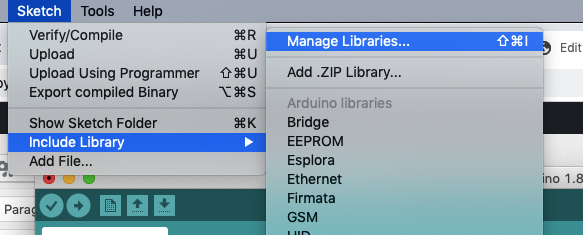
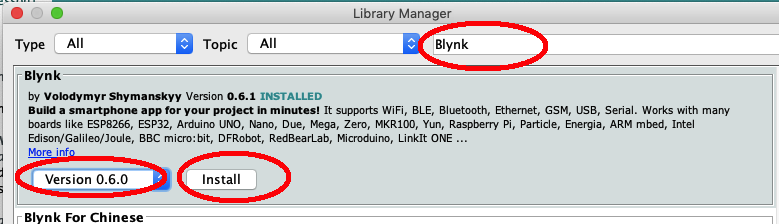
3)Download and Install Blynk Library into your IDE
You can click Sketch ->Include Library ->Manager Libraries, then search Blynk and install the library file.
4)Download and Install BlynkESP8266_Lib library from:
https://osoyoo.com/driver/blynk/BlynkESP8266_Lib.zip
Install above zip file in Sketch ->Include Library ->Add .ZIP Library.
Getting Started With The Blynk App
1. Create a Blynk Account
After you download the Blynk App, you’ll need to create a New Blynk account. This account is separate from the accounts used for the Blynk Forums, in case you already have one.
We recommend using a real email address because it will simplify things later.

Why do I need to create an account?
An account is needed to save your projects and have access to them from multiple devices from anywhere. It’s also a security measure.
You can always set up your own Private Blynk Server and have full control.
2. Create a New Project
After you’ve successfully logged into your account, start by creating a new project.

3. Choose Your Hardware
Change your hardware from ESP8266 to Arduino UNO as following:
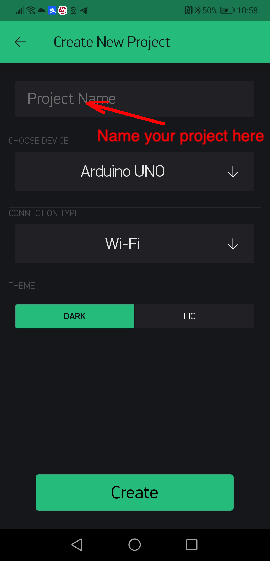
You can assign a project name (i.e Lesson 1) in project name field, then Click Create Button.
4. Auth Token
After you pressed Create button, system will remind you that Authentication token will be sent to your email. Click OK!
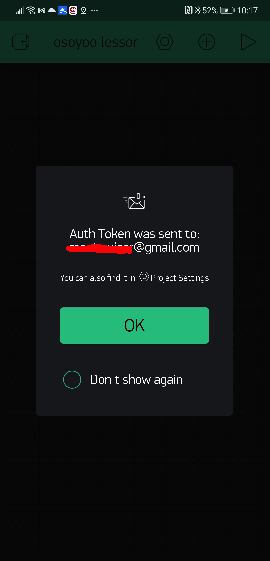
Auth Token is a unique identifier which is needed to connect your hardware to your smartphone. Every new project you create will have its own Auth Token. You’ll get Auth Token automatically on your email after project creation. You can also copy it manually. Click on devices section :
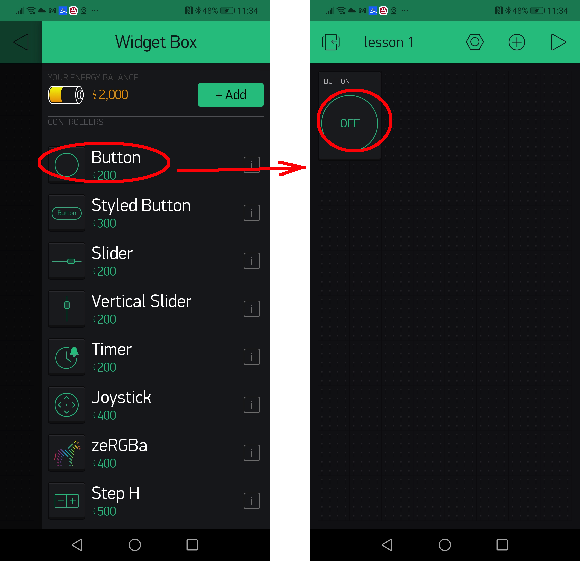
5. Add a button Widget
Now your APP will go to a new UI page as following, click + icon to add a new Widget (sensor, actuator etc):

Now you will see a Widget Box, Click Button, you will see a button OFF icon in following picture, click the OFF to config this button.
After click Button OFF, you will see a button config UI, click PIN can tell APP which PIN is associated with this button. PUSH/SWITCH toggle can setup the button working mode. Following picture shows we change PIN to D7 and Change button to SWITCH mode
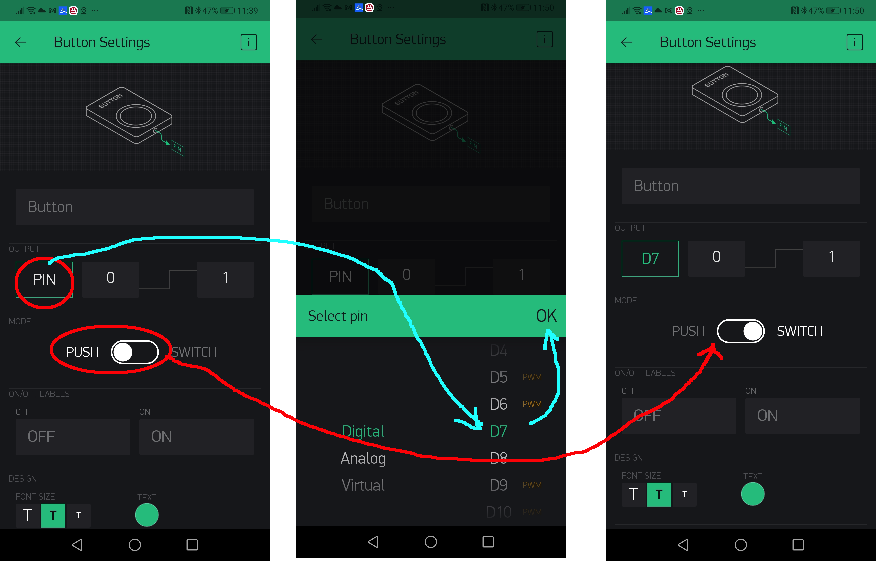
Now click the back arrow <- button and go back to button UI.
6. Install IDE Sketch
Download Blynk-lesson1 IDE sketch from https://osoyoo.com/driver/blynk-iot-lesson1/blynk-lesson1.zip, unzip the file you will see blink-lesson1 folder. Please enter the folder and open blynk-lesson1.ino file into your IDE.
You need replace line 41 with your own Blynk token and Line 45,46 with your own wifi ssid and password.
char auth[] = "***"; //replace *** with your blynk token sent by email

char ssid[] = "***";// replace *** with your wifi ssid
char pass[] = "***";// replace *** with your wifi password
After changing the token and wifi password, upload code to IDE and open your Serial monitor as following:
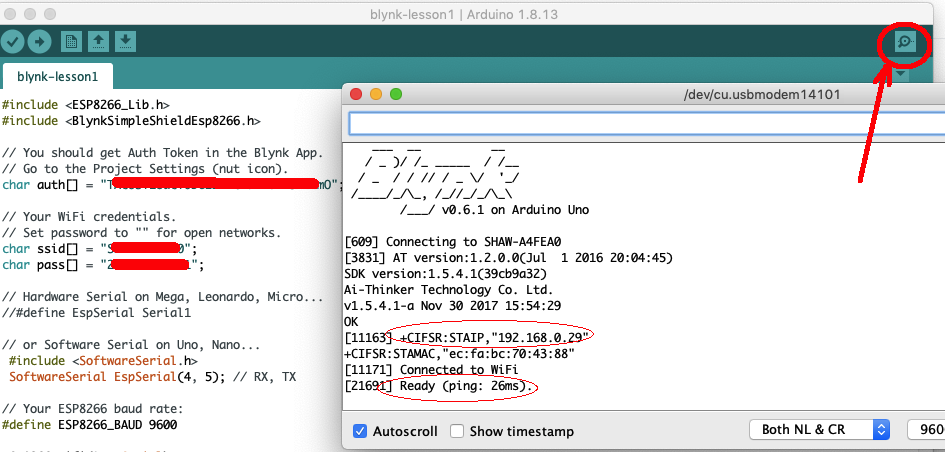
If your WIFI Password and Blynk token setting is correct, you will see your IP address. The last line will show “Ready” which means your mainboard has connected to Blynk Cloud Server.
7. Run The Project
Now go back to APP , click the ►Play button, your UI will go to running status. In the upper-right corner, you can find an board icon (see blue circle area), this means your mainboard has been detected by Blynk cloud server. If mainboard failed to connect Blynk, this icon will show some alert sign.
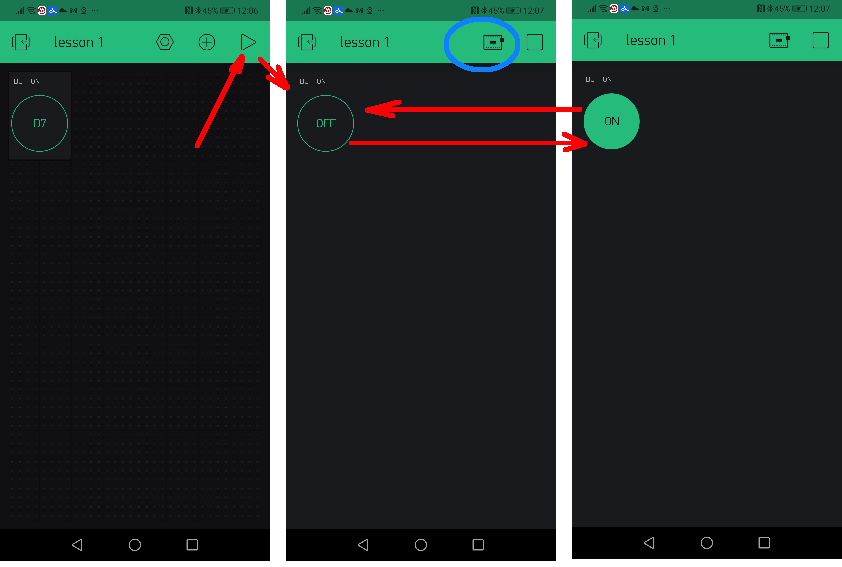
Now you can click the button. Each click will toggle OFF to ON and ON to OFF. Your remote LED in mainboard D7 pin will also turn ON and OFF according to your button status.


