

Authorized Online Retailers:
Purchase from US Purchase from Japan


Introduction
In this lesson,we will show how to use the Blynk app to control a relay remotely.
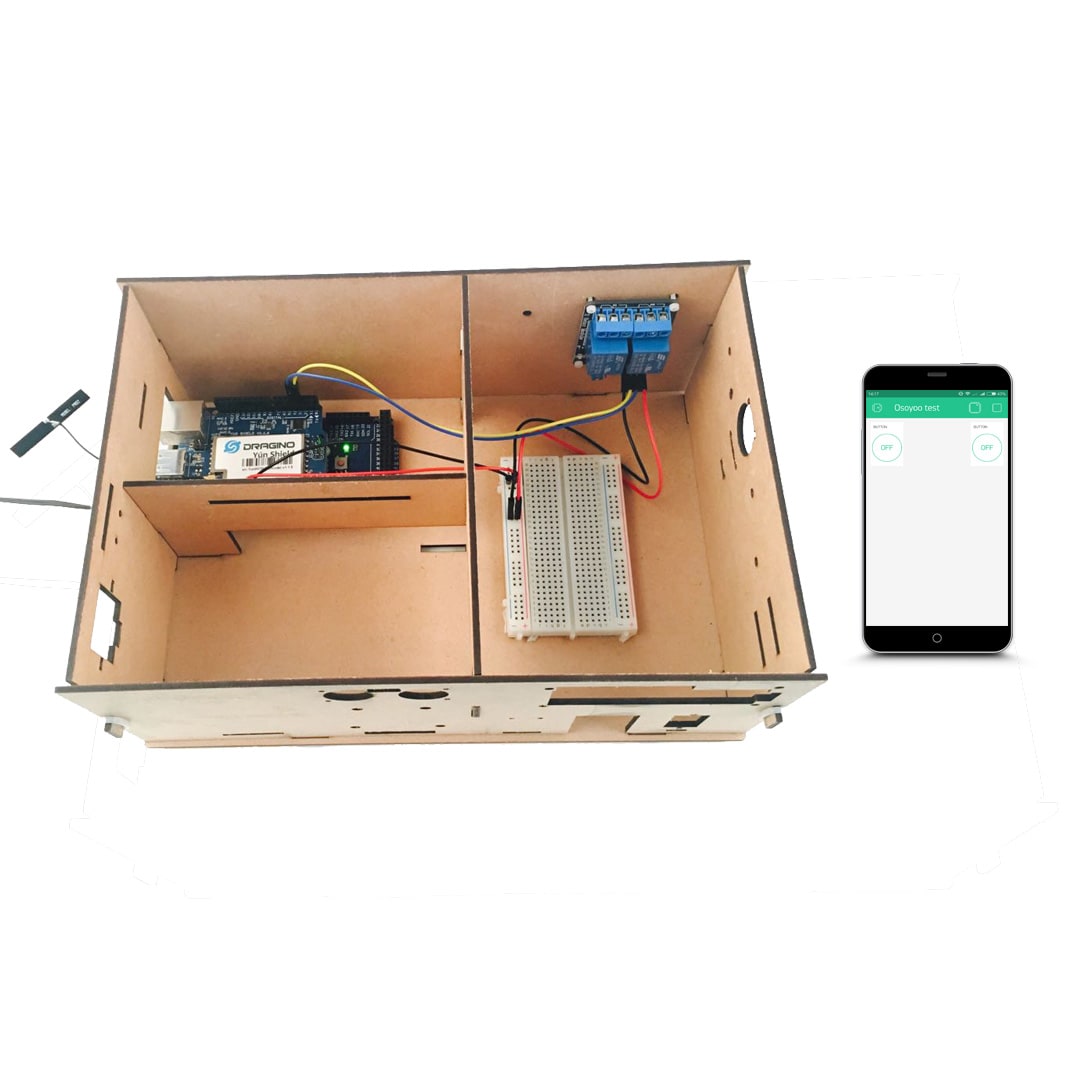
HARDWARE
- Arduino(Osoyoo Mega2560 here) x 1
- Dragino Yun Shield x 1
- 2 Channels Relay x 1
- Jumpers
SOFTWARE
Connection
Build the circuit as below:
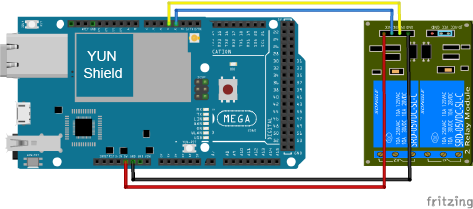
| Osoyoo Mega2560+Yun Shield |
2 channel relay |
| VCC |
5V |
| GND |
GND |
| IN1 |
D4 |
| IN2 |
D3 |
Code Program
After above operations are completed, make sure that the Yun Shield is on the same network with the computer. Open the Arduino IDE and choose corresponding board type and port type for you project. Then load up the following sketch onto your Arduino.
You can get the Arduino sketch here.
Add a Widget
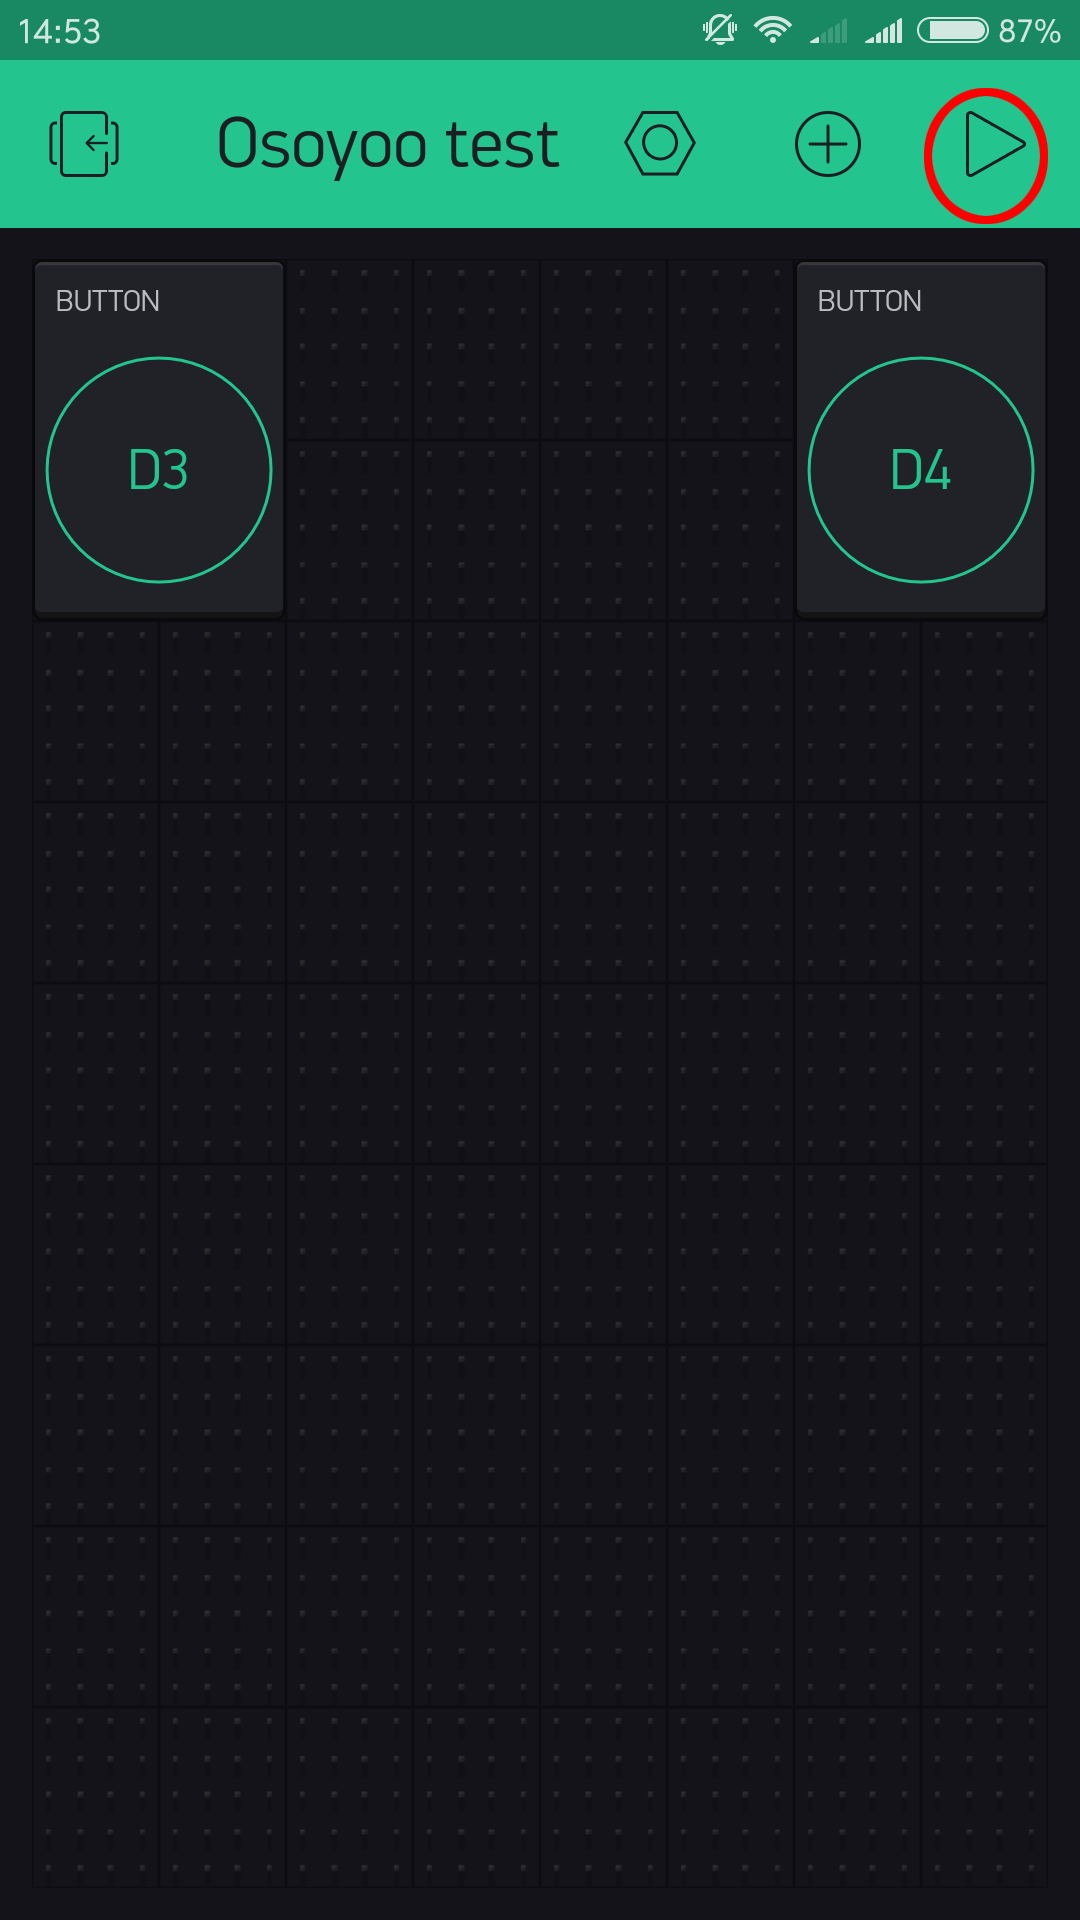
Open your Blynk , and let’s add two buttons to control the 2 channels relay.
Tap anywhere on the canvas to open the widget box. All the available widgets are located here. Now pick a button.
Widget Box


Drag-n-Drop – Tap and hold the Widget to drag it to the new position.
Widget Settings – Each Widget has it’s own settings. Tap on the widget to get to them.
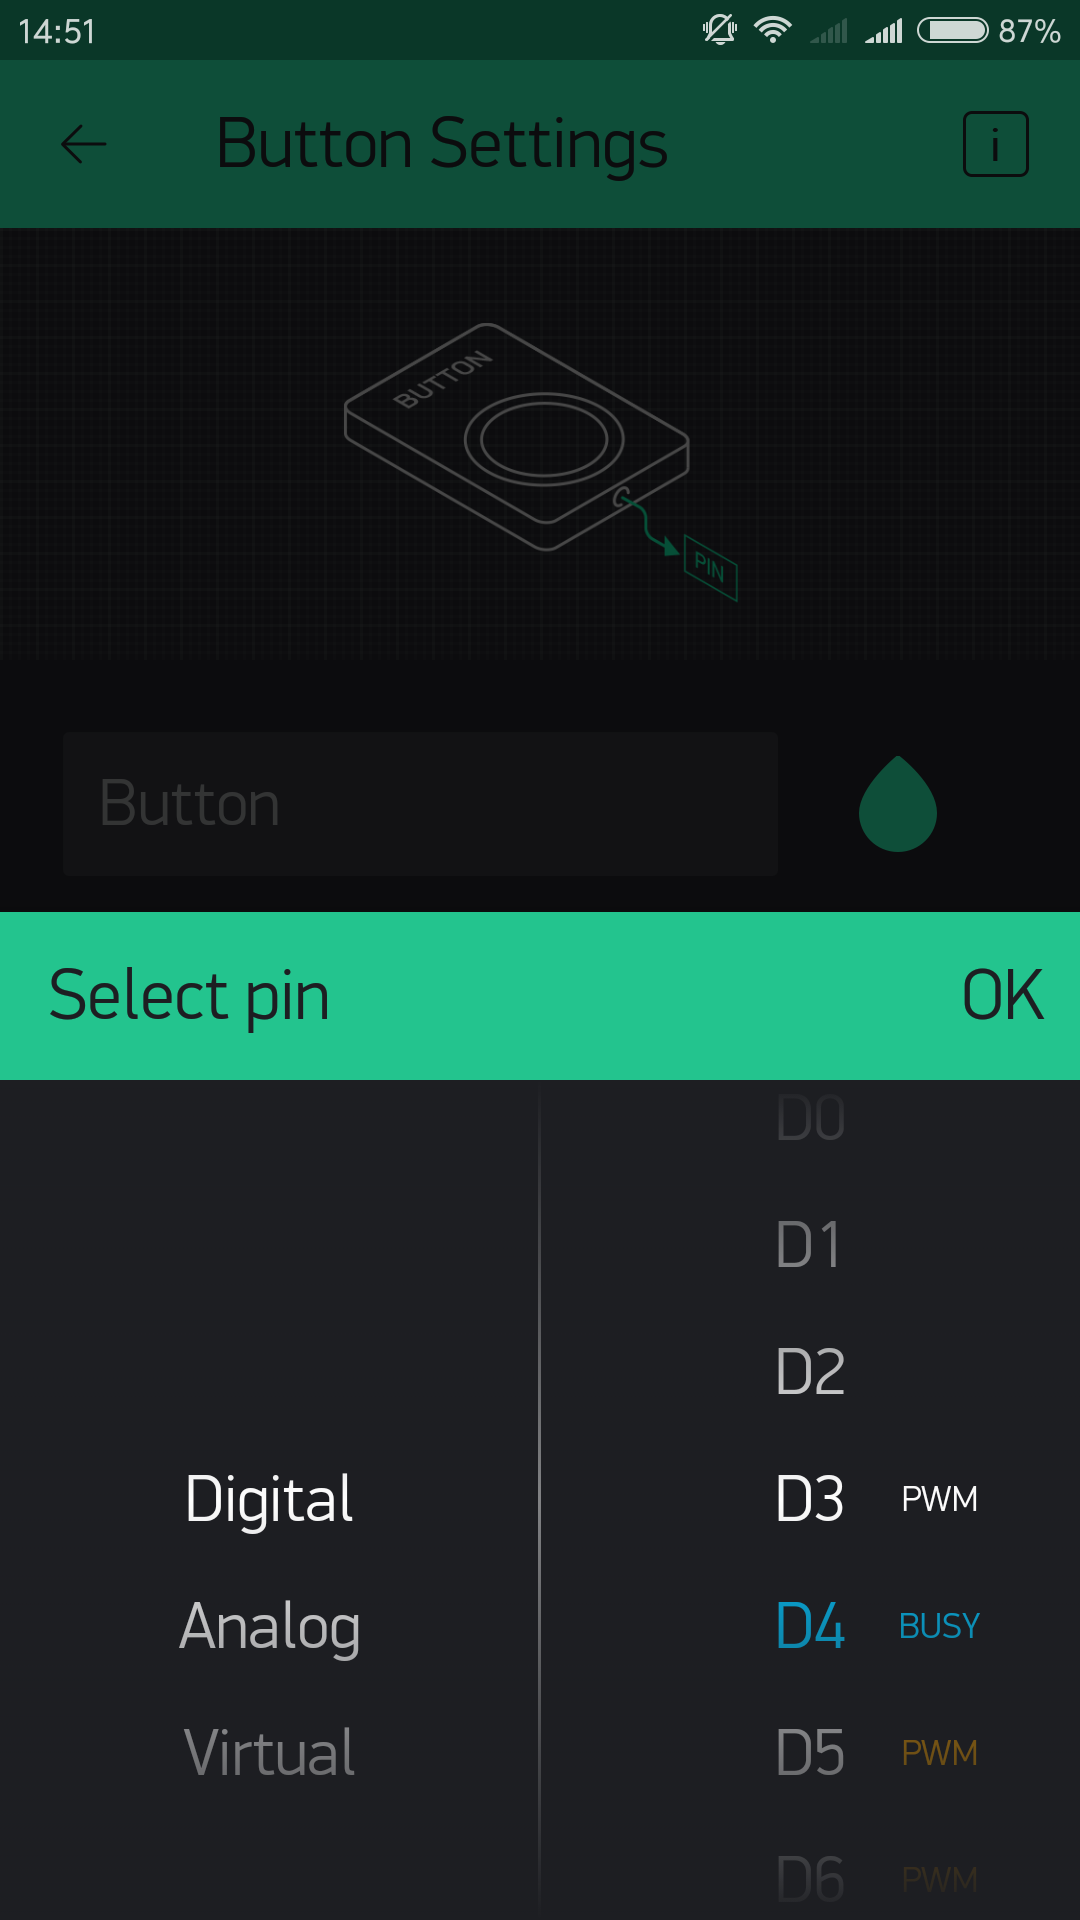
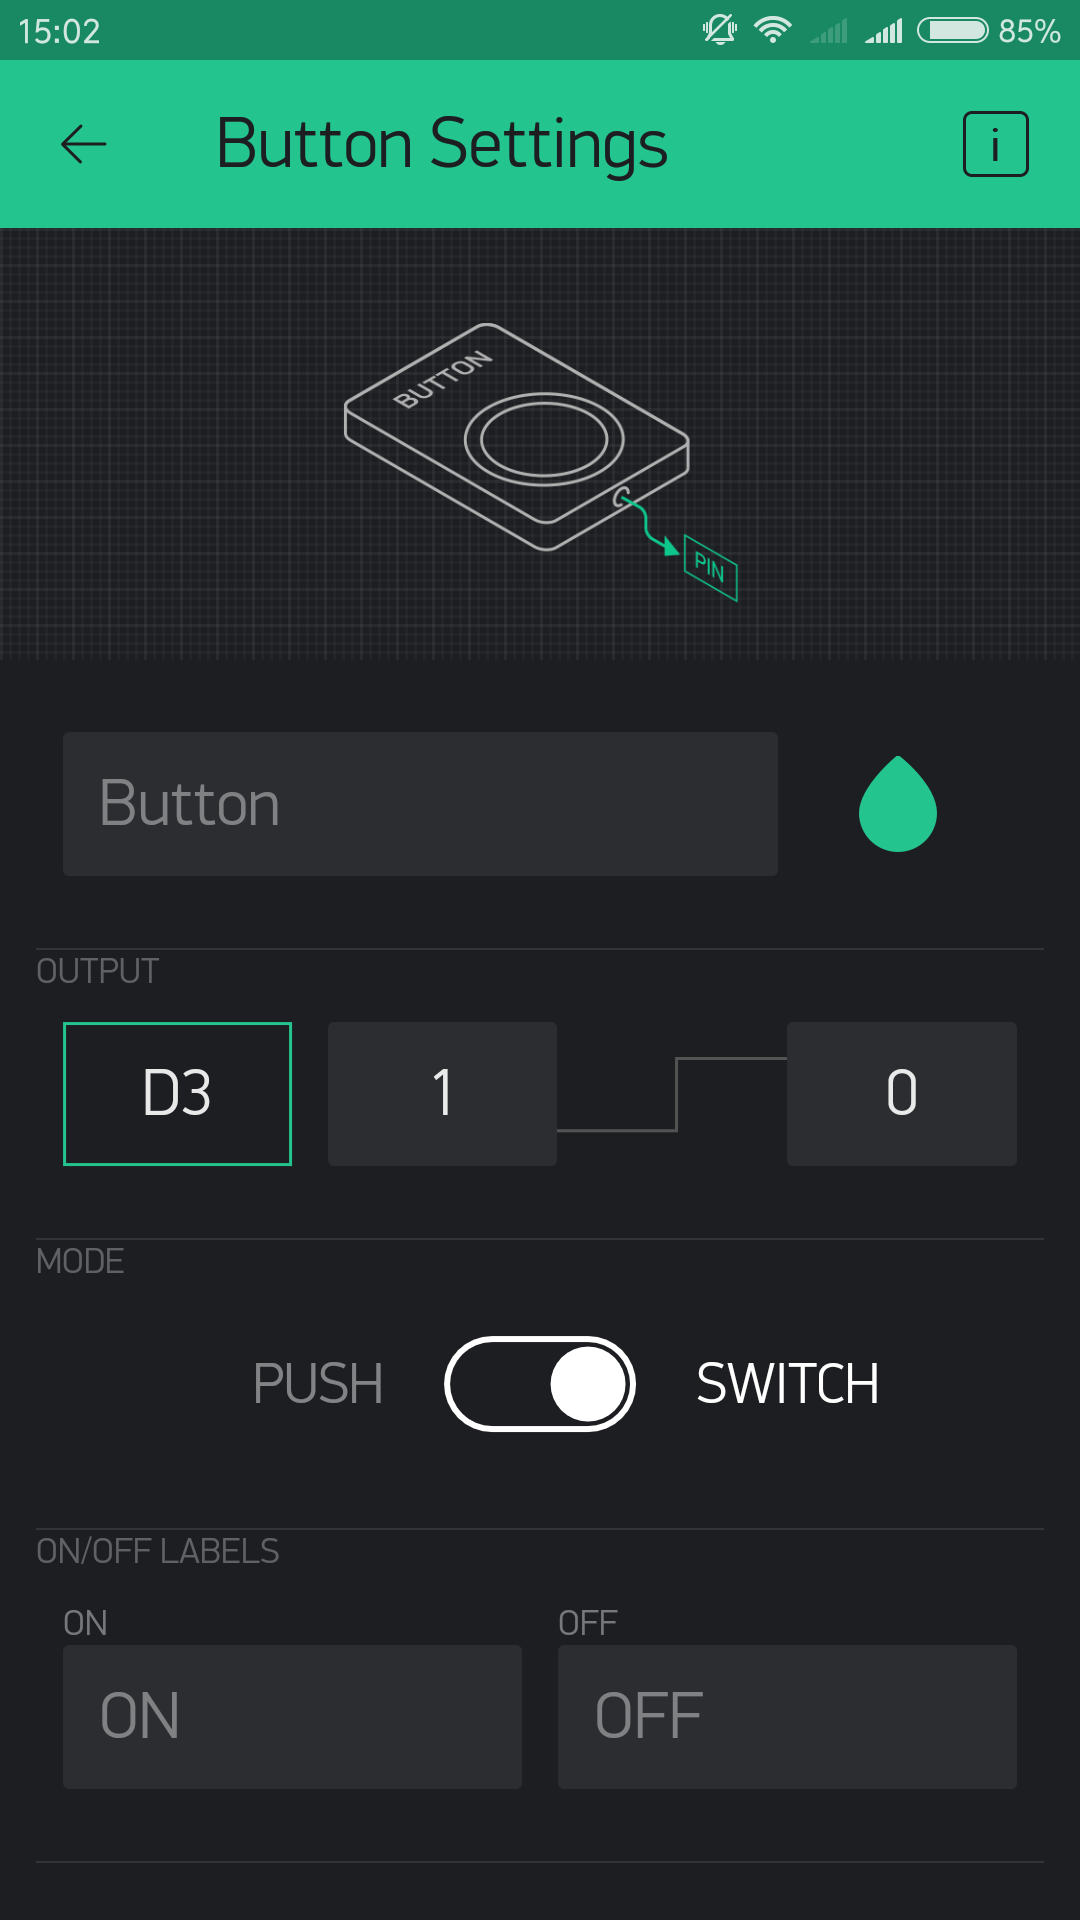
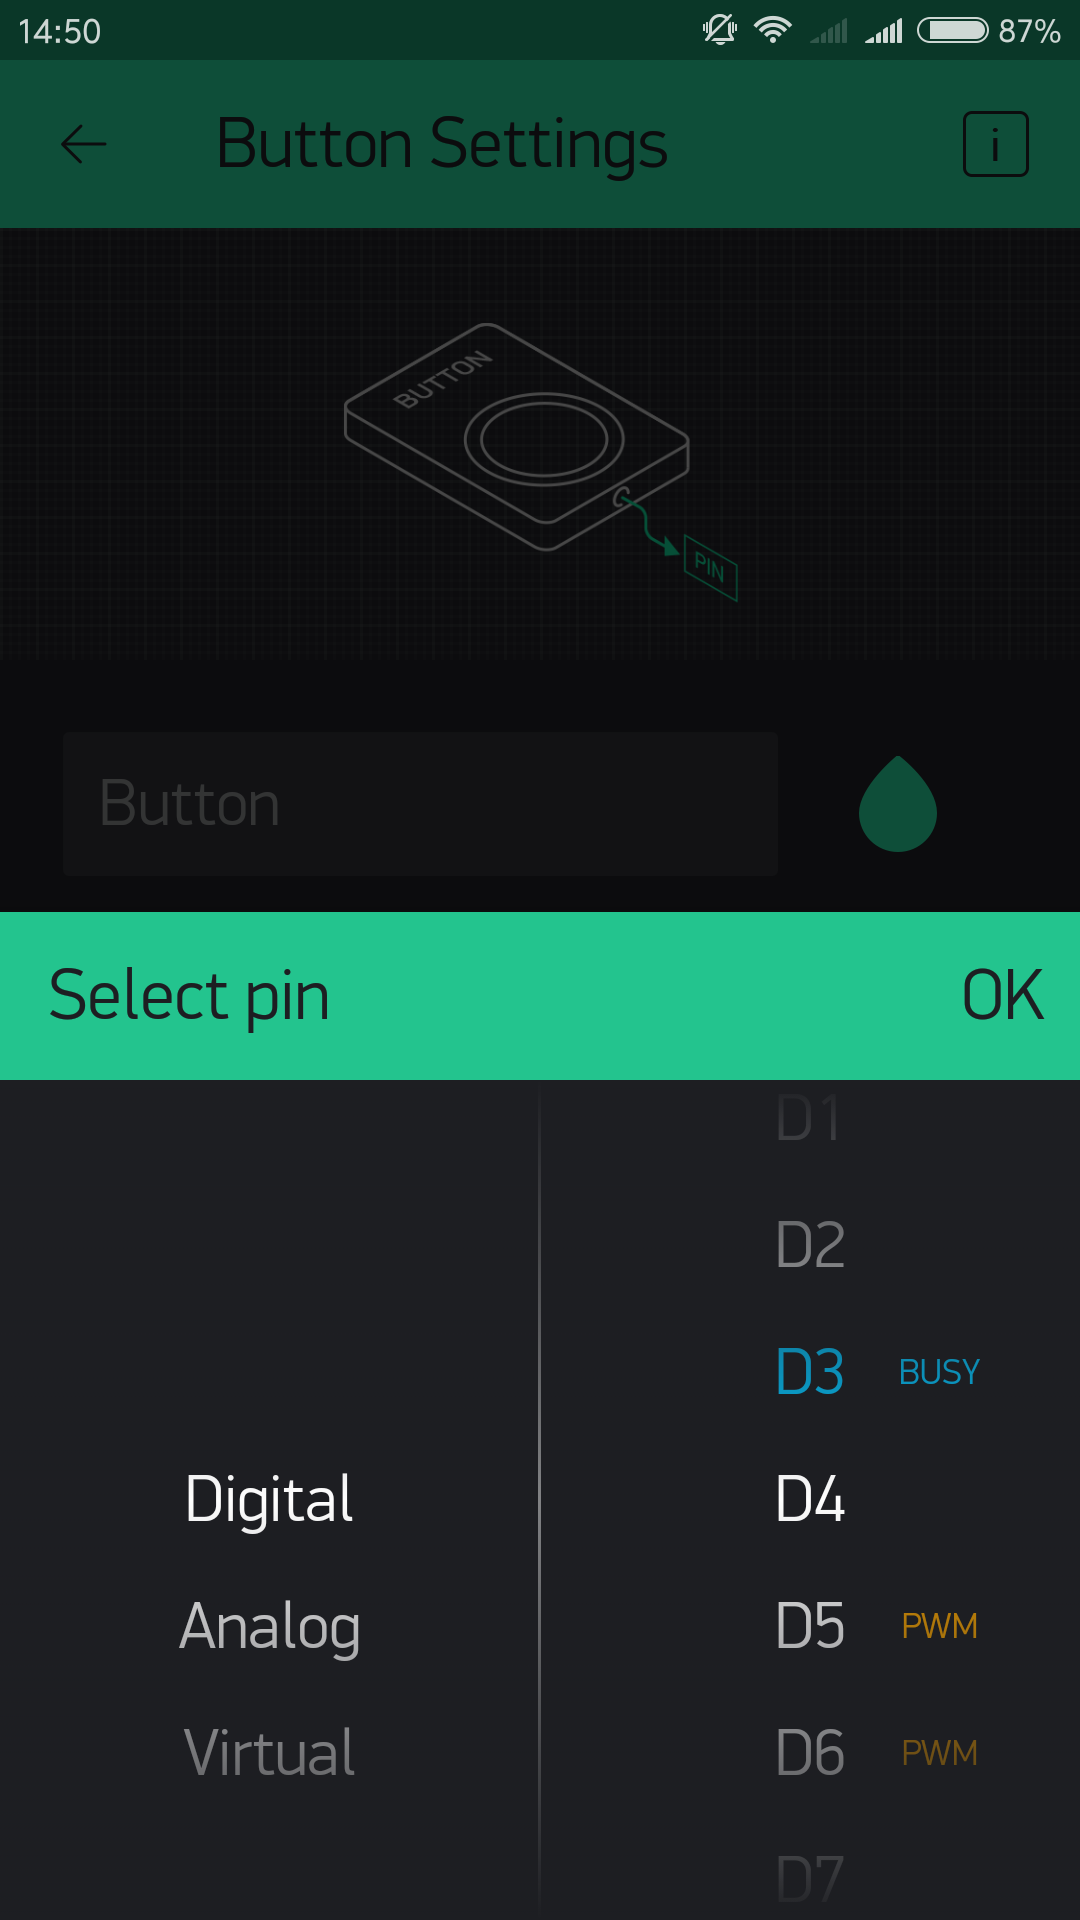
The most important parameter to set is PIN . The list of pins reflects physical pins defined by your hardware. If your relay is connected to Digital Pin 3 – then select D3 (D – stands for Digital).

Repeat the above operation,set the OUTPUT PIN as D4.
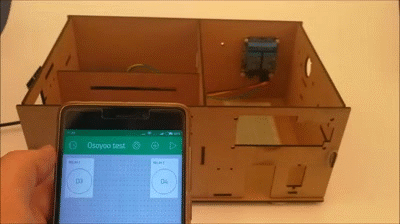
Running Result
After you finished all above operations, open the Serial Monitor, then open the Blynk APP, press the PLAY button. This will switch you from EDIT mode to PLAY mode where you can interact with the hardware. While in PLAY mode, you won’t be able to drag or set up new widgets, press STOP and get back to EDIT mode.
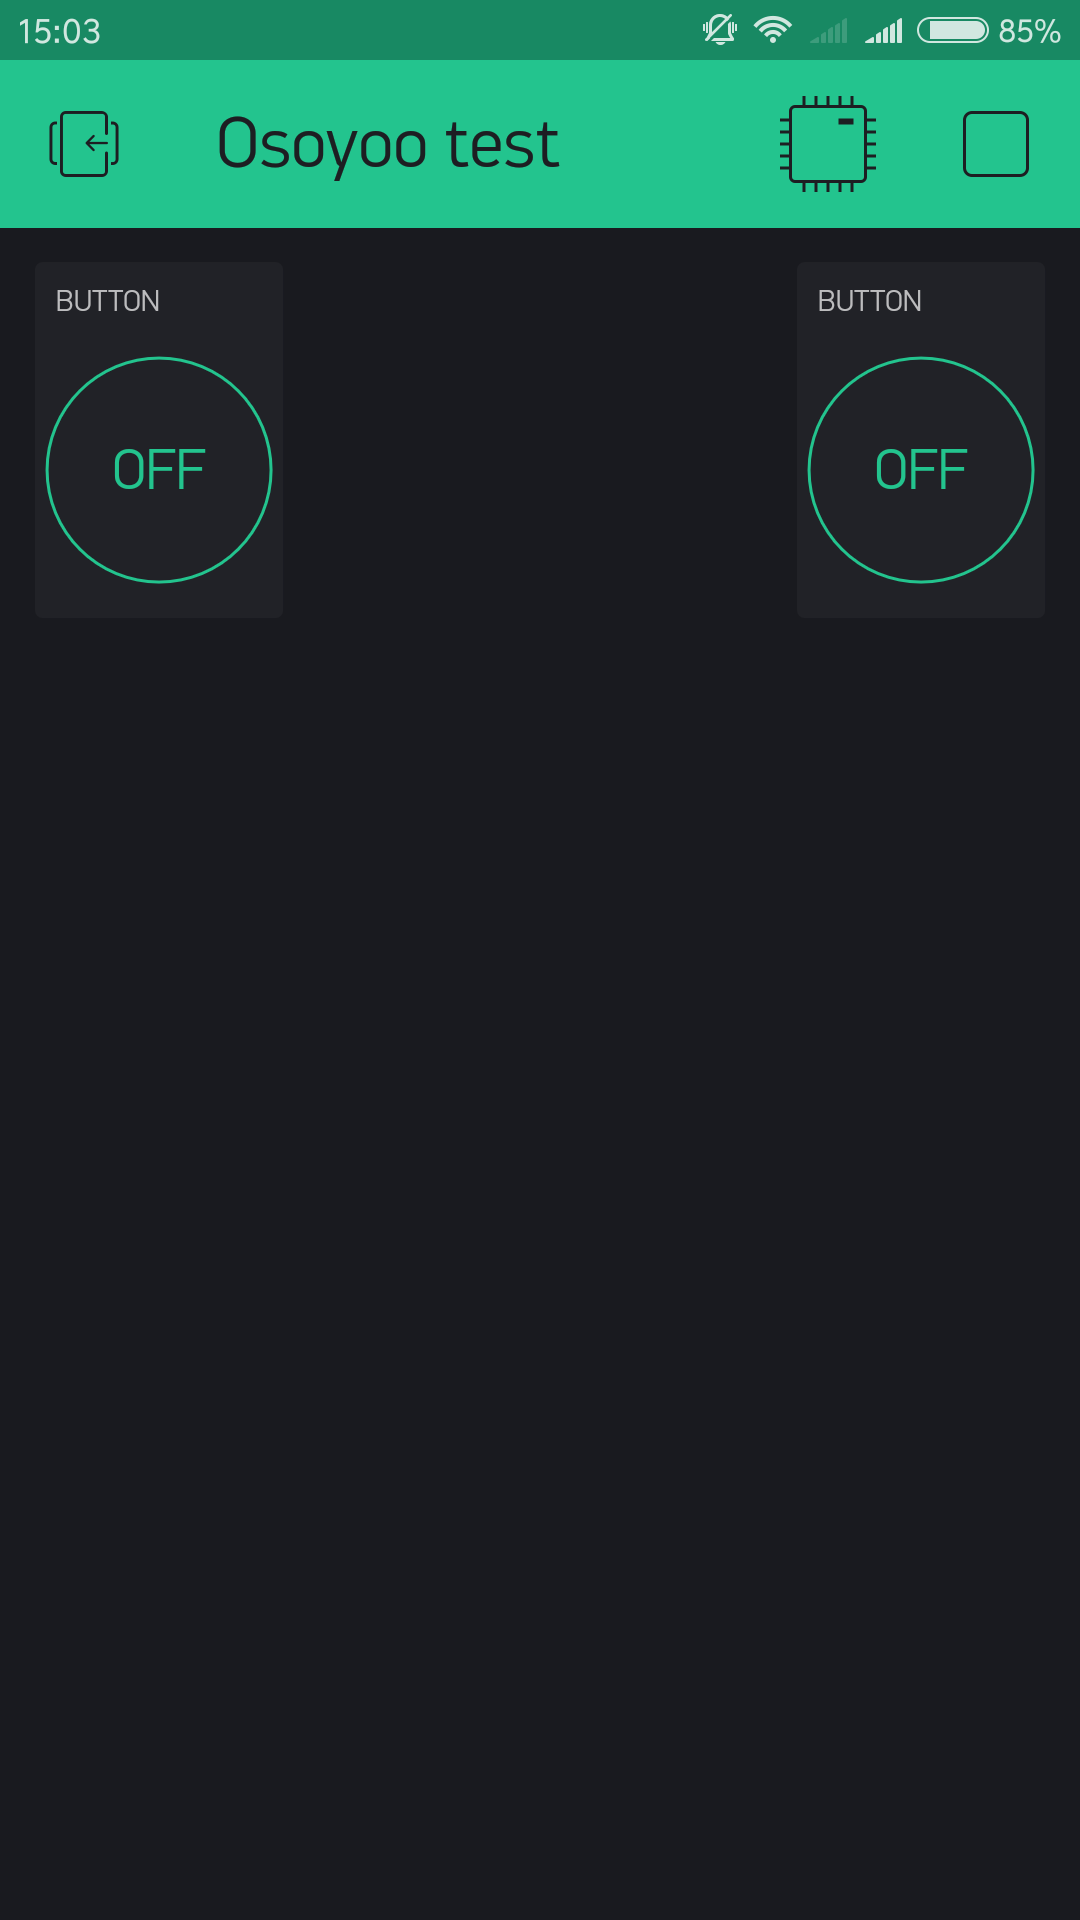
At the same time, press the button, the relay will be opened or closed.