In this tutorial, we will learn how to use OSOYOO IoT kit with Blynk APP to make a remote fire alarm. When the fire alarm detects a flame, it will trig alarm and the white warning light will turn on. At the same time, the Blynk APP will also push fire alarm notifications .
HARDWARE
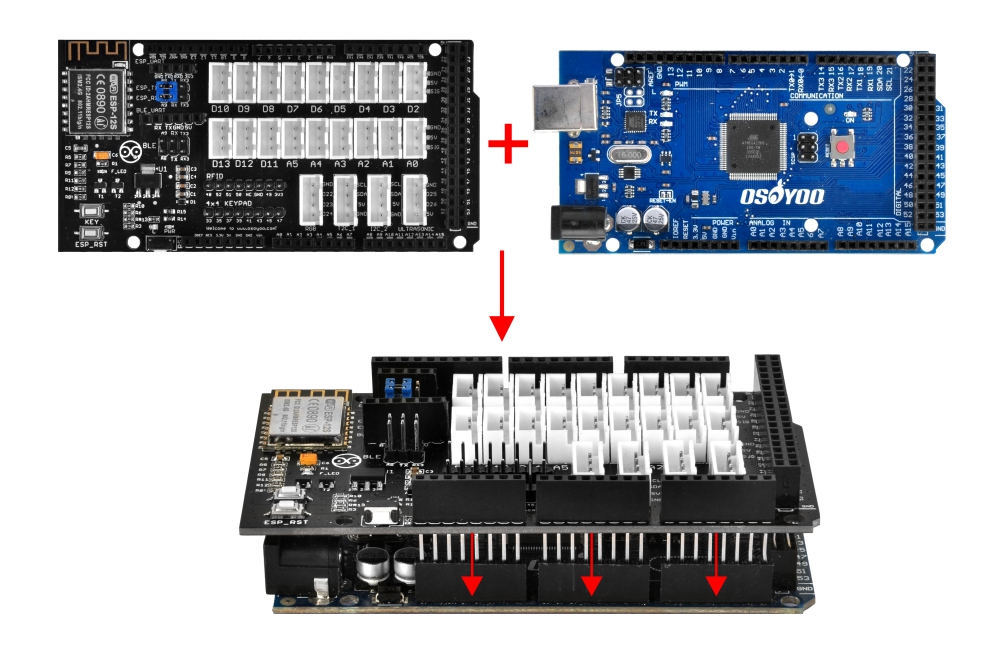
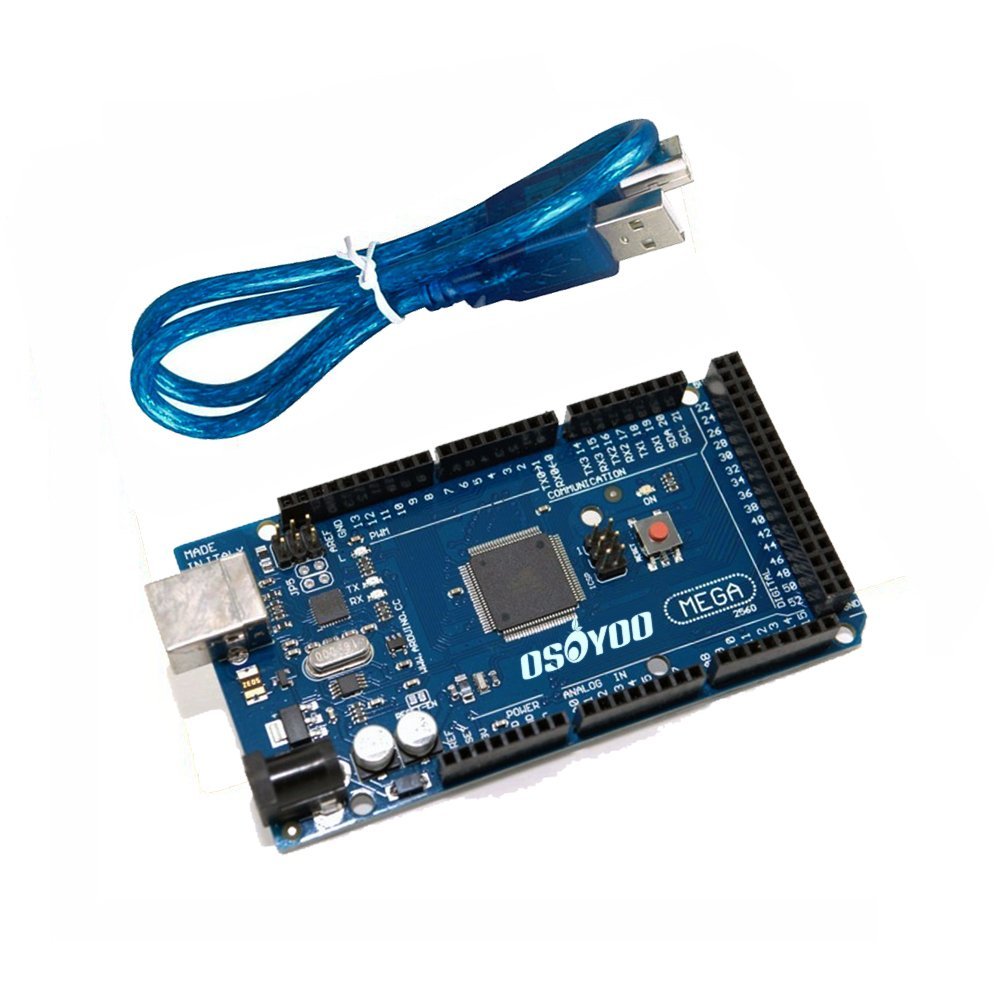
Osoyoo Mega2560 (compatible with Arduino MEGA2560) x 1
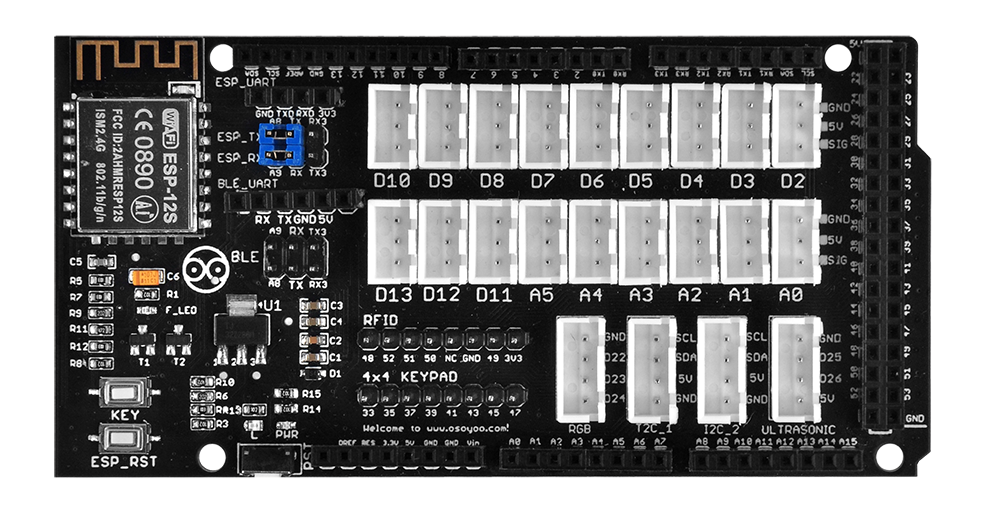
First, please plug OSOYOO MEGA-IoT Extension Board into MEGA2560 board:
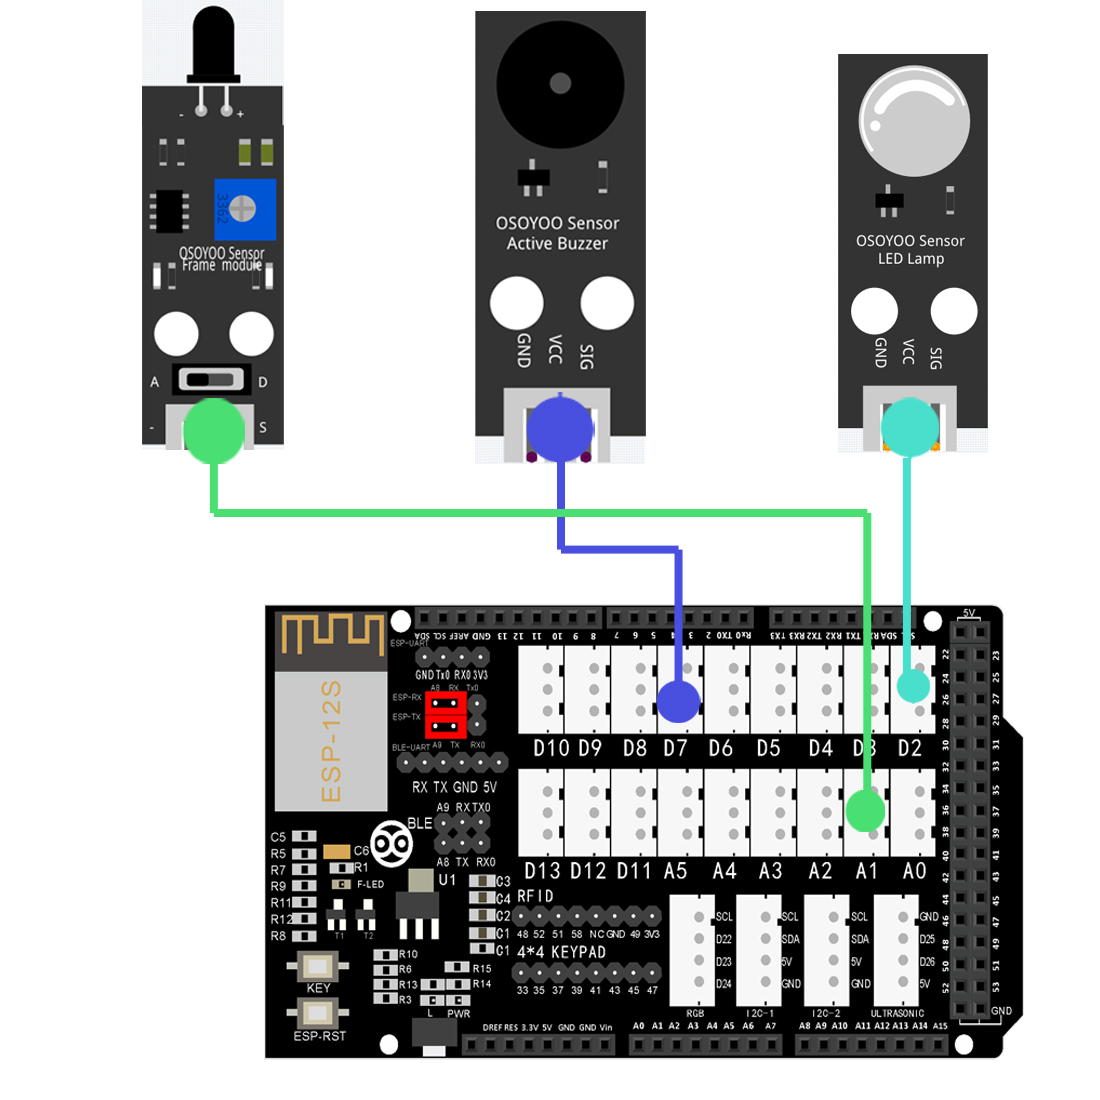
Build the circuit as below:
Flame sensor- A1 Make sure the Fire sensor is on “A” side.
Active buzzer – D7
White LED- D2
Prerequisite:
You need to install Local Blynk Server, Blynk APP, Arduino IDE, Blynk Libraries before running the code of this lesson. If you haven’t done these installations, please read following contents in lesson2-1 link:
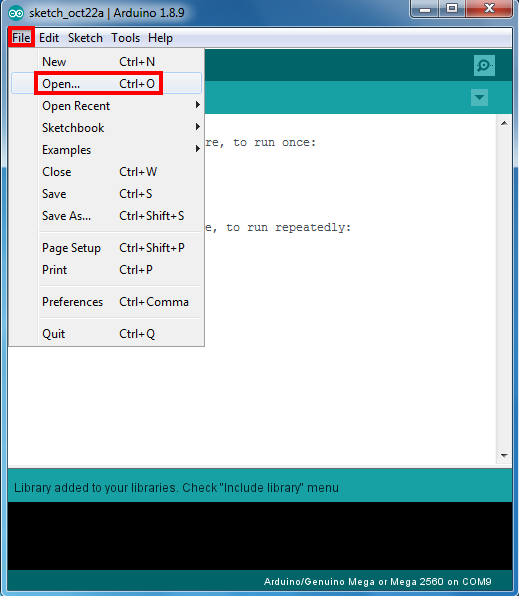
If you have installed above libraries, please go to next stage: Download and Edit Lesson3-3 Arduino Code Step 1 Download the code from following link, unzip it:
Note: In the sketch, find these code in line 13,14 as following:
char auth[] =”0ByWpc50cmOJ5O6OyHMaK4OSHkDvUeI-”;
char server_ip[]=”192.168.1.81″; // replace this line with your Blynk Server IP addres;
Replace 0ByWpc50cmOJ5O6OyHMaK4OSHkDvUeI- with your local Blynk Token.
Replace 192.168.1.81 with your local Blynk Server LAN IP address.
If you don’t know how to get token and Server IP address, read this article.
In lines 17,18 and replace *** with your wifi ssid/password
char ssid[] = "***";//replace this line with your wifi ssid
char pass[] = "***"; //replace this line with your wifi password
please replace the *** with your correct wifi SSID and password, otherwise your project can not connect to Internet.
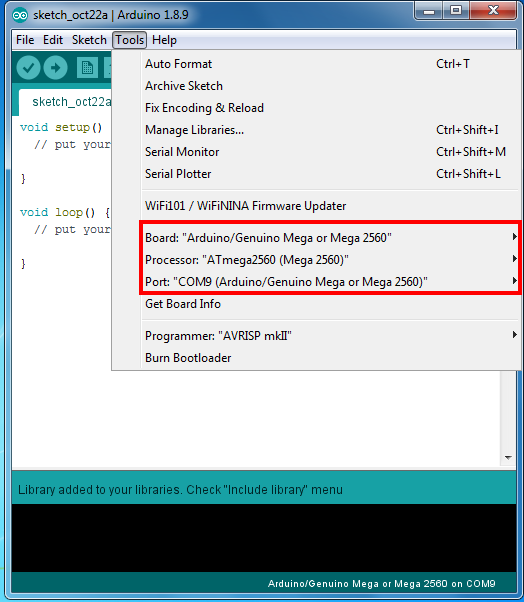
Upload the sketch to the board. Wait until you see something like this:
Done uploading
Now open your Serial Monitor, you will see Arduino is trying to talk to Blynk server. After 20 to 30 seconds, your Serial monitor will finally shows Arduino’s IP address and a “Ready (ping: 25ms)” ending message.
Congratulations! You are all ready! Your hardware is now connected to the Blynk server.
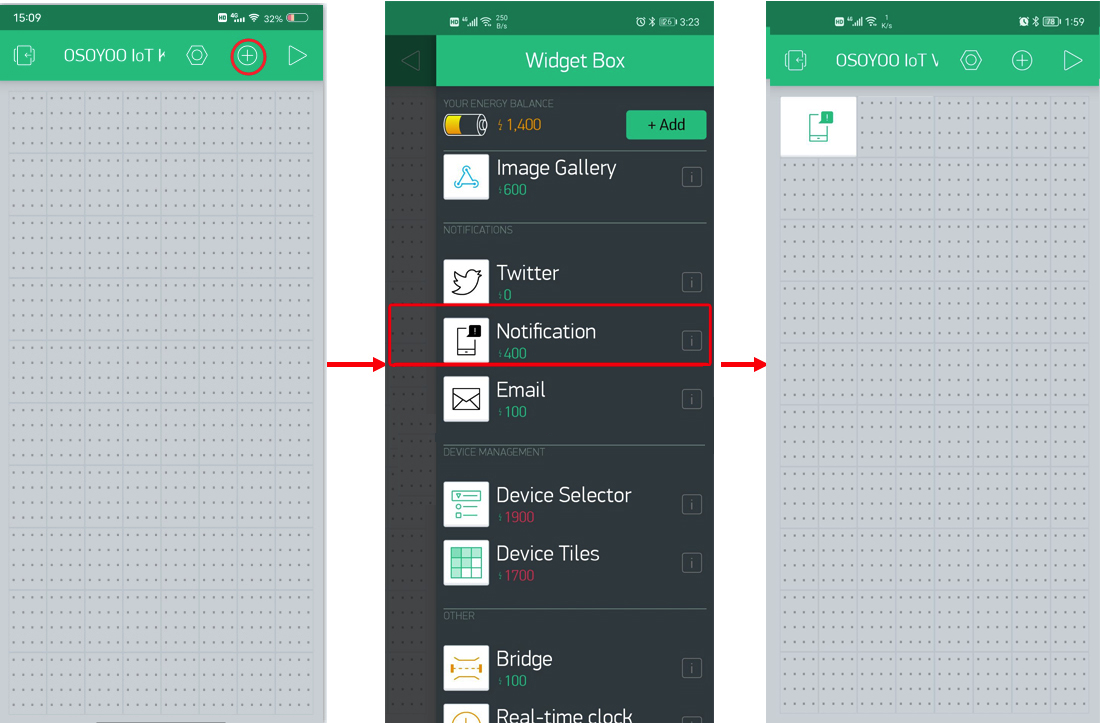
Add Widgets in your Blynk legacy APP
We need to add Notification and Email widgets on your Blynk APP.
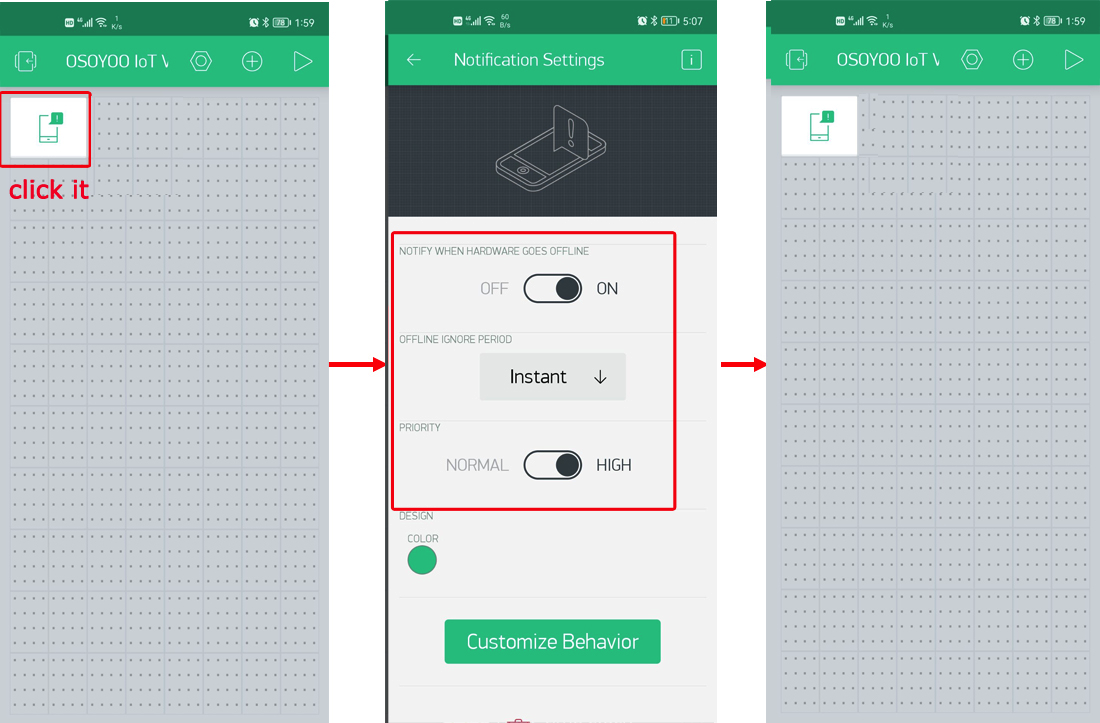
Notification Widget settings:
Notify when hardware goes offline: ON
Offline ignore period: Instant
Priority: HIGH
Then set the Blynk notification to the highest authority in the phone settings.
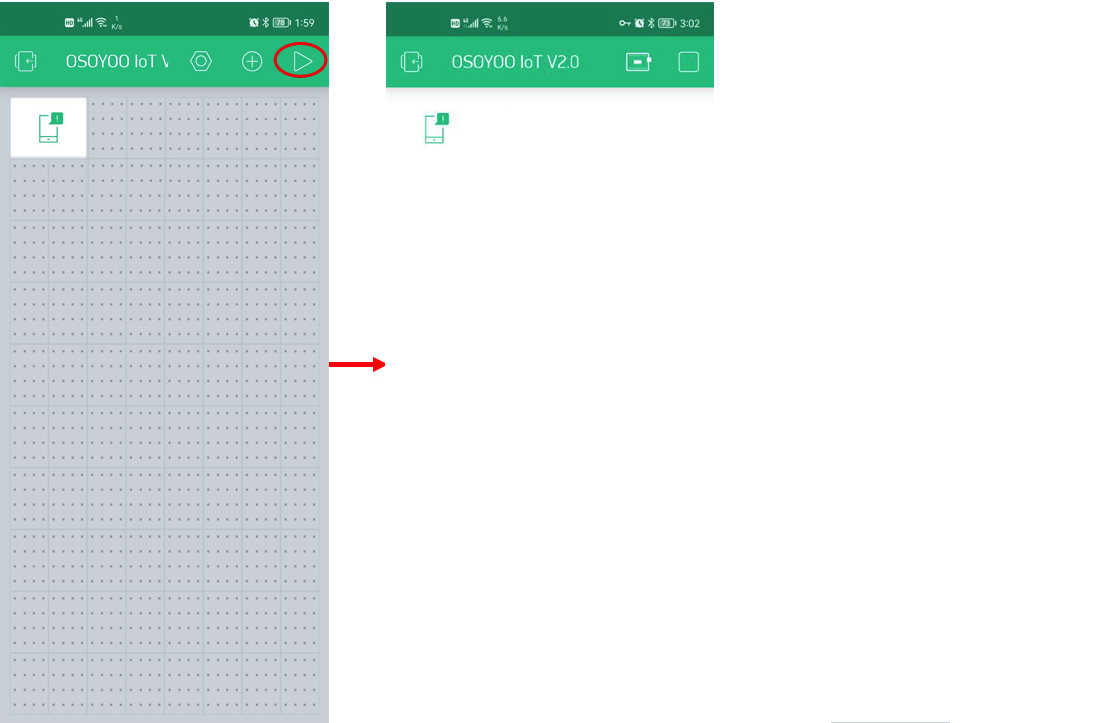
press the “▷” button to start your project.This will switch you from EDIT mode to PLAY mode .
Push Notifications
Push Notification widget allows you to send push notification from your hardware to your device. Currently it also contains 2 additional options:
Notify when hardware offline – you will get push notification in case your hardware went offline.
Offline Ignore Period – defines how long hardware could be offline (after it went offline) before sending notification. In case period is exceeded – “hardware offline” notification will be send. You will get no notification in case hardware was reconnected within specified period.
Priority high priority gives more chances that your message will be delivered without any delays. See detailed explanation here.
WARNING: high priority contributes more to battery drain compared to normal priority messages.
Example code:
Blynk.notify("Hey, Blynkers! My hardware can push now!");
You can also use placeholder for device name, that will be replaced on the server with your device name:
Blynk.notify("Hey, Blynkers! My {DEVICE_NAME} can push now!");
Limitations:
Maximum allowed body length is 120 symbols;
Every device can send only 1 notification every 5 seconds;
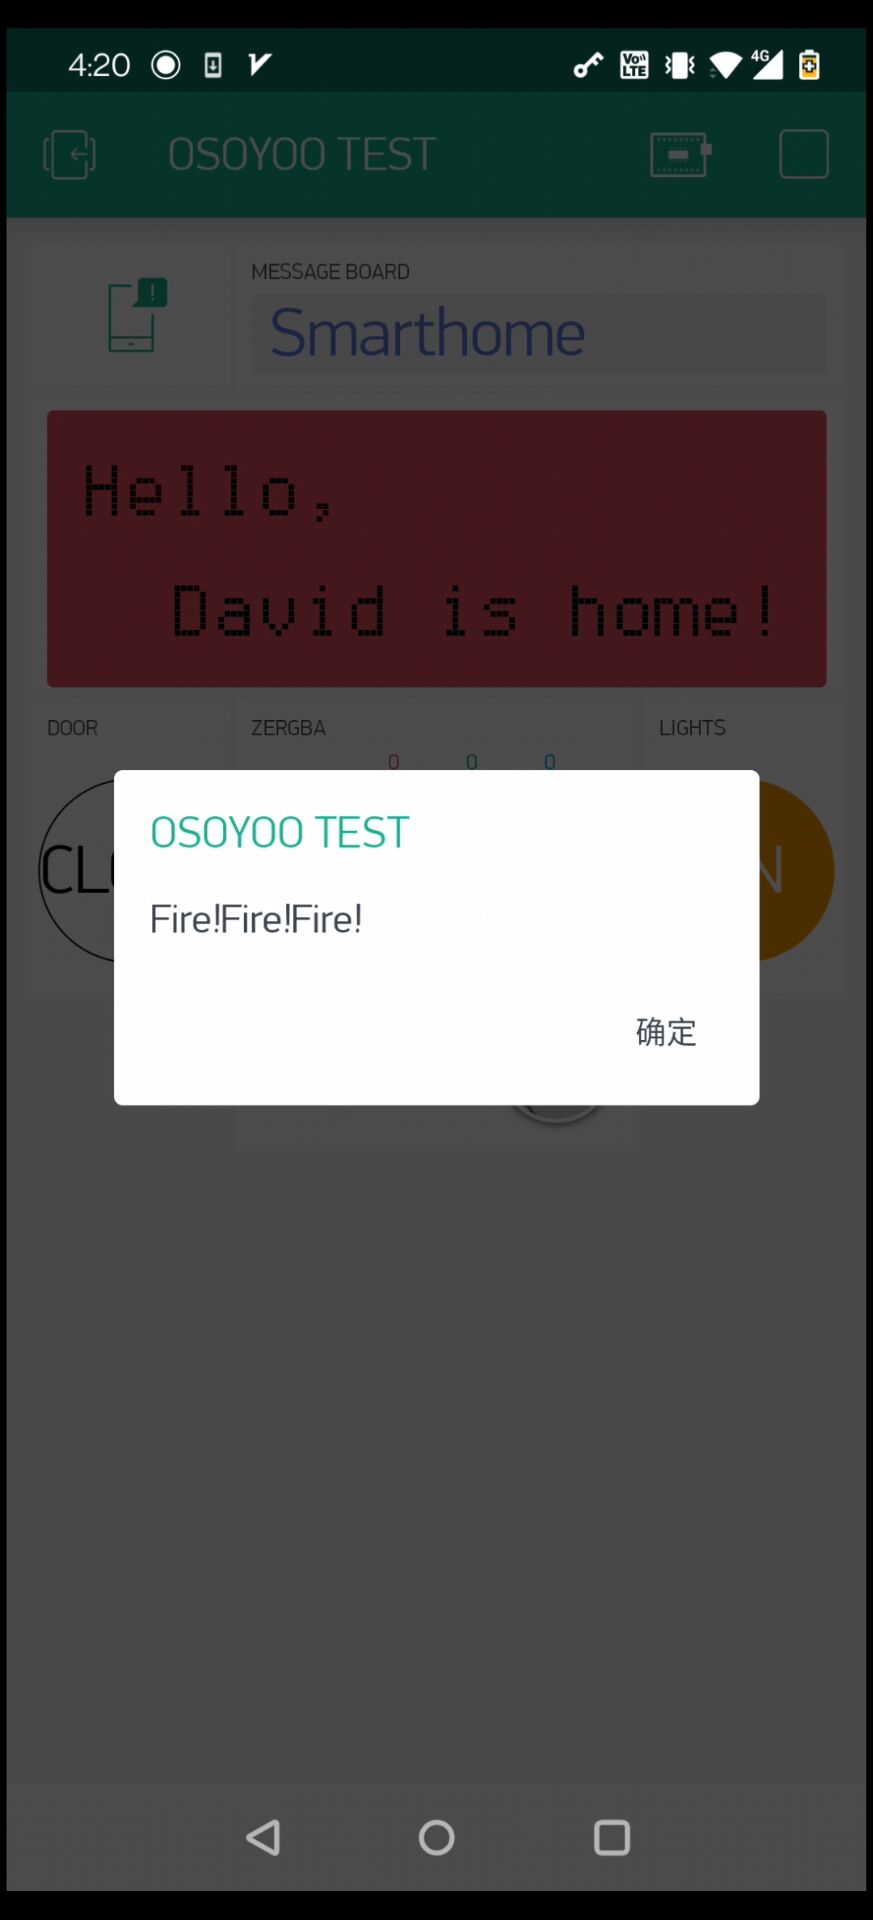
When the fire alarm detects a flame, it will sound an alarm, and the white warning light will be light. At the same time, the Blynk APP will also push fire alarm noticications and emails to your phone.
At the same time, you phone will receive a noticication: