


I. Objective
II. Parts and Devices
III. Hardware Installation
IV. Software Installation
V. Functional Testing and Verification
VI. Troubleshooting

Gyro is one of the most commonly used electronic component in human society. From large devices like rockets, satellites, and torpedoes, to small ones like smartphones and toy drones, we all use gyros.
In this course, we will learn how to program a gyroscope with Arduino to optimize the OSOYOO Robot Car’s performance.
You must complete lesson 1 before you continue on with this lesson.

OSOYOO ESPro Robot car chassis x1
OSOYOO Wheels x2
OSOYOO DC motors x2
OSOYOO ESPro motor driver board x1
OSOYOO Voltage meter x1
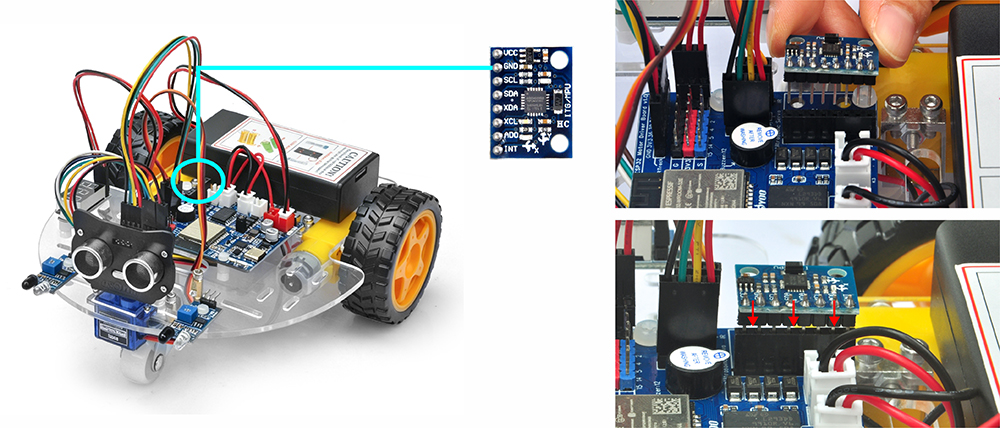
OSOYOO MPU6050 Gyro Module x1
OSOYOO Battery box x1
OSOYOO 3pin female to female jumper wire x1
OSOYOO 4pin female to female jumper wire x1
18650 Batteries (3.7 V) x2
Battery charger x1

Step 1.

Step 1: Install latest Arduino IDE (If you have Arduino IDE version after 1.1.16, please skip this step). Download Arduino IDE from https://www.arduino.cc/en/Main/Software?setlang=en , then install the software.
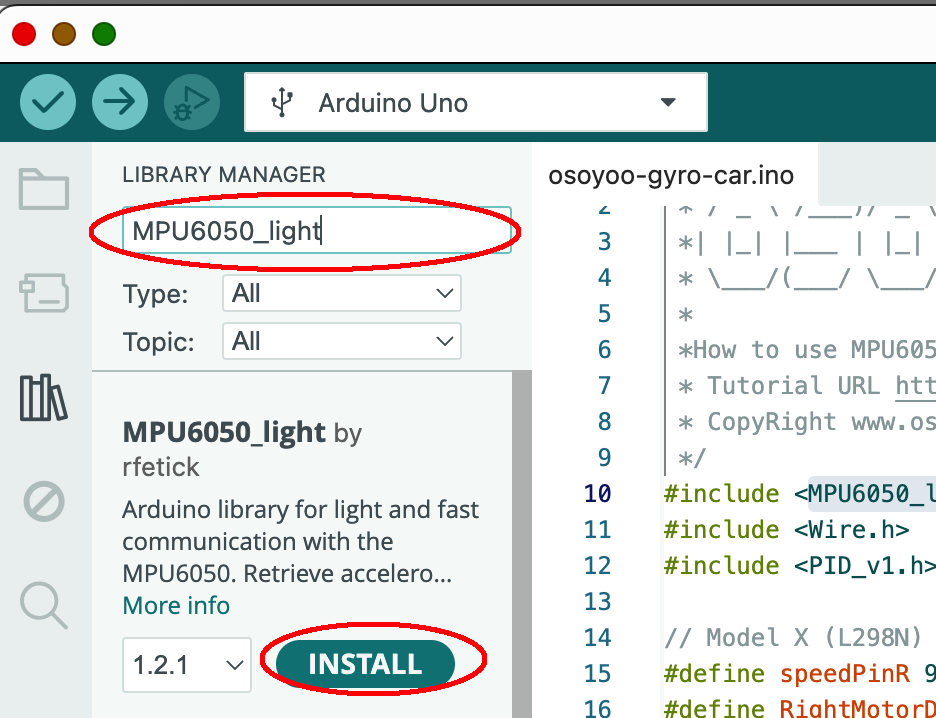
Step 2: In Arduino IDE top menu -> Sketch ->Include Library->Manage Libraries
Search MPU6050_light , you will find a library “MPU6050_light by rfetick”,
Click Install, then Install ALL to install MPU6050_light library.
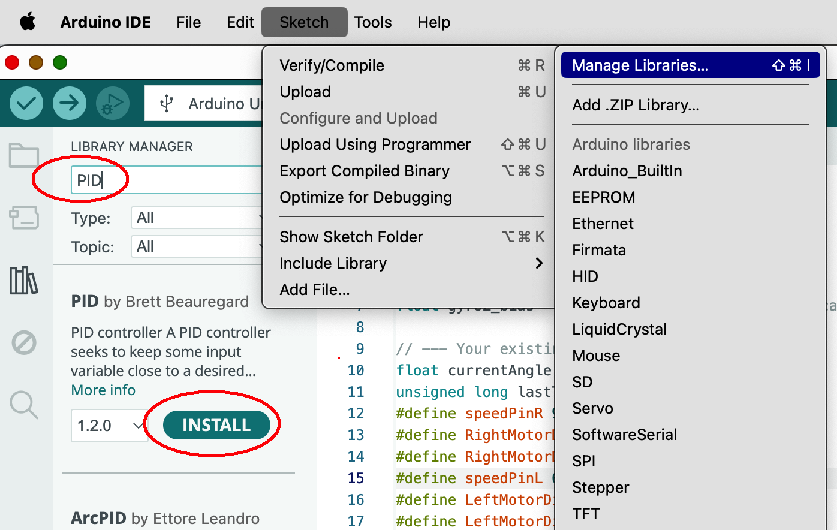
Similarly, install PID library from Arduino IDE as following :
Step 3: Download https://osoyoo.com/driver/espro-2wd-car/espro-lesson4-go-straight.zip, unzip the download zip file , you will see a folder called espro-lesson4-go-straight.zip.
Step 4: Connect ESPro motor driver board to PC with USB cable, Open Arduino IDE -> click file -> click Open -> choose code espro-lesson4-go-straight.ino” in lesson folder, load the code into arduino.
Step 5:In Serial Monitor, set baud rate to 9600, then you should see:
MPU6050 Found!
Step 6: Select Tool->Board->board Manager, Search ESP32 and Add ESP32 into Board Manager.
Then in Tool->Board, select esp32 ->ESP32 Dev Module,
Step 7: Last select correct port which matches ESP32 board,upload the sketch to the board.
Congrats! This means Arduino detects MPU6050 and you can put the car in the ground and test the performance.
Now you can put the car onto the ground, turn on the power. You will see the car will stay freeze for a while waiting the Arduino to initialize the gyro. Then the car will move straight forward . If you use your foot to force the car change direction, the car will automatically go back to its original direction.


