| Buy from US |
Buy from UK |
Buy from DE |
Buy from FR |
Buy from IT |
Buy from ES |
ここでご購入を! |
 |
 |
 |
 |
 |
 |
 |

In previous lessons, we have learnt many example on how to use web browser in PC to monitor to control a remote device through HTTP protocol. Such HTTP protocol has some problem. First, it needs run a web server in Arduino which has limited memory. Therefore the performance is slow and not stable. Second, it can only has one direction control (from PC to control remote device). It is not a 100% Thing to Thing connection required by many IoT applications.
This lesson we will discuss how to use two MEGA-Iot Shields to make Things-to-Things communication by UDP protocol. Please be noted that if you need do experiment in this lesson, you need buy two pcs of Osoyoo Mega-IoT extension shields.
In order to make duplex communication between two IoT, we need use a new internet protocol called UDP. UDP is very commonly used by email and IP phone service. It is a very simple protocol which allows internet device to send one way data to destination device. You only need tell UDP software the IP address and Port number, then destination can get the message.

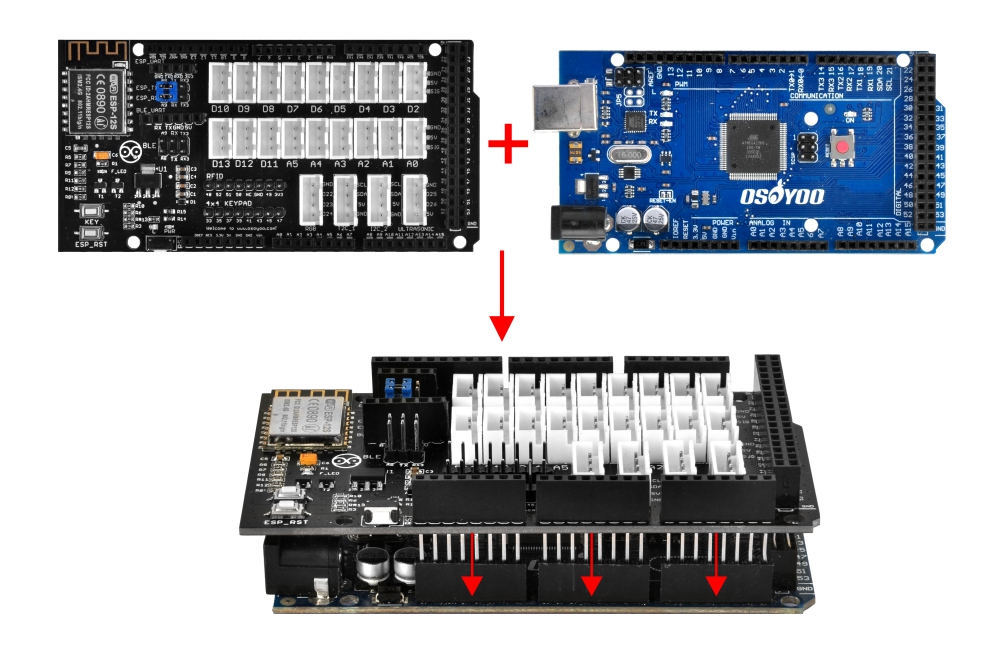
- OSOYOO Advanced Board for Arduino MEGA2560 x 2
- OSOYOO MEGA-IoT Extension Board x 2

First, please plug OSOYOO MEGA-IoT Extension Board into OSOYOO Advanced Board for Arduino MEGA2560:

Notice: Shut off your battery or Unplug your power adapter when upload sketch code to OSOYOO Advanced Board for Arduino MEGA2560.
Step 1 Install latest IDE (If you have Arduino IDE version after 1.1.16, please skip this step)
Download IDE from https://www.arduino.cc/en/software, then install the software.
Step 2 WifiEsp Library Installation (if you have installed WifiESP library, please skip this step)
OSOYOO MEGA-IoT extension TX/RX pin to OSOYOO Advanced Board for Arduino MEGA2560 A9/A8 pin by default. So in sketch code, we need use Software Serial Port to communicate with ESP8266 (set A9 as TX and A8 as RX in softwareserial object).
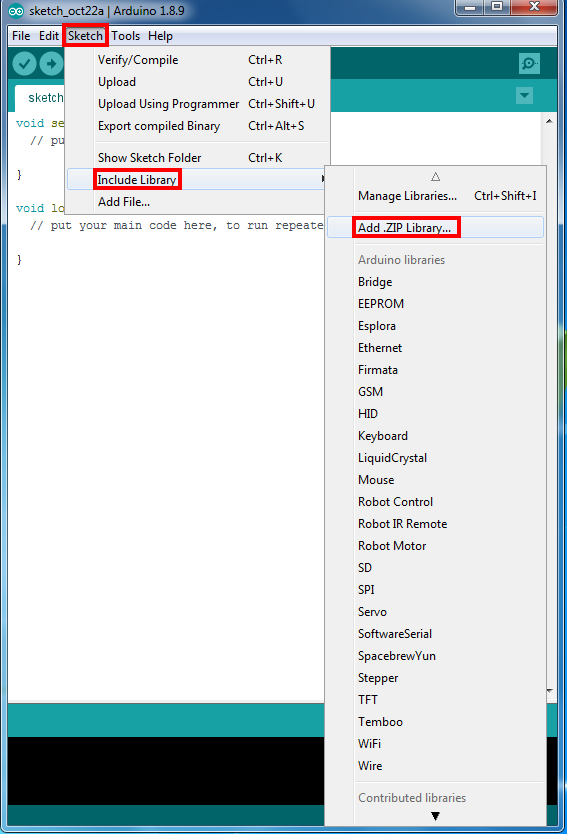
To use this wifi shield in IDE, we need download WiFiEsp-master library from following link:
https://osoyoo.com/driver/WiFiEsp-master.zip
Open IDE, click Sketch – Include Library- Add .Zip library to load above zip files into IDE.
Step 3 After installing above library, please download the main code from following link, unzip it, you will see a folder called “smarthome-lesson18”:
https://osoyoo.com/driver/smarthome/smarthome-lesson18.zip
Unzip the downloaded zip file, you will see two sub-folders in smarthome-lesson18: UdpSend and UDPreceive .
UdpSend should be installed in the sender OSOYOO Advanced Board for Arduino MEGA2560 device. It is to send UDP data(in the sample code,message is “what’s your name?”
UDPreceive should be installed on the other OSOYOO Advanced Board for Arduino MEGA2560 device which receive data from sender device. It is to show incoming UDP message and send response “my name is alice” back to sender device).
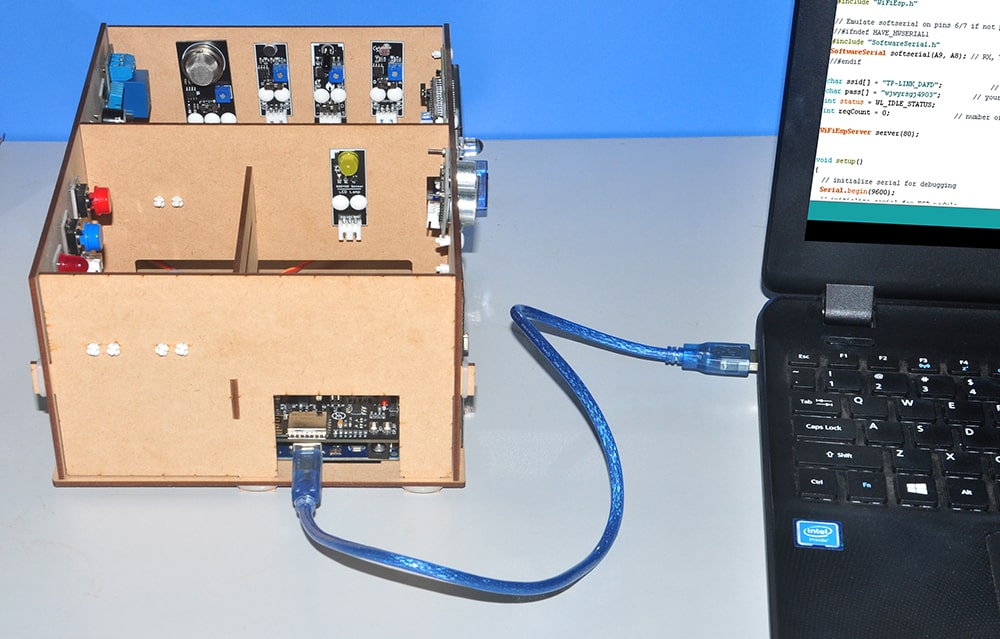
Step 4 After above operations are completed, connect OSOYOO MEGA2560 Board to PC with USB cable.
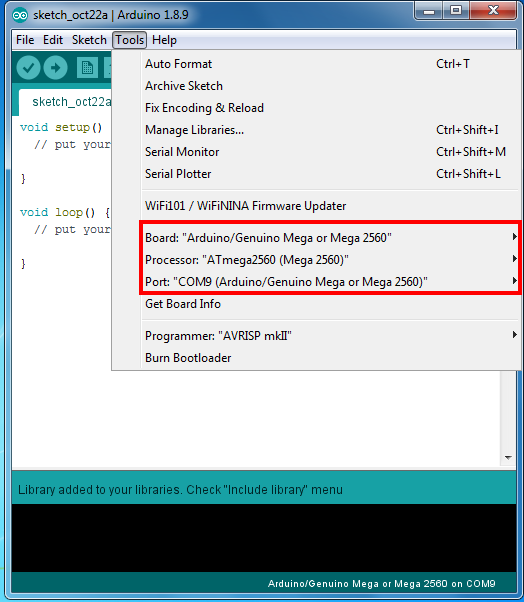
Step 5 IDE: Choose corresponding board type and port type for you project .
Load UdpReceive.ino to Receiver device
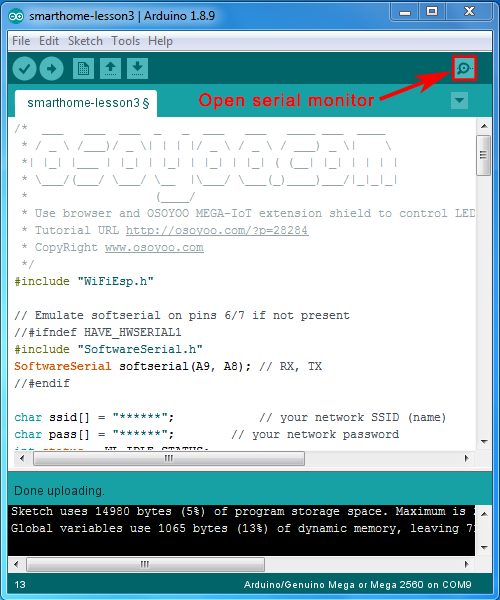
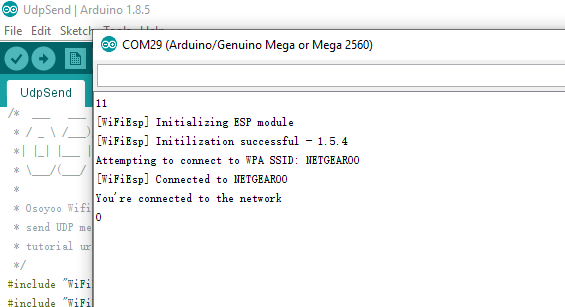
Step 6 Please run sample code for receiver device in lesson 3, please record the receiver device IP address, you’ll need it in the step below.
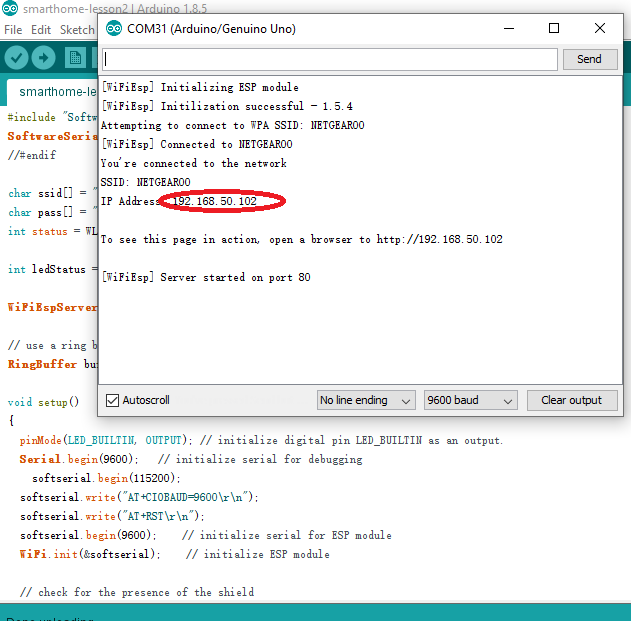
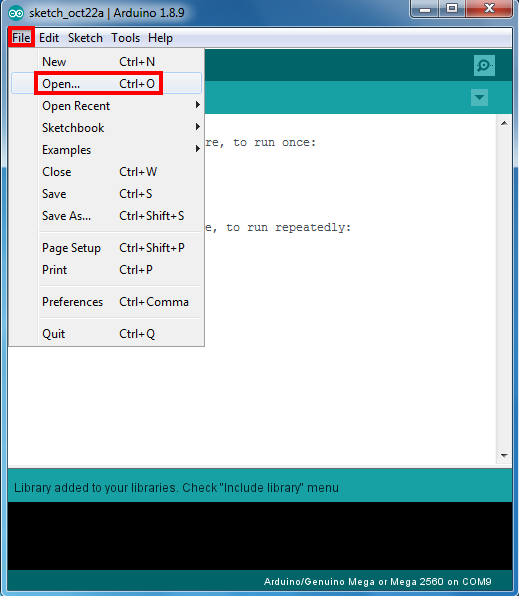
Step 7 IDE: Click file – Open to load UdpReceive.ino to Receiver device
Note: In the sketch, find line 16,17 as following:
char ssid[] = "******"; // your network SSID (name)char pass[] = "******"; // your network password
Please replace the ****** with your correct wifi SSID and password, otherwise your project can not connect to Internet.
Load UdpSend.ino to Sender device.
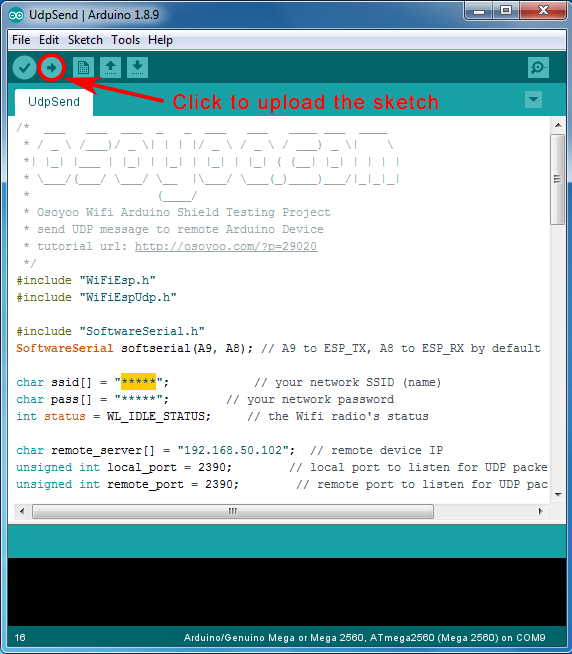
Step 8 IDE: Click file – Open to load UdpSend.ino to Sender device
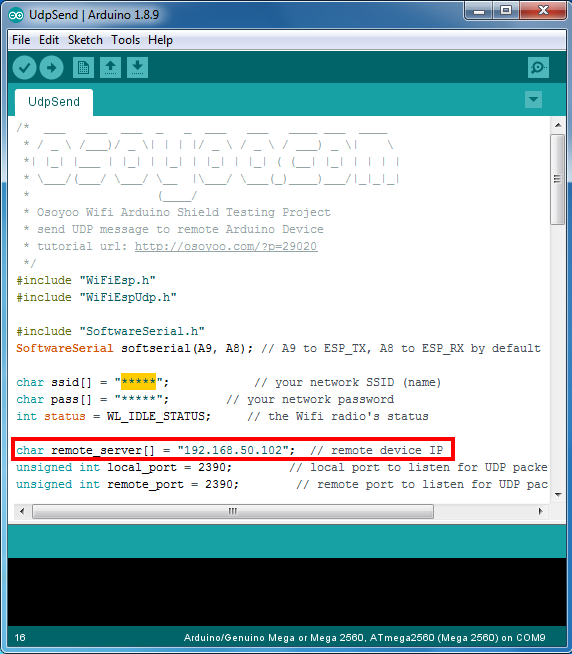
Note: In the sketch, find line 16,17 as following:
char ssid[] = "******"; // your network SSID (name)char pass[] = "******"; // your network password
Please replace the ****** with your correct wifi SSID and password, otherwise your project can not connect to Internet.

You also need change line 20 as following (recorded in step 6):
char remote_server[] = “192.168.50.102”; // replace receiver device ip address here
If you don’t know receiver device IP address, you need run sample code for receiver device in lesson 3

Open sender device’s serial monitor, you will see following screen:
Open receiver’s serial monitor, you will see following screen: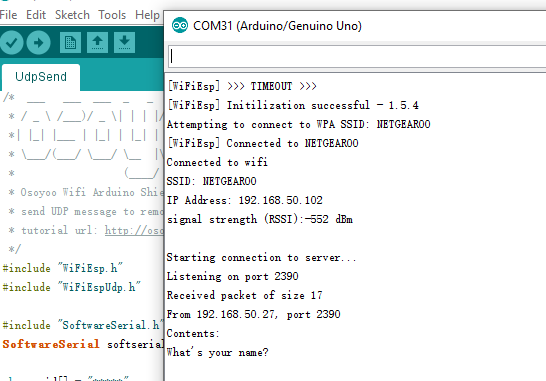
You can see Sender’s message “What’s your name?”
Now back to sender’s serial monitor, you will see following screen:
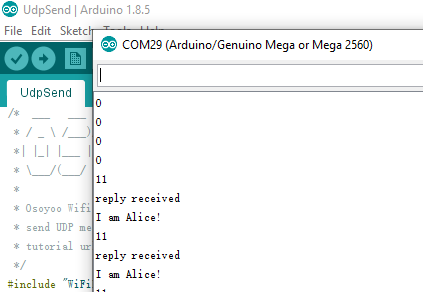
Now you can see new response message “I am Alice” which is from receiver device.