Authorized Online Retailers:
| Buy from US |
Buy from UK |
Buy from DE |
Buy from IT |
Buy from FR |
Buy from ES |
Buy from JP |
 |
 |
 |
 |
 |
 |
 |
Authorized Online Retailers:
1 Overview
In previous lessons, we have showed how to use web browser to access OSOYOO Basic Board through Internet. In these examples, we used a protocol called HTTP.
In this lesson, we will teach you to use a very simple and power protocol called UDP which is commonly used for Email service and control signal. We will use a cell phone APP to send angle control signal to remote mainboard and make the servo to make a rotate at a specific angle.
2 Hardware Preparation
|
Quantity |
| OSOYOO Basic Board |
1 |
| Ethernet Shield W5100 |
1 |
| USB cable |
1 |
| Servo motor SG90 |
1 |
| Jumper wires |
Several |
| Breadboard |
1 |
3 Hardware connection
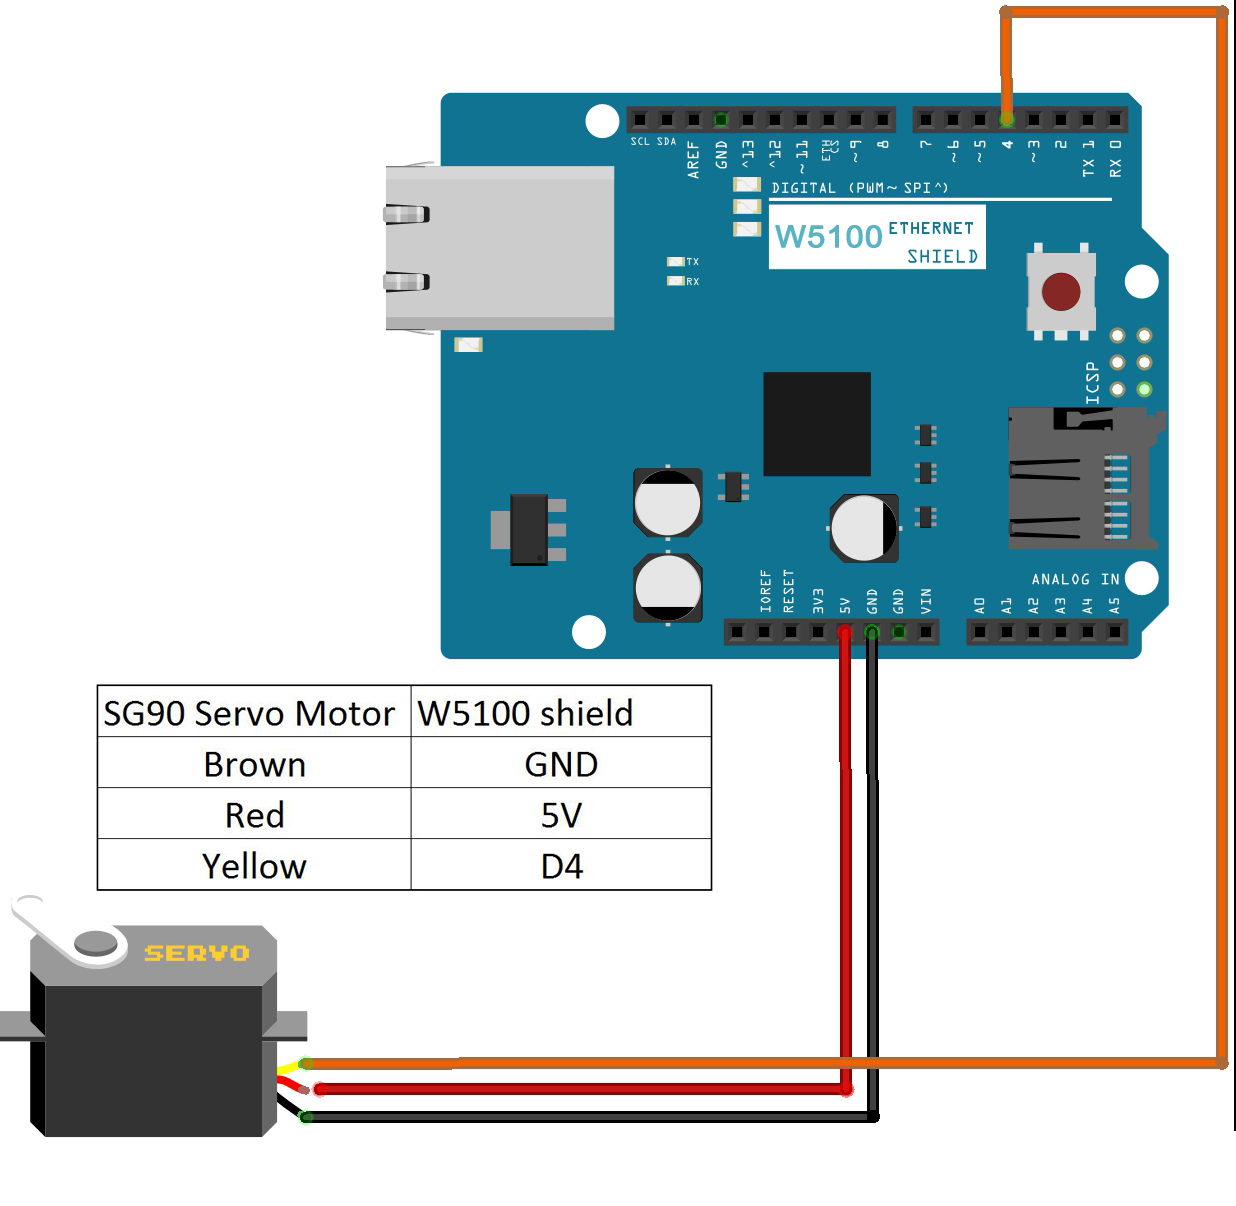
Connect the servo motor SG90 with OSOYOO Basic Board as following diagram:

4)Software Installation
Step A)Install Servo library: (if you have installed Servo Library, please skit this step)
Download the library from:
https://osoyoo.com/driver/Servo.zip
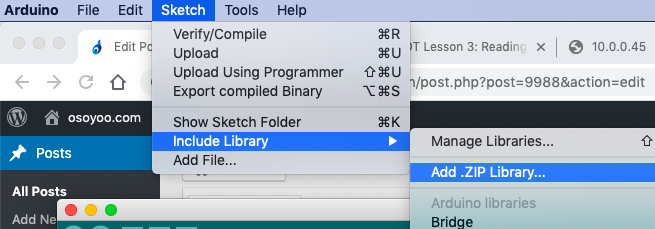
Then in your IDE ->Sketch->Include Library->Add .ZIP Library and select these two zip files you just downloaded, and upload it to IDE .
Step B) Download sample code from https://osoyoo.com/driver/ethernet_iot/lesson7/w5100-lesson7.zip, unzip the file and double click the w5100-lesson5.ino file, load the sketch into IDE.
Open your Serial Monitor, you can see your router will assign an IP address to your mainboard as following:
Your mainboard IP address is 10.0.0.45
In above result, you can see my mainboard IP address is 10.0.0.45 , we will set this IP in our UDP send/receive Cell Phone APP.
Step C)Download an Android or iOS UDP sending/receiving APP. You can use any UDP sending/receiving APP. In this lesson , we use a free APP called “UDP Sender/receiver” in Google Play Store. If you are using iPhone, you can search UPD sender to get similar APP.
After opening UPD Sender/Receiver APP, you will following UI:
please be noted local Port can be any value between 1 to 10000, but can not be blank. We suggest you use 2391 same as our sample.
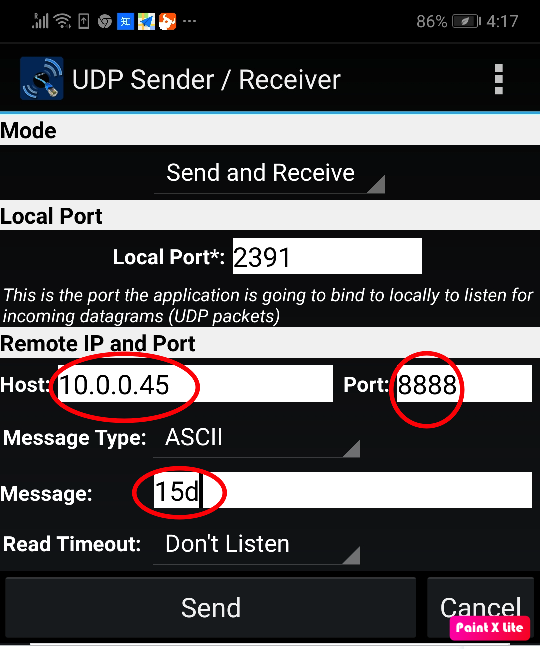
In above UI, you fill 3 fields:
Host: 10.0.0.45 , this is your mainboard IP which you get from IDE Serial monitor
Port:8888 , this is your UDP listen port, defined by lesson7 sketch line 24.
Message: 15d , this is the control message which means we want Servo point to 15 degree position.
Test:
Now click send button, the message “15d” will be sent to your remote mainboard and your server will make 15 degree rotate.
You can fill the message text field with “180D” and click send, your servo turn to 180 degree position.
If you send the message “0D”, the servo will rotate back to 0 degree position.


May 17, 2018
The servo does not move.
Transfer and dashboard settings are normal.
we have updated our on-line instruction of lesson 7. could you please have a try again?
we have updated our on-line instruction of lesson 7. could you please have a try again?
Servo does’nt move. In the UDP send receive app (same as in your instructions) local port info (2391 in your example) is empty. When fill up with any value the msg text seems to be sent but nothing happen
You need set local port by yourself. It can any value between 1 to 10000, can not be blank. If you like, you can use 2391 same as our example.
Hi,
Not Working.
Any tips?
thanks,
M