In this lesson, you will learn how to create program to make the Arduino’s built-in LED blink.
The ‘L’ LED
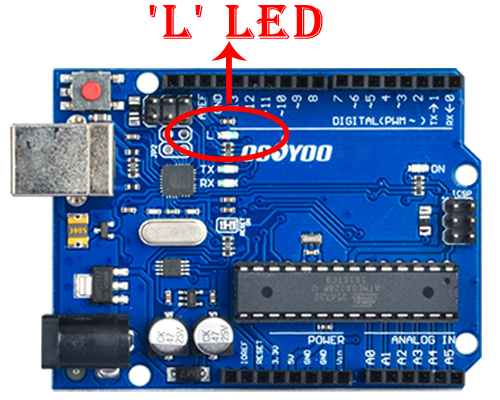
OSOYOO Basic Board for Arduino UNO has rows of connectors along both sides that are used to connect to electronic devices and plug-in ‘shields’ that provide extra functions(i.e wifi, bluetooth etc). However, the OSOYOO Basic Board for Arduino UNO also has a build-in LED that you can control from your sketches. This LED is often referred as the ‘L’ LED (Labelled on the board). By default, this led is connected to the D13 pin of the UNO board.
The position of this LED is the red circle on above picture of the OSOYOO Basic Board for Arduino UNO.
OSOYOO Basic Board for Arduino (Fully compatible with Arduino UNO rev.3) x 1
USB Cable x 1
PC x 1
Not much is needed for this lesson,make sure you’ve gone through Preparation lessons and Hello World lesson first!
Make sure you have a good quality syncing cable,do not pick a ‘charge only’ USB cable
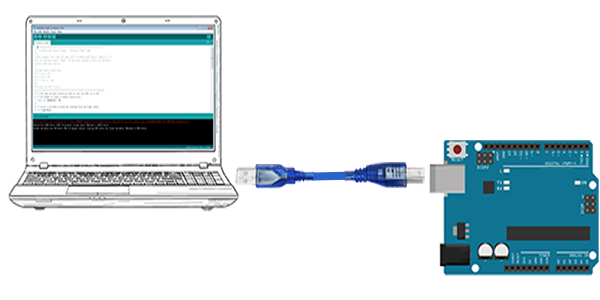
Connect the OSOYOO Basic Board for Arduino UNO to your computer using the USB cable. The green power LED (labelled PWR) should go on.
Notice: Shut off your battery or Unplug your power adapter when upload sketch code to OSOYOO Basic Board for Arduino UNO.
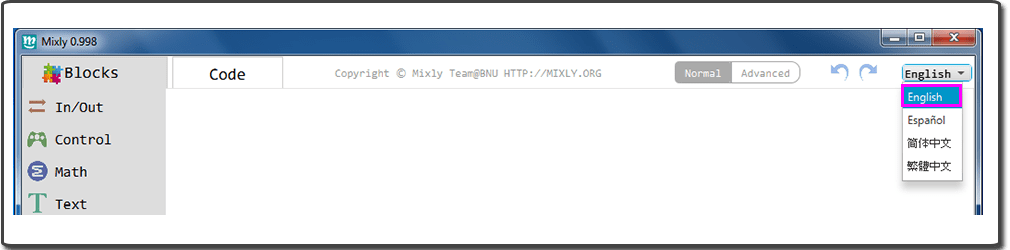
Open the Graphical Programming softwareMixly, if Mixly is not English, you should change the language first:
You can download the code directly, then click “Open” in Mixly to choose the code you download: Download the Code
Or you can do as following operations:
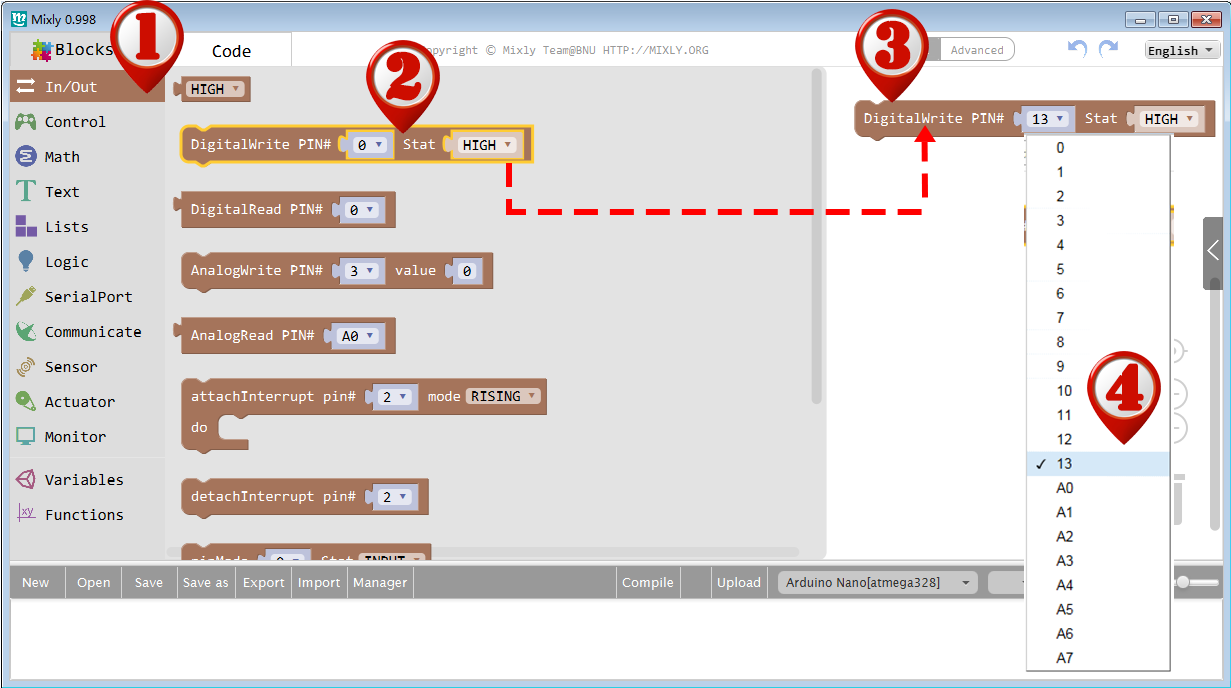
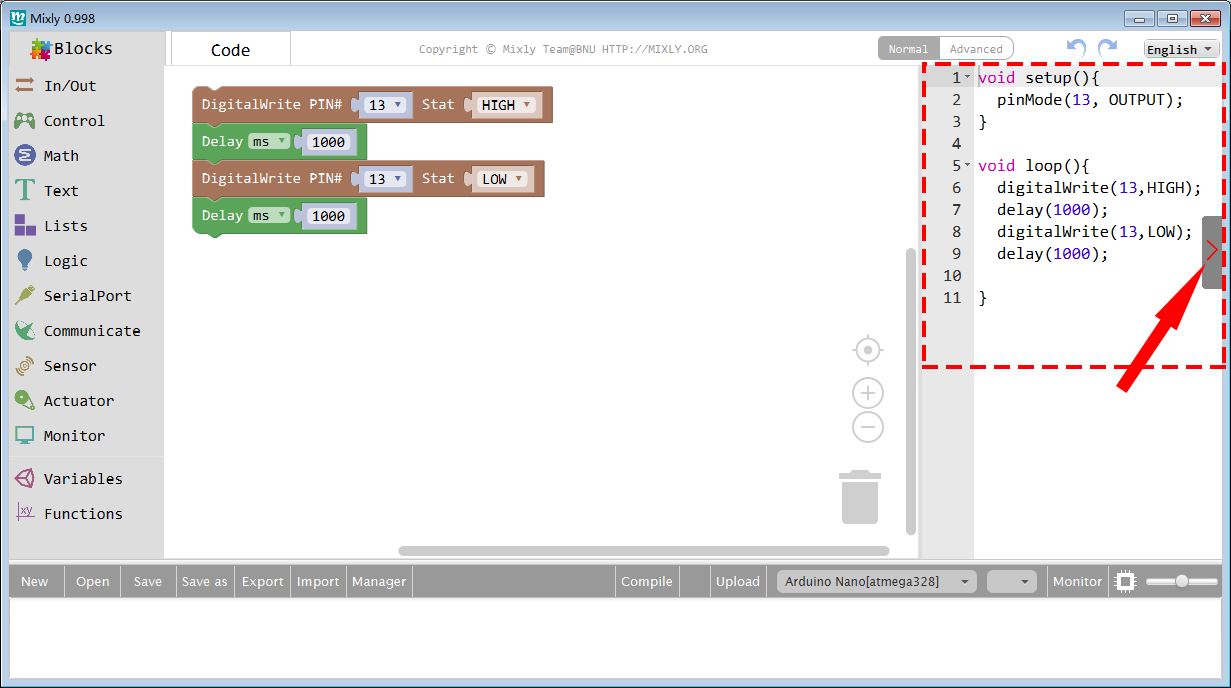
Open the Mixly software , In the “In/Out” menu, find the DigitalWrite module, Click it and drag it to the blank area,
Click to select 13 in the PIN # drop-down menu and select the Stat value to HIGH,
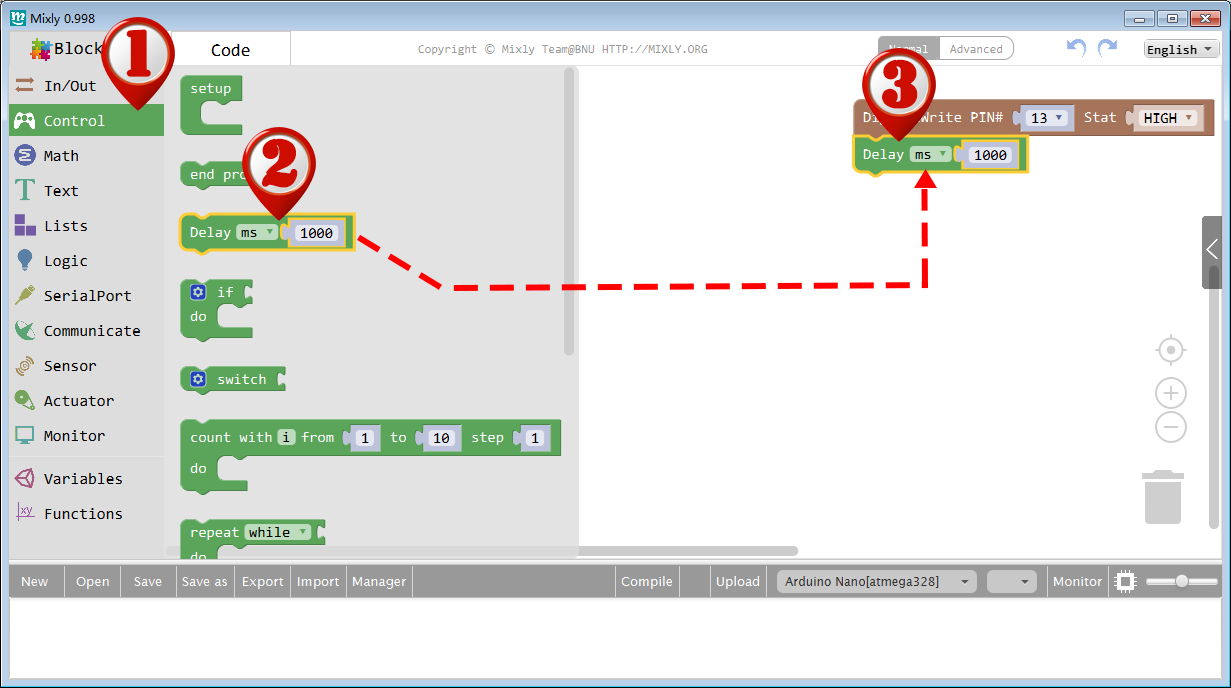
Next, drag a Delay block in the Control category to the blank area. Use the default delay value 1000 ms. Drag the Delay block under the DigitalWrite block and fit the bulge to make two blocks embedded together as following picture:
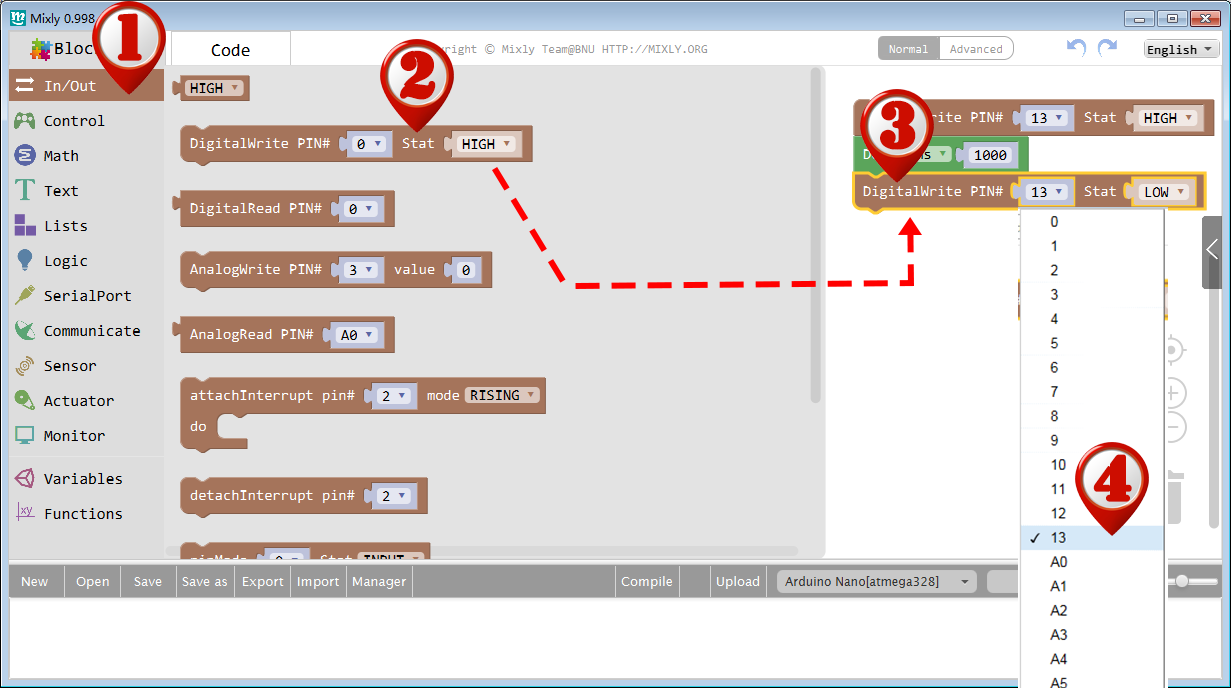
Drag another DigitalWrite in In/Out section, set the PIN to 13 and Stat to LOW, then drop it to blank area
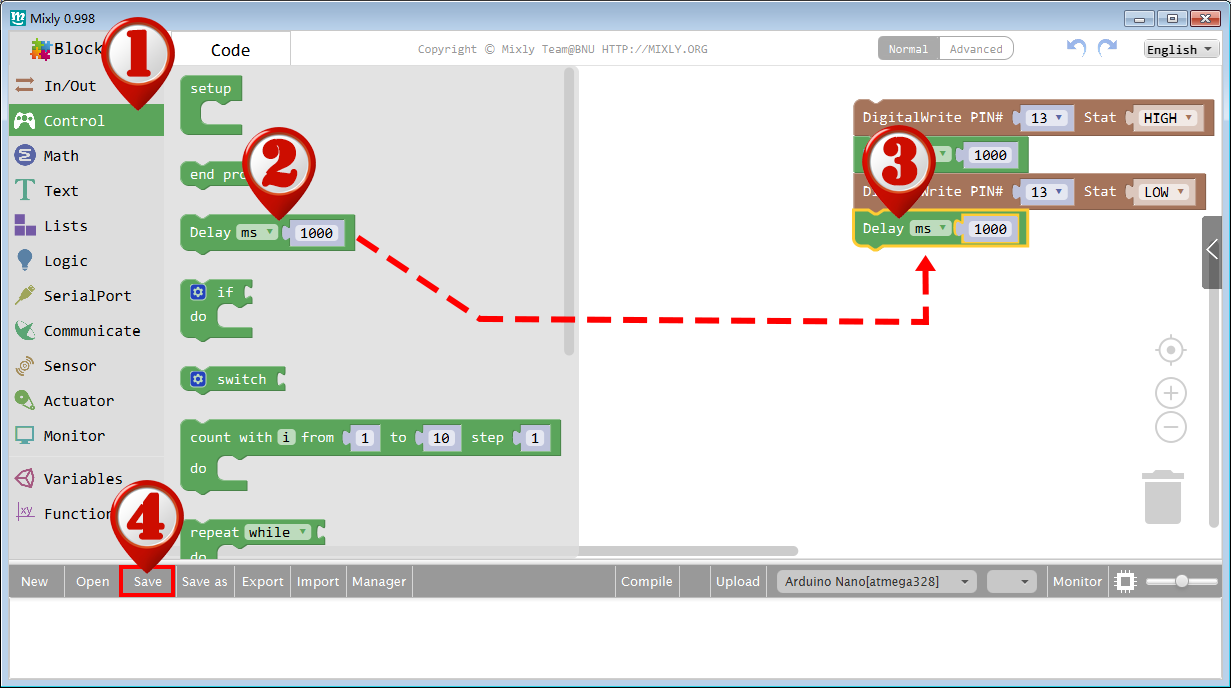
drag another Delay block to black area, use default delay value 1000 ms.
Now we have finished graph programming. The 4 programming blocks will give a high / low level voltage loop to the pin 13 and turn LED on and off(blinking) continuously. Click Save after finishing graphic programming.
At anytime, you can click the “<” button to check the corresponding code(C language) on the right bar. You can use IDE to run these code, the running result on OSOYOO Basic Board for Arduino UNO hardware will be same as graphic programming by this Mixly software. If you want learn more about how to use Arduino IDE to write C language code, you can read our tutorial https://osoyoo.com/2017/05/08/download-and-install-arduino-ide/
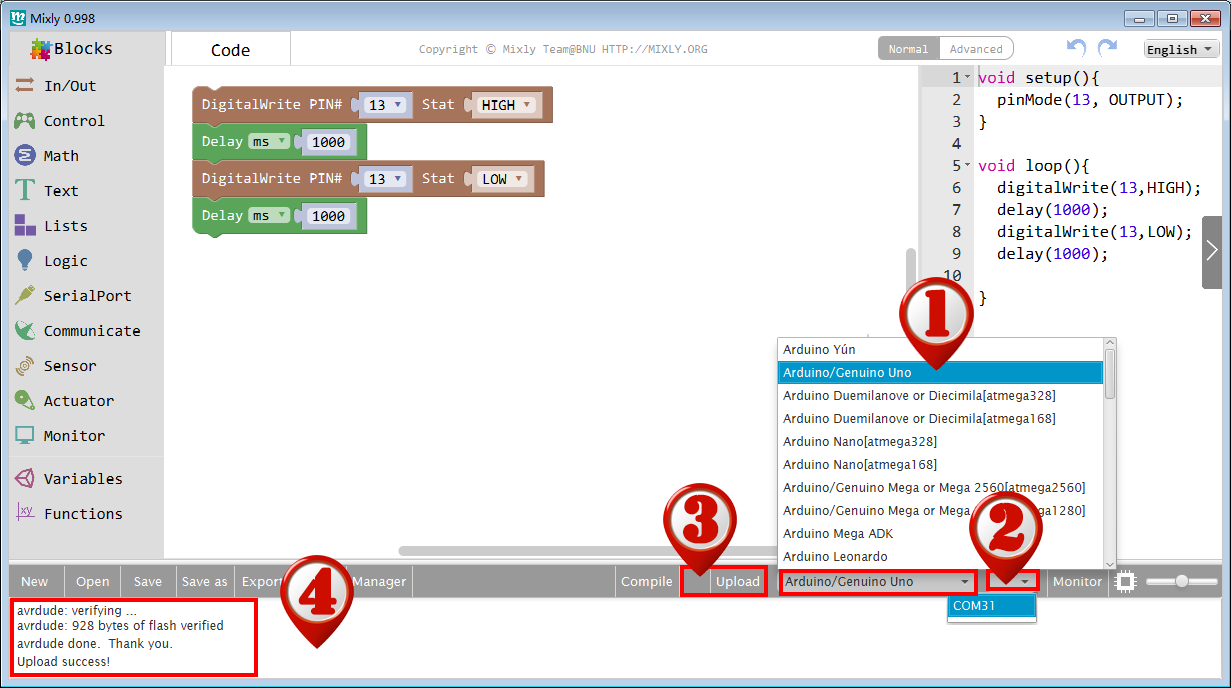
Next, select the board type and serial port before uploading. In this lesson, we are using OSOYOO Basic Board for Arduino UNO, so just select Arduino/Genuino Uno from drop-down manual (1).
Next, select the serial device of the OSOYOO Basic Board for Arduino UNO from the COM drop-down manual(2).
Next, upload the code. If the uploading fails, please check COM port setting, cable connection and board type setting are all correct and try again.
Finally, if everything is ok, the status will change to ‘Upload success!’.
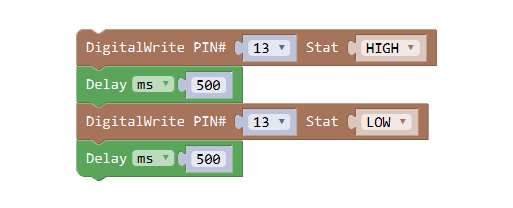
Now let’s try to make LED blink faster. As you might have guessed, we can do this by changing the value in the Delay block.
The delay period is in milliseconds, and if you want the LED to blink twice as fast, reduce delay time from 1000 ms to 500 ms as showed above. This will double the flashing speed.
Upload the code again and you should see the LED flash much faster than before.
Here, we see two very common module blocks – DigitalWrite Block and Delay Block.
DigitalWrite block lets Arduino send digital signals(voltage) to the output circuit – 0 and 1:
0 means the output voltage level is LOW;
1 means the output voltage level is HIGH.
Delay block is very straight forward, it just makes Arduino keep current status for a specific time period.
Now we can explain the function of above four blocks in detail:
The system starts with the first block( DigitalWrite) which sends a HIGH voltage to pin 13. Pin 13 is connected to a build-in LED. therefore the LED is turned on.
The 2nd block(DELAY) keeps previous status for 1000ms(one second), so the LED keeps turning on for 1 second.
The 3rd block is another DigitalWrite. But this time , instead of sending 1, this block sends value zero (LOW voltage) to Pin 13.
The last block is DELAY again, it will keep current status(Low voltage in Pin 13) for 1 second. This means our LED’s OFF status will last for 1 second.
Now all the program blocks have been executed, What will be next? Should the LED be OFF forever?
The answer is NO! After the last block is executed, the system will back to the very beginning and run all the blocks again and again. (In Arduino IDE, all the code related to Mixly blocks are actually in a function called loop(). This is an endless dead loop which will run forever as long as the Arduino power is on.
So after the LED is turned off for one second by the last block, OSOYOO Basic Board for Arduino UNO Pin 13 is turned on to HIGH again by first DigitalWrite Block which makes the LED flashing again and again.
Now you have completed this simple LED flashing project. We hope have got some basic idesa on how Mixly works on OSOYOO Basic Board for Arduino UNO. Let’s go to next lesson to explore new topics on Arduino programming.


 Not much is needed for this lesson,make sure you’ve gone through Preparation lessons and Hello World lesson first!

 , In the “In/Out” menu, find the DigitalWrite module, Click it and drag it to the blank area,