The OSOYOO Magic I/O Shield for Arduino is a powerful board for the beginners. With this Magic board, we can easily connect various sensors and actuators much easier than before.
In this lesson we will use Arduino to drive 4 LEDs and make a running LED light row.
Preparations
Hardware
OSOYOO UNO Board (Fully compatible with Arduino UNO rev.3) x 1
OSOYOO Magic I/O Shield V1.1 x 1
OSOYOO LED Module x 4
OSOYOO 3-Pin PnP cable x4
USB Cable x 1
PC x 1
Software
Arduino IDE (version 1.6.4+)
Connection
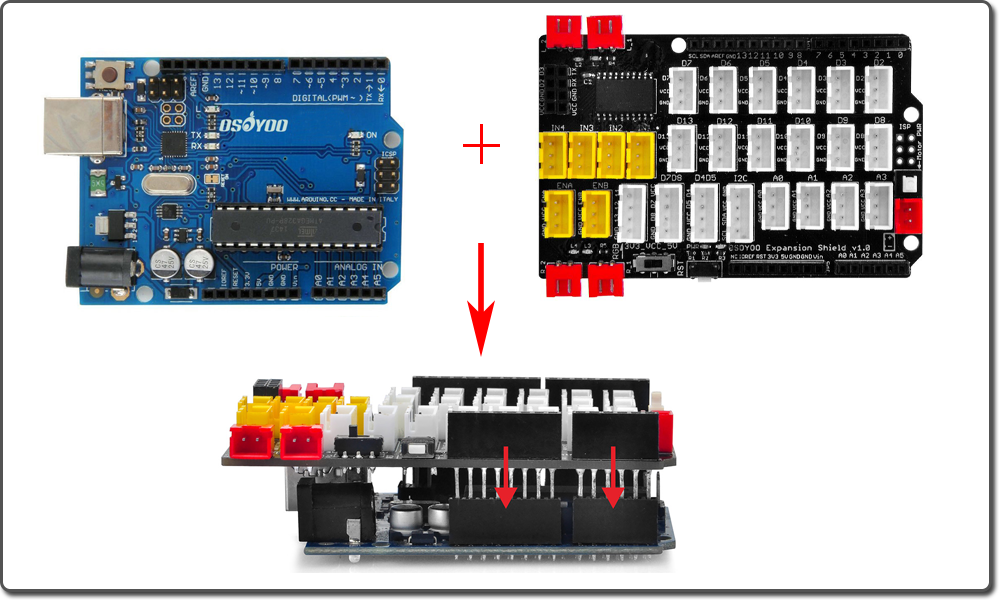
First, please plug OSOYOO Magic I/O shield into UNO board:
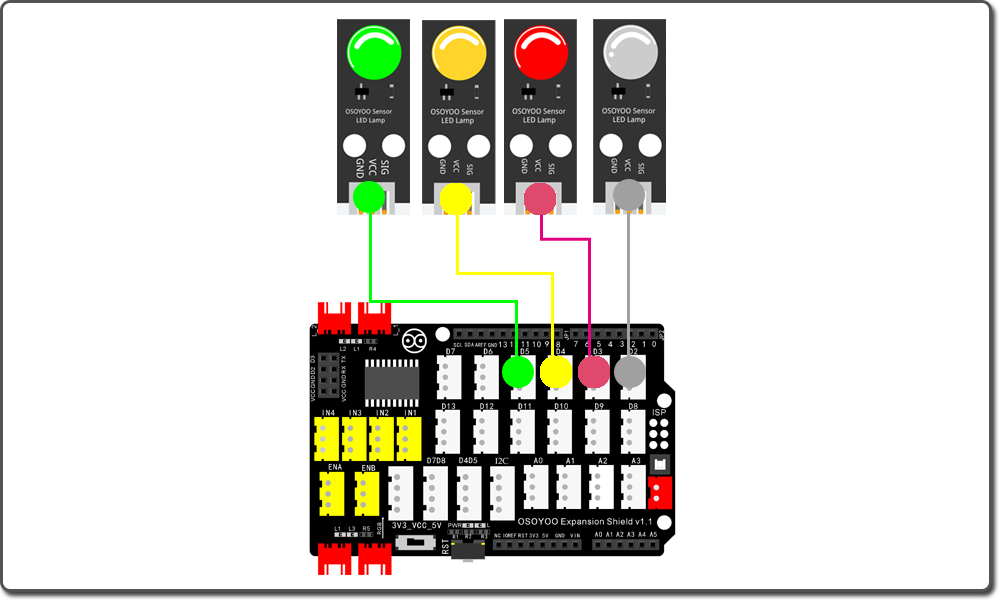
Then connect the LED module to the ports of the Magic I/O shield with four 3-pin PNP cables as below:
White – D2
Red – D3
Yellow – D4
Green – D5
Note:
You should NOT connect a normal LED between 5V and GND pins in Arduino without a resistance. First, This will cause too much current passing through LED and burn it out. Second, the LED polarity is wrongly connected(i.e Positive Pin connected to GND pin) will also damage the LED.
To solve such problem. we designed OSOYOO LED module which has a build-in resistance to limit the current and fixed polarity socket to avoid these mistakes. In this project, we will use OSOYOO LED module.
Upload Sketch
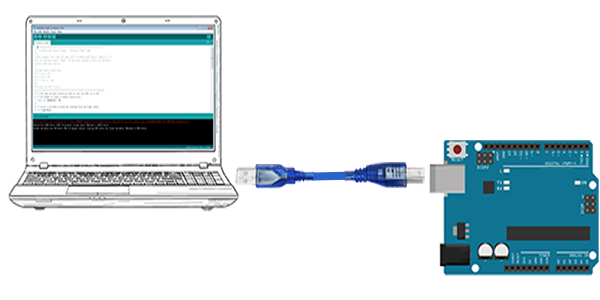
If you have connected the wiring diagram, connect the Arduino UNO board to your computer using the USB cable. The green power LED (labelled PWR) should go on.
Open the Arduino IDE,and choose the corresponding board type and port type for your Arduino,then open the sketch or copy below code to your IDE window:
voidsetup(){for(inti=2;i<=5;i++)//Set the pin2~pin8 cycle output{pinMode(i,OUTPUT);}}voidloop(){for(intx=2;x<=5;x++)//Each LED will flash in one second{digitalWrite(x,HIGH);delay(500);digitalWrite(x,LOW);delay(500);}}
Now, simply click the “Upload” button in the environment. Wait a few seconds – you should see the RX and TX leds on the board flashing. If the upload is successful, the message “Done uploading.” will appear in the status bar.
Running Result
Now, you should see four LEDs lighting one by one as per following video, this whole process will repeat until the circuit is powered off.