Note: ALL OSOYOO Products for Arduino are Third Party Board which is fully compatitable with Arduino
Authorized Online Retailers:
Content
- Introduction
- Preparations
- About the SW-520D Tilt Sensor
- Example
- Connection
- Upload Sketch
- Program Running Result
Introduction
The tilt sensor allows to detect orientation or inclination. It detects if the sensor is completely upright or if it is tilted, In this lesson,we will learn how a Tilt Sensor works and how to use it with OSOYOO basic Board for Arduino for detecting motion.
Preparations
Hardware
- Osoyoo basic Board (Fully compatible with Arduino UNO rev.3) x 1
- Tilt Sensor x 1
- Jumpers
- USB Cable x 1
- PC x 1
Software
- Arduin IDE (version 1.6.4+)
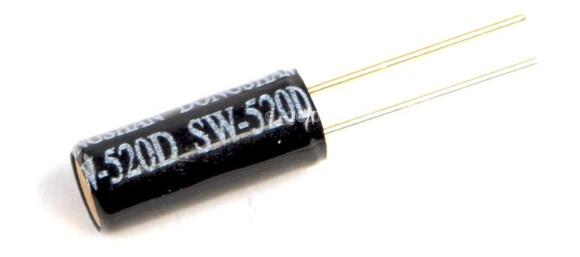
About Tilt Sensor
Overview
Tilt sensors allow you to detect orientation or inclination. However it is only the equivalent to a pushbutton activated through a different physical mechanism. This type of sensor is the environmental-friendly version of a mercury-switch. It contains 2 metallic balls inside that will commute the two pins of the device from on to off.
Features:
- Detect orientation or inclination
- Small and inexpensive
- Low-power and easy-to-use
- If used properly, they will not wear out.
- Sensitivity range: > +-15 degrees
- Lifetime: 50,000+ cycles (switches)
- Power supply: Up to 24V, switching less than 5mA
Dimensions:
- Diameter: 5.2mm
- Height: 11.5mm (excluding leads)
How it works?
These ball switch-type tilt sensors are a type of digital switch that change state from open to closed based on its inclination relative to the earth’s gravitational field vector. Electrically, they behave much like the push button we’ve used in the past where contacts are conducting when the switch closes, and not conducting when it opens. Mechanically, they usually consist of a hollow shell (typically cylindrical) and a conductive free mass inside (typically a blob of mercury or a rolling, metallic ball); on one end of the shell the sensor has two or more conductive elements that become shorted when the sensor’s orientation is such that the free mass inside rolls and makes physical contact with them.

Examples
Tilt sensitive LED
This is just a simple example for you to start put hands on your tilt sensor. In this example, an LED will be turned off if the sensor is upright, and will be turned on if the sensor is tilted.
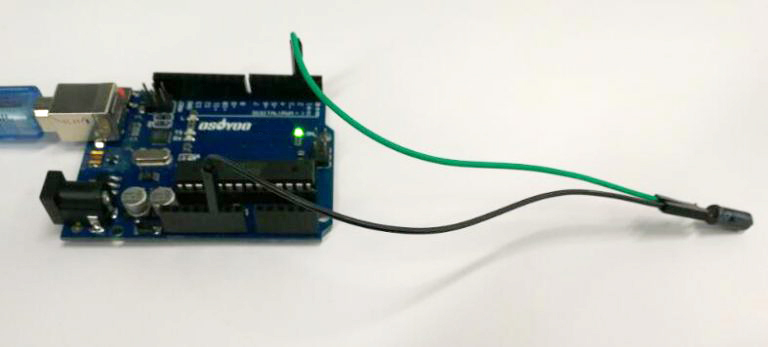
Connection
Build the circuit as below:
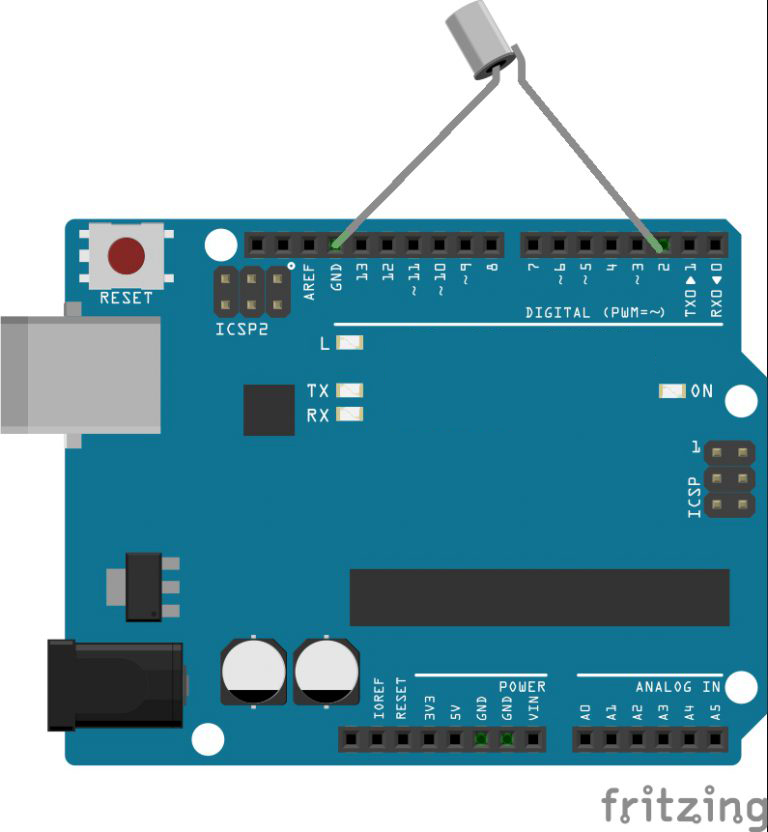
Overhere, the tilt sensor is connected to pin 2 of OSOYOO basic board. The other terminal of the sensor is connected to ground. The on-board LED are used to indicate the detection of the tilt by OSOYOO Basic board.
Code Program
After above operations are completed, connect the board to your computer using the USB cable. The green power LED (labelled PWR) should go on.Open the IDE and choose corresponding board type and port type for you project. Then load up the following sketch onto your board.
const int ledPin = 13;//the led attach to
void setup()
{
pinMode(ledPin,OUTPUT);//initialize the ledPin as an output
pinMode(2,INPUT);//set pin2 as INPUT
digitalWrite(2, HIGH);//set pin2 as HIGH
}

void loop()
{
int digitalVal = digitalRead(2);//Read the value of pin2
if(HIGH == digitalVal)//if tilt switch is not breakover
{
digitalWrite(ledPin,LOW);//turn the led off
}
else ////if tilt switch breakover
{
digitalWrite(ledPin,HIGH);//turn the led on
}
}
Running Result
A few seconds after the upload finishes, when the sensor is held upright, the circuit is closed. Current flows through the LED and it glows. When the orientation of the sensor is changed, the circuit is open and the LED is turned off.


