

Authorized Online Retailers:
Purchase from US Purchase from Japan


Introduction
In this lesson, we will show how to use the Osoyoo Yun IoT Kit to make a simple night lamp, When someone passes at night, the light will be lit.

HARDWARE
- Arduino(Osoyoo Mega2560 here) x 1
- Dragino Yun Shield x 1
- Ultrasonic HC-SR04 x 1
- Photoresistor Module x 1
- LED x 1
- 200Ω Resistor x 1
- Jumpers
SOFTWARE
Connection
Build the circuit as below:
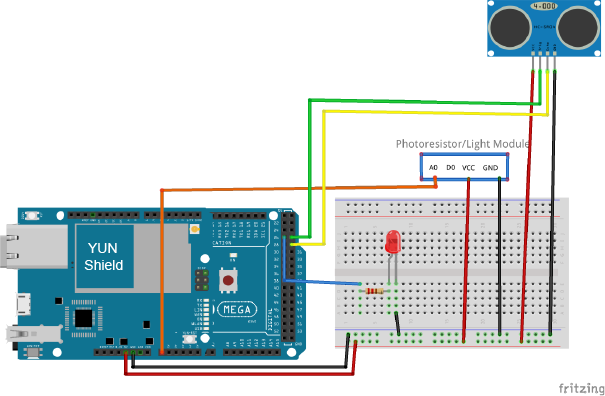
| Photoresistor sensor |
Mega2560+YUN Shield |
| VCC |
5V |
| GND |
GND |
| A0 |
A0 |
| Ultrasonic HC-SR04 |
|
| VCC |
5V |
| GND |
GND |
| Trig |
D27 |
| Echo |
D29 |
We connect the LED to D26.
Code Program
After above operations are completed, make sure that the Yun Shield is on the same network with the computer. Open the Arduino IDE and choose corresponding board type and port type for you project. Then load up the following sketch onto your Arduino.
#include "Bridge.h"
#include "Console.h"
#include "SimpleTimer.h"
#include "SPI.h"
SimpleTimer timer;
#define echoPin 29
#define trigPin 27
int lightsensorPin = A0;    // select the input pin for the photoresistor
//int ledPin = 9;   // select the pin for the LED
int light_val = 0;       // variable to store the value coming from the sensor
int LED = 26;   // select the pin26 for the LED

//Light / Ultrasonic

void LIGHTSENSOR () {
    Console.println("LIGHT SENSOR AND HC-SR04 START!");
  float duration, distance;
  digitalWrite(trigPin, LOW);
  delayMicroseconds(2);

  digitalWrite(trigPin, HIGH);
  delayMicroseconds(10);
  digitalWrite(trigPin, LOW);

  duration = pulseIn(echoPin, HIGH);
  distance = (duration / 2) * 0.0344;

light_val = analogRead(lightsensorPin);   // read the value from the sensor
    Console.print("light_val = ");
    Console.println(light_val);   //The serial will print the light value
    Console.print("Distance = ");
    Console.print(distance);
    Console.println(" cm");
  if(light_val>=400 && distance <= 10  )       // the point at which the state of LEDs change
  {
    digitalWrite(LED, HIGH);
    delay(1000);
  }
  else
  {
     digitalWrite(LED, LOW);  //set LED off
  }
}

void setup()
{
  Blynk.begin(auth);
  Bridge.begin();
  Console.begin();
  SPI.begin();
  pinMode(trigPin, OUTPUT);
  pinMode(echoPin, INPUT);
  pinMode(LED, OUTPUT);      // declare LED as output
  timer.setInterval(1000, LIGHTSENSOR);
  while (!Console);{}
}
void loop() {
  timer.run();
}
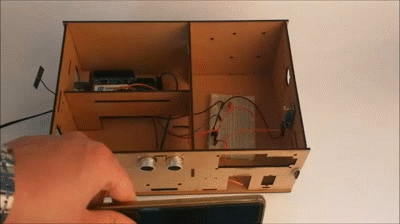
Running Result
Open the Serial Monitor, with one hand covering the photosensitive sensor and simulating the night, while the other hand is slowly approaching the ultrasonic module, you will find that the LED will be lit.