Note: ALL OSOYOO Products for Arduino are Third Party Board which is fully compatitable with Arduino
Authorized Online Retailers
Buy from US
Buy from UK
Buy from DE
Buy from IT
Buy from FR
Buy from ES
Buy from JP
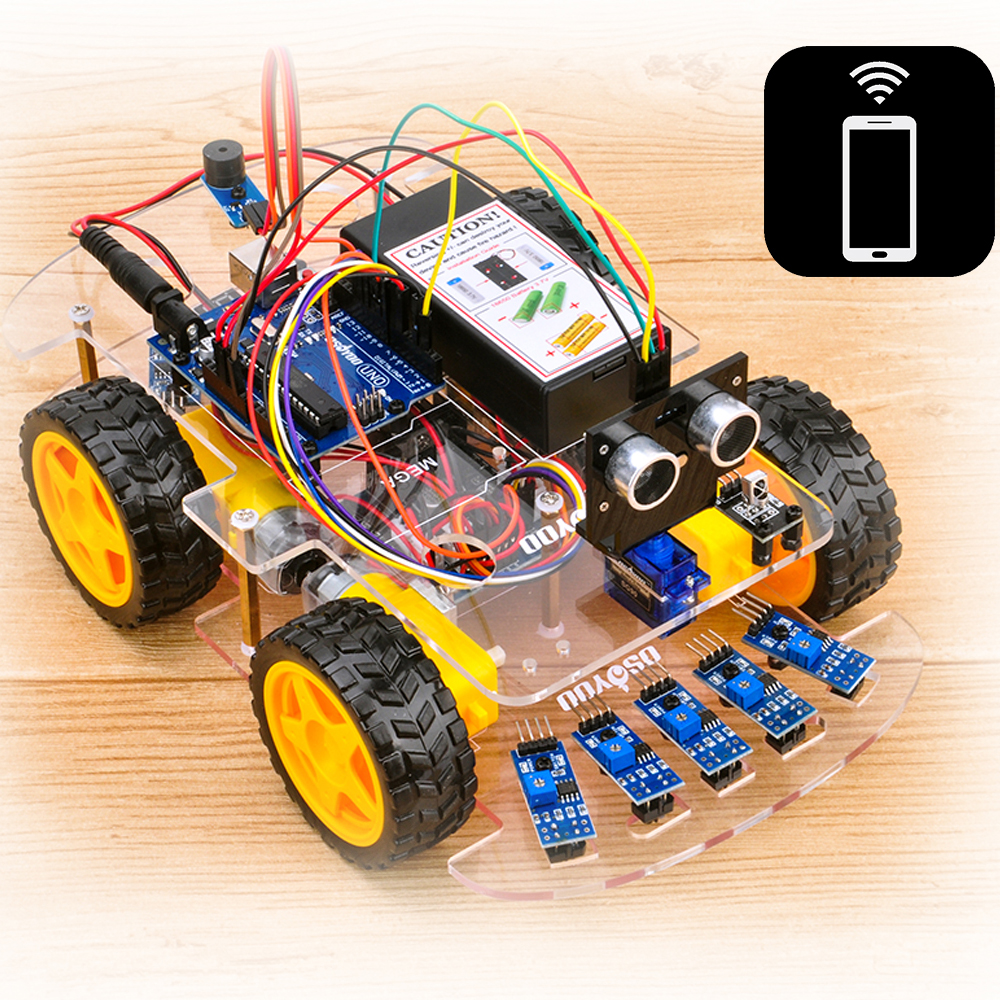
Objective:
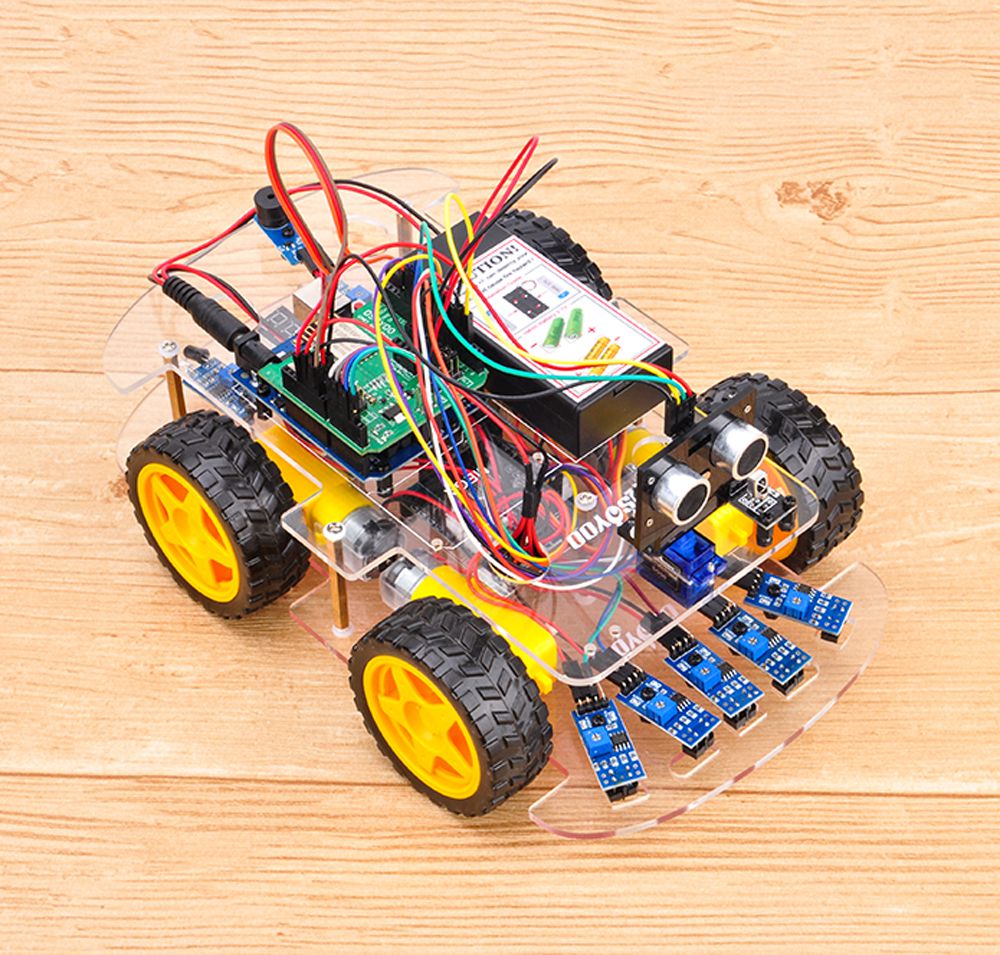
In this project we will connect Robot Car to WIFI and Use an APP to control the car through Internet. This is a typical Internet of Things(IoT) Application.
Step 1: Install the smart car basic frame work as per Smart Car Lesson 1 . If you have already completed installation in Lesson 1 , please remove all wires on Osoyoo basic board
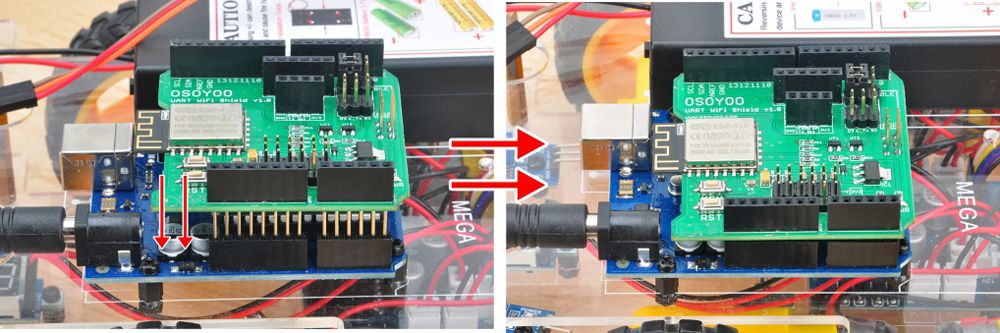
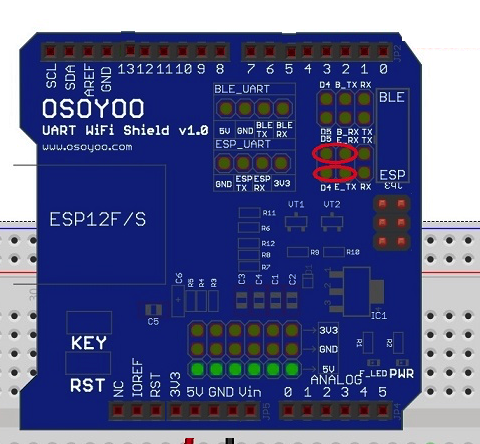
Step 2: Insert to Osoyoo WIFI Shield onto your board
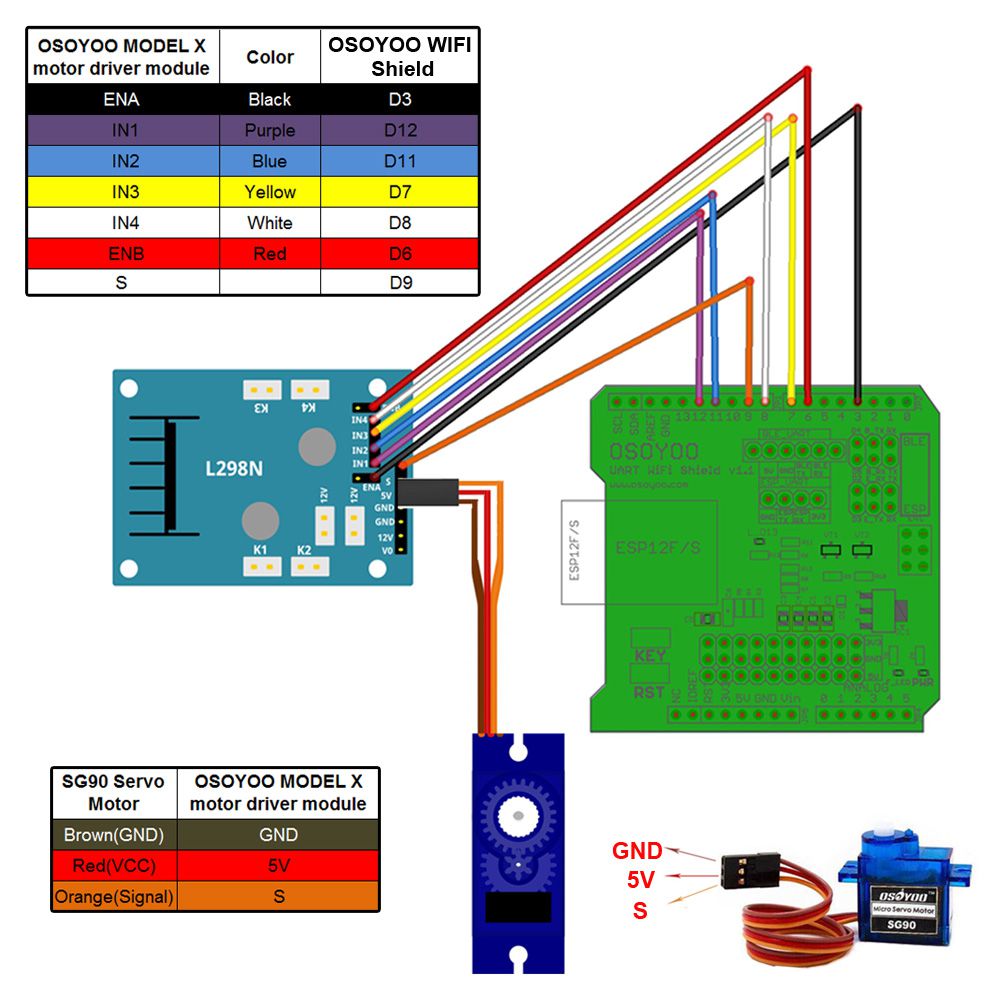
Step 3: Connect SG90 servo motor, OSOYOO MODEL X motor driver module and OSOYOO Wifi Shield as following graph:
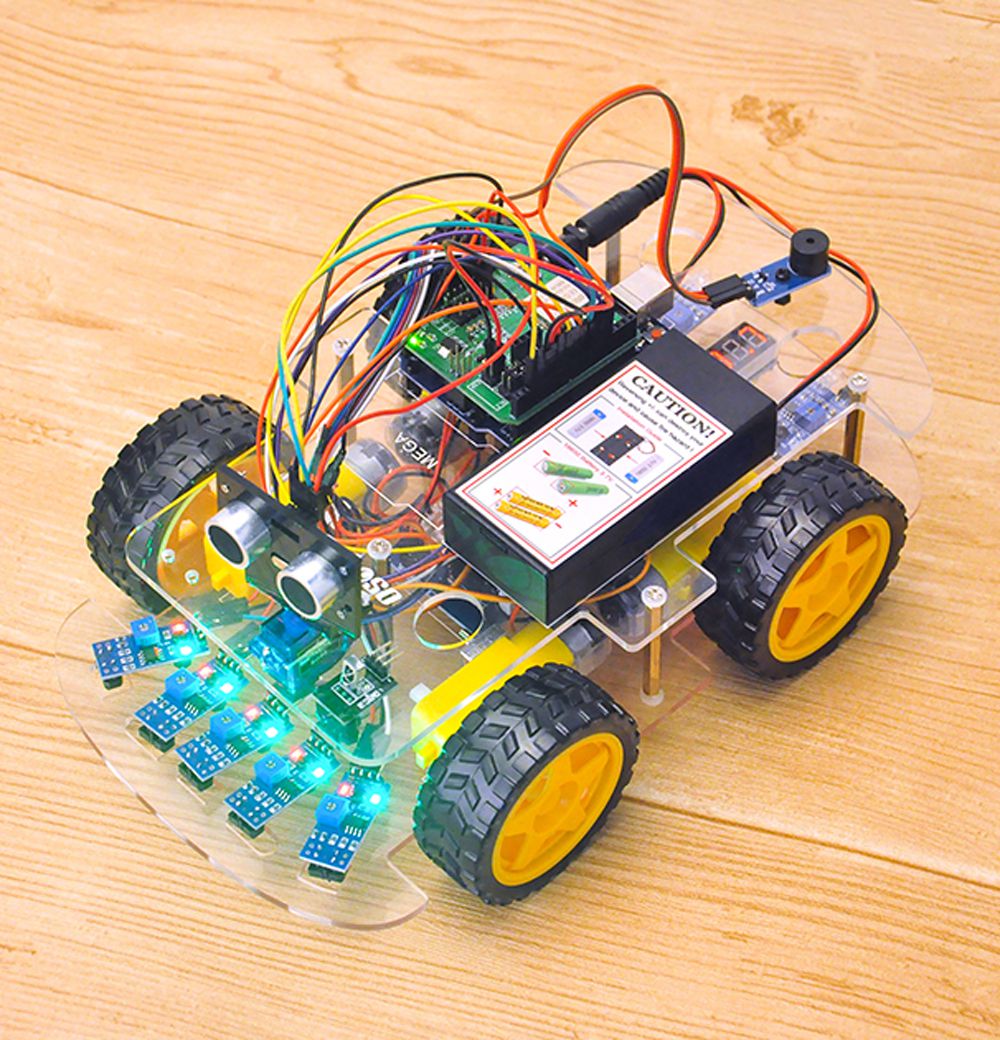
Step 4: Connect 5pcs tracking sensor modules with OSOYOO wifi shield as below connection diagram (if you remove the wires on tracking sensor modules, you need to remove the screws on copper pillars)
Step 5: Connect ultrasonic module, buzzer module with OSOYOO WIFI shield as below connection diagram
Step 6: Connect E_TX (Esp8266 TX) pin to D4(soft serial RX) and E_RX(ESP8266_RX) pin to D5(software serial TX) as per following picture
Step 7:Fix the screws on copper pillars to connect upper chassis to lower chassis (if don’t remove screws on copper pillars, please skip this step)
Step 8: After connected above wires, download a test sketch file from L6 test code. After uploading this file to Arduin and turning on your car, it should move forward ,backward, left turn , right turn and then stop. If the car does not move in above mentioned scenario, please check your wiring
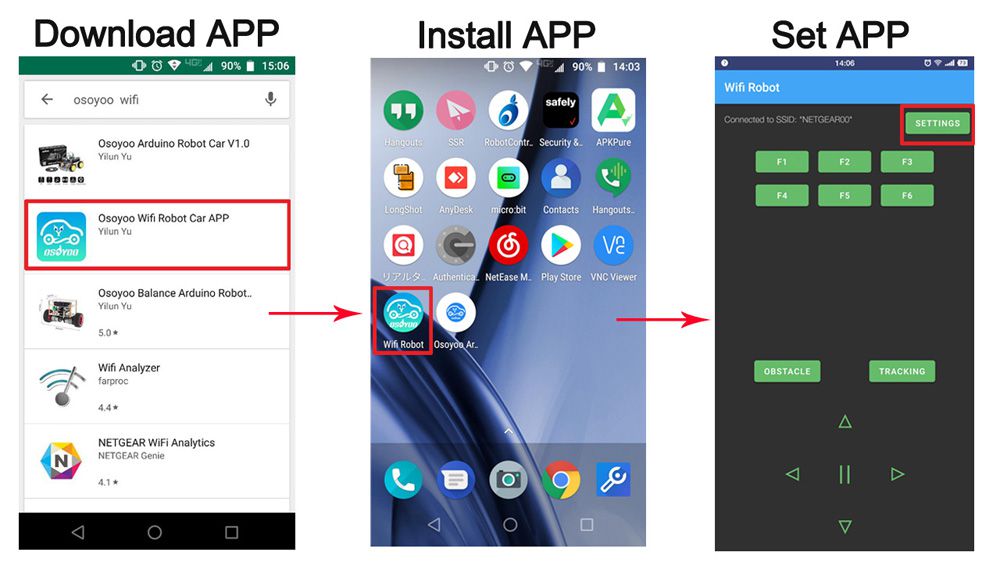
search “Osoyoo WIFI Robot APP” in
Google Play or Apple Store
Step 1) APP installation: you need search “Osoyoo WIFI Robot APP” in Google Play or Apple Store, and then install this APP
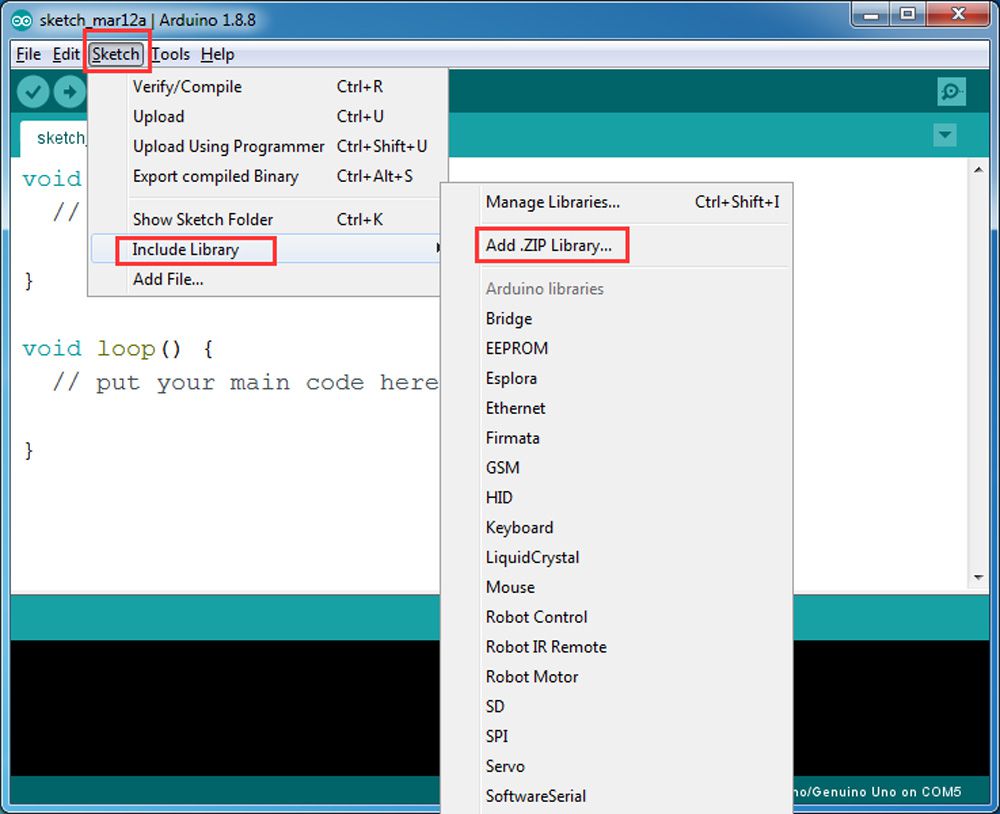
Step 2) Please download the library zip file from WiFiEsp-master .Open Arduin IDE ->click Sketch ->Include Library ->Add .ZIP library , then load above zip file into Arduin
Step 3) Sketch code Installation:
Osoyoo V2 Robot Car can work in two WIFI modes: STA mode and AP mode. The sketches for these two modes are different. Let’s explain these two modes one by one
A)STA mode In STA mode, V2 Robot Car will be a client device of your LAN router. You need save the SSID name and password of your LAN router in sketch.
Once the sketch is running, your router DHCP service will assign an IP address to your robot car and your APP will use this IP address to access your car.
1) Please download STA mode sketch code from v2smartcar-lesson6A . Unzip the file, you will see a folder “v2smartcar-lesson6A”. Open Arduin IDE -> click file -> click Open -> choose code “v2smartcar-lesson6A.ino” in v2smartcar-lesson6A folder, load the code into Arduin (Notice: Shut off your battery or Unplug your power adapter when upload sketch code to Arduin.)
2) You need change the code Line 96 and Line 98 :
char ssid[] = “YOUR_ROUTER_SSID”; // replace this with your router wifi SSID
char pass[] = “YOUR_ROUTER_WIFI_PASSWORD”; // replace with your wifi password
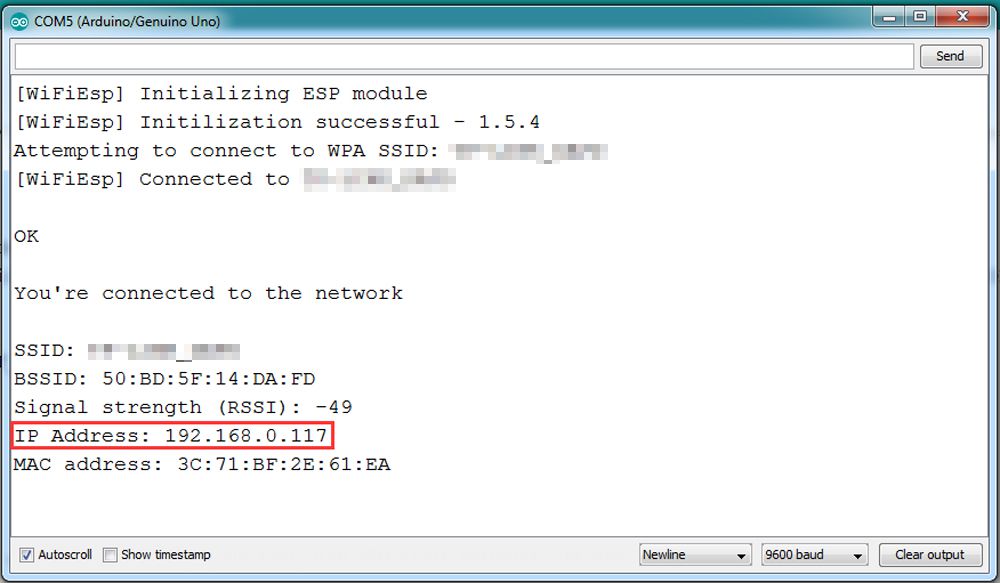
3) Upload the sketch to Arduin. Finally, click the Serial monitor window in upper right corner of Arduin IDE, you will see following result:
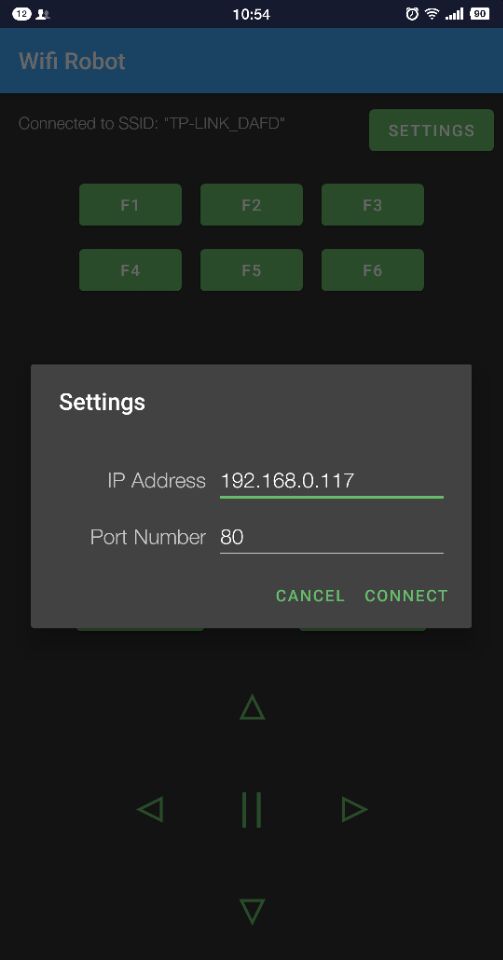
4) In this mode, your will see an IP address which is our LAN IP address assigned by my router. Please write down this IP address and click Setting to set up robot IP address and set this IP address to your APP Setting section (no need change default port 80 in APP).
Now your Robot car is connected to your LAN, you can use Mobile phone under same LAN to control the robot car. If your APP is in WAN, you need to go to your Router Control Panel, forward Port 80 to Robot car LAN IP address, then you can use Router IP to control the car. This feature makes our robot car A REAL INTERNET OF THING device
B)AP mode
Sometimes we do not have a LAN or WIFI Router. In order to control the car, we need to use AP mode.
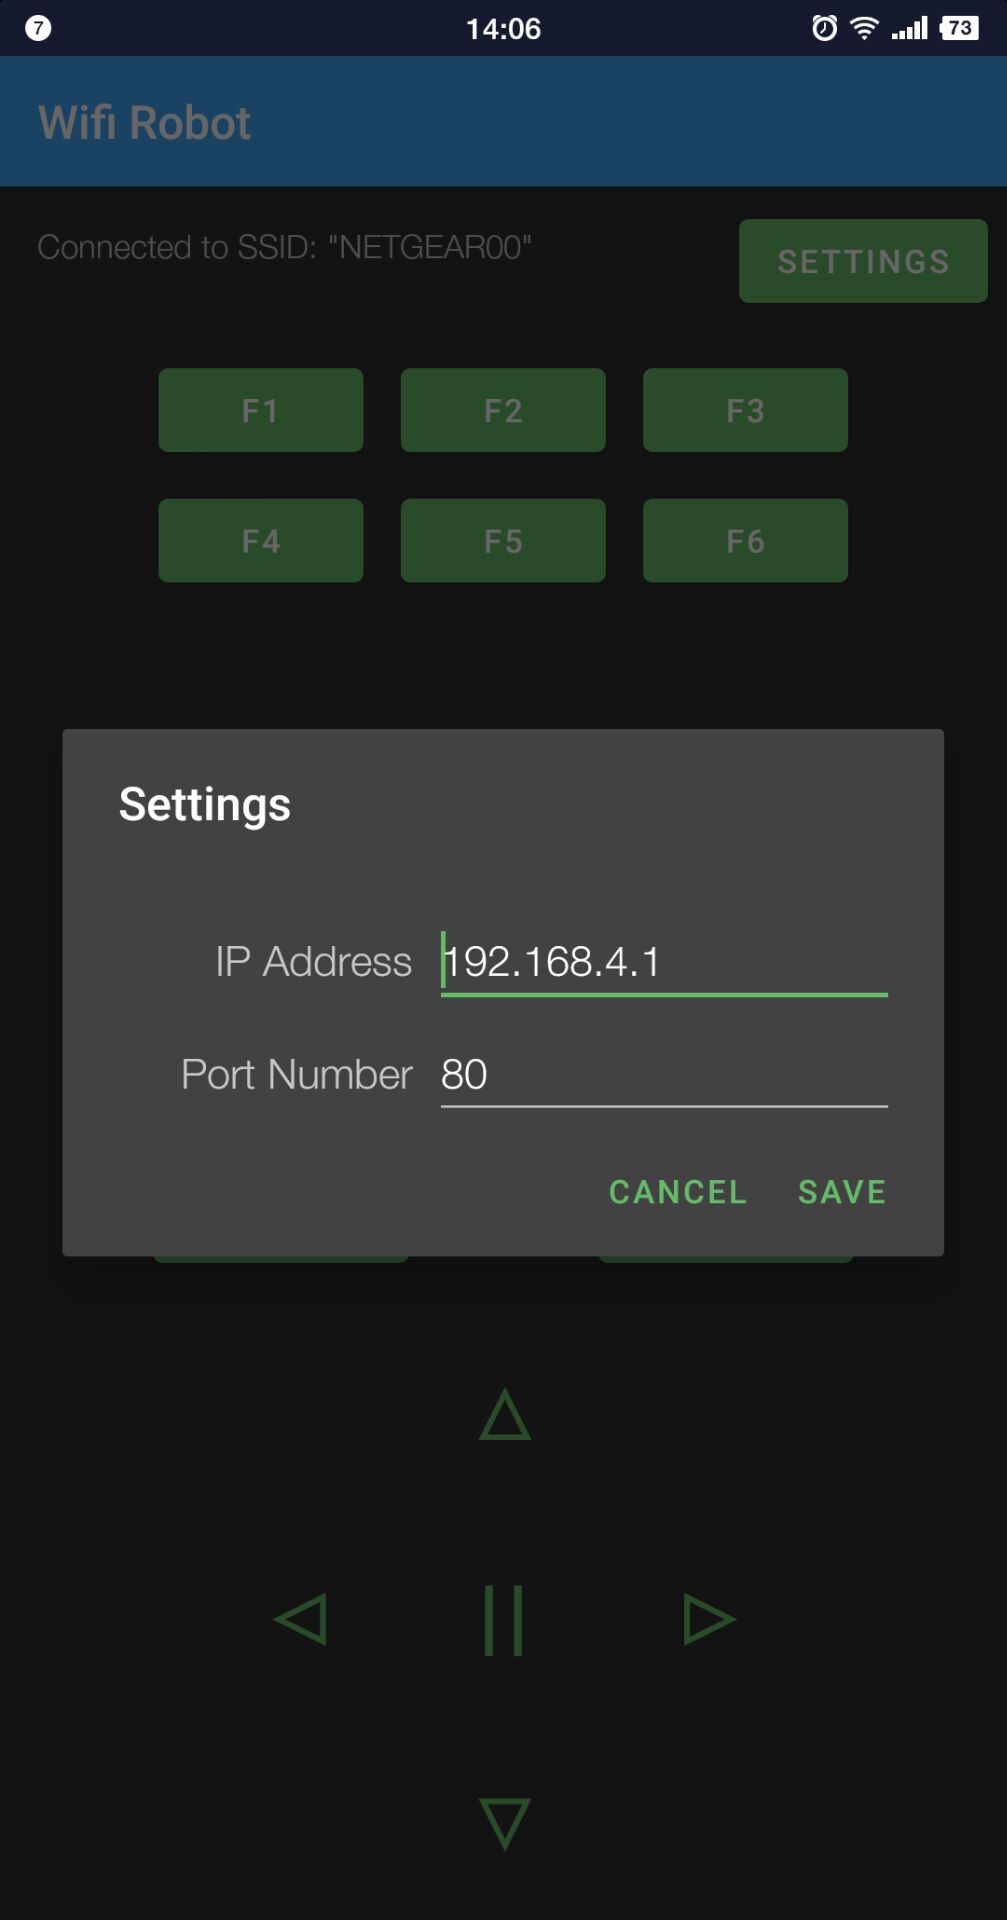
When working in AP mode, our robot car itself will become a WIFI Hot Spot. Our cell phone can connect to Robot Car as its wifi client. The IP address of Robot is fixed as 192.168.4.1 and It is not connected to WAN.
1) Please download sketch from following link: v2smartcar-lesson6B. Unzip the file, you will see a folder “v2smartcar-lesson6B”. Open Arduin IDE -> click file -> click Open -> choose code “v2smartcar-lesson6B.ino” in v2smartcar-lesson6B folder, load the code into Arduin (Notice: Shut off your battery or Unplug your power adapter when upload sketch code to Arduin.)
2) Open your Serial monitor, and you will see a similar result as STA mode. A new WIFI SSID “osoyoo_robot” with IP address 192.168.4.1 will show up in the window. This means your Robot car has a WIFI Hot Spot name “osoyoo_robot” , its IP address is 192.168.4.1
3) Connect your cell phone to “osoyoo_robot” wifi hot_spot, and set IP address as “192.168.4.1” to your APP Setting section
Now your Robot car become a WIFI Hot Spot, you can use Mobile phone control the robot car.
Final Testing:
Trun on the car. Now click Setting to set up robot IP address.
In STA mode, you need connect cell phone to the same LAN ssid of your robot car and set IP address same as the Robot IP showed in Serial Monitor.
In AP mode , you need contact your cell phone to “osoyoo_robot” wifi hot_spot and set IP address as 192.168.4.1
you can click the ◄ ► ▲ ▼ direction keys to make the car move. Use || pause key to stop the car movement.
If you click Obstacle key, the car will do obstacle avoidance auto driving similar to Lesson 5
If you click Tracking key, the car will do link tracking auto driving similar to lesson 4
Note: F1~F6 are further development functions in the future.
First, you are running lesson6A or Lesson6B sketch?
If you are running lesson6 A, did you set your Wifi Route name and password in the Lesson6A sketch? what is the IP address showed serial monitor ?
I am not sure how do you know you are not connected. Is there any error message in your cell phone?
Normally when your cell phone is connected your local Wifi network, your APP will show message like Connected to SSID: “xxxxx” , xxxxx is your wifi name, see the RED circle in following picture: http://osoyoo.com/driver/picar/lesson6wifi.jpg
Did you see your wifi SSID similar to above picture? If not, what did you see?
STA mode is working on Android 8.0 but not on newer Android version.
Any special setting on the phones for newer Android versions? Any updated sketch to support newer Android versions?
APP always shows wifi disconnected even if the phone shows it’s connected to the wifi. The serial monitor already shows the car is connected to the wifi.
AP mode not working on Android 6, 8 & 10. APP shows wifi connected osoyoo wifi but no response on the car after pressing any of the buttons.
Hello,
I can’t connect to the Cr with the APP on Android 10, the car doesn’t drive, doesn’t respond.
I connected all the cables correctly.
The WIFI Shielt sends out WiFi, my cell phone connects to the car but it doesn’t move when I press the buttons.
Hello,
I can’t connect to the Car with the APP on Android 10, the car doesn’t drive, doesn’t respond.
I connected all the cables correctly.
The WIFI Shielt sends out WiFi, my cell phone connects to the car but it doesn’t move when I press the buttons.
Hola , tengo un problema con el código . Me lo podrían solucionar ?
me pone error en la parte de #include “WiFiEsp.h”
y en la parte donde te notifica los errores pone :
v2smartcar-lesson6A:92:10: fatal error: WiFiEsp.h: No such file or directory
#include “WiFiEsp.h”
^~~~~~~~~~~
compilation terminated.
exit status 1
WiFiEsp.h: No such file or directory


when I go into the app it says Error: cannot connect to robot
First, you are running lesson6A or Lesson6B sketch?
If you are running lesson6 A, did you set your Wifi Route name and password in the Lesson6A sketch? what is the IP address showed serial monitor ?
did you set the IP address of your robot in your APP?
yes I did, and still got the error message, i also charged the batteries again and double-checked the wiring, can you please help.
When you run the Lesson6 sketch in arduino, any error message? What is the Ip address showed in the serial monitor?
there was no error message in Arduino, the Ip address was 192.168.1.233
DID you set the 192.168.1.233 in your cell phone APP? Also make sure your cell phone has connected to the same Wifi network as the robot car.
yes I did, still did not connect
I am not sure how do you know you are not connected. Is there any error message in your cell phone?
Normally when your cell phone is connected your local Wifi network, your APP will show message like Connected to SSID: “xxxxx” , xxxxx is your wifi name, see the RED circle in following picture:
http://osoyoo.com/driver/picar/lesson6wifi.jpg
Did you see your wifi SSID similar to above picture? If not, what did you see?
Hi,
STA mode is working on Android 8.0 but not on newer Android version.
Any special setting on the phones for newer Android versions? Any updated sketch to support newer Android versions?
APP always shows wifi disconnected even if the phone shows it’s connected to the wifi. The serial monitor already shows the car is connected to the wifi.
AP mode not working on Android 6, 8 & 10. APP shows wifi connected osoyoo wifi but no response on the car after pressing any of the buttons.
we have developed a new version APP and tutorial which is based on UDP protocol. Please check following link:
https://osoyoo.com/2020/06/10/osoyoo-v2-robot-car-lesson-6b-use-wifi-udp-to-control-an-iot-robot-car/
Hello,
I can’t connect to the Cr with the APP on Android 10, the car doesn’t drive, doesn’t respond.
I connected all the cables correctly.
The WIFI Shielt sends out WiFi, my cell phone connects to the car but it doesn’t move when I press the buttons.
I solved the problem myself.
https://osoyoo.com/2020/06/10/osoyoo-v2-robot-car-lesson-6b-use-wifi-udp-to-control-an-iot-robot-car/
i apologize for the request.
greeting
Stefan
Hello,
I can’t connect to the Car with the APP on Android 10, the car doesn’t drive, doesn’t respond.
I connected all the cables correctly.
The WIFI Shielt sends out WiFi, my cell phone connects to the car but it doesn’t move when I press the buttons.
I solved the problem myself.
https://osoyoo.com/2020/06/10/osoyoo-v2-robot-car-lesson-6b-use-wifi-udp-to-control-an-iot-robot-car/
i apologize for the request.
greeting
Stefan
Great! How did you solve the problem?
I used the code from
https://osoyoo.com/2020/06/10/osoyoo-v2-robot-car-lesson-6b-use-wifi-udp-to-control-an-iot-robot-car/ .
The car jerks even if there is no obstacle. Can I change this?
Hola , tengo un problema con el código . Me lo podrían solucionar ?
me pone error en la parte de #include “WiFiEsp.h”
y en la parte donde te notifica los errores pone :
v2smartcar-lesson6A:92:10: fatal error: WiFiEsp.h: No such file or directory
#include “WiFiEsp.h”
^~~~~~~~~~~
compilation terminated.
exit status 1
WiFiEsp.h: No such file or directory
Do you have source code available for the iOS app? I am an iOS developer and would like to modify it.