| Kaufen Sie in den USA |
Kaufen Sie in Großbritannien |
Kaufen Sie bei DE |
Kaufen Sie bei der IT |
Kaufen Sie bei FR |
Kaufen Sie bei ES |
ここでご購入を! |
 |
 |
 |
 |
 |
 |
 |


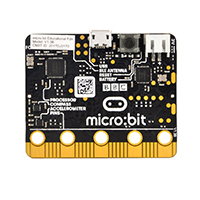
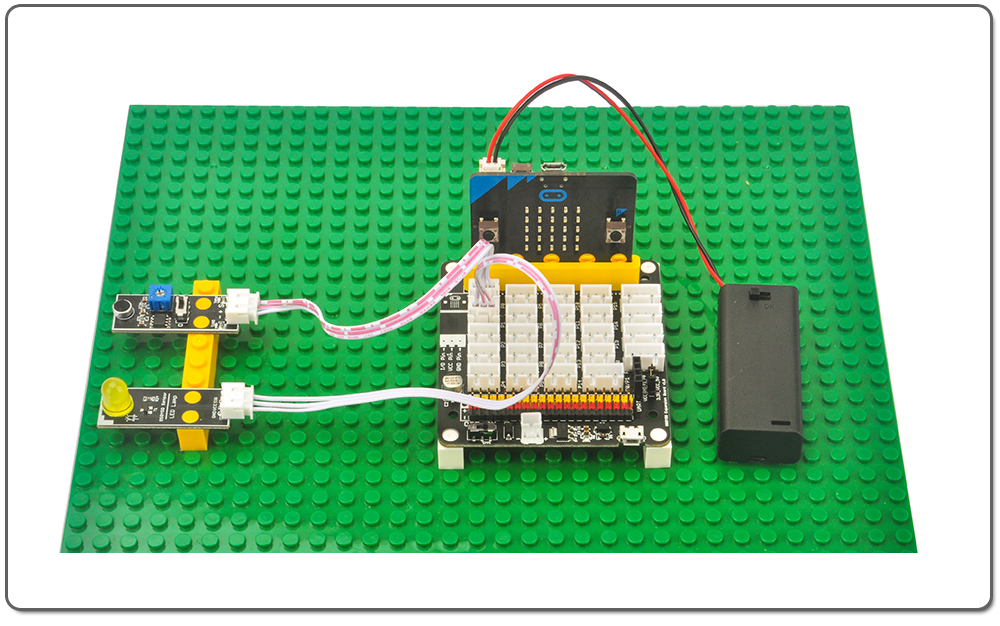
- BBC micro:bit board x 1
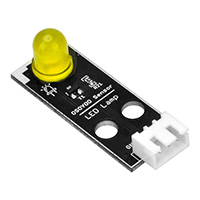
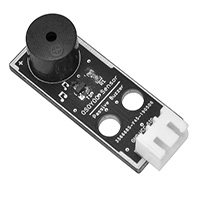
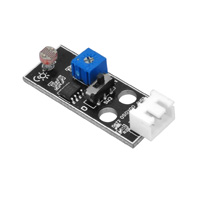
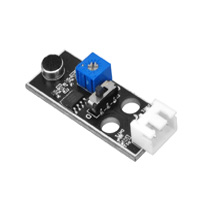
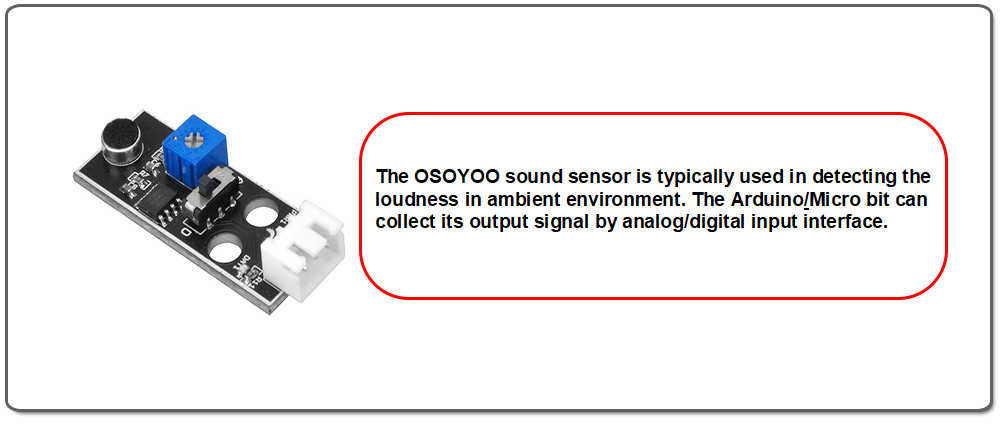
- OSOYOO Soundmodul x 1
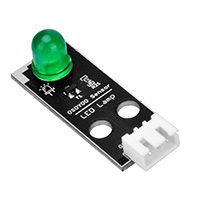
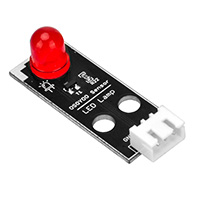
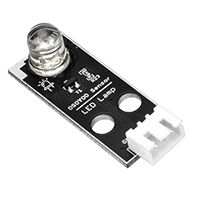
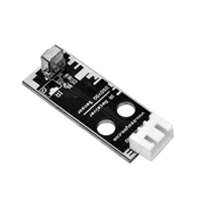
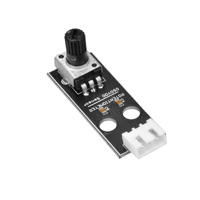
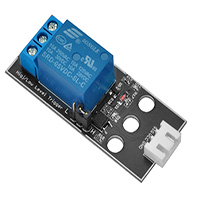
- OSOYOO LED-Modul x 1
- OSOYOO 3-poliges PnP-Kabel x 2
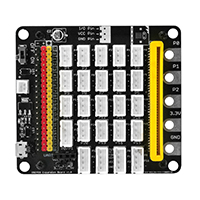
- OSOYOO Plug&Play( PnP ) Board für micro:bit x 1


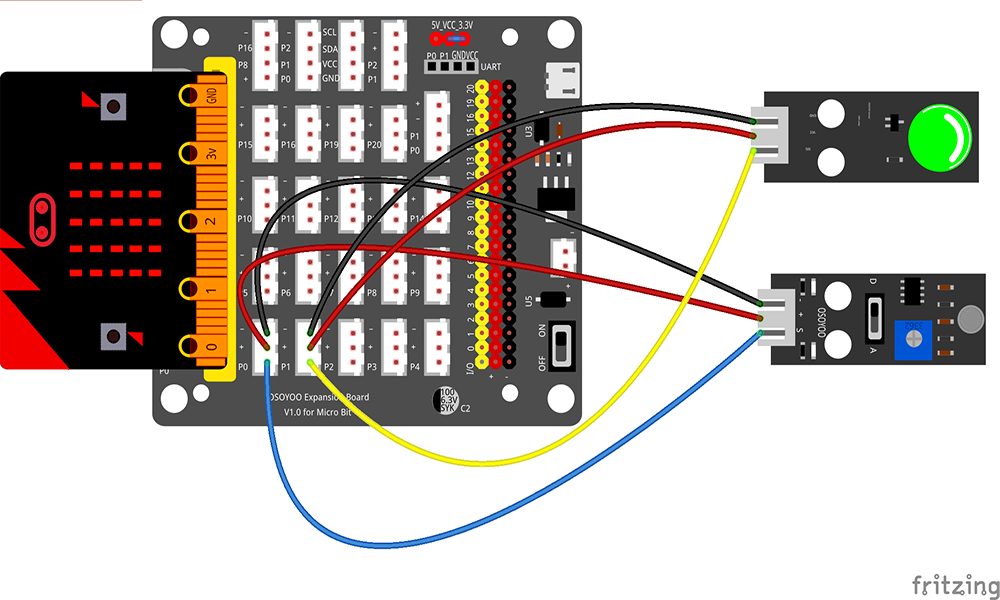
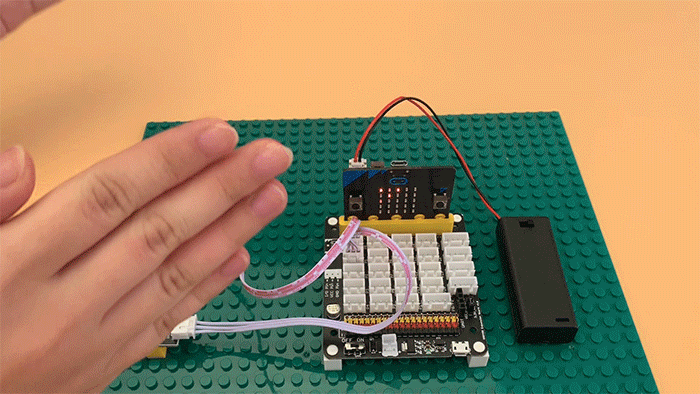
Verbinden Sie das Soundmodul mit dem OSOYOO PnP Board für micro:bit P0 mit dem OSOYOO 3-pin PnP Kabel;
Verbinden Sie das LED-Modul mit dem Port P1 der OSOYOO PnP-Platine mit dem 3-poligen OSOYOO PnP-Kabel wie unten dargestellt;

Schritt 0: Gehen Sie zu url: https://makecode.microbit.org , klicken Sie auf New Project, klicken Sie mit der rechten Maustaste auf Block on start und löschen Sie ihn.
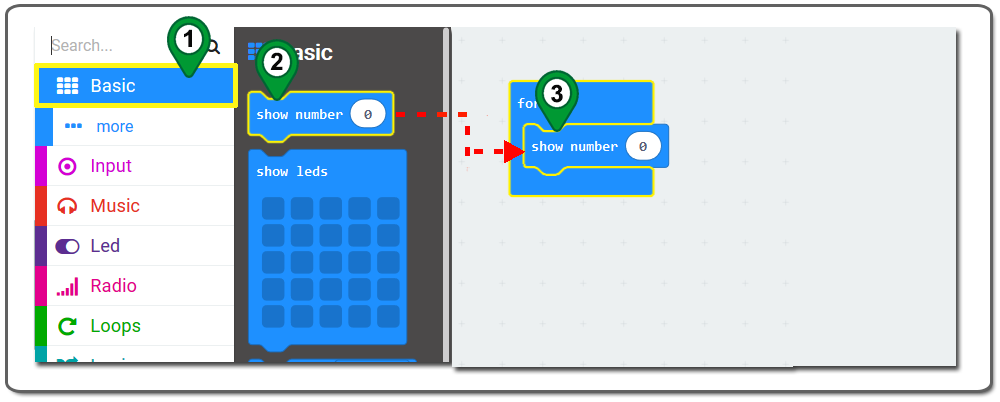
 Schritt 1. Klicken Sie in der Kategorie Toolbox auf die Kategorie Basic , klicken und ziehen Sie den Block show number und platzieren Sie ihn innerhalb des Platzhalters des Blocks forever , wie in der folgenden Abbildung dargestellt.
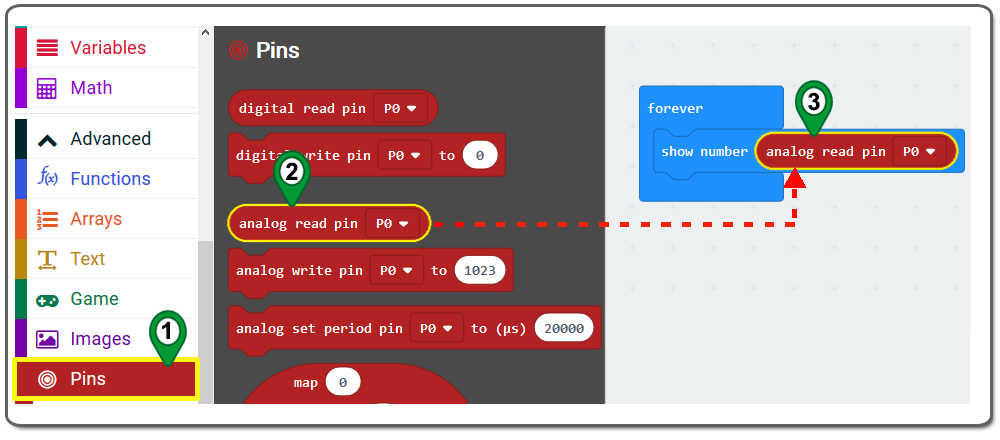
Schritt 2. Klicken Sie auf die Kategorie Pins . Klicken und ziehen Sie dann den analog read pin Block und platzieren Sie ihn innerhalb des Platzhalters des show number Blocks, wie in der folgenden Abbildung dargestellt.
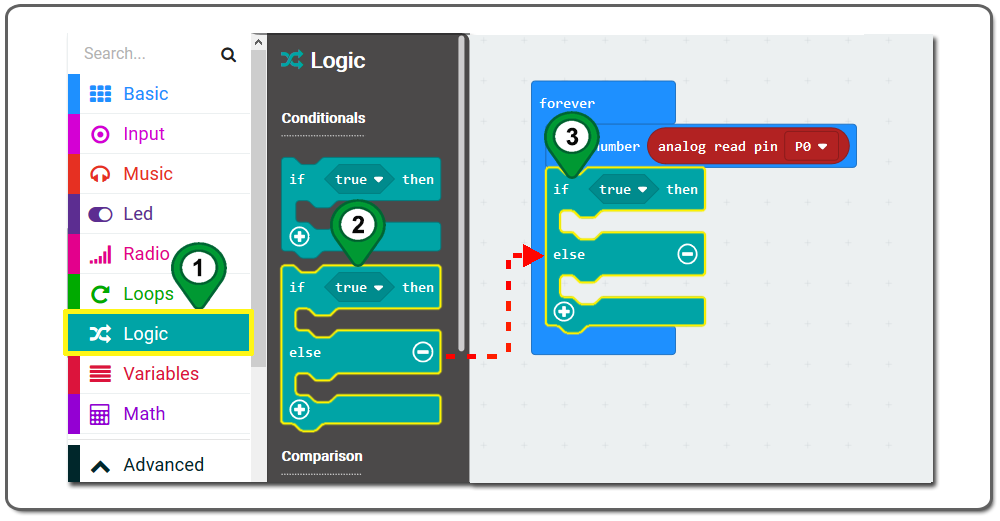
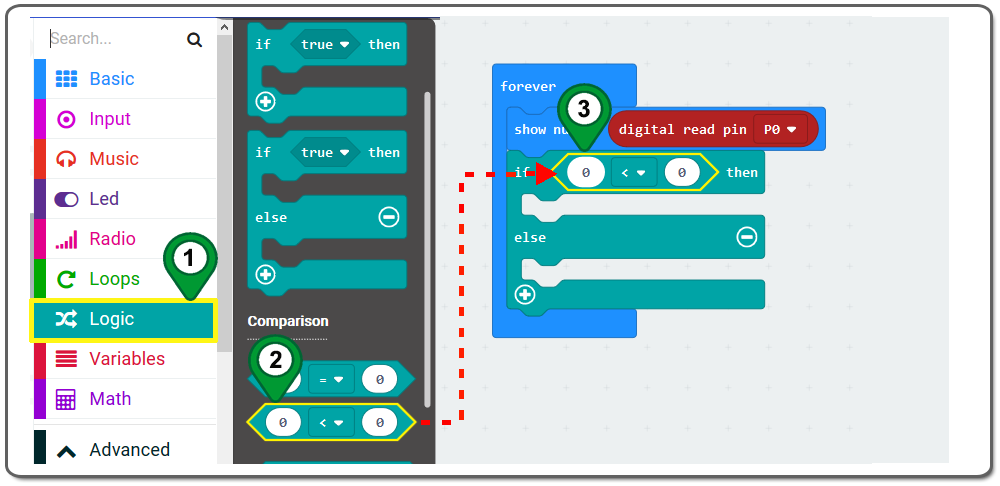
Schritt 3. Klicken Sie in Toolbox auf die Kategorie Logic . Klicken und ziehen Sie nun den if ~then~else Block und platzieren Sie ihn innerhalb des forever Blocks, wie in der folgenden Abbildung dargestellt.
Schritt 4. Ziehen Sie einen 0<0 Block und platzieren Sie ihn innerhalb des Platzhalters des if ~then~else Blocks, direkt unter dem show number Block (siehe folgende Abbildung).
Schritt 5. Klicken Sie in Toolbox auf die Kategorie Pins und klicken und ziehen Sie den analog read pin Block darüber und platzieren Sie ihn innerhalb des 0<0 Blocks. Setzen Sie dann den Analogwert P0 ≤ 700 wie in der folgenden Abbildung dargestellt.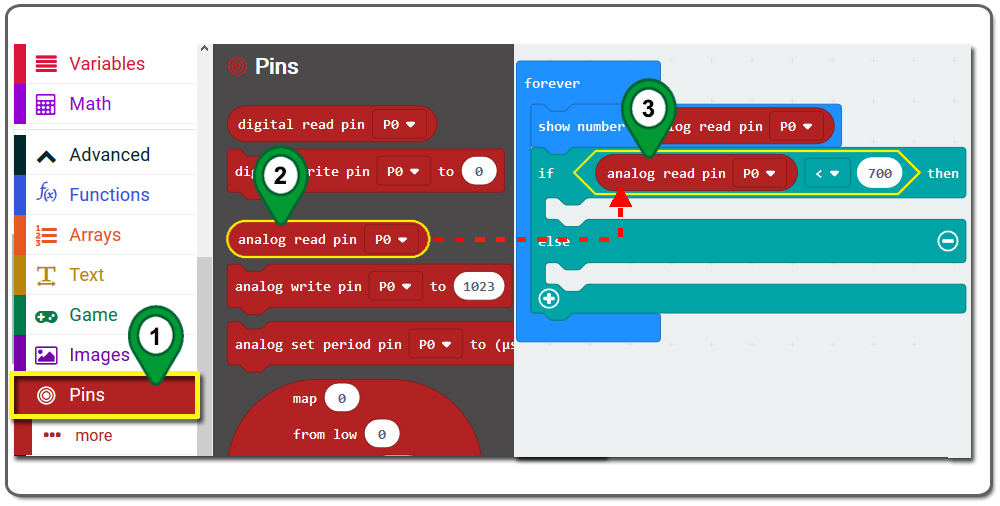
Schritt 6: Klicken Sie auf die Kategorie Pins . Dann klicken und ziehen Sie den digital write pin Block und legen ihn innerhalb des if ~then ~else Blocks ab. Wählen Sie dann den digitalen Schreibstift P1 aus dem Dropdown-Menü, wie in der folgenden Abbildung dargestellt.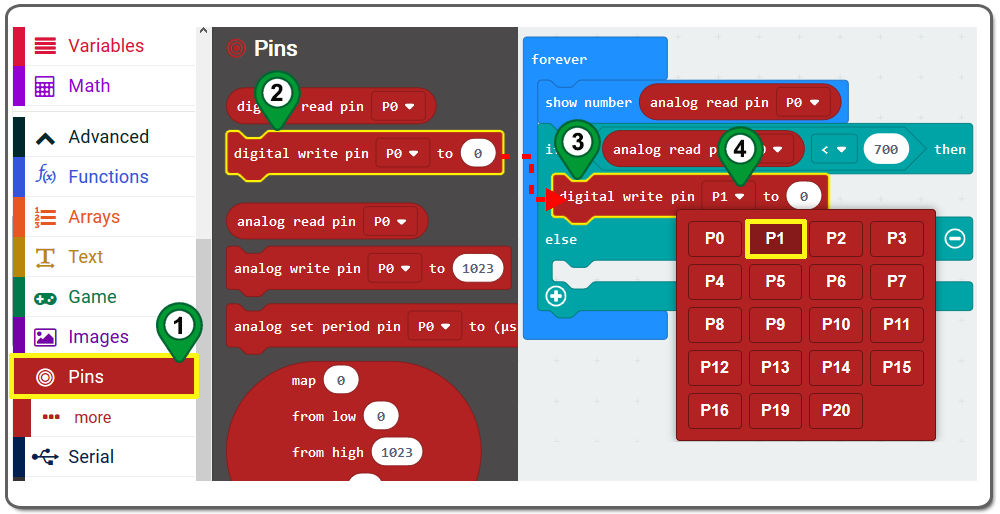
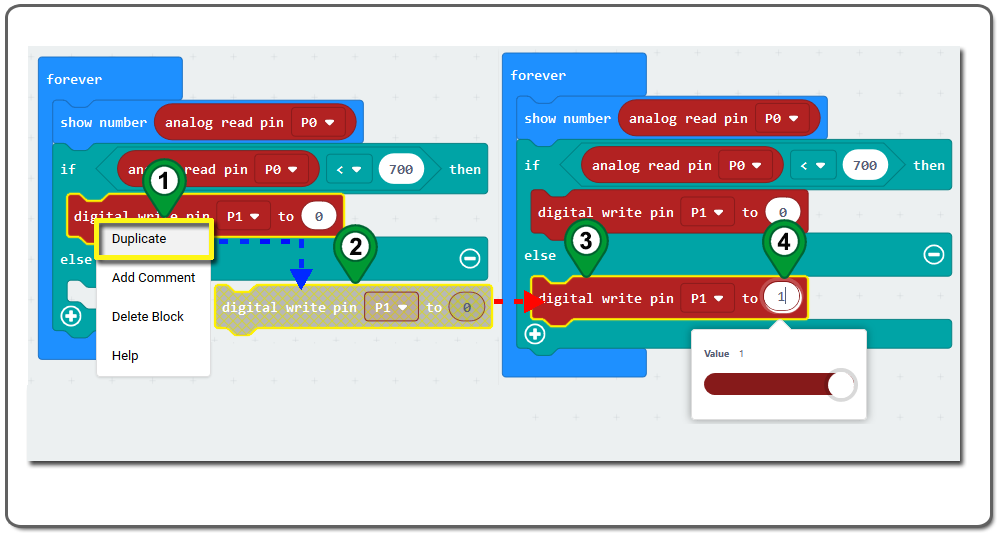
Schritt 7. Klicken Sie auf “Duplizieren” im Block digital write pin to. Sie erhalten einen duplizierten Block und platzieren ihn im Block else . Setzen Sie den digitalen Pin-Wert auf 1, wie in der folgenden Abbildung dargestellt.
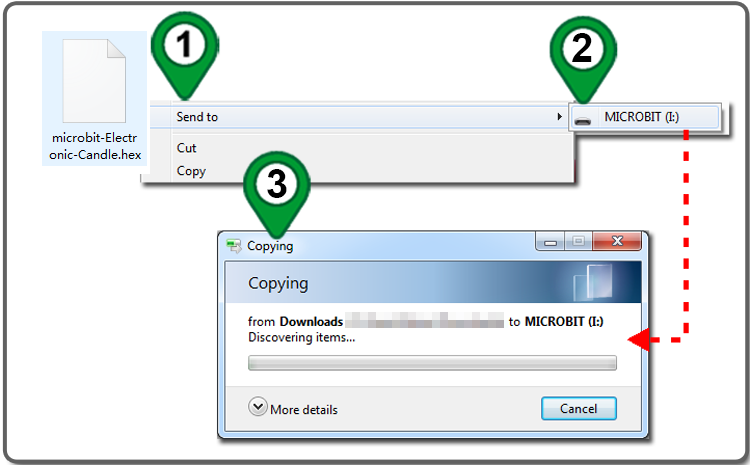
 Schritt 8. Laden Sie diese “.hex“-Datei herunter und speichern Sie sie auf Ihrer MICROBIT -Diskette Driver wie in der folgenden Abbildung dargestellt.
Nachstehend finden Sie die vollständigen Codeblöcke für die Grafikprogrammierung, die wir für Sie als Referenz erstellt haben:


ERFAHREN SIE MEHR ÜBER TEILE