|
|
|
Kaufen bei DE |
Kaufen bei IT |
Kaufen bei FR |
Kaufen bei ES |
ここでご購入を! |
 |
 |
 |
 |
 |
 |
 |
-

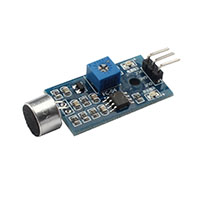
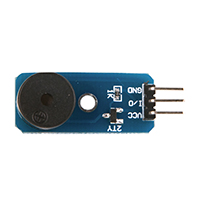
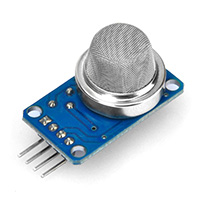
In dieser Lektion zeigen wir Ihnen, wie Sie einen Geräuschsensor verwenden, um die Schallintensität der Umgebung zu erfassen und die Daten mit einer App zu überwachen. Der Geräuschsensor ist so konzipiert, dass er erkennt, ob es in seiner Umgebung Geräusche gibt. Bitte beachten Sie, dass er nicht zum Sammeln von Schallsignalen verwendet werden sollte. Das Geräuschsensormodul hat ein eingebautes kapazitives elektrisches Mikrofon, das sehr empfindlich auf Schall reagiert. Wenn Schallwellen den dünnen Film des elektrischen Mikrofons in Schwingung versetzen, ändert sich die Kapazität, was zu einer entsprechenden Spannungsänderung führt. Daher kann es die Schallintensität in der Umgebung erkennen. Sie können die Empfindlichkeit mit dem Potentiometer einstellen.

- OSOYOO Grundplatine x 1
- OSOYOO ESP8266 WIFI Abschirmung x 1
- Schalldetektor-Sensormodul x 1
- USB-Kabel x 1
- Jumper Drähte mehrere

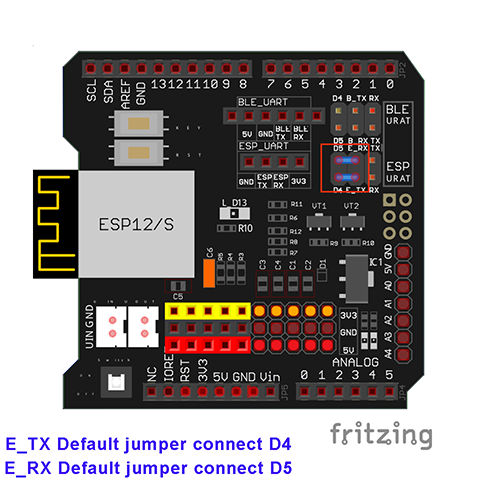
Bitte setzen Sie zunächst das ESP8266 Wi-Fi Shield in Ihr Motherboard ein.
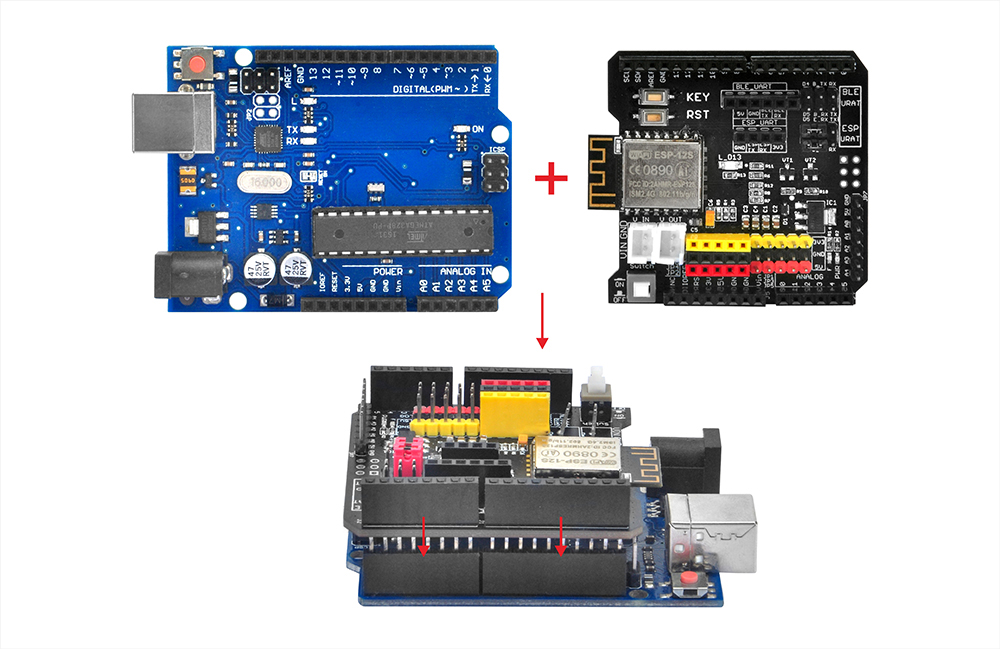
- Vergewissern Sie sich, dass die Überbrückungskappe von E_TX an D4 und E_RX an D5 angeschlossen ist.
 Schließen Sie den Tonsensor wie in der Abbildung gezeigt an die Hauptplatine an.
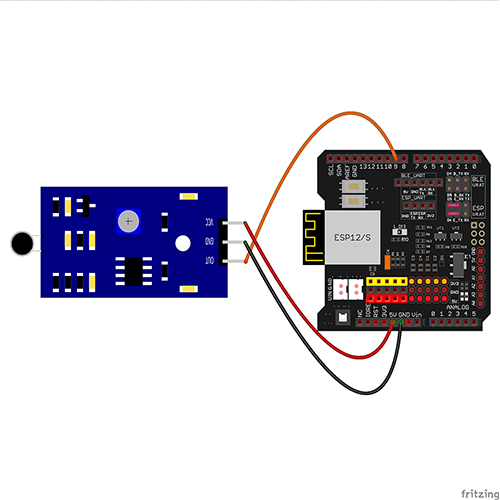
| OSOYOO Grundplatine |
Schalldetektor-Sensormodul |
| D9 |
OUT |
| GND |
GND |
| 5V |
VCC |
 Installation der Software
Schritt A) Installieren Sie die neueste IDE von https://www.arduino.cc/en/Main/Software?setlang=en. (Wenn Sie die IDE-Version 1.1.16 oder später haben, überspringen Sie bitte diesen Schritt).
Schritt B) Schließen Sie das Motherboard über ein USB-Kabel an den Computer an.
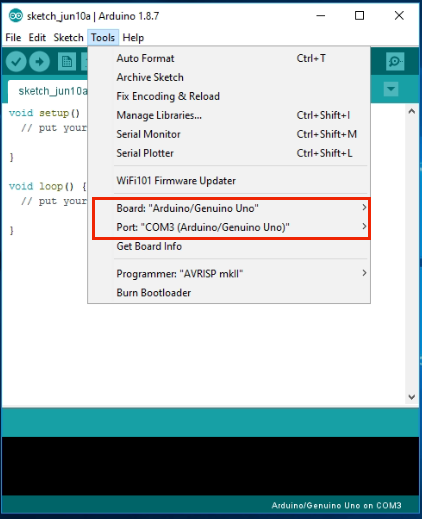
Schritt C) Öffnen Sie die IDE und wählen Sie den entsprechenden Boardtyp und Porttyp für Ihr Projekt:
- Board:”Arduino/Genuino UNO”
- Port: Wählen Sie Ihre eigene serielle Schnittstelle für Ihr Mainboard
Schritt D) Laden Sie die Sketch-Datei von https://osoyoo.com/driver/wifi-iot/lesson10/wifi-lesson10.zip herunter, entpacken Sie die Datei und doppelklicken Sie auf die Datei esp8266-lesson10.ino, um den Sketch in die IDE zu laden.
- Finden Sie die folgenden Zeilen:
char ssid[] = "******"; // your network SSID (name)
char pass[] = "******"; // your network password
Bitte ersetzen Sie die ****** durch Ihre korrekte Wi-Fi SSID und Ihr Passwort,
da Ihr Projekt sonst keine Verbindung zum Internet herstellen kann
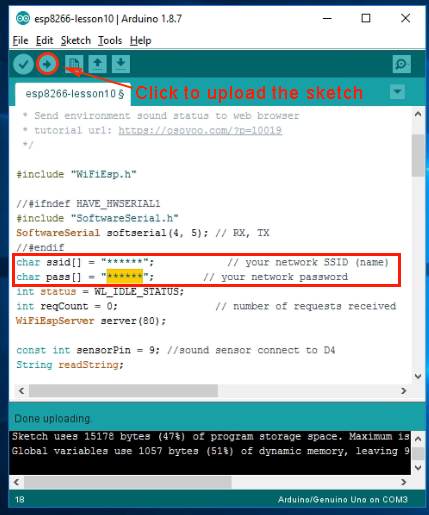
Schritt E) Nachdem Sie die obigen Zeilen geändert haben, laden Sie den Sketch in die IDE.
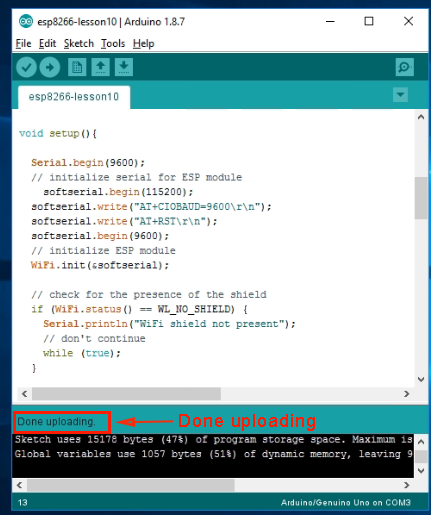
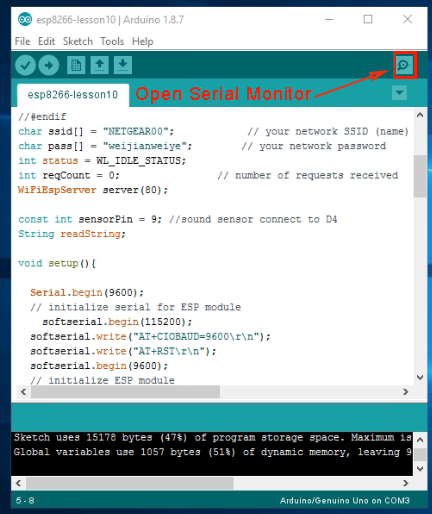
 Schritt A) Öffnen Sie den seriellen Monitor. Sie können sehen, dass Ihr Router Ihrer IDE eine IP-Adresse zuweist, wie im folgenden Beispiel gezeigt:
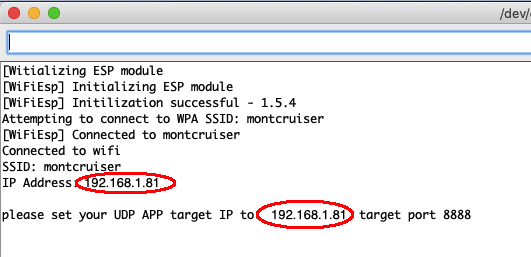
Im obigen Beispiel ist 192.168.1.81 die IP-Adresse meiner IDE. Im nächsten Schritt müssen wir diese IP-Adresse in unserer App festlegen.
- Schritt B) Öffnen Sie Ihre OSOYOO IOT UDP Robot App. Wenn Sie diese App nicht installiert haben, lesen Sie bitte den Abschnitt APP-Installation in Lektion 2.Schritt C) Vergewissern Sie sich, dass sich Ihr Mobiltelefon im selben lokalen Netzwerk befindet wie Ihr Arduino. Öffnen Sie die App, klicken Sie auf Einstellungen, geben Sie Ihre Arduino-IP-Adresse aus Schritt F ein und setzen Sie den Port in den Einstellungen auf 8888.
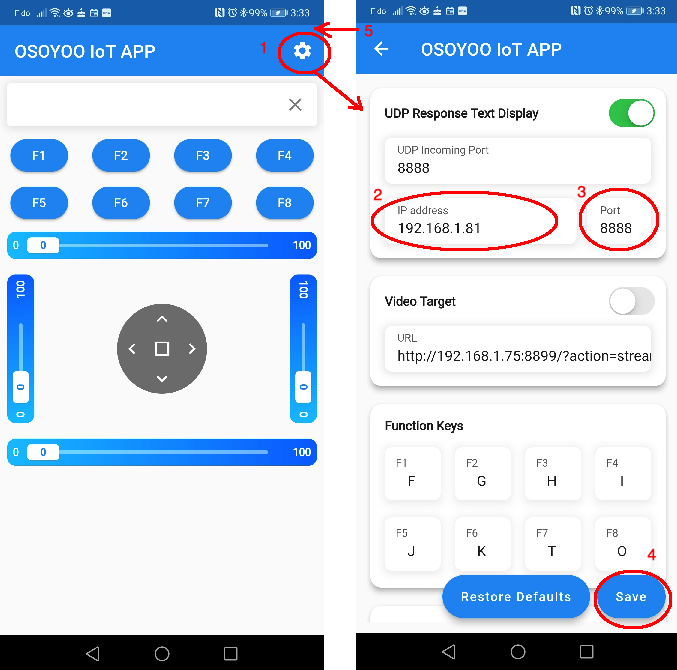
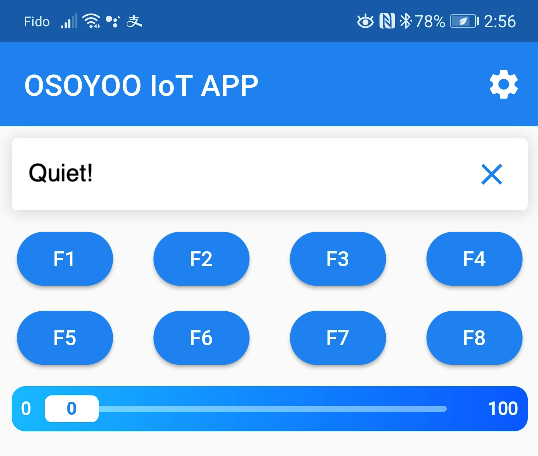
Drücken Sie nun eine beliebige Taste auf Ihrer App, und Ihr Arduino beginnt, Geräusch-Statusdaten an die App zu senden. Wenn ein Geräusch erkannt wird, zeigt die App “Noisy!” an. Andernfalls zeigt die App “Leise!” an, wie im folgenden Bild gezeigt.
-
ERFAHREN SIE MEHR ÜBER TEILE