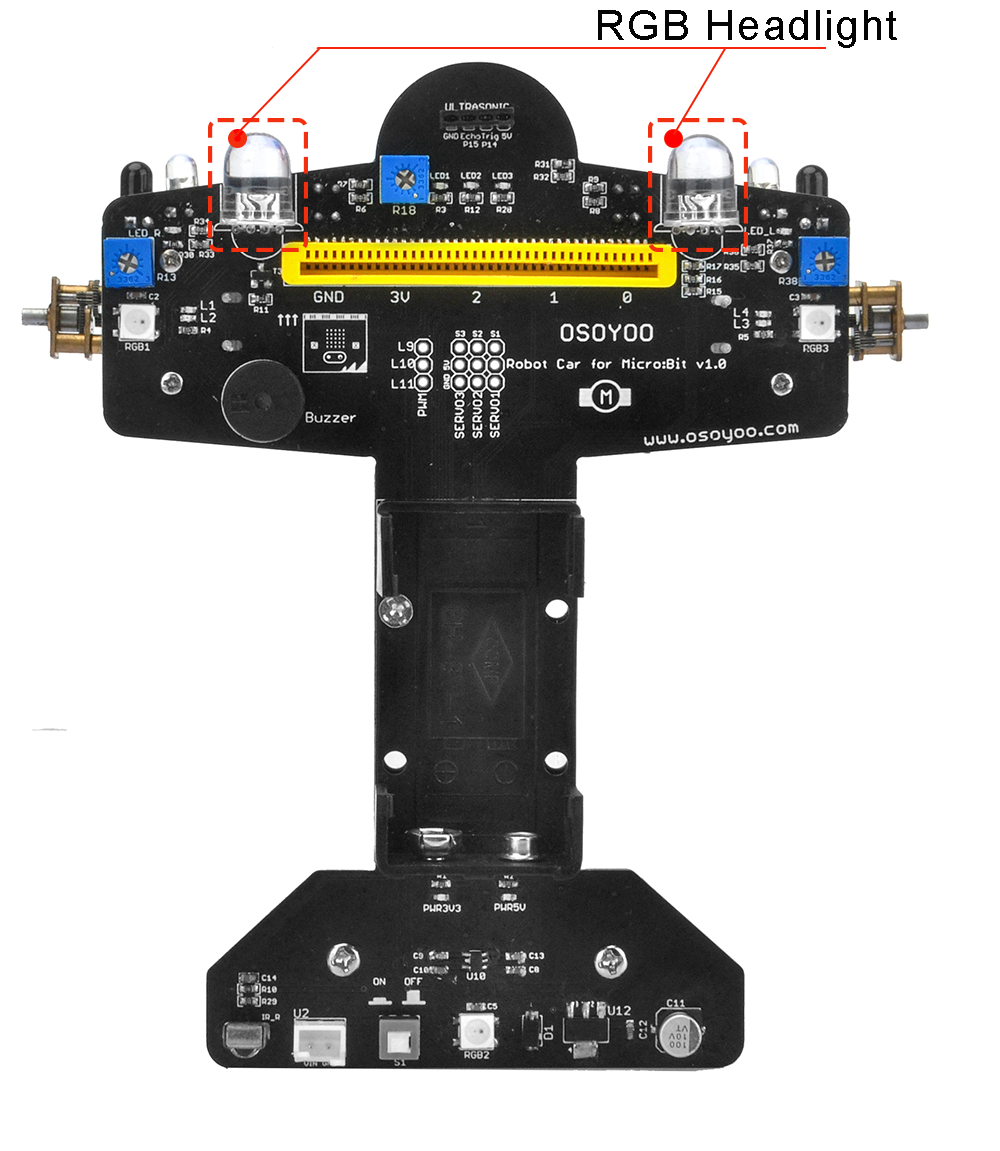
Through this lesson, you can learn how to change RGB headlight colours and matrix display pattern.
● 1 x USB cable
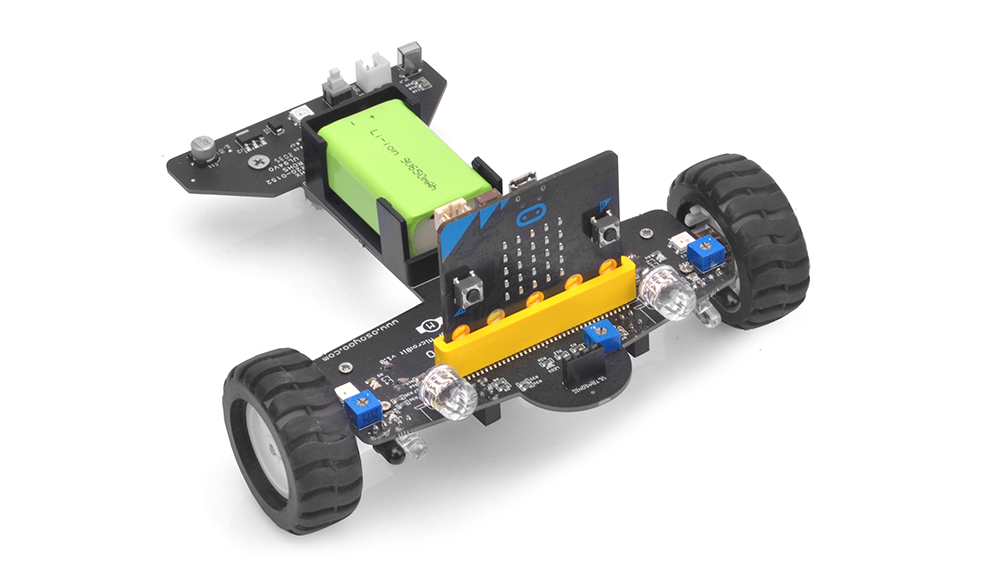
● 1 x micro:bit board
● 1 x 9V battery
● 1 x OSOYOO Robot for Micro bit
The RGB colour model is an additive colour model in which red, green and blue light are added together in various ways to reproduce a broad array of colours. The name of the model comes from the initials of the three additive primary colours: red, green and blue. The reason that you can mix any colour you like by varying the quantities of red, green and blue light is that your eye has three types of light receptor in it (red, green and blue). Your eye and brain process the amounts of red, green and blue and convert it into a colour of the spectrum.
Block
Analyse
Examples
Startup items;
When dragged into this block, the program will be displayed after booting
Headlight colour display;
switch different colours by yourself
Cycle block;
When dragged into the block, the program will always display in a loop
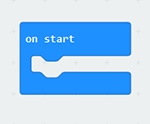
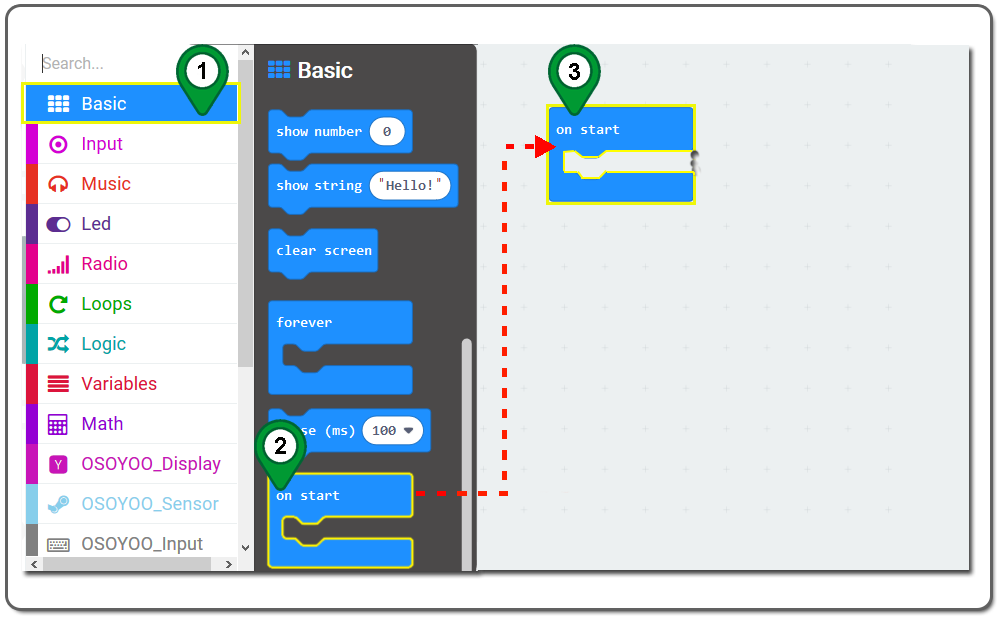
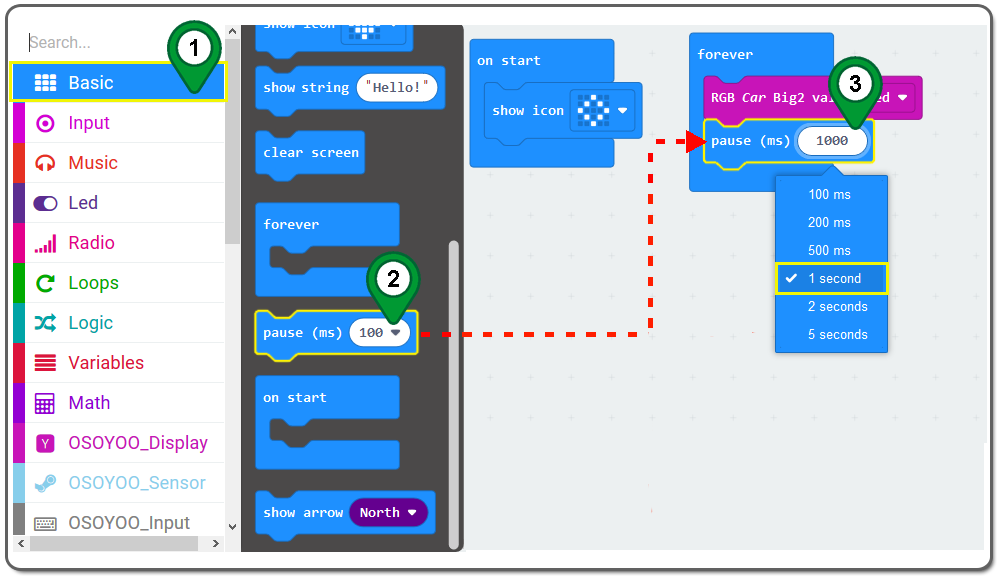
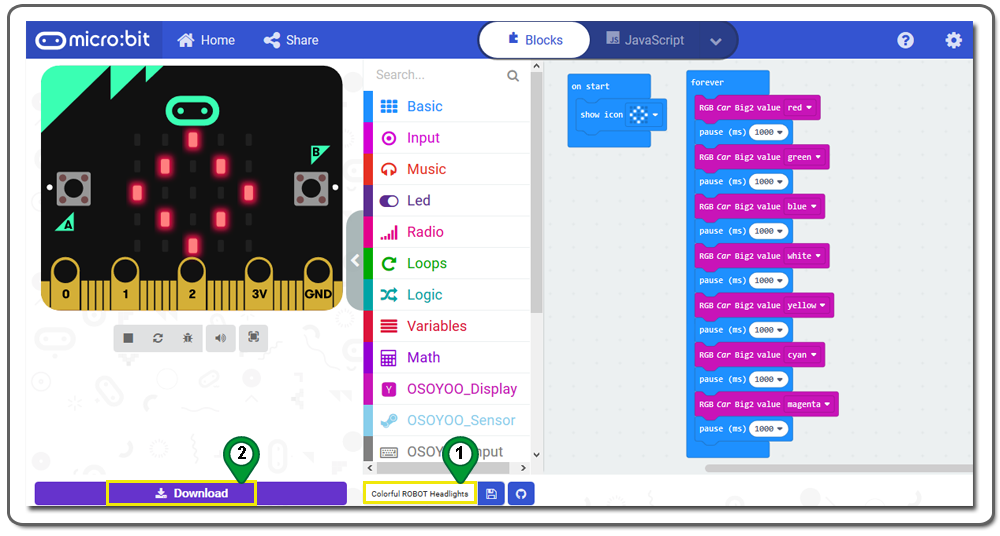
Step 1.In the Toolbox, click on the Basic category and then click the on start block , and then Drag as following figure:
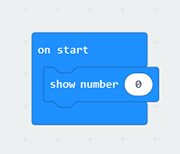
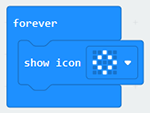
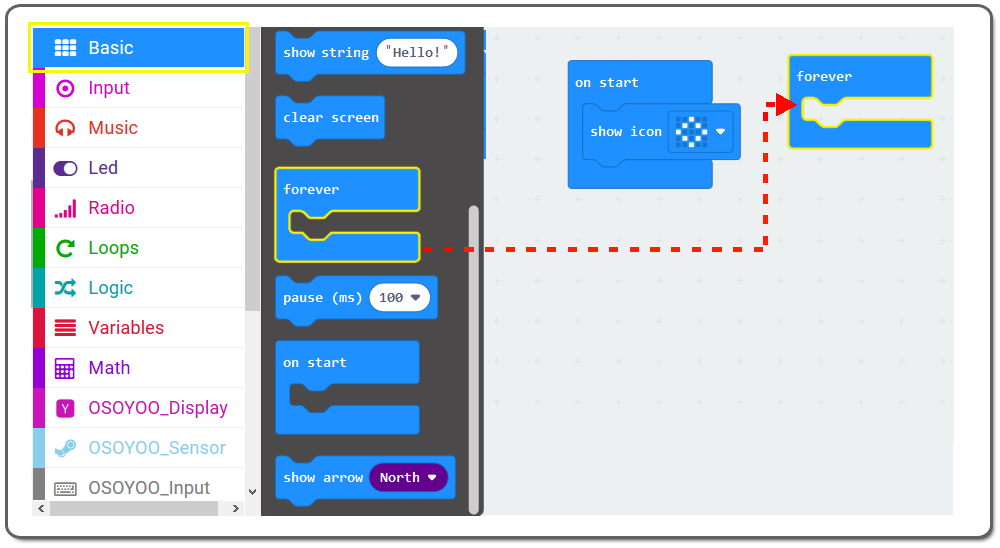
Step 2. Click on the Basic category again. Then drag the show icon block and drop it inside the on start block ,and choose the icon from the drop-down menu as following figure.Step 3. Click on the Basic category and then click the forever block, and then Drag as following figure:
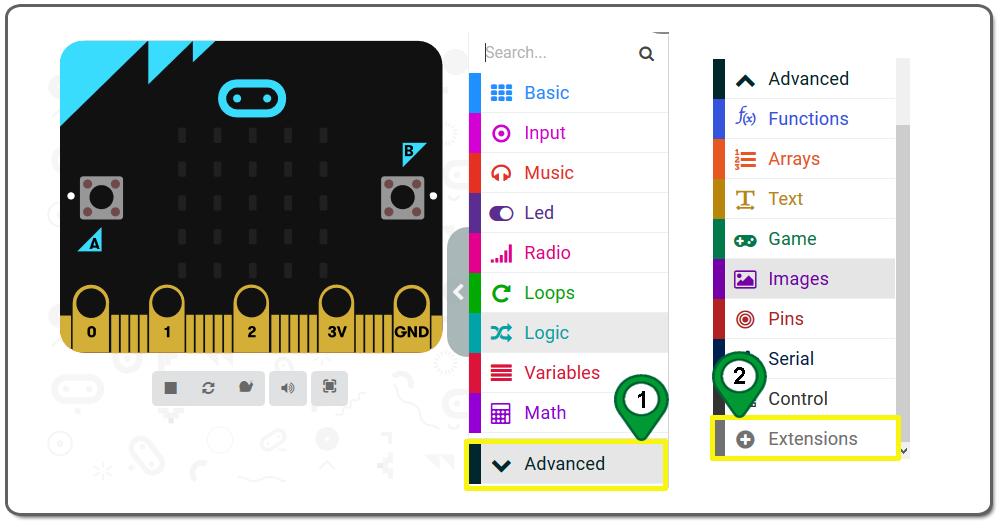
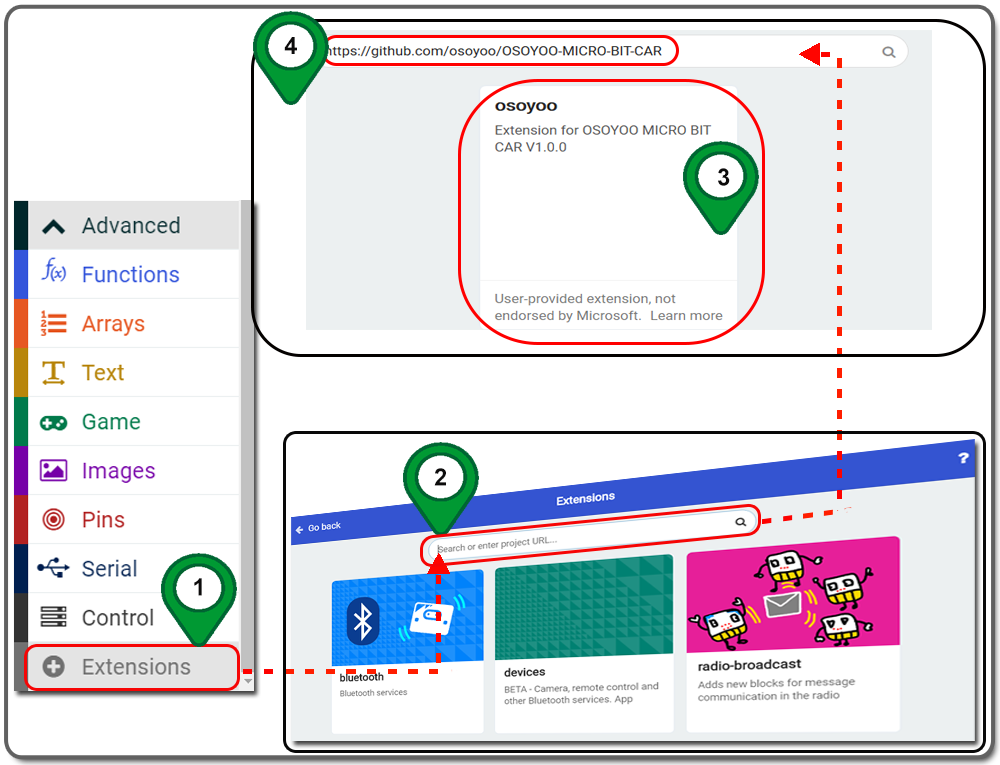
Step 4.In the Editor controls, click on the Advanced button and then Extensions as following figure.
Step 5. In the Extensions page , enter project URL “https://github.com/osoyoo/OSOYOO-MICRO-BIT-CAR ” in the Search textbox and click on the Search button. The page will show you all the matching extensions based on your search string. Now, click on OSOYOO to add it into your project .
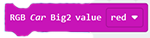
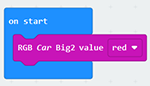
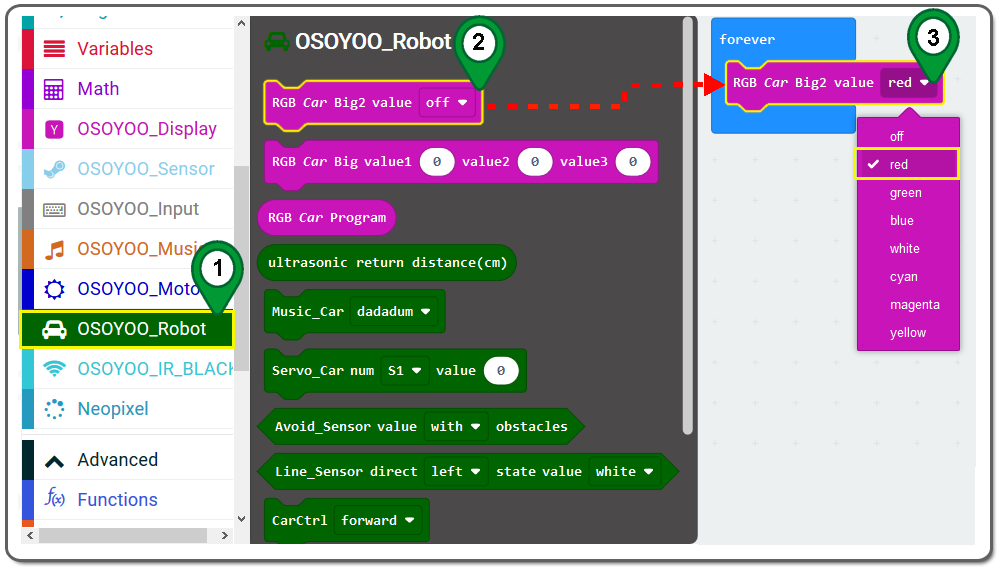
Step 6.Click on the OSOYOO_Robot category. Drag RGB Car Big2 value off block and place it inside the forever block,set red from drop-down menu.
Step 7.Click on the Basic category again. Then drag the pause(ms) block and place it below RGB Car Big2 value block (inside theforever block) , and choose 1 second from the drop-down menu .
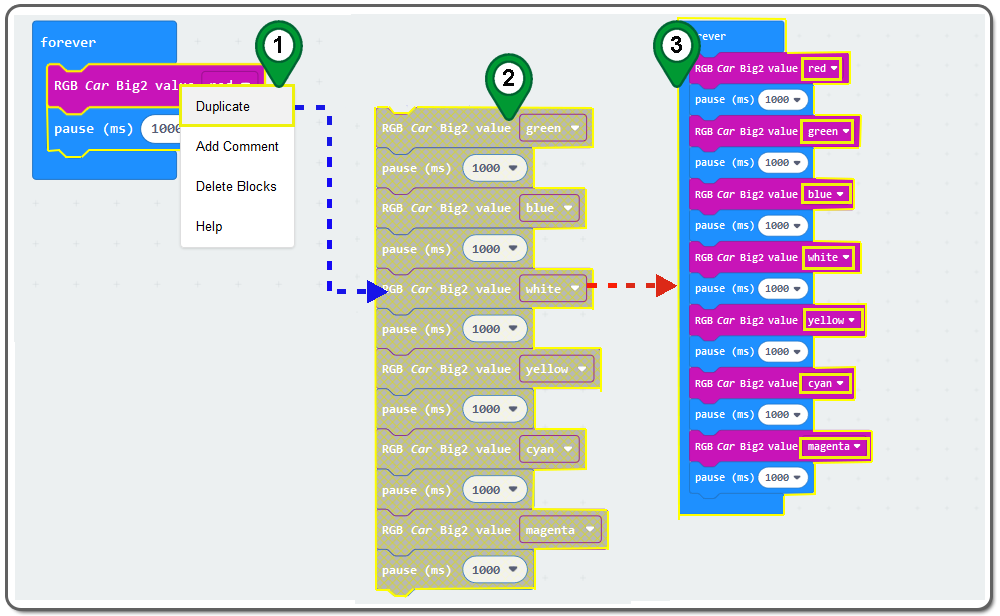
Step 8.Duplicate RGB Car Big2 value block and pause(ms)1000 block six times. Drag and place them below previous PAUSE 1000 block .Change theRGB Car Big2 value block value as following figure:
Step 9. Rename this project and download the “.hex” file as following figure:
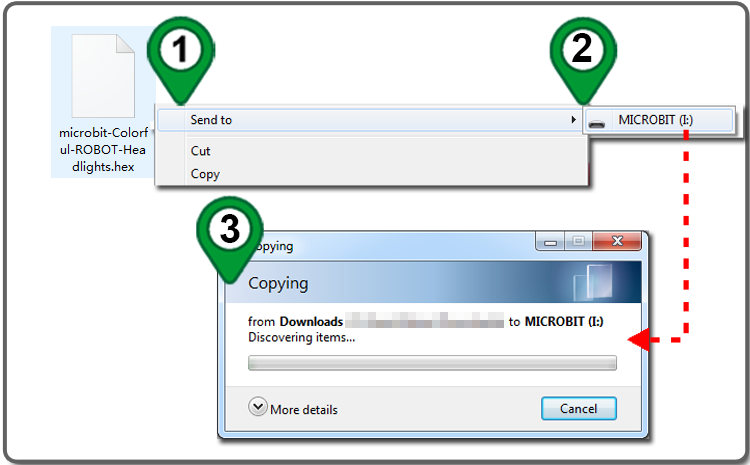
Step 10. Save it to your MICROBIT disk Driver as following figure.
If you want the color of your robot headlight to keep changing, you can try uploading the code below to your micro bit. Of course, you can also adjust the color sequence and delay time according to your own ideas.
Step A)Connect the micro:bit with the computer through USB cable, and the computer will pop up a U disk and send the download file(.hex)to your micro:bit.
Step B)Insert the micro:bit main board into the robot, and connect a 9v battery into the battery box.
Step C)Turn the POWER switch ON. The micro:bit car ‘s headlight will showed red ,and the matrix will showed a rhombus .