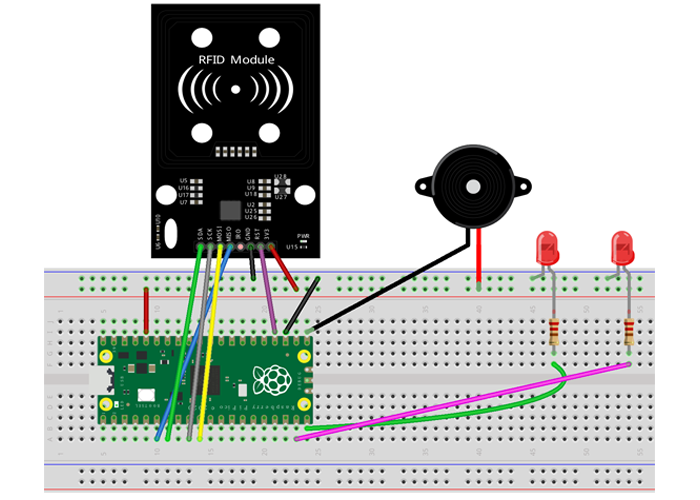
Ein RFID-Leser ist ein sehr beliebtes Gerät in Sicherheitssystemen. Er kann die ID einer RFID-Karte lesen und an ein Computersystem senden.
In dieser Lektion verwenden wir den OSOYOO RFID-Leser, um ein einfaches Sicherheitsüberprüfungssystem zu erstellen. Dieser RFID-Leser wird ein neues Kommunikationsprotokoll namens SPI verwenden, um Daten an den Pico zu senden. Nach Abschluss dieser Lektion haben Sie drei Arten von Kommunikationsprotokollen kennengelernt: SPI, I2C und Serial (RS232). Der Geschwindigkeitsvergleich zwischen diesen drei Methoden ist wie folgt: SPI > I2C > Serial.
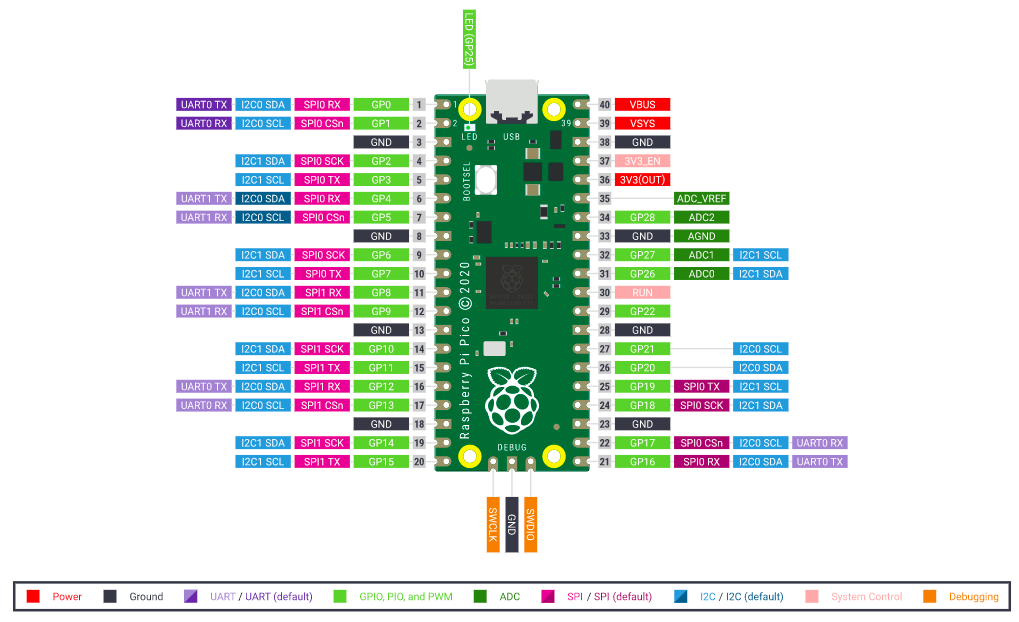
Da wir in diesem Projekt viele Pins verwenden werden, haben wir hier die Pico-Pin-Map zur Verfügung gestellt, um Benutzern zu helfen, die richtigen Pins zu finden.
1.Raspberry Pi Pico Board und MicroUSB-Kabel
2.Ein Computer zum Ausführen der Thonny Python-IDE
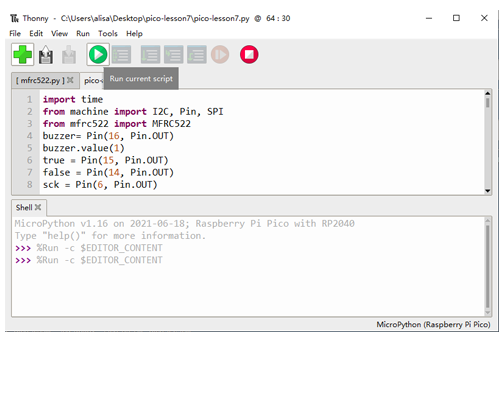
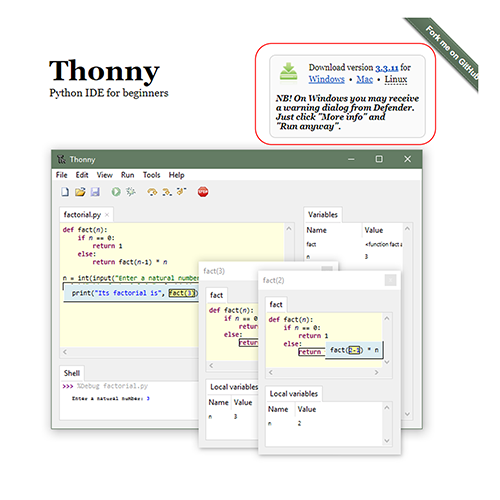
Später können Sie Thonny verwenden, um pico-lesson7.py zu öffnen und auf den Pico zu laden.
Hier ist der vollständige Code mit Kommentaren:
import time
from machine import I2C, Pin, SPI #import I2C,Pin,SPI library
from mfrc522 import MFRC522 #import RFID reader library
buzzer= Pin(16, Pin.OUT) #set buzzer to GP16
buzzer.value(1)
true = Pin(15, Pin.OUT) #set Green LED to GP15
false = Pin(14, Pin.OUT) #set Red LED to GP14
sck = Pin(6, Pin.OUT) #set RFID sck to GP6
mosi = Pin(7, Pin.OUT) #set RFID mosi to GP7
miso = Pin(4, Pin.OUT) #set RFID miso to GP4
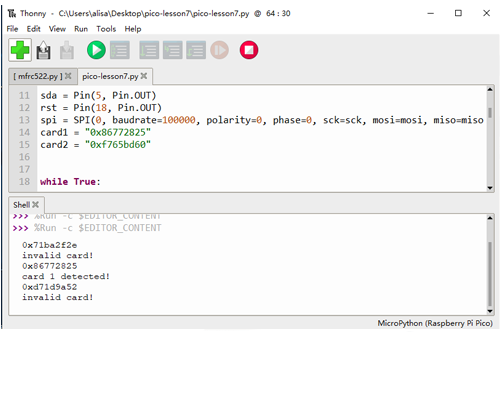
sda = Pin(5, Pin.OUT) #set RFID sda to GP5
rst = Pin(18, Pin.OUT) #set RFID rst to GP18
spi = SPI(0, baudrate=100000, polarity=0, phase=0, sck=sck, mosi=mosi, miso=miso) #initial SPI
card1 = "0xe58a6223" #change this value to match your testing RFID card 1
card2 = "0xf765bd60" #change this value to match your testing RFID card 2
while True:
rdr = MFRC522(spi, sda, rst) #initialize reader
(stat, tag_type) = rdr.request(rdr.REQIDL) #read card ud
if stat == rdr.OK:
(stat, raw_uid) = rdr.anticoll()
if stat == rdr.OK:
uid = ("0x%02x%02x%02x%02x" % (raw_uid[0], raw_uid[1], raw_uid[2], raw_uid[3]))
print(uid)
if uid == card1: #if ID matches card 1, buzzer beep once, turn on Green LED
print("card 1 detected!")
buzzer.value(0)
time.sleep(0.3)
buzzer.value(1)
true.value(1)
time.sleep(1)
true.value(0)
time.sleep(1)
elif uid == card2:
print("card 2 detected!") #if ID matches card 2, buzzer beep twice, turn on Green LED
buzzer.value(0)
time.sleep(0.3)
buzzer.value(1)
time.sleep(0.3)
buzzer.value(0)
time.sleep(0.3)
buzzer.value(1)
true.value(1)
time.sleep(1)
true.value(0)
time.sleep(1)
else: #if ID doesn't match any card, long beep, turn on Red LED
print("invalid card!")
buzzer.value(0)
time.sleep(2)
buzzer.value(1)
false.value(1)
time.sleep(0.1)
false.value(0)
time.sleep(0.1)
false.value(1)
time.sleep(0.1)
false.value(0)
time.sleep(0.1)
false.value(1)
time.sleep(0.1)
false.value(0)
time.sleep(1)
Schritt 1: Verbinden Sie das Pico-Board mit einem der USB-Anschlüsse Ihres PCs. Schritt 2: Wenn Sie die Thonny-Software noch nicht installiert haben oder nicht wissen, wie Sie die Thonny-IDE verwenden sollen, lesen Sie bitte Lektion 1.
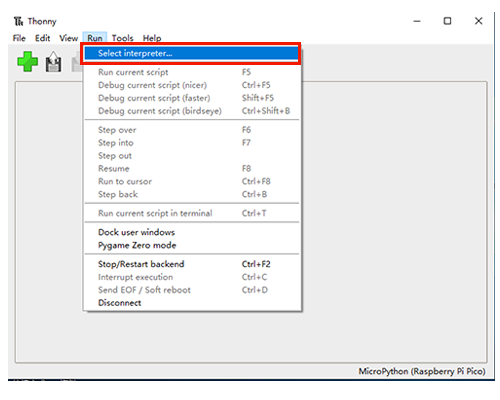
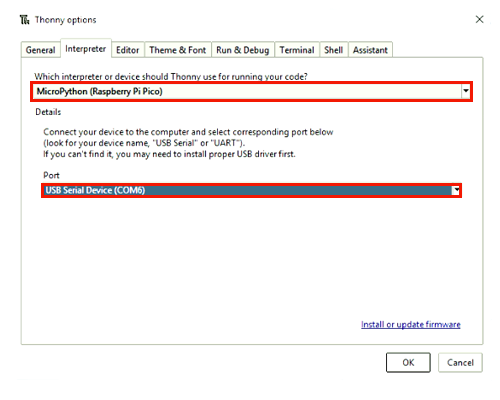
Schritt 3: Öffnen Sie nun die Thonny Python-IDE und klicken Sie auf “Ausführen”, um MicroPython für Raspberry Pi Pico als Interpreter auszuwählen.
Wählen Sie auch den COM-Port aus, an den Ihr Pico-Board angeschlossen ist.:
Klicken Sie anschließend auf “OK”, um die Einstellungen zu speichern.
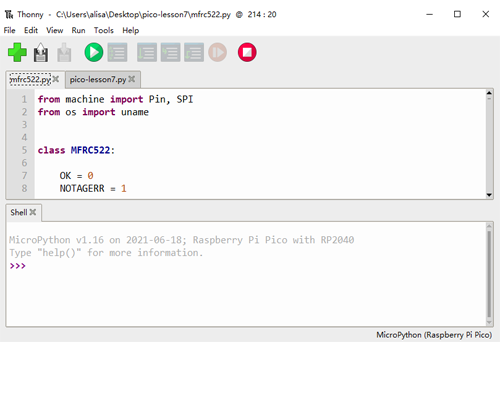
Schritt 4: Laden Sie nun den Code von https://osoyoo.com/driver/pico/lesson7/pico-lesson7.zip herunter, speichern Sie ihn auf Ihrem lokalen PC und entpacken Sie die Datei. Sie finden zwei Dateien: mfrc522.py und pico-lesson7.py. Öffnen Sie die Bibliotheksdatei mfrc522.py mit Thonny.
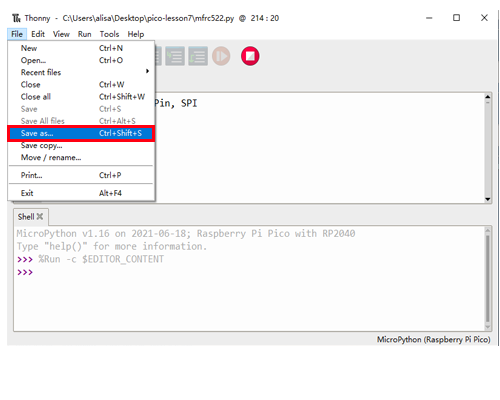
Schritt 5: Klicken Sie dann auf “Datei” -> “Speichern unter”.
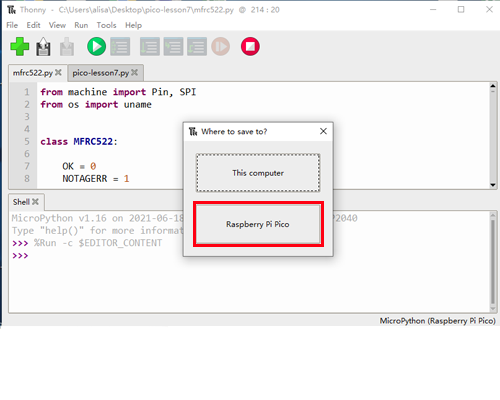
Schritt 6: Wählen Sie dann “Raspberry Pi Pico” als Ziel aus.
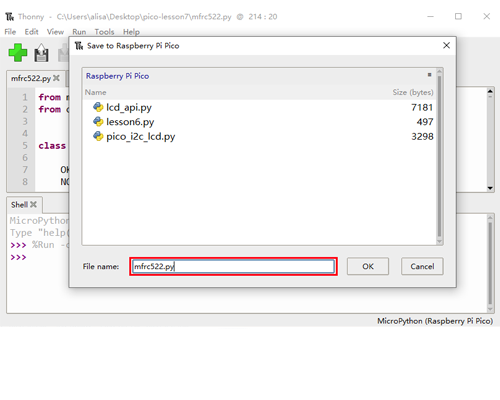
Schritt 7: Geben Sie den Dateinamen als “mfrc522.py” ein. Klicken Sie danach auf “OK”, um die Einstellungen zu speichern.
Dann verwenden Sie Thonny, um eine andere Datei namens pico-lesson7.py zu öffnen, klicken Sie auf das kleine ►-Symbol, um den Python-Code auszuführen.
Sie müssen drei verschiedene RFID-Karten vorbereiten. Berühren Sie jede Karte auf dem Leser, und Sie sehen ihre ID, wie “0xd71d9a52” und “invalid card”, im Shell-Fenster. Auch die rote LED wird eingeschaltet, und der Summer wird einen langen Piepton abgeben. Dies liegt daran, dass die aktuellen Karten-IDs nicht mit den IDs in den Zeilen 14 und 15 übereinstimmen. Bitte ändern Sie die Zeilen 14 und 15 in die IDs Ihrer Karte 1 und Karte 2 und klicken Sie dann erneut auf das ►-Symbol, um den Code auszuführen.
Jetzt sehen Sie, dass wenn Sie Karte 1 auf den Leser legen, es die Nachricht “Karte 1 erkannt”, einen kurzen Piepton und ein grünes Licht auslöst. Wenn Sie Karte 2 auf den Leser legen, zeigt das Shell-Fenster “Karte 2 erkannt”, zwei kurze Pieptöne und ein grünes Licht an.
Nach Abschluss der Operation drücken Sie Strg+C, um den Befehl zu beenden.


 Dann verwenden Sie Thonny, um eine andere Datei namens pico-lesson7.py zu öffnen, klicken Sie auf das kleine ►-Symbol, um den Python-Code auszuführen.