In this project, we will use obstacle sensor(ultrasonic distance detector) to detect obstacles ,avoid collision and auto-drive.
OSOYOO UNO Board (Fully compatible with Arduino UNO rev.3) x 1
OSOYOO Magic I/O Shield for Arduino x1
OSOYOO IR Sensor Module x1
OSOYOO Servo Motor x1
OSOYOO Ultrasonic Sensor Module x1
OSOYOO 3-Pin PNP Cable 10cm x 6
OSOYOO 3-Pin PNP Cable 20cm x 1
OSOYOO 4-Pin PNP Cable 20cm x 1
Acrylic Platform x1
Transmission Motor with 2 Wheels
USB Cable
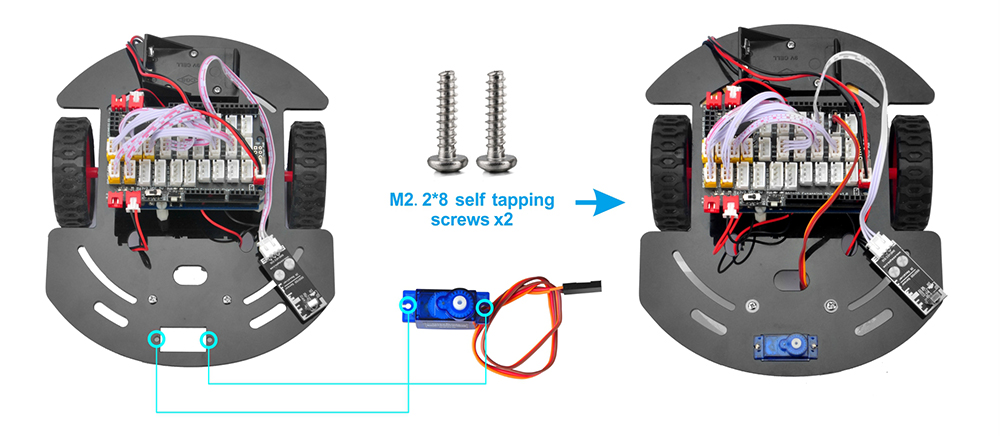
Install the smart car basic frame work as per Lesson 21, If you have already completed installation in Lesson 21 , just keep it as is.
Step 1:Remove screws on copper pillars and install servo motor at the front of car chassis with 2pcs M2.2*8 Self Tapping Screws.
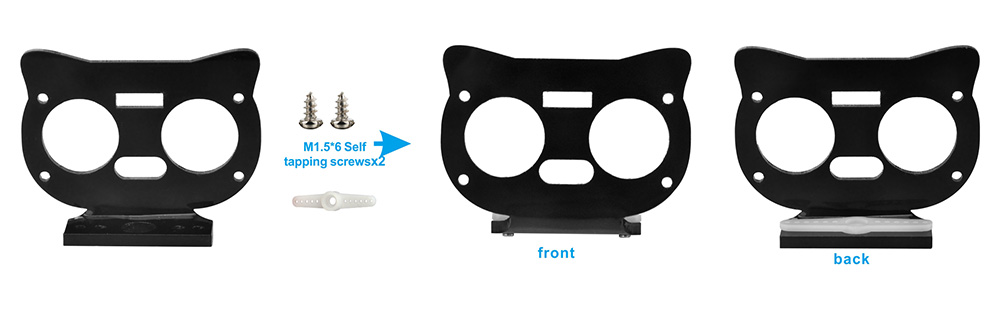
Step 2:Install bracket (from servo motor package) on mount holder for Ultrasonic Module with 2pcs M1.5*4 Self Tapping Screws
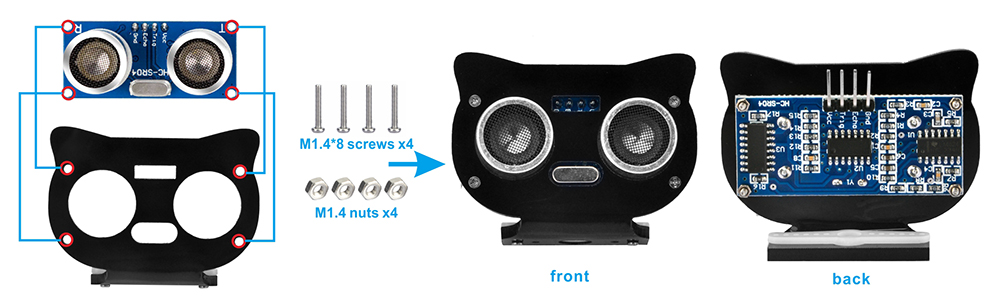
Step 3: Install Ultrasonic Module to mount holder with 4pcs M1.4*8 screw and M1.4 nuts.
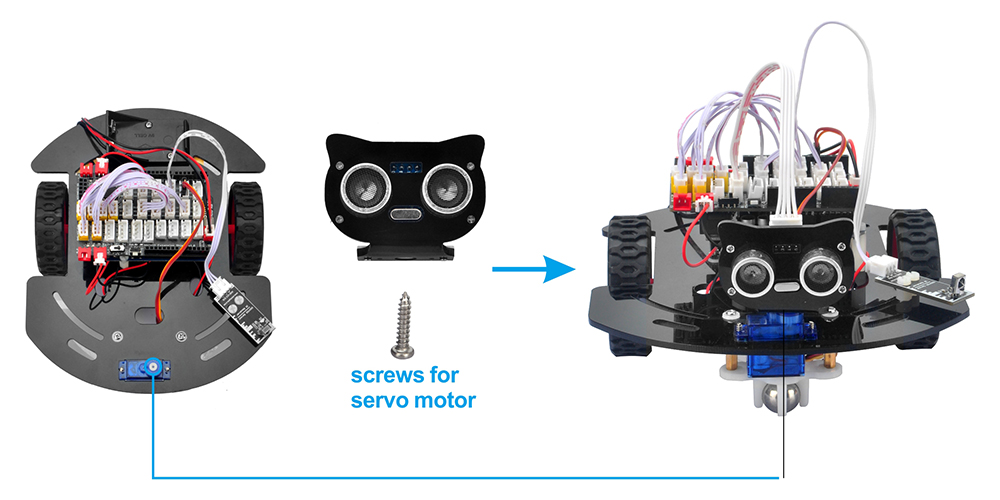
Step 4: Install mount holder for Ultrasonic Module on servo motor with M2*4 Self Tapping screw.
Step 5:If you have already completed wire connection installation in Lesson 21 , just keep it as is.
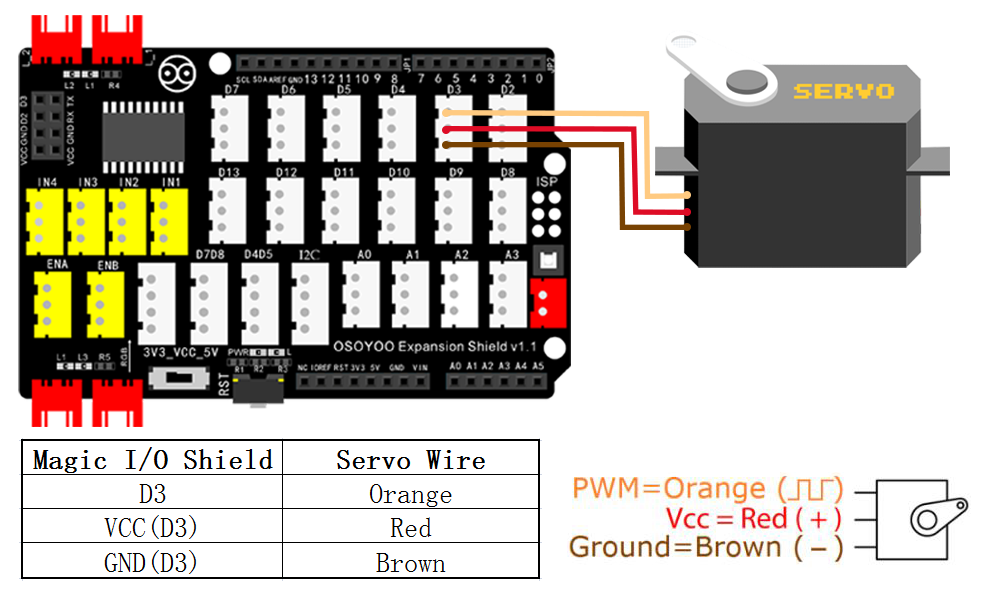
Then Connect SG90 servo motor to OSOYOO to the D3 port of the Magic I/O shield as following graph.
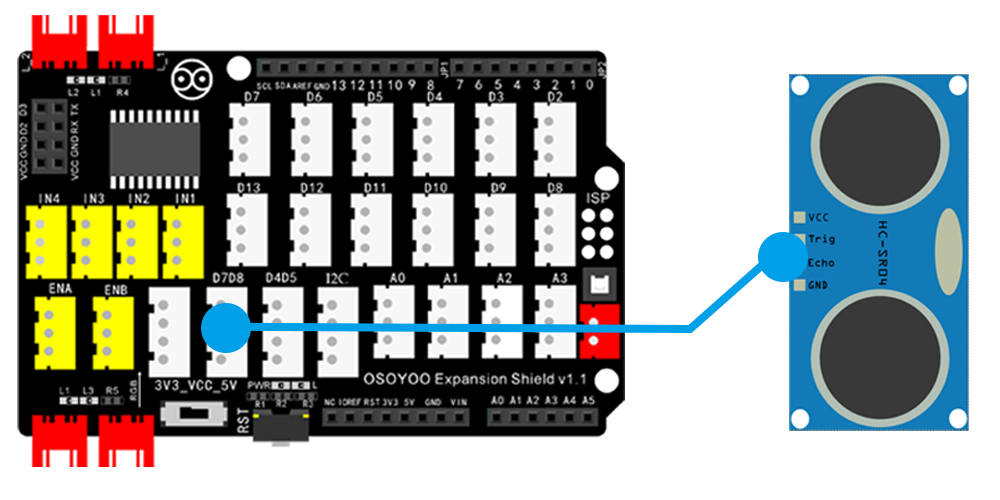
Step 6:Then connect the Ultrasonic module sensor to the D7D8 port of the Magic I/O shield with a 4-pin PNP cable as below:
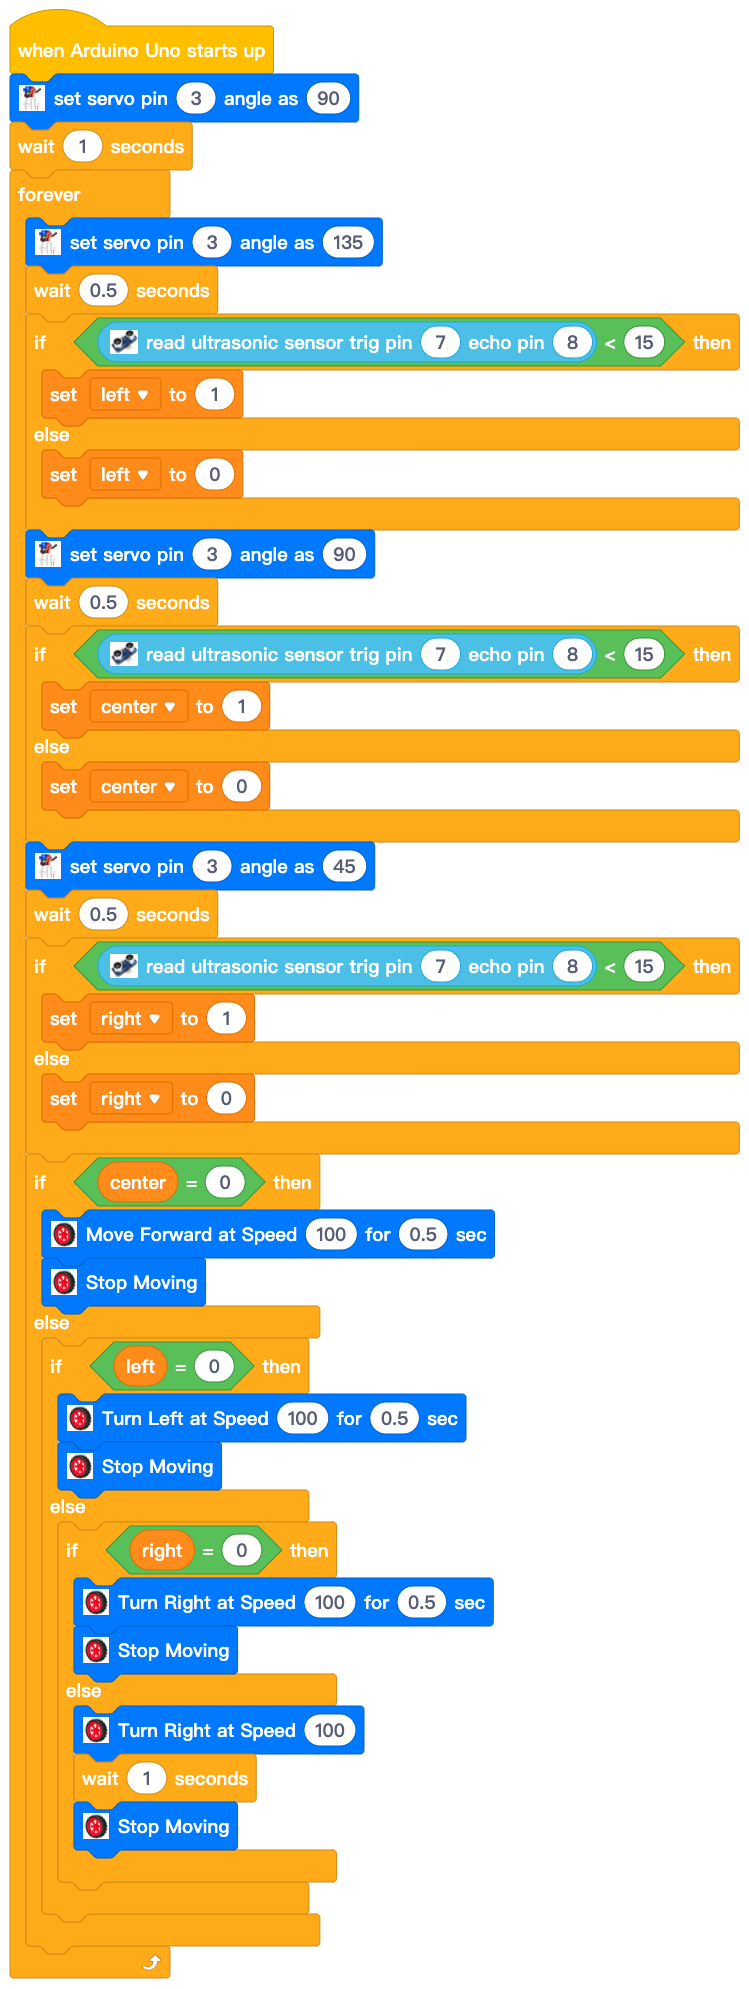
In order to test the obstacles and find route for the car, we need to setup three variables to record the obstacle status in 3 directions (left, center and right). When distance to obstacle is less than 15 cm, we will mark obstacle status as 1 otherwise mark status as 0. status 1 means there is an obstacle in that direction.
The routing logic is: First test left, center and right 3 direction obstacle status.
If center status is 0 (no obstacle), then move forward.
If center status is 1, then check left status, if left status is 0(no obstacle in left side), turn left.
If left status is 1, then check right status, if left status is 0( no obstacle in right side), turn right.
If right status is 1, this means from left, center to right 3 directions all have obstacles. Then the car will make a U turn.
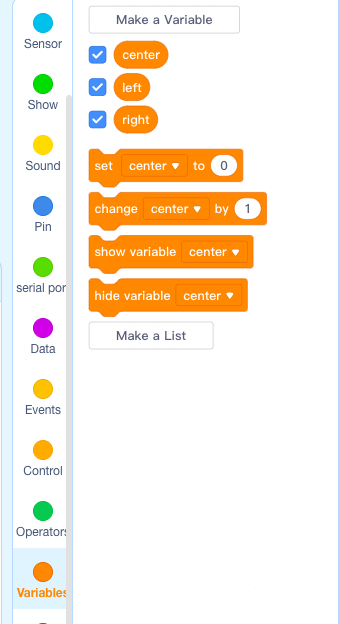
To begin coding, we need to click Variables, then add 3 variables called left, center, right as following:
The next step, we need to use these 3 varaibles to build the blocks and make obstacle avoidance program. As students have learnt a lot about building blocks from different categories in previous lesson, so in this final project, we omitted all the middle steps and only give you the final block structure as following:
Please upload above block code to Arduino same as previous lessons
Adjust the Ultrasonic Sensor direction:
After the code is loaded into robot car, unplug the USB cable from the UNO board and turn on the power switch on the Magic I/O board. Then the ultrasonic sensor will rotate to face the straight forward direction for 5 seconds. If the Ultrasonic sensor is not facing the front position, please turn off the power. Please use a screw driver to adjust the ultrasonic sensor direction and make it facing straight ahead , then turn on the power again and during the early 5 seconds, the sensor should be facing front direction.
After the 5 seconds , the robot car will start to drive and change direction to avoid obstacles automatically.