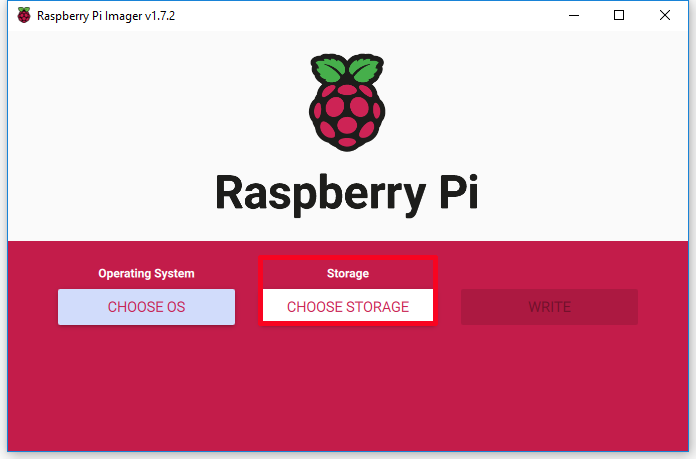
Installation OS with Raspberry Pi imager
Note: here we take Raspberry Pi imager v1.7.2 as example to install OS, and other version may have some differences.
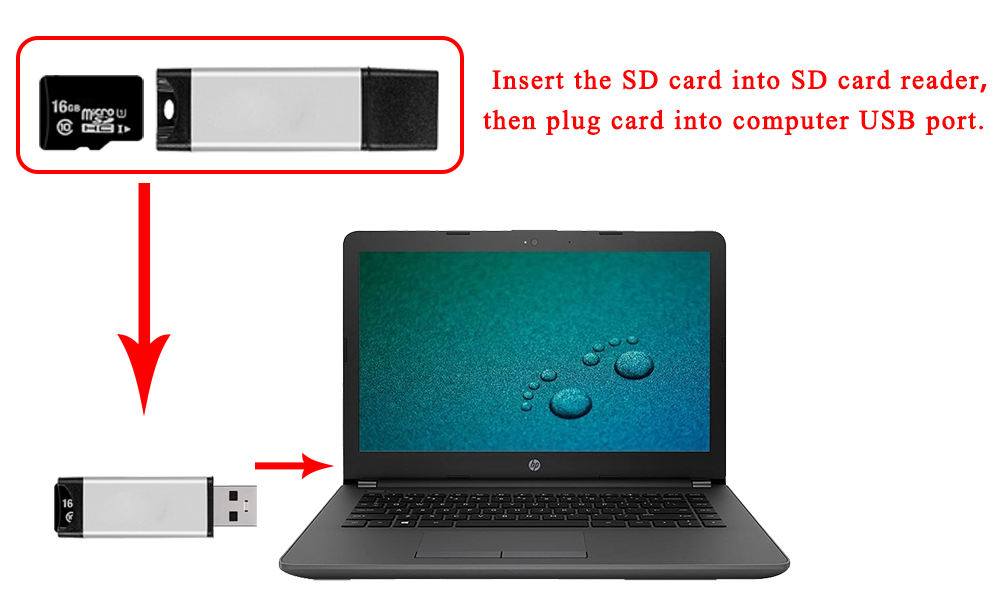
Step 1: Prepare a newly formatted micro SD memory card(TF card) with USB micro SD card reader, recommend sizes are 16G, 32G. (skip this step if your SD card has pre-installed Rasbian OS Image).
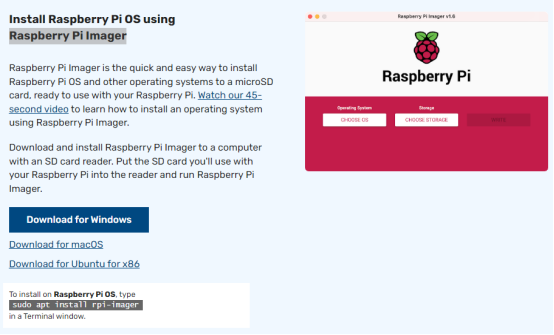
Step 2): Download the Raspberry Pi Imager from Raspberry Pi official website: https://www.raspberrypi.com/software/
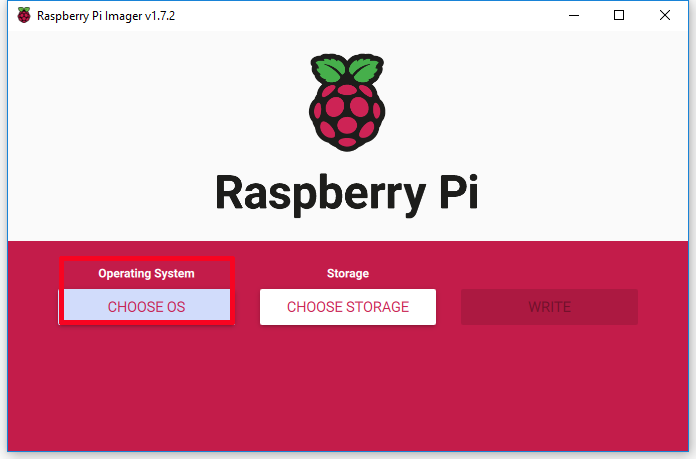
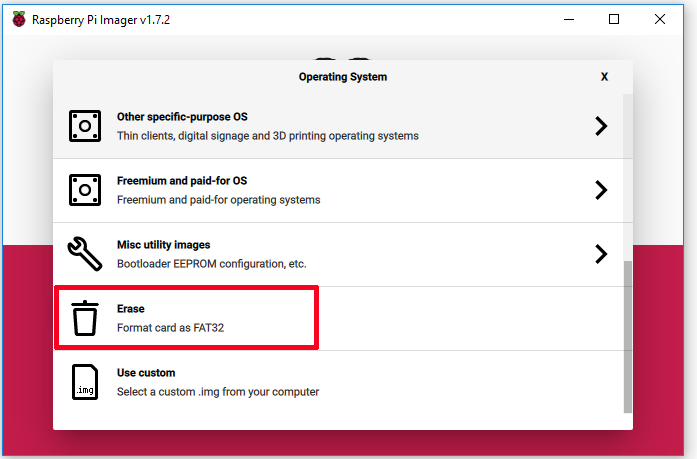
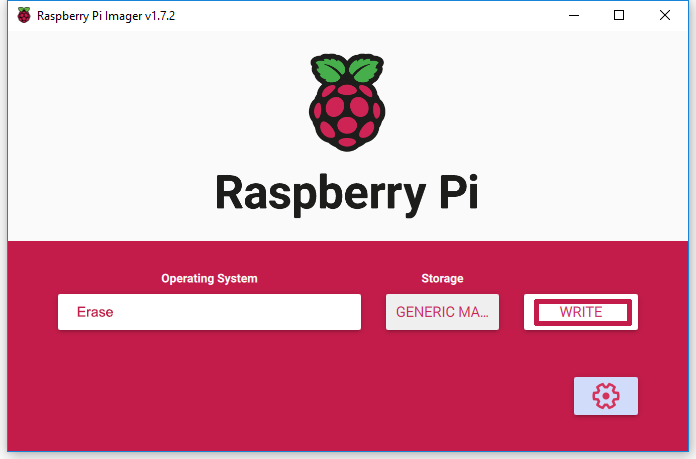
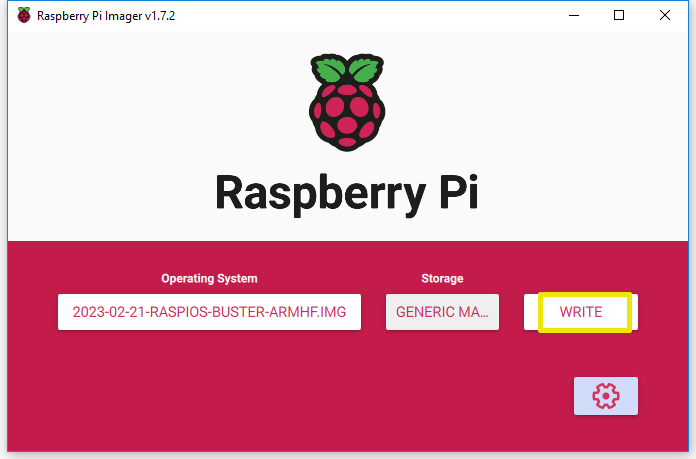
Step 3): If you don’t know how to format micro SD card, please run Raspberry Pi Imager and select “Erase” in Operating System field, and “your micro SD card” in Storage field, then click “WRITE” to format micro SD card

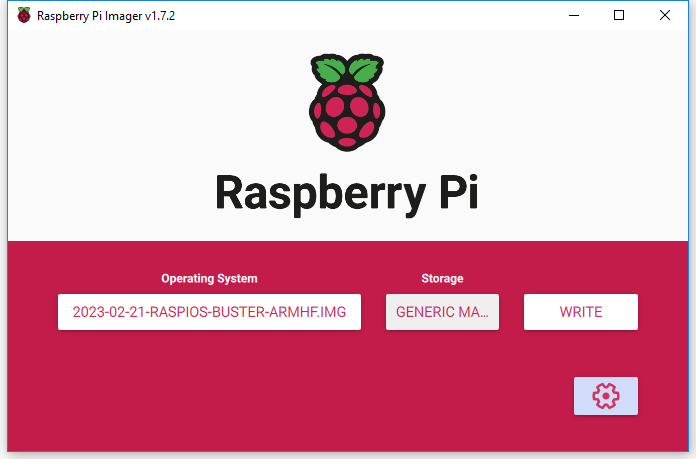
Step 4): Run Raspberry Pi Imager, then select “Use custom” in Operating System field then browse “Raspberry Pi OS” you have downloaded, then select “your SD card” in Storage field. (If you have burnt Raspberry Pi OS in your SD card, please skip step 3 to step 5)
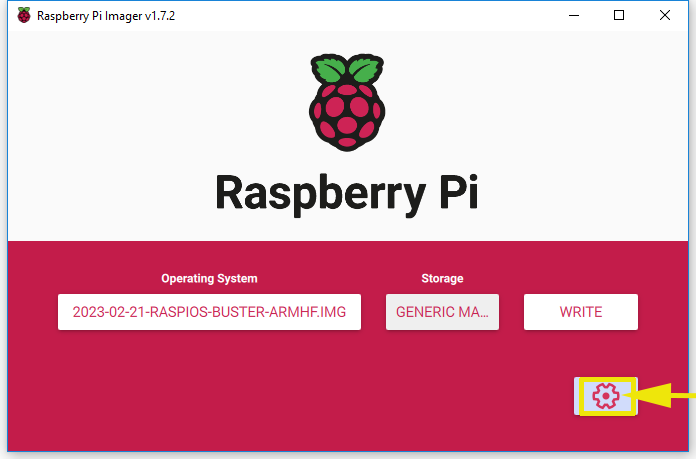
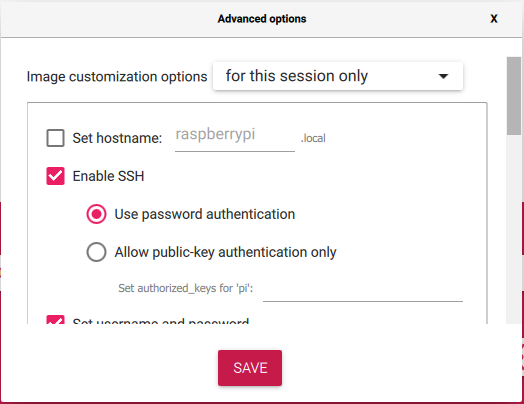
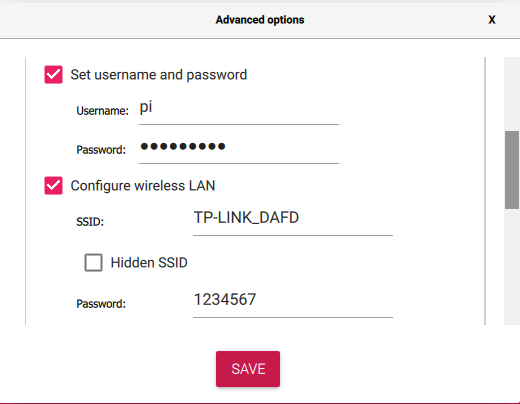
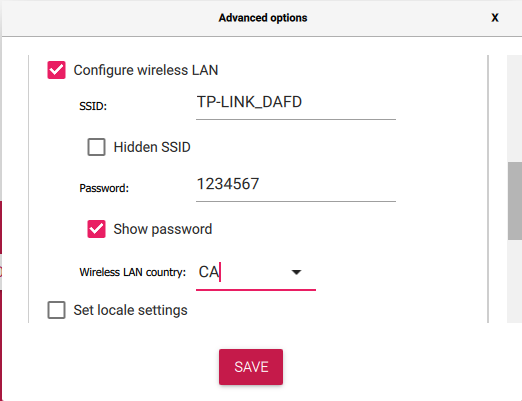
Step 5): Click “setting icon” to enable SSH, set username and password (here we use pi as username and raspberry as password), and configure wireless LAN. Then click “SAVE”
Step 6): Click WRITE to burn OS system (Raspberry Pi OS) in your micro SD card

Control Raspberry Pi remotely
Step 1: Know the IP address
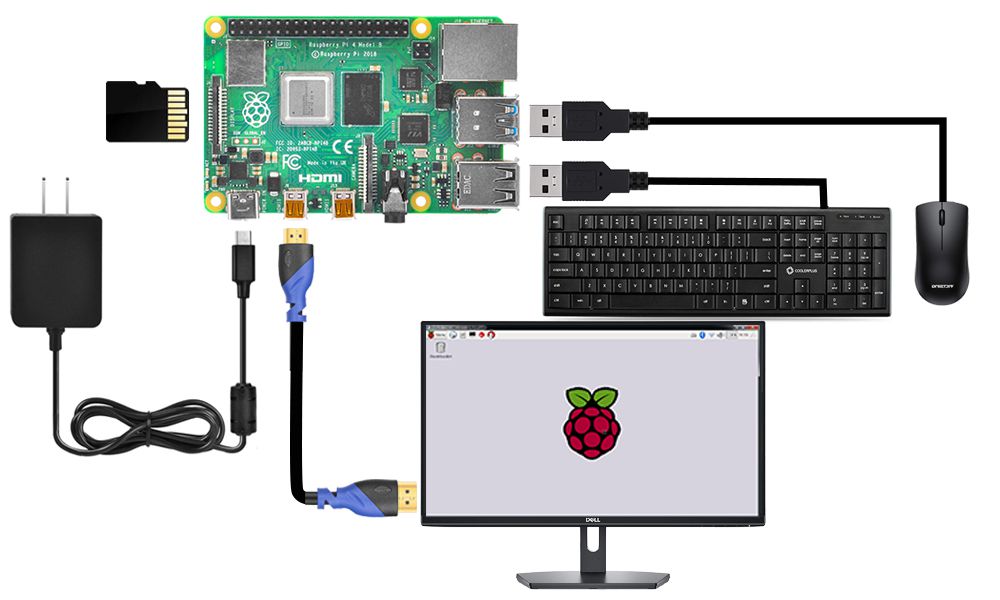
1. Connect Raspberry Pi to your HDMI monitor or TV. Put a keyboard and mouse into Raspberry Pi USB ports. Insert SD card which has installed OS into the slot on your Raspberry Pi (if you have intalled your raspberry pi robot car, please connect this Raspberry Pi with screen and know the IP address).
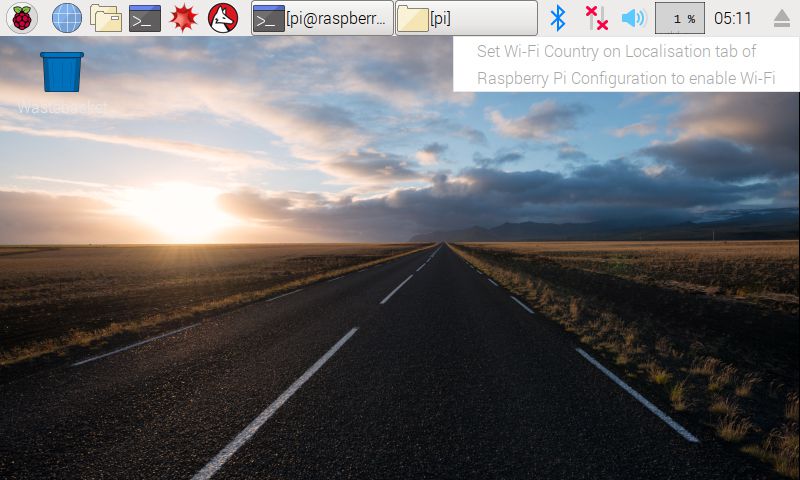
2. If you move over the Lan icon, and get the notice as following:
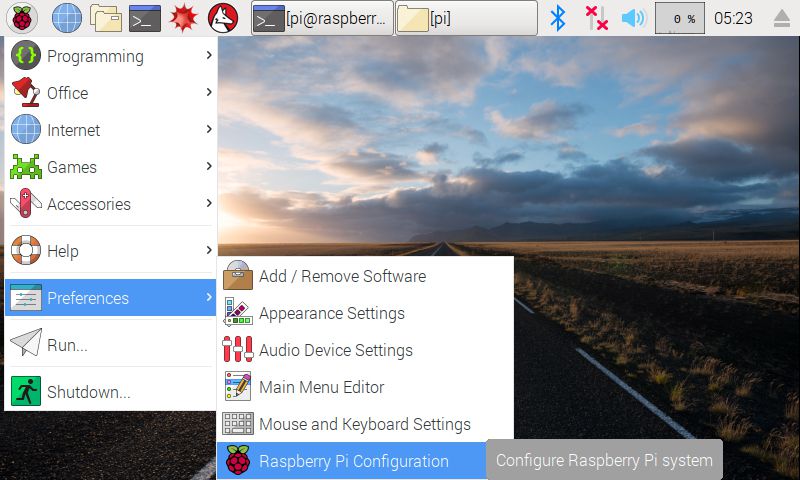
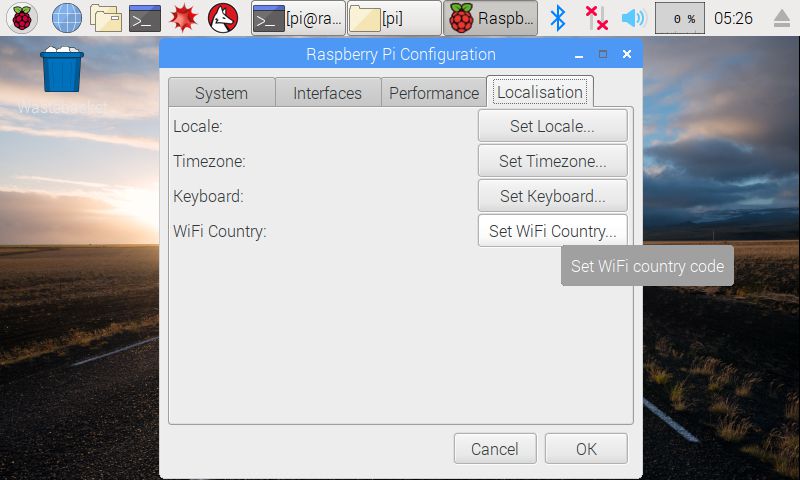
3. Please click configure the WIFI localisation as following:
4. Find out the IP address of the RPi.
Method A: Connect your Pi to monitor and mouse, click LAN or WIFI icon to get the IP address as following photo

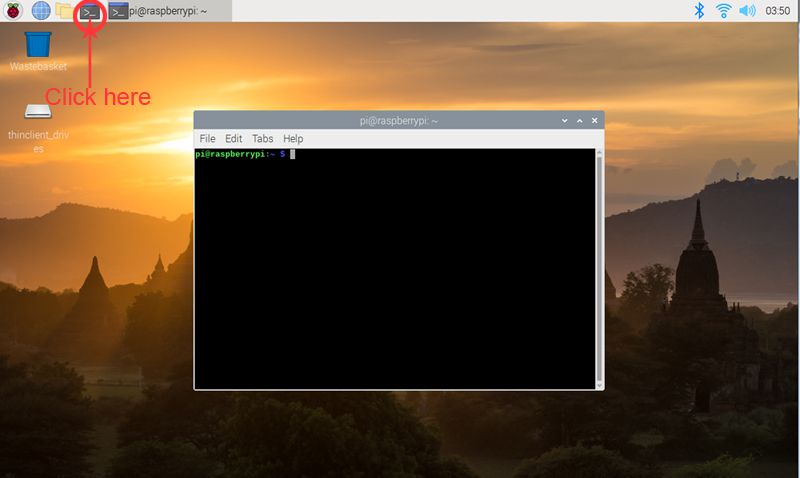
Method B: Click the icon of Terminal on the screen,enter the following command in terminal window to get your IP address :
hostname -I

Step 2: Use ssh tool to control Raspberry Pi remotely
Note:
1) To learn more about how to use ssh tool to control Raspberry Pi remotely, Please visit the link: https://osoyoo.com/2017/06/20/raspberry-pi-3-basic-tutorial/#7
2) In our sample lessons, we use Windows PC as the remote console device and PuTTY as the ssh tool
1. Please insert SD card which have installed OS into Raspberry Pi board (Attention please: you need to power off the rapsberry pi firstly), and then power on robot car.
2. Download PuTTY from: https://www.chiark.greenend.org.uk/~sgtatham/putty/ and install this exe. in your Windows PC

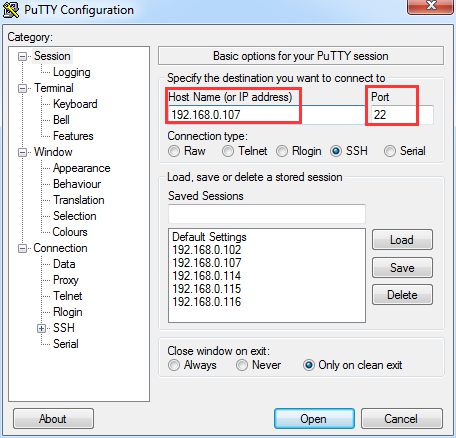
3. Open PuTTY and click Session on the left tree-alike structure (generally it’s collapsed upon PuTTY startup):

4. Enter the IP address you got into the textbox under Host Name (or IP address) and 22 under Port (by default it is 22) ,then click open.
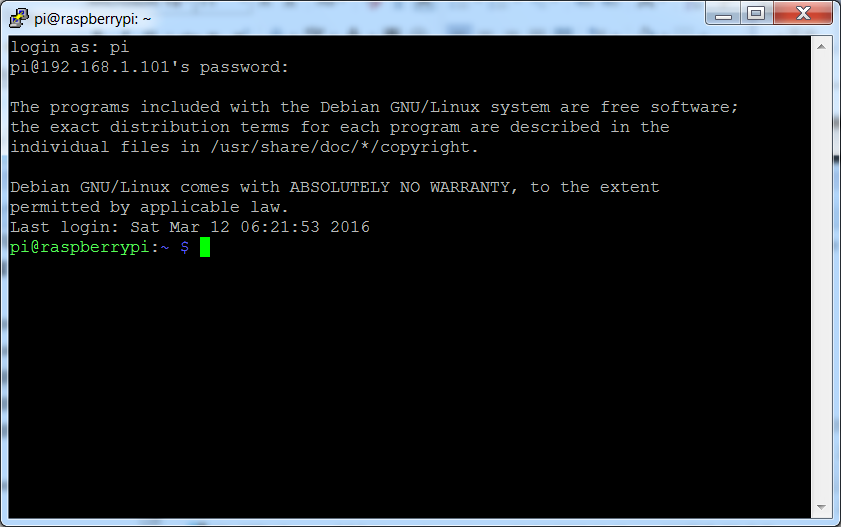
5. Note that when you first log in to the Raspberry Pi with the IP address, you’ll be prompted with a security reminder. Just click Yes. When the PuTTY window prompts login as: type in the user name: pi, and password: raspberry (the default one, if you haven’t changed it).
Note: when you’re typing the password in, the window shows nothing just null, but you’re in fact is typing things in. So just focus on typing it right and press Enter. After you log in the RPi successfully, the window will display as follows:
Use ssh tool to control Raspberry Pi remotely on other OS PC, Please visit the link: https://osoyoo.com/2017/06/20/raspberry-pi-3-basic-tutorial/#7


