Introduction
Dice is a squire type solid box which contains 6 different numbers on all of its sides. We throw dice on a surface to get a random number while playing the games. In this lesson, we will build a dice that is shaken by holding the button in and thrown by releasing the button. The shake, throw and number thrown are animated and displayed on a seven segment display. A 74HC595 IC is used to interface the 7-segment display to the Arduino, using only 3 Arduino digital pins.

Preparations
HARDWARE
- Osoyoo UNO Board (Fully compatible with Arduino UNO rev.3) x 1
- One digit 7-Segment LED Display x 1
- 200 ohm Resistor x 8
- 10k ohm Resistor x 1
- Push Button x 1
- 74HC595 x 1
- Breadboard x 1
- Jumpers
- USB Cable x 1
- PC x 1
SOFTWARE
- Arduino IDE (version 1.6.4+)
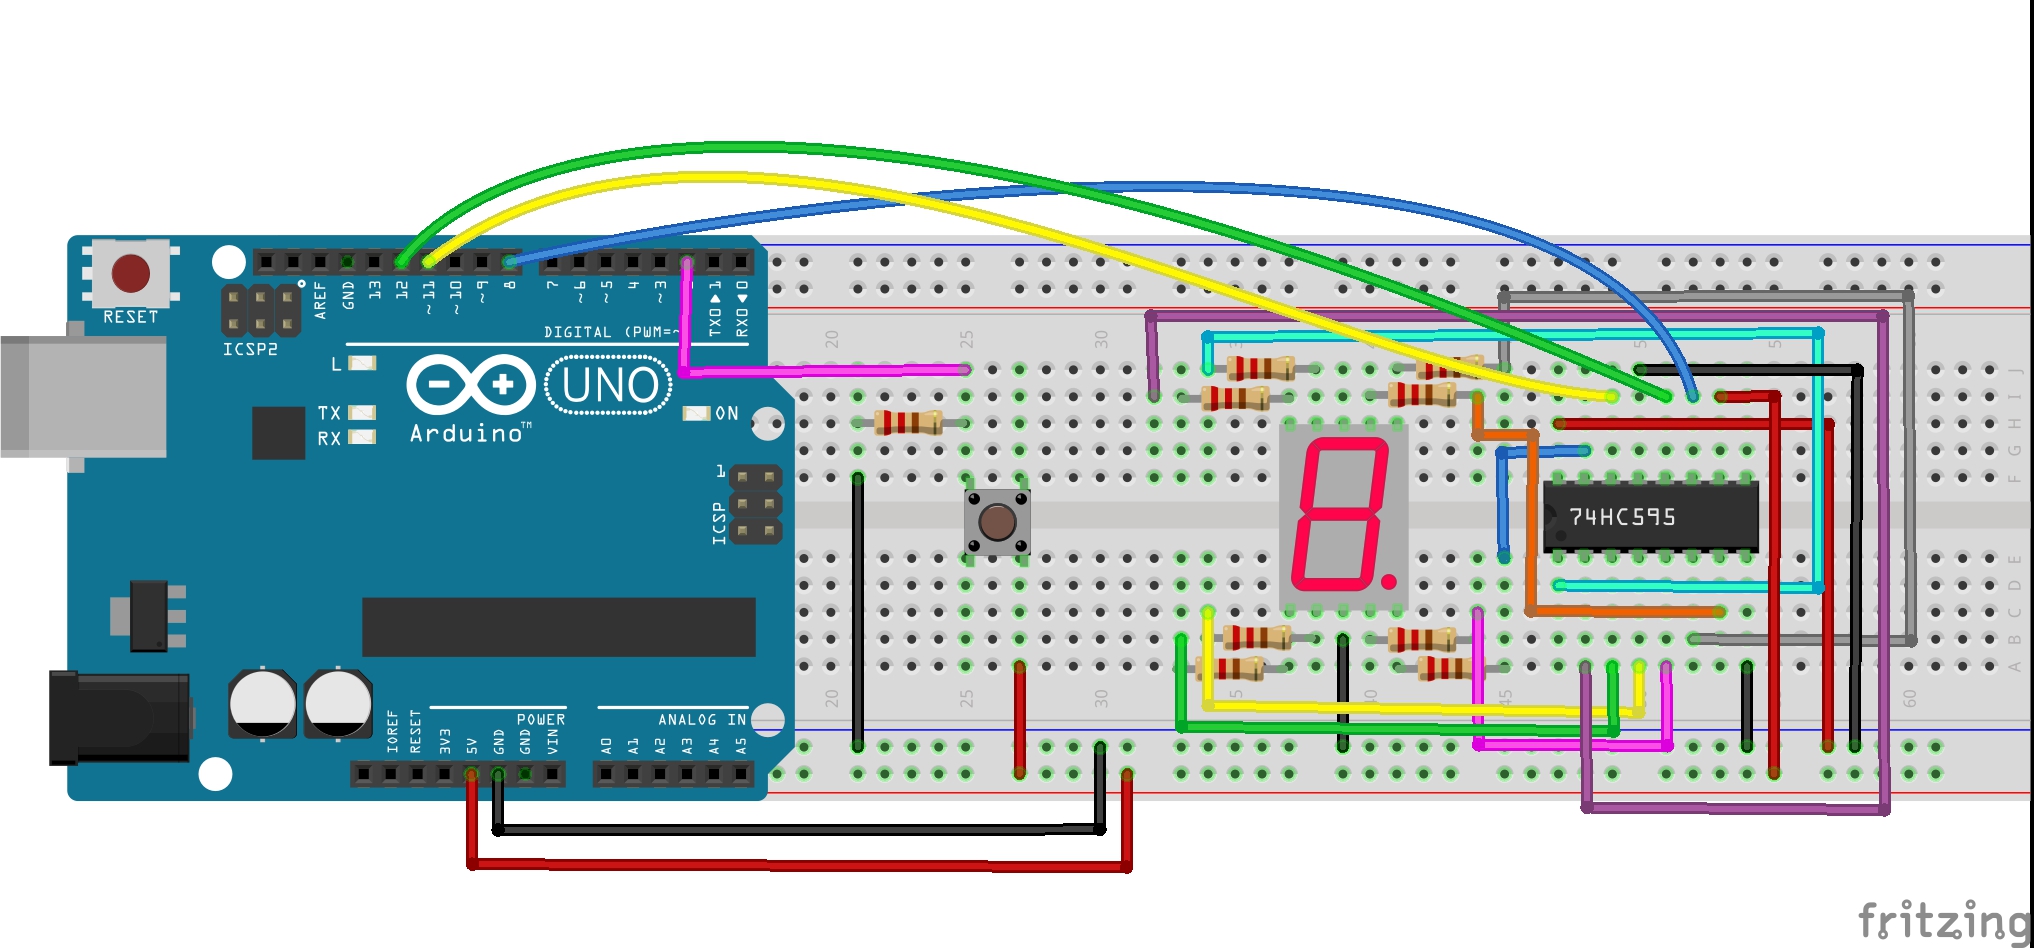
Find more information about interfacing the 74HC595 IC to the Arduino in the Arduino Lesson – 74HC595 article from the Osoyoo website. The circuit diagram uses the same Arduino pins as this article. If you want to get more info about the switch button please check the Arduino Button example, more info about the one digit 7-segment LED display please check the Arduino Lesson – one digit 7-segment LED display.
Connection
The circuit diagram is shown below. The seven segment display could have been directly interfaced to the Arduino, but by using the 74HC595, only 3 Arduino pins are used.
CODE PROGRAM
After above operations are completed, connect the Arduino board to your computer using the USB cable. The green power LED (labelled PWR) should go on.Open the Graphical Programming software Mixly and follow the next operations:
Note: The code will be a little long You’re recommended to open the developed code example to check.
Declare the variables and array.
The text list is: 252, 96, 218, 242, 102, 182, 190, 224, 254, 246, 238, 62, 156, 122, 158, 142

This function is to display the number in dataArray[] on the 7-segment display. Pin 12 connected to ST_CP of 74HC595:

Store values read from pin 2.

Check if the pushbutton is pressed. If yes, the corresponding pin is high level, then num adds 1.
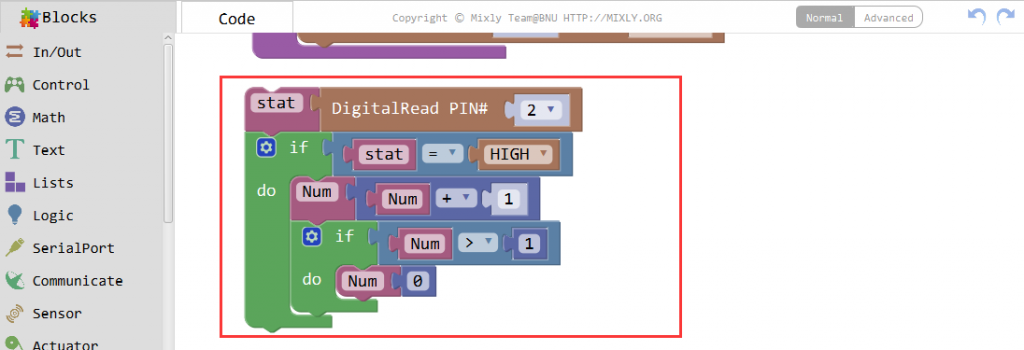
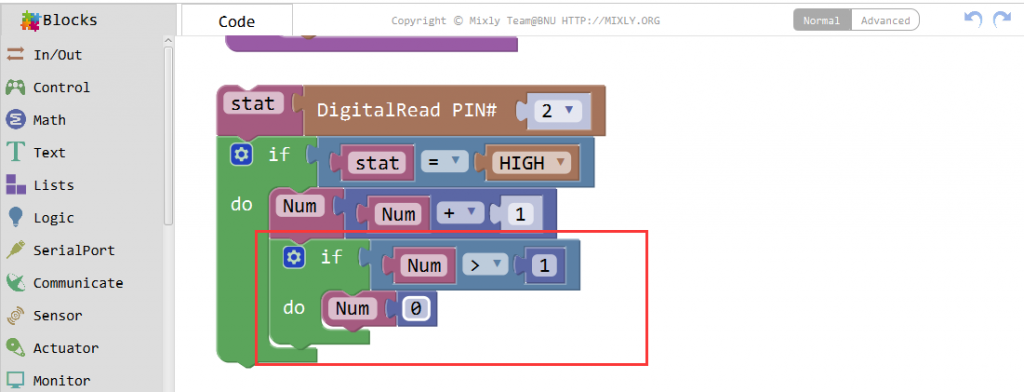
If Num >1. clear the valueIs to prevent repeated pressing. So just count it as once no matter how many times you press.
Print the Num on the Serial Monitor:

When the pushbutton is pressed.
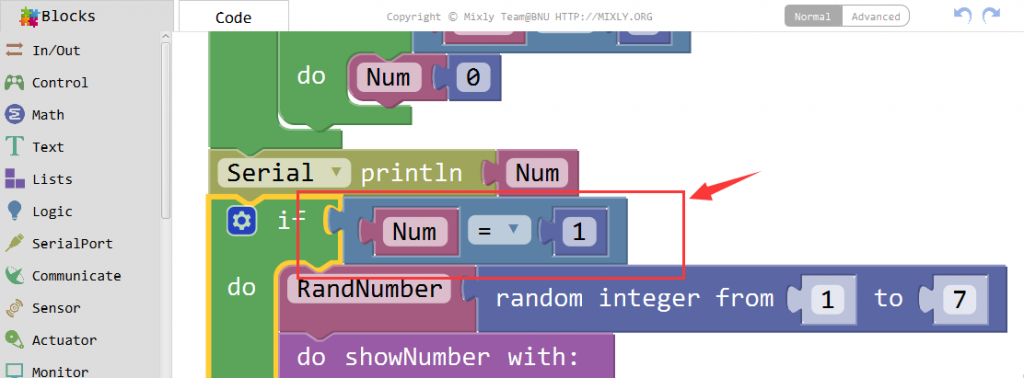
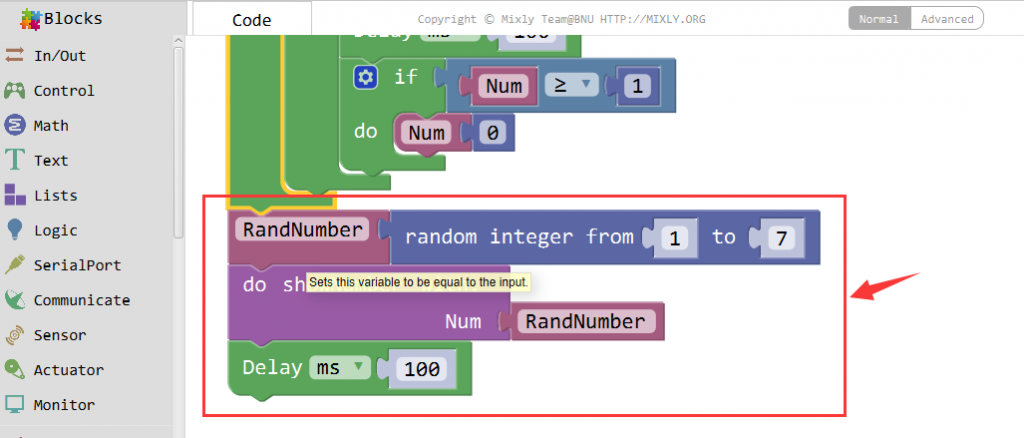
Generate a random number between 1 and 7, and show the RandNumber on the 7-segment:

When theres no button (pin 2)pressed, the program stops here, and keeps it displaying the last random number. Then read the state of the button again.
 Check if the pushbutton is pressed. If yes, run the code below.
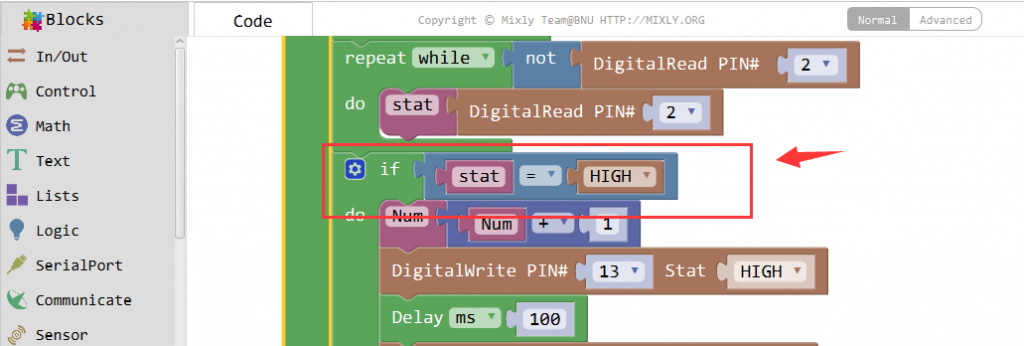
Turn on/off the LED.
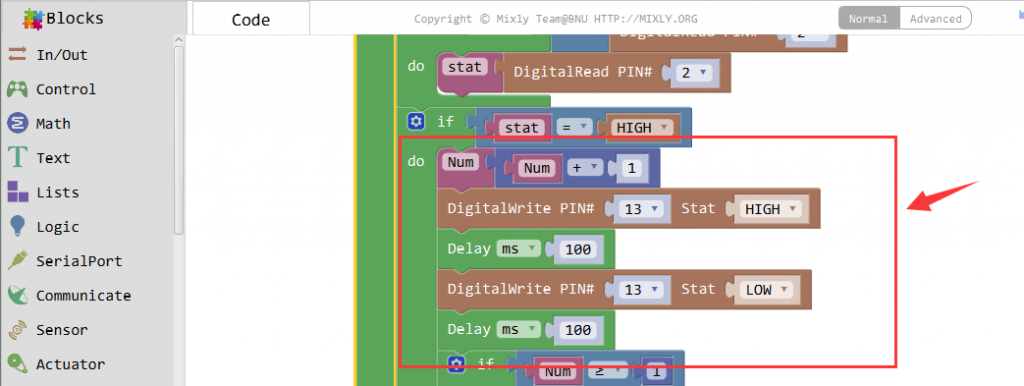
Clear the Num.

If the button has not been pressed, show random numbers at 100 microseconds intervals.
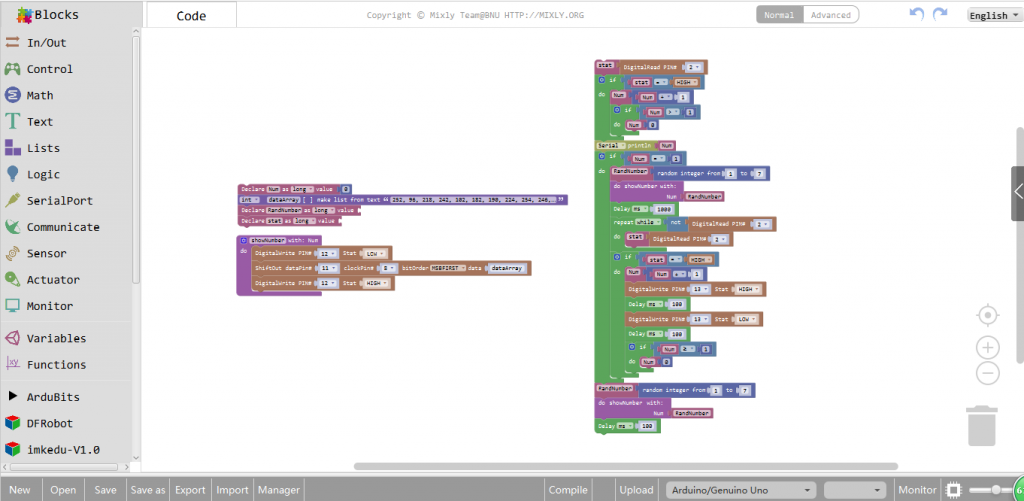
Click Save aftogramming is done. Select the board type and serial port before uploading. For instause a Uno board, just select Arduino/Genuino Uno: if you use a Mega2560, select Arduino/Genuino Mega or Mega2560. 
Select the serial device of the Arduino board from the COM menu. This is likely to be COM3 or higher (COM1 and COM2 are usually reserved for hardware serial ports). To find out, you can disconnect your Arduino board and re-open the menu; the entry that disappears should be the Arduino board. Reconnect the board and select that serial port.

Next,upload the code. If the uploading fails, check and correct the code according to the prompts.


Finally, the staus will change to ‘Upload success!’.

Running Result
A few seconds after the upload finishes, you should now see the 7-segment display jump between numbers from 1 to 6. Press the button, and the jumping will slow down until it stops three seconds later. Press the button again, and the process will repeat.


