Objective:
In this lesson, we will show you how to use OSOYOO wifi shield to exchange data between Arduino and Raspberry Pi through UDP protocol.
We will use our V2 Robot for Arduino+OSOYOO ESP8266 WIFI Shield to send UDP control signal to remote Raspberry Pi Robot and control its movement.
Parts and Accessories:
1)OSOYOO Robot Car V2.0 for Arduino (purchase link: https://osoyoo.com/2018/12/21/osoyoo-robot-car-kit-tutorial-introduction/)
2)OSOYOO Raspberry Pi Robot Car (https://osoyoo.com/2018/05/15/raspberry-pi-robot-car-diy-learning-kit/)
Circuit Connection diagram:
Arduino to WifiShield
| Arduino |
WifiShield |
| A0 |
E_TX |
| A1 |
R_TX |
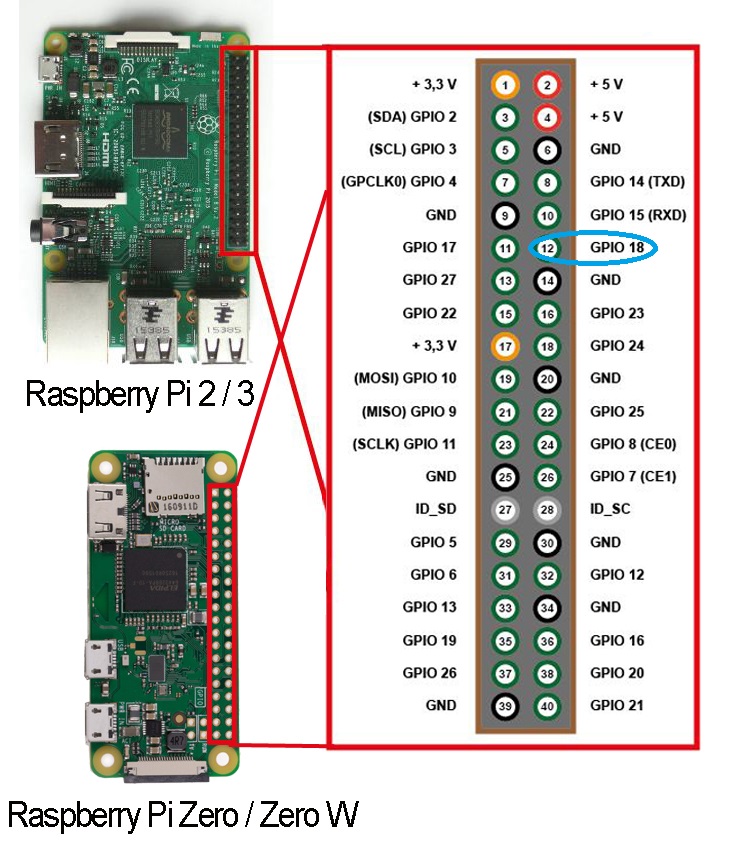
Raspberry Pi to Model X
| Raspberry Pi |
Model X |
| Pin 11(GPIO 17) |
IN1 |
| Pin 12(GPIO 18) |
IN2 |
| Pin 13(GPIO 27) |
IN3 |
| Pin 15(GPIO 22) |
IN4 |
| Pin 2(5V) |
ENA |
| Pin 4(5V) |
ENB |
GPIO pin map:
Software Installation:
Step A. Install Raspberry Pi Software:
Open Raspberry Pi terminal and run following command to download and run the udpreceive.py python file.
wget http://osoyoo.com/driver/arduino-udp/udpreceive.py
python udpreceive.py
After running the python code, you will see IP address of your raspberry pi as follows:
(‘My Raspberry Pi LAN ip is ‘, ‘192.168.0.22’)
remember this IP address, we need use it to replace
Step B. Software:
1)If you don’t have WifiEsp-master library, please download WiFiEsp-master library from following link:
https://osoyoo.com/driver/WiFiEsp-master.zip. If you have installed this library, please skip this step.
2)Download Arduino sketch file UdpSend.ino from https://osoyoo.com/driver/arduino-udp/UdpSend.ino
Open above file with Arduino IDE, replace line 16 with your wifi SSID, line 17 with your WIFI password and Line 20 with your raspberry pi IP address which showed in Step A.
Running the car
1)Disconnect your car from wired power. Put your Raspberry Pi robot car on the ground, turn on the battery , then use Windows Putty or MacBook ssh command to connect pi’s IP address. Type following command again to start the updreceive.py program:
python updreceive.py
2)Load your UdpSend.ino sketch code to Arduino, then open Serial Monitor
then in the text field, type following 5 letters to control Robot Movement
A : make car move forward
B : make car move backward
L : make car left turn
R : make car right turn
E ; end the Udp conversation with pi


