Authorized Online Retailers
SKU:2020005200(with mainboard)
| Buy from US |
Buy from UK |
Buy from DE |
Buy from IT |
Buy from FR |
Buy from ES |
ここでご購入を! |
|
|
|
|
|
|
 |
2020005300 (without mainboard)
| Buy from US |
Buy from UK |
Buy from DE |
Buy from IT |
Buy from FR |
Buy from ES |
ここでご購入を! |
|
|
|
|
|
|
|
This tutorial and most of OSOYOO’s content about BBC micro:bit will use MakeCode by Microsoft as programming development environment.

Step 1. Using your web browser, go to https://www.microsoft.com/en-us/makecode to open the MakeCode landing page.
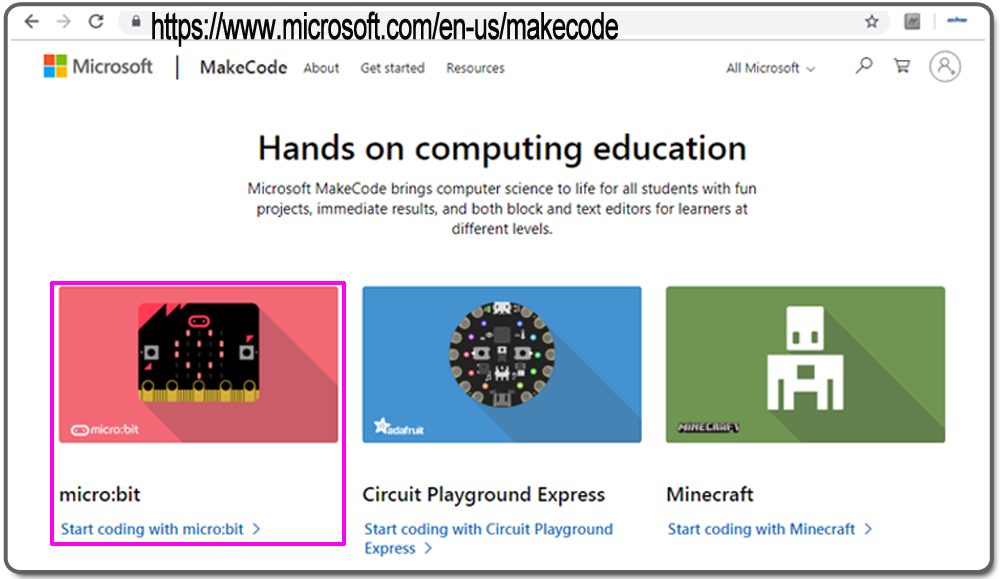
Step 2. Click “micro:bit” icon to MakeCode landing page.
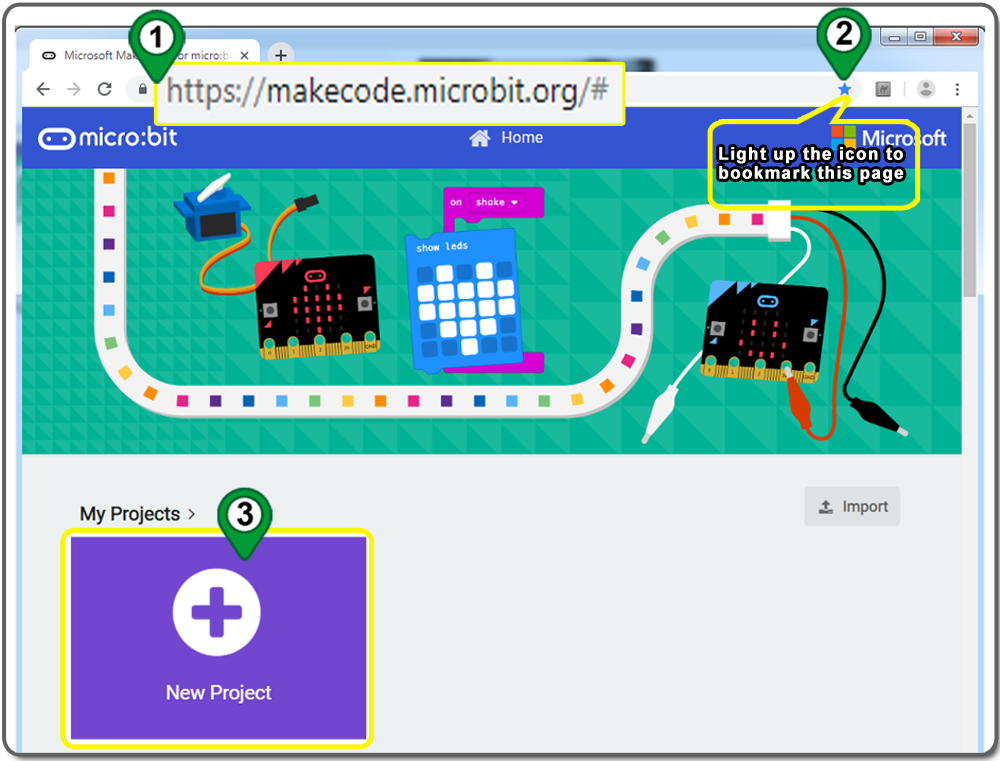
you can also skip the step 1/2, and go directly to MakeCode page by typing following link https://makecode.microbit.org in browser.
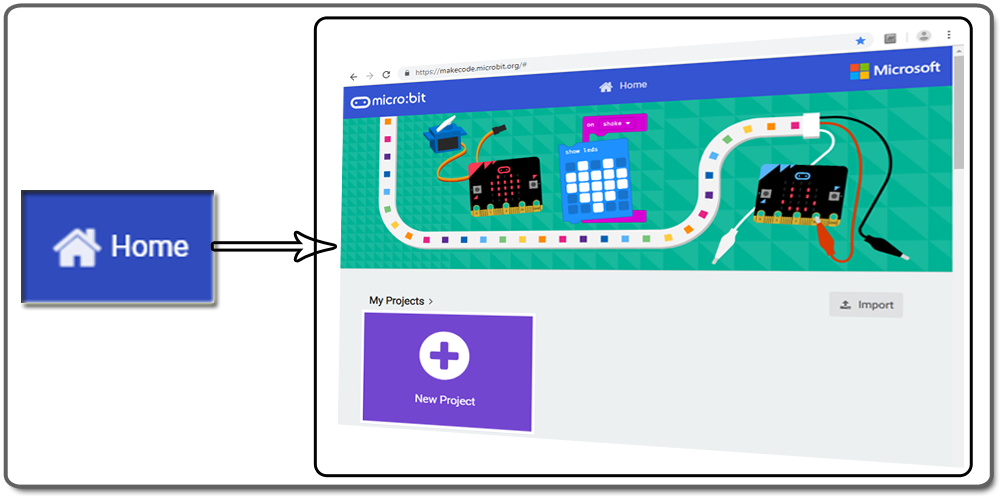
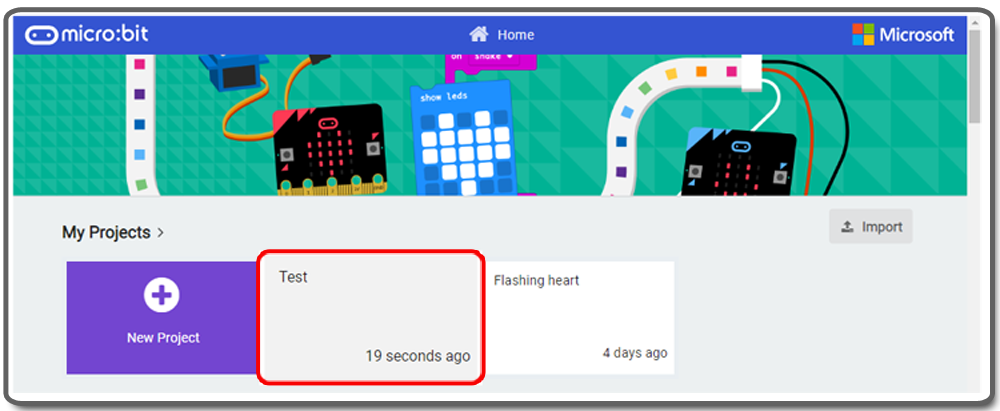
In the MakeCode home page My Projects section, click on “New Project” to create new project. and click previous project to edit existing project.
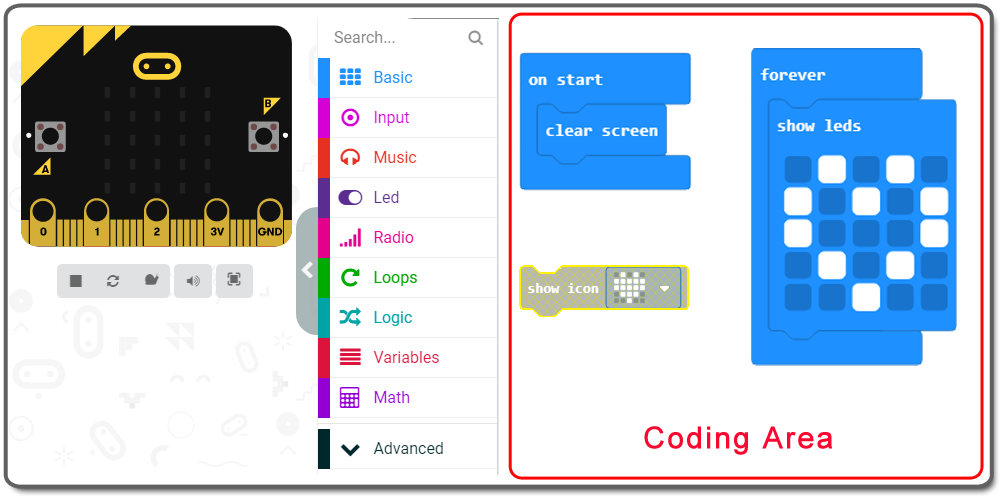
Step 3. The MakeCode editor for micro:bit will start on your browser.
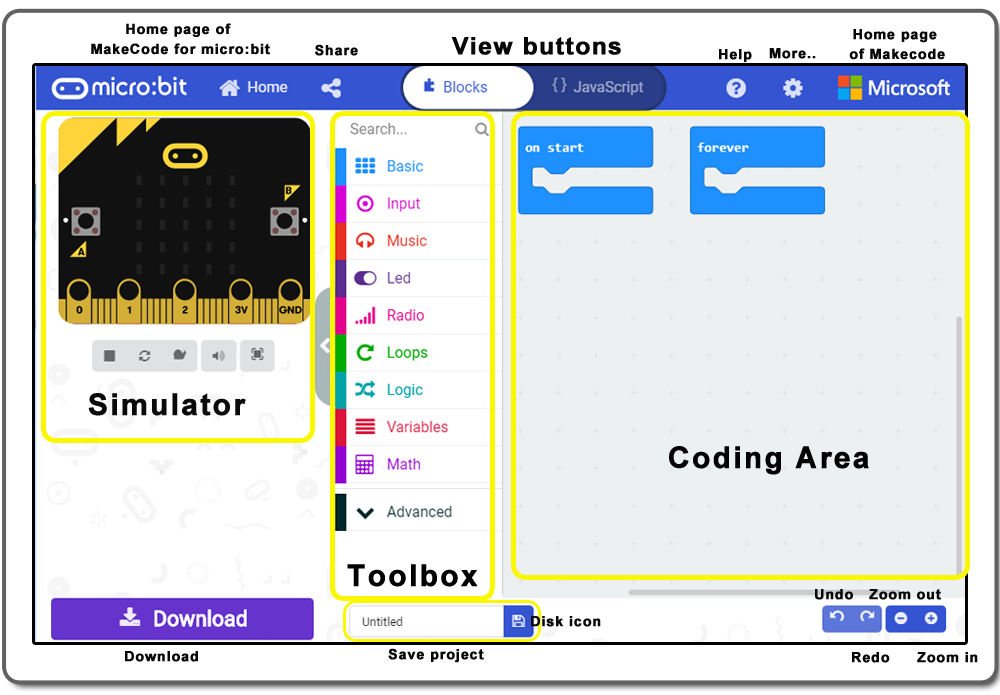
Simulator – Provides the output without the real hardware while you are building the code.
Toolbox – Provides blocks in categories. It also allows you to search extensions(ready-made program modules) and add more extensions to the toolbox.
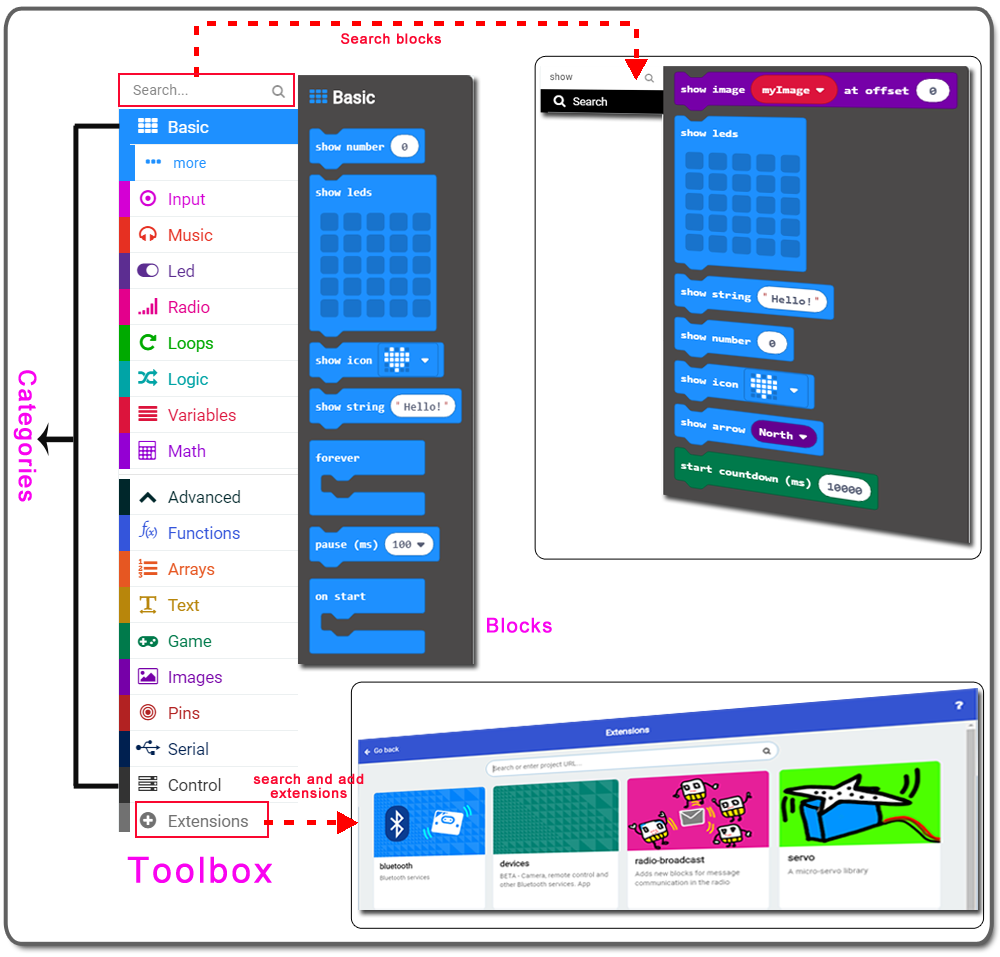
Coding Area – The area you use to design your program logic through Blocks (graphic programming) or JavaScript coding.
Home – Takes you to the home screen (https://makecode.microbit.org/), which shows recent projects and other activities
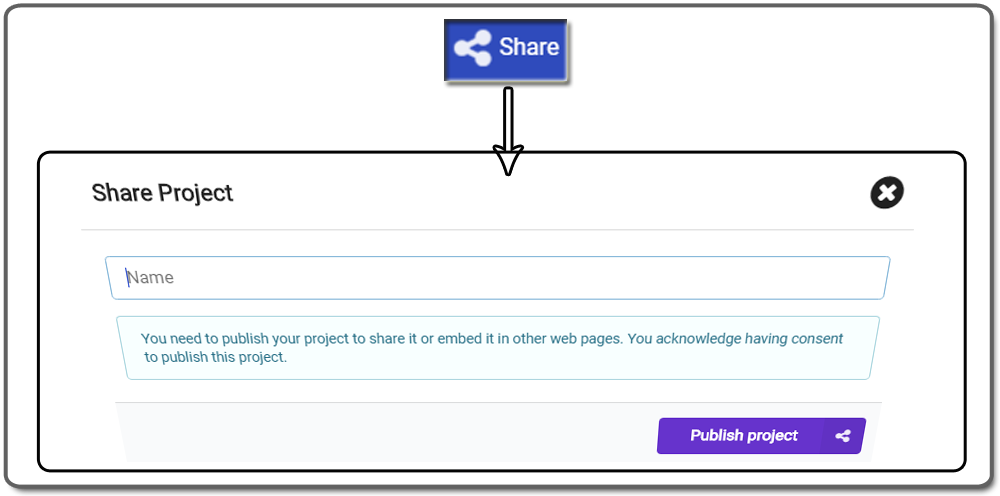
Share – Displays the Share Project window that lets you publish your project to the public cloud and embed your project into a web page with different options.
Blocks and JavaScript button- Allows you to switch the code view between Blocks and JavaScript. Press one of the view buttons at the top to switch the programming method.

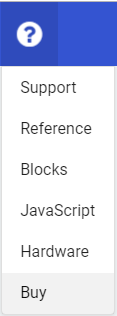
Help – Shows a menu with help options such as support, reference, blocks, JavaScript, hardware, and where to buy
More… (Gear wheel) – Allows you to access project settings, adding extensions, deleting the current project, deleting all the projects, choosing a language, and pairing micro:bit for one-click download.

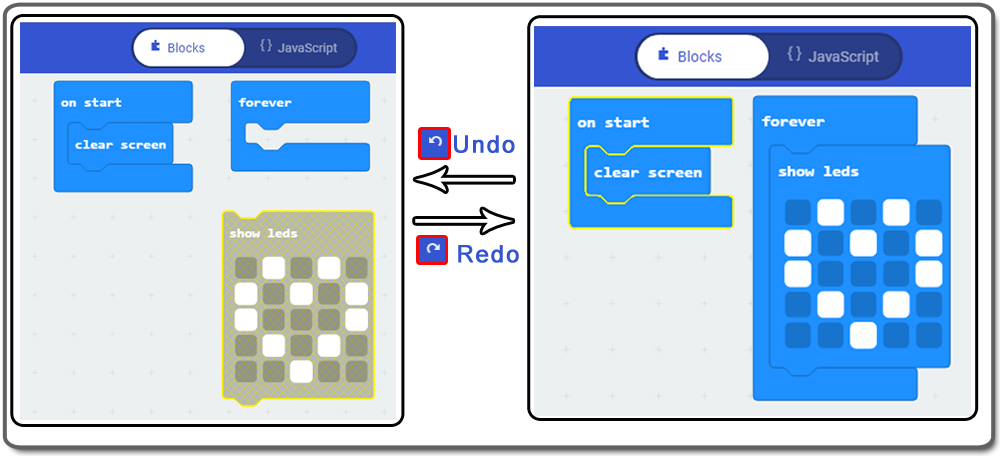
Undo and Redo – Allows you to undo and redo recent changes you make either in Blocks or JavaScript with the Undo and Redo buttons in the bottom right of the editor window.
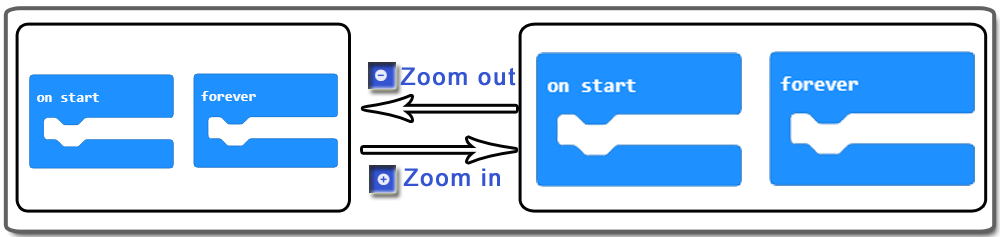
Zoom In and Zoom Out – The zoom buttons change the size of the blocks when you’re working in the Blocks view. When you’re working with the code in the JavaScript view, the zoom buttons change the size of the text.
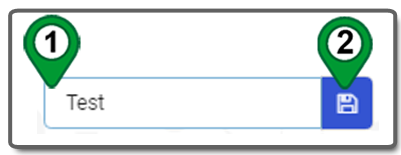
Save Project – You can type a name for your project and save it. Type in a name for the project in the text box, and press the disk icon to save.

Download – The Download button will copy your program to a drive on your computer.
Show/Hide the simulator – The Show/Hide the simulator button can be used to show or hide the simulator.


a) in the project name box, type in a name for your project and click on the Disk icon. The new name of the project is updated in your browser’s local cache. At the same time, a hex file will be downloaded to your computer.
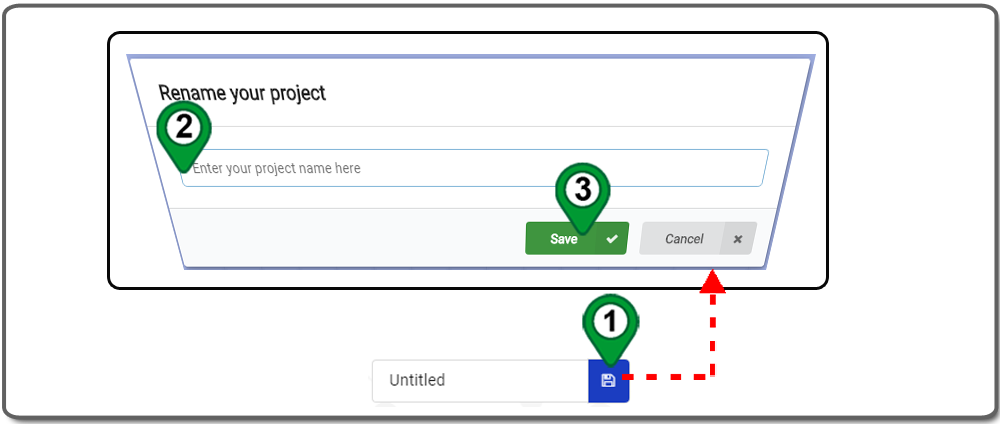
b) If you click on the Disk icon without providing a new name for the project (with the default file name, Untitled), the Rename your project modal box (window) will pop up, type in a name for the project, and click on the Save button. The project will save under the new file name, and a hex file will be downloaded to your computer
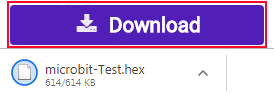
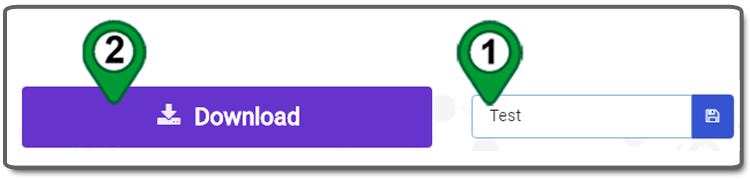
c) Click on the Download button in the bottom of the page. A hex file will be downloaded to your computer.

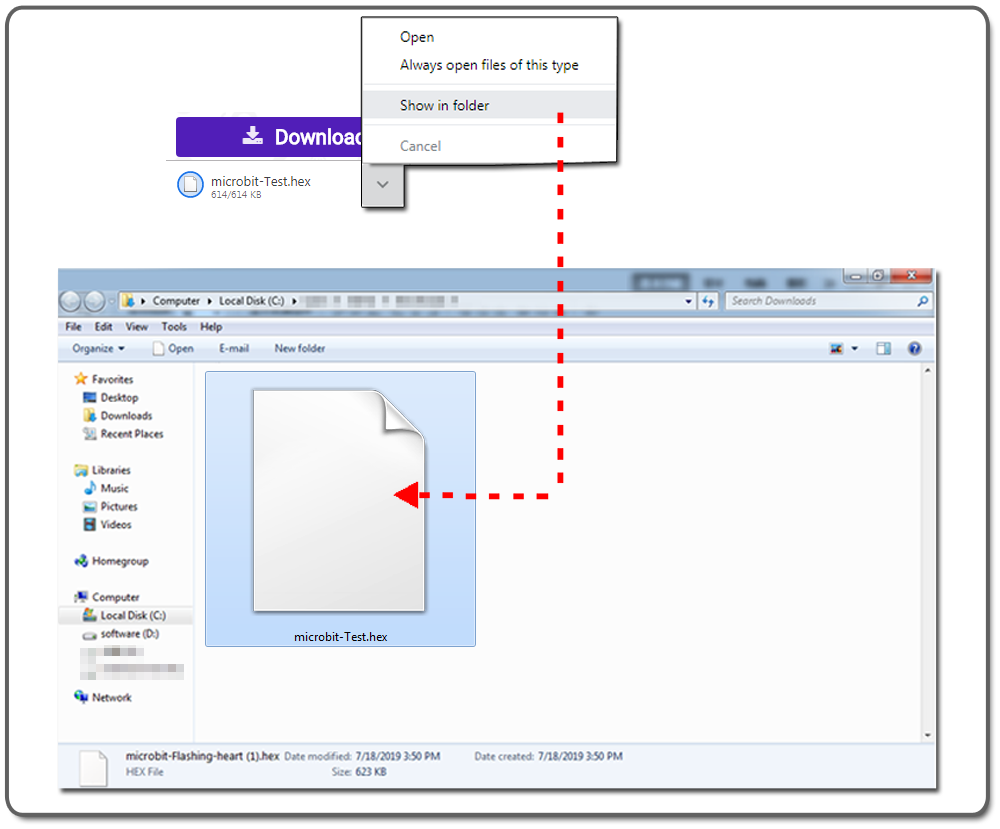
For chrome browser users, you can see a little windows at the bottom of browser, you can see a .hex file when click “Show in folder”. If you use other browser, please open this file’s folder according to the download directory of your browser.
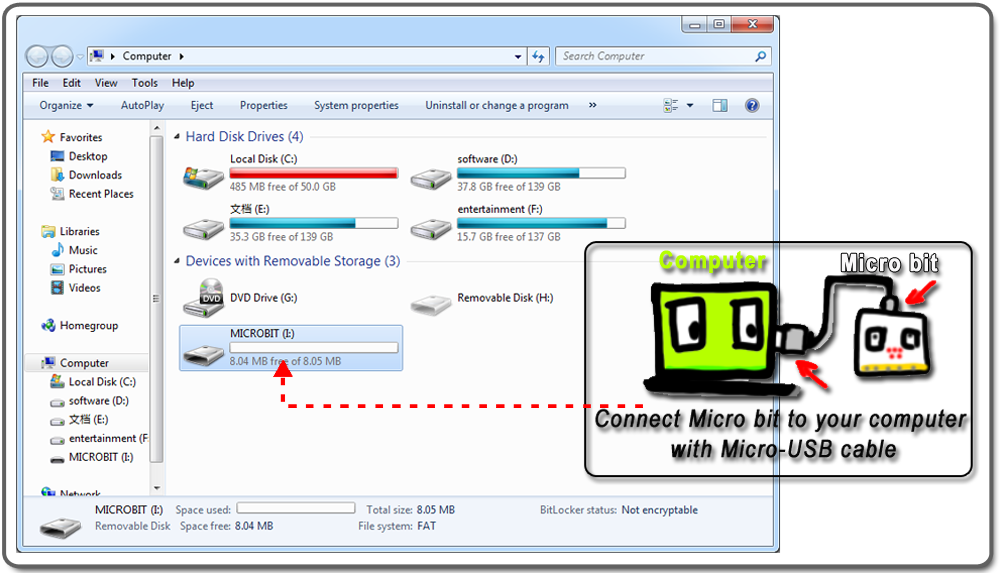
Connect the micro:bit to your computer using a micro USB cable (use the micro USB port on the top of the micro:bit)
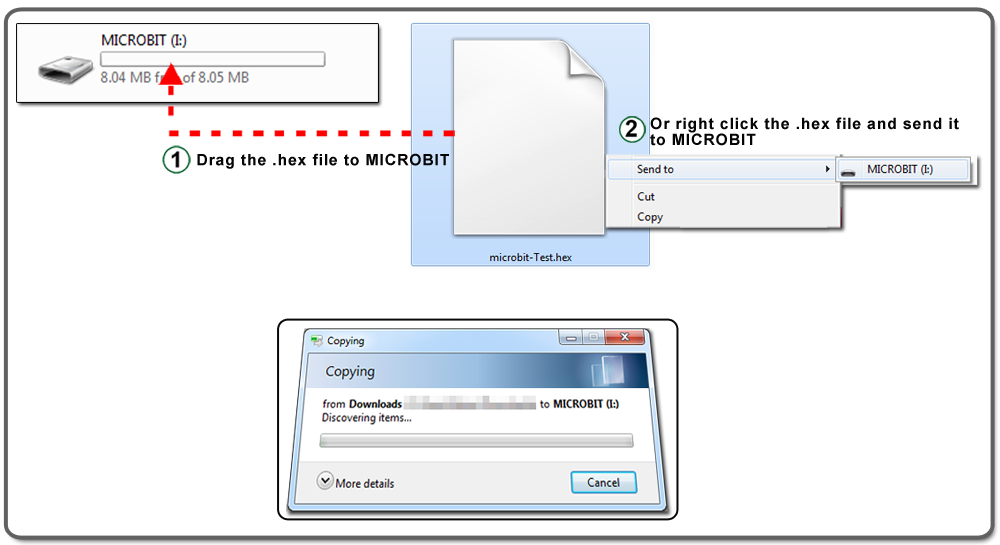
Copying a hex file to the micro:bit drive

Go to MakeCode home page and choose the project you want to delete.
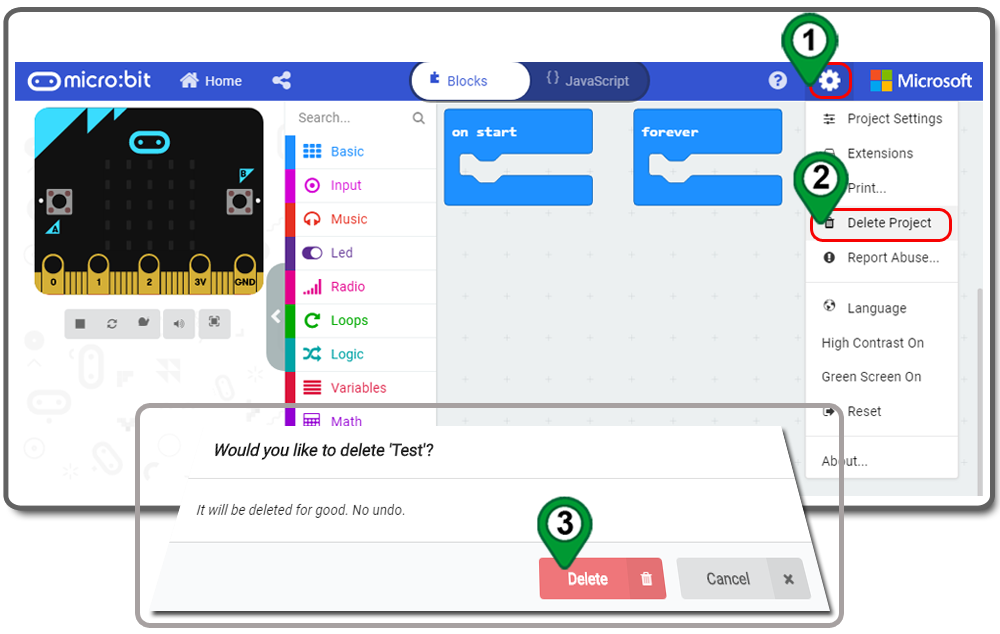
In the Editor controls, click on the More… button. In the drop-down menu, click Delete Project. In the delete confirmation modal box (window), click on the Delete button

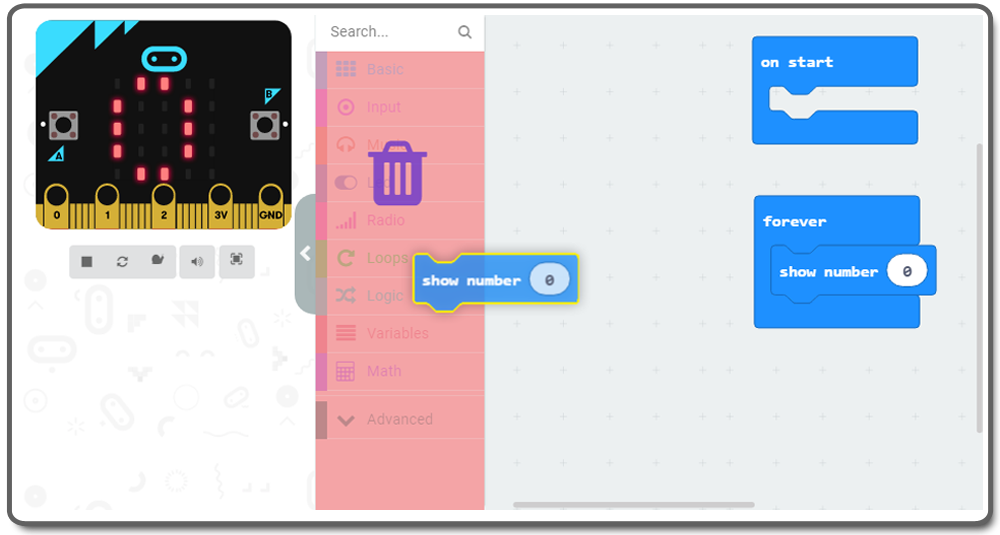
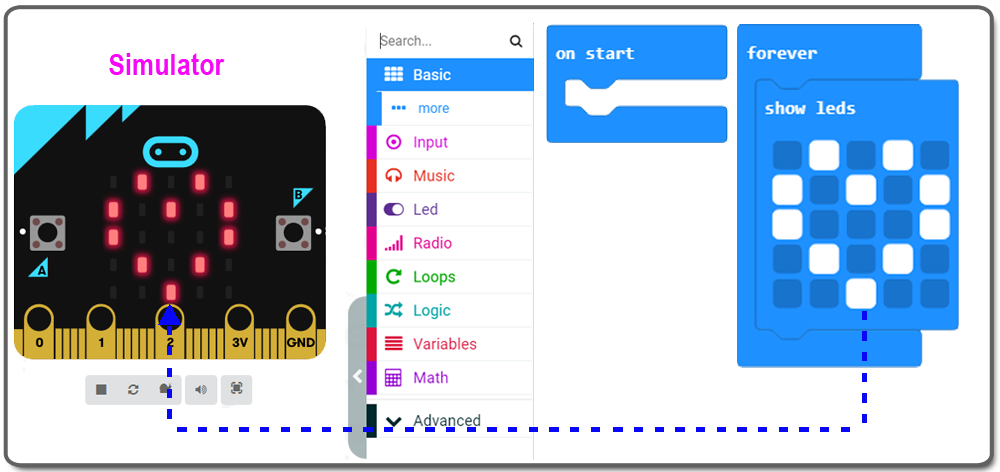
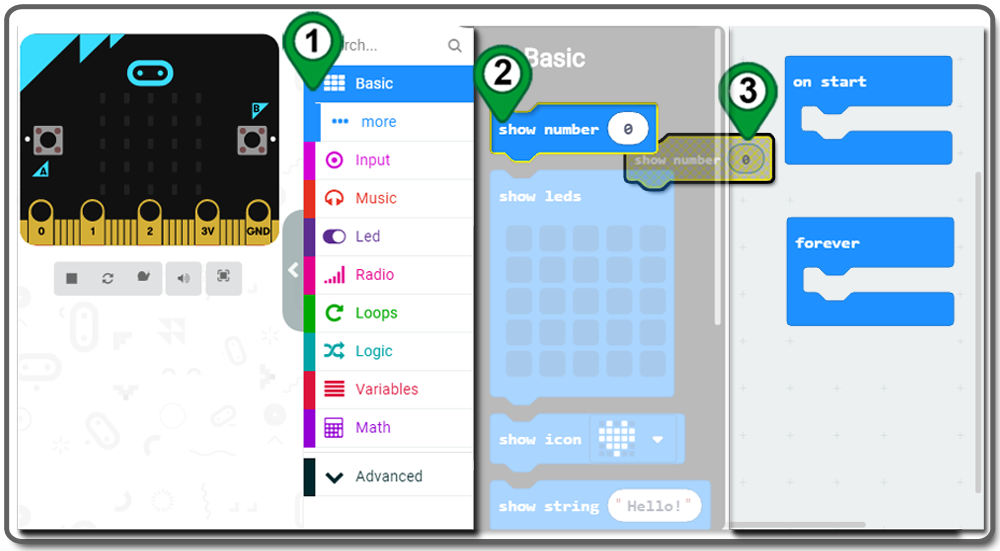
In the Toolbox, click on any Category and from the sub-menu, click on the block you want to place on the coding area
you can also drag and drop a block onto the coding area.
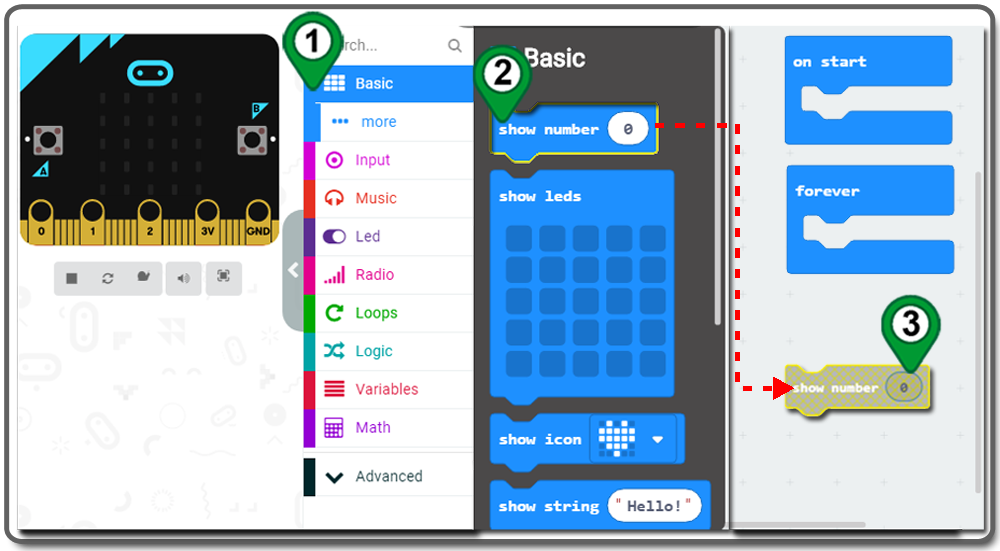
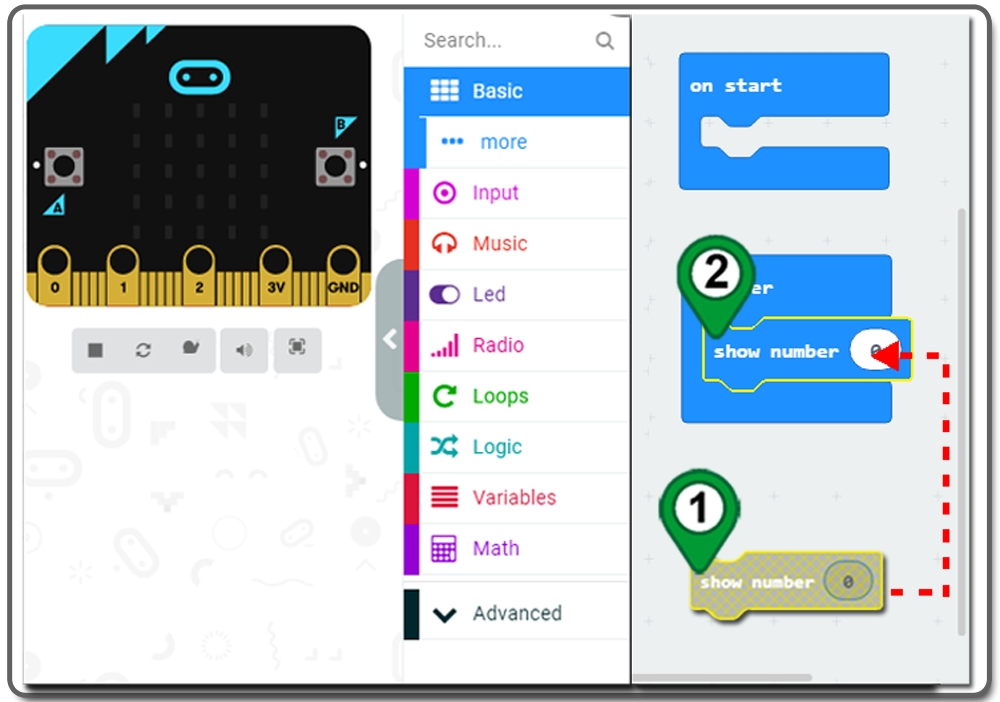
After placing the block, you can further move it to any place on the coding area by dragging and dropping

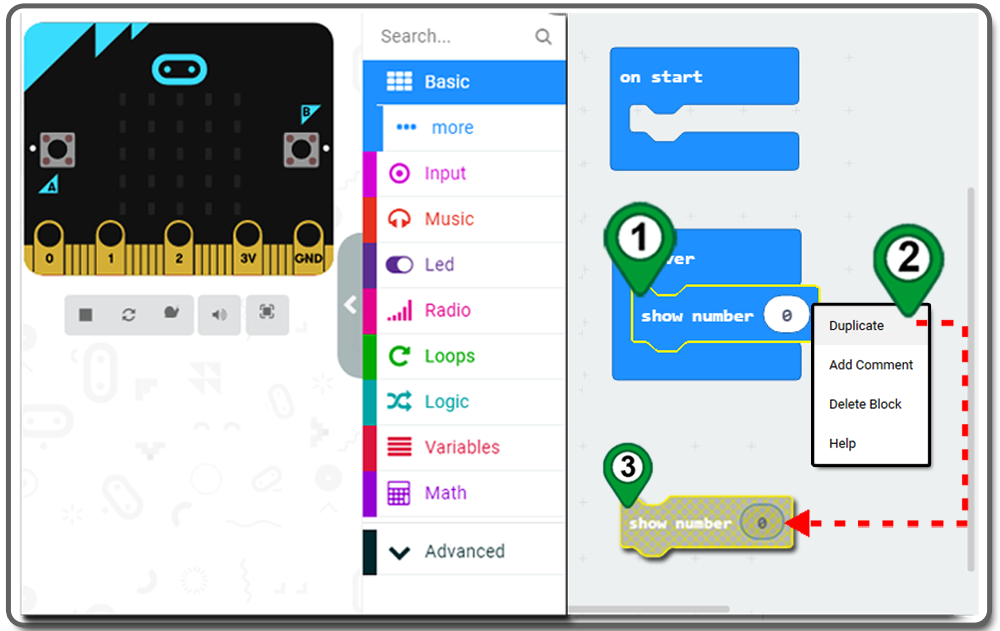
In the coding area, right-click on the block you want to duplicate. Click Duplicate from the shortcut menu. You will get a duplicated block

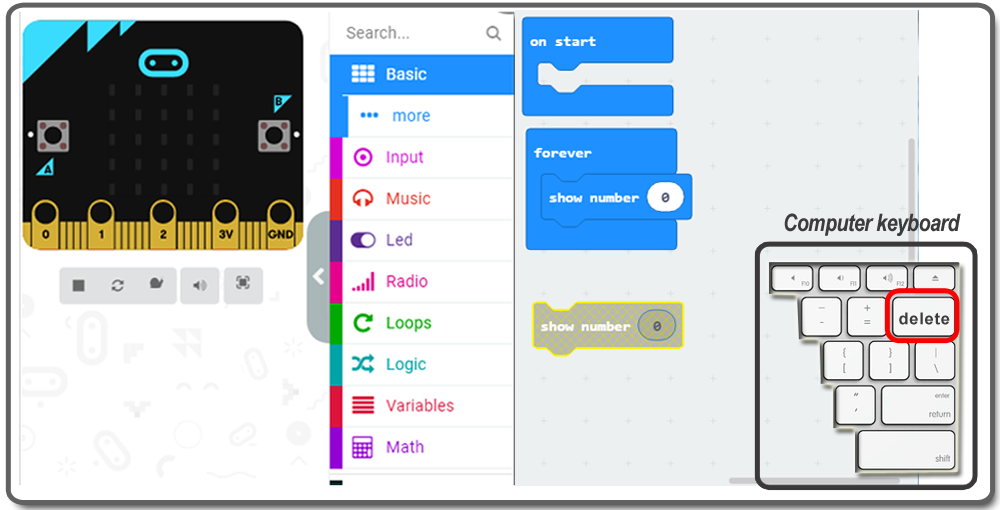
In the coding area, click on the block you want to delete and from the keyboard, press the DELETE key.
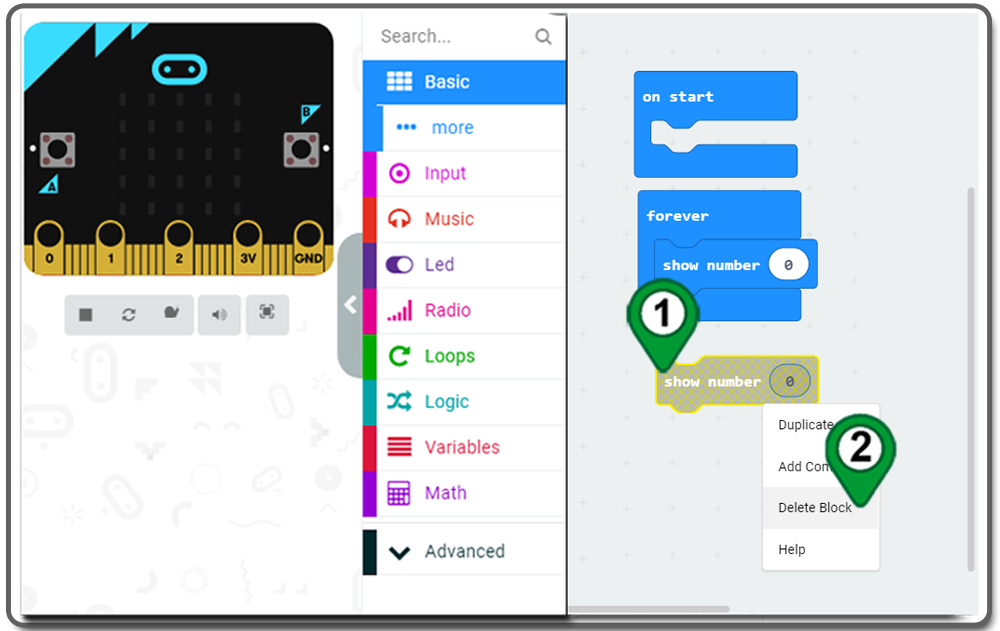
In the coding area, right-click on the block you want to delete. Then, click Delete Block from the shortcut menu
Drag and drop the block into the Toolbox