


| Buy from US |
Buy from UK |
Buy from DE |
Buy from IT |
Buy from FR |
Buy from ES |
Buy from JP |
 |
 |
 |
 |
 |
 |
 |

In this lesson, we will learn how to use button to control a Passive Buzzer.


The buzzer is a small component with a piece of metal in it that moves when you apply a voltage across it. This motion causes a small sound, or “click.”
If you turn the voltage on and off fast enough, you get different beeps, squeals, chirps and buzzes. You will use PWM to control the speed of turning the piezo on and off — and, in turn, the audio frequency coming out of the buzzer. Adjusting the PWM enables you to get legitimate notes out of the buzzer.
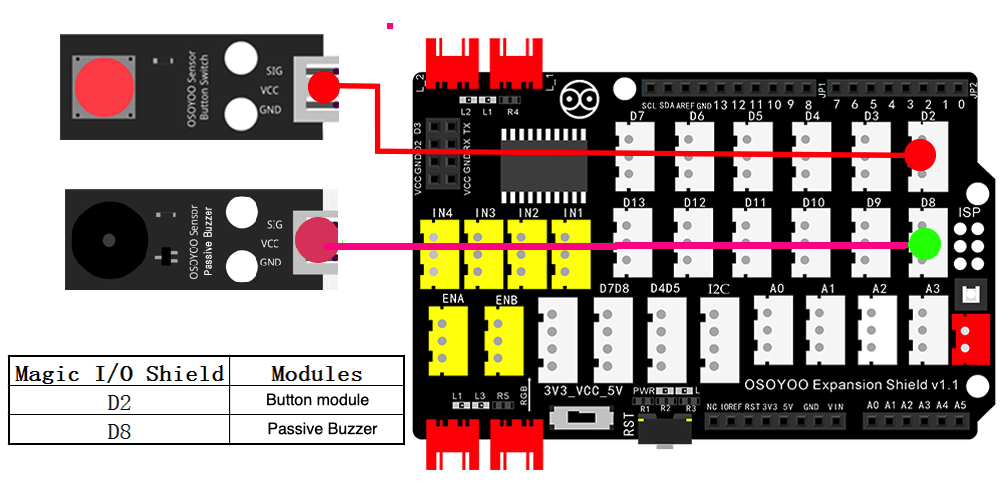
If you flip the buzzer over and look at the bottom, you will see that one pin has a (+) next to it. That pin gets connected to a signal from the P0 pin. The other pin should be connected to ground.

- OSOYOO UNO Board (Fully compatible with Arduino UNO rev.3) x 1
- OSOYOO Magic I/O Shield for Arduino x1
- OSOYOO Passive Buzzer module x 1
- OSOYOO Button switch Module x 1
- OSOYOO 3-Pin PNP Cable x 2
- USB Cable x 1
- PC x 1

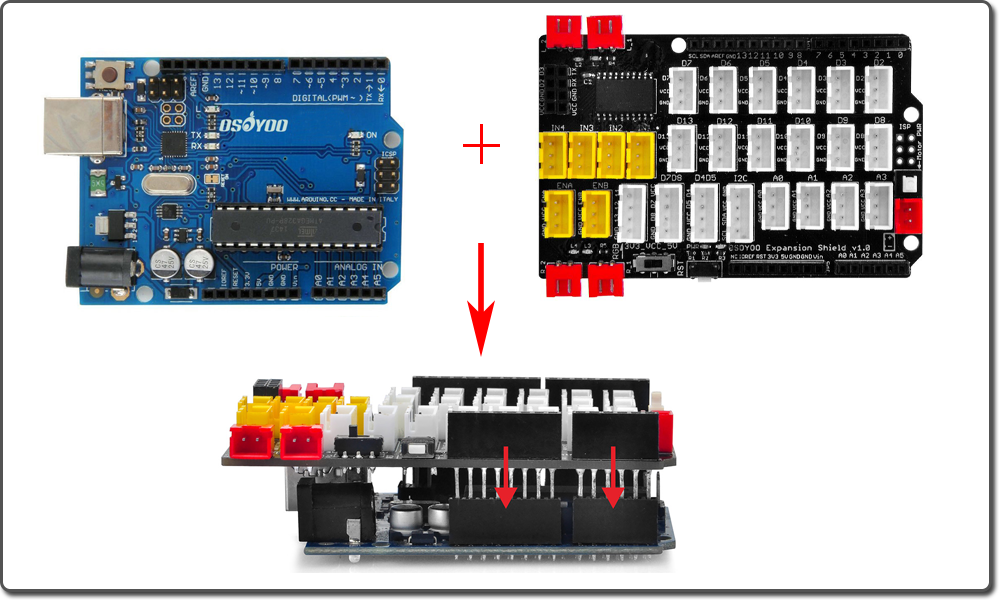
Firstly, please plug Osoyoo Magic I/O shield into UNO board as following:

Step 1) If you haven’t install mBlock software in your PC, please read Lesson 1, download and install the software.
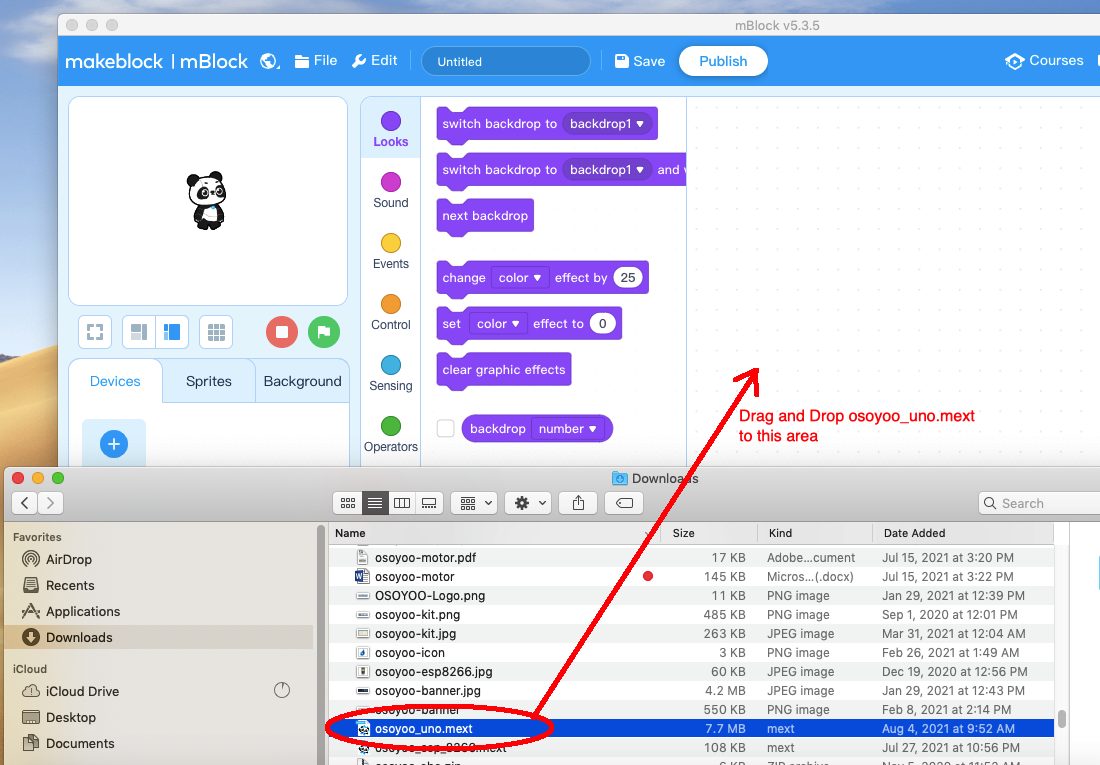
Step 2) Run the mBlock PC software by double click the lovely Panda icon. Drag and Drop osoyoo_uno_mext file(downloaded in Step 1) to mBlock software as following:
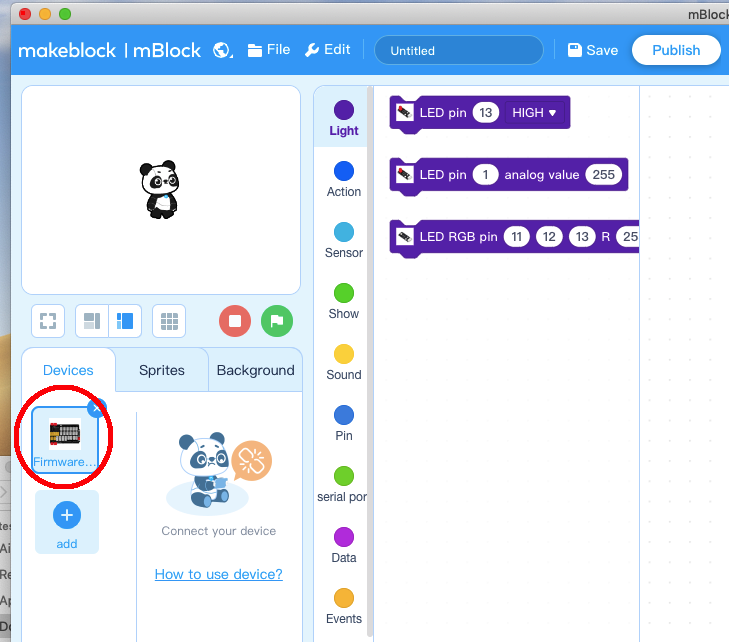
Now you will see a new device firmware in mBlock, see following picture:
Now mBlock software and OSOYOO_UNO device firmware have been successfully installed in our PC!
Now we will show you how to use blocks to turn above idea into reality.
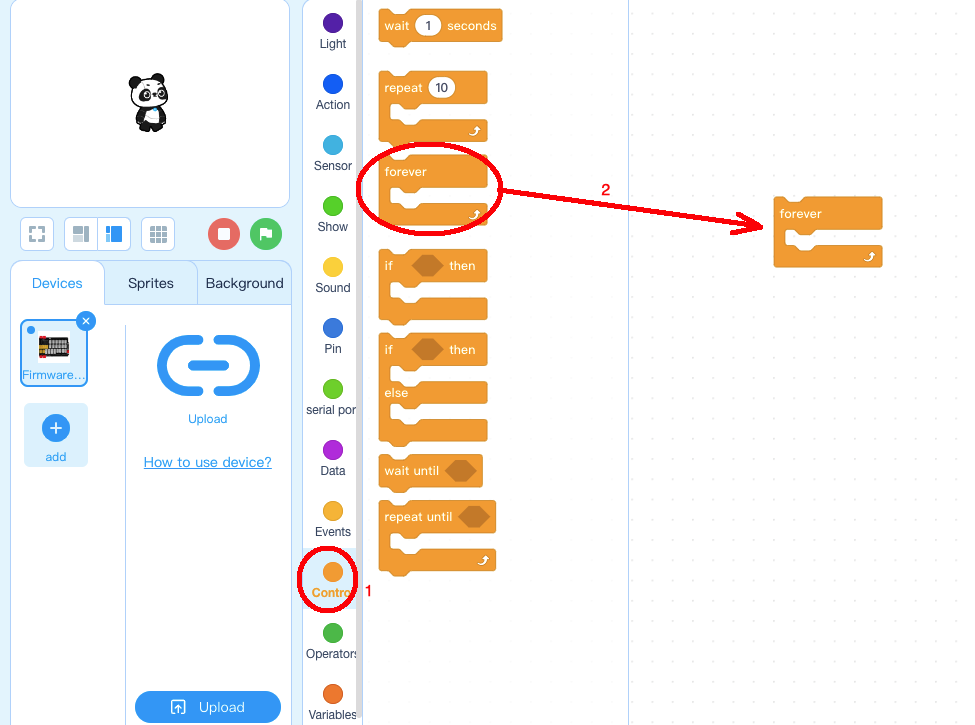
Step 1: Click Control, then Drag and drop Forever block to programming area as following:
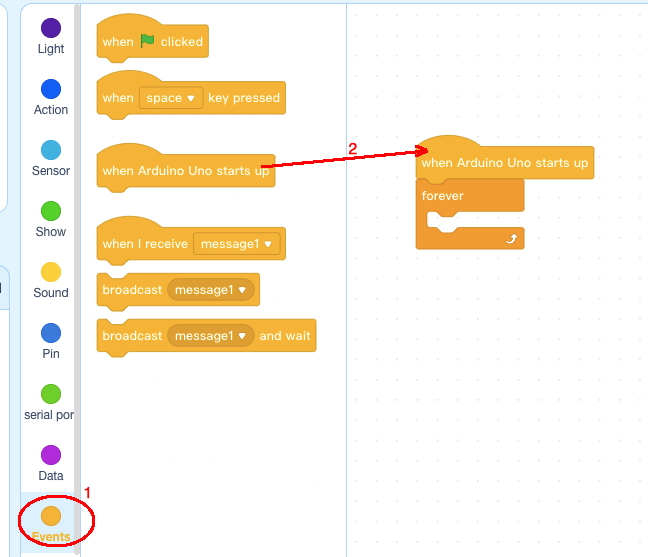
Step 2: Click Events, add when Arduino Uno starts up block to the top:
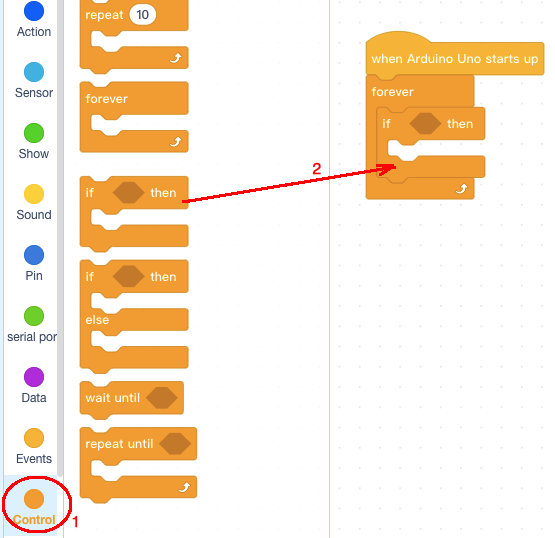
Step 3: Click Control, add if then block inside forever block:
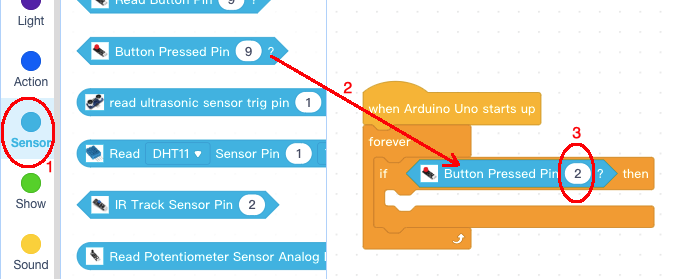
Step 4: Click Sensor, add Button Pressed block inside if condition area , then change button pin to No.2:
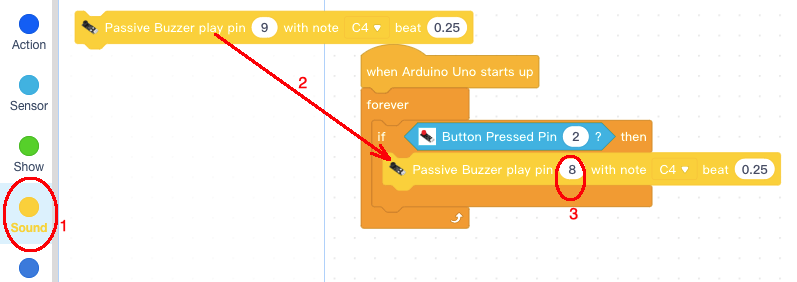
Step 5: Click Sound category, add Passive Buzzer block inside if then block block, change buzzer pin to No. 8:
Now we have complete the block programming. We can upload the program to Arduino.
Upload the program to Arduino
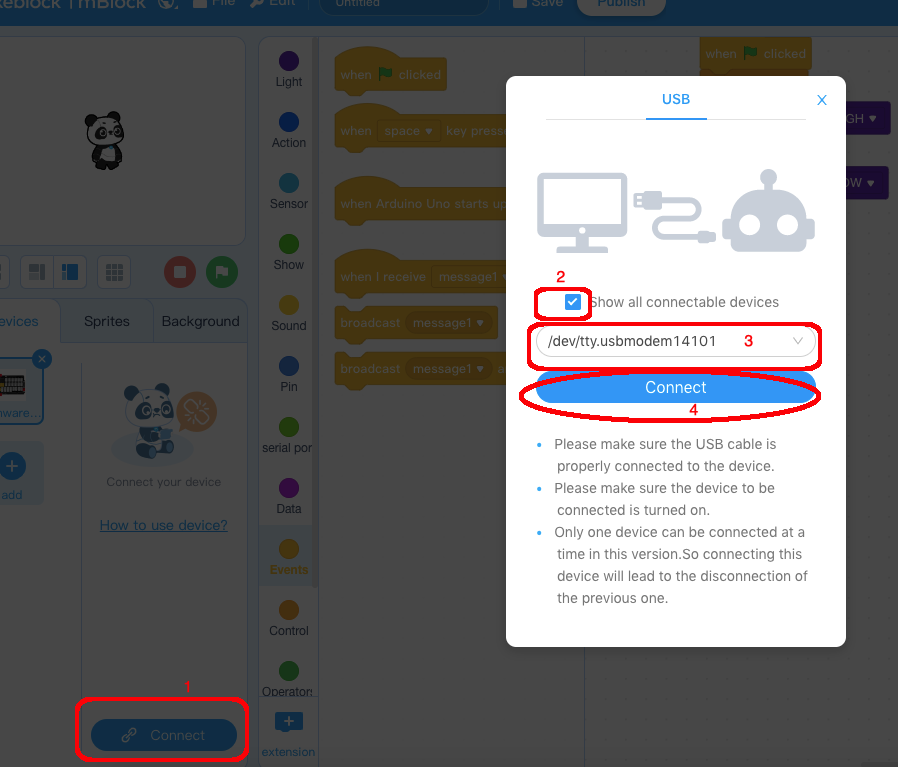
1)you need click the Connect button in the bottom of the mBlock software, you will see a USB window pop up,
2) select Show all connectable device check box , then a device drop-down menu will show up,
3) select your Arduino port from device drop-down menu
4) click Connect button to connect your PC to Arduino
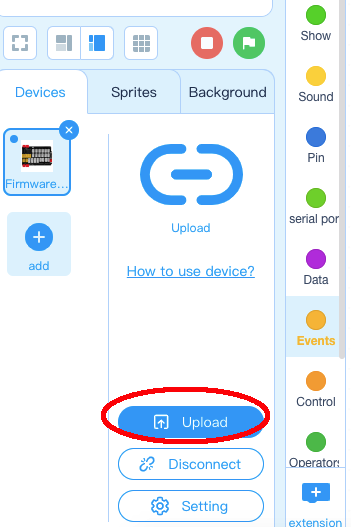
5)After you PC is connected to Arduino UNO board, please click Upload button in the bottom of your software, then the code will be uploaded to Arduino UNO board:
Test the program:
When you press the button, the Buzzer will beep, When you release button, the buzzer will stop beeping.


