Note: ALL OSOYOO Products for Arduino are Third Party Board which is fully compatitable with Arduino
Content
- Introduction
- Preparations
- About the Tilt Sensor Module
- Examples
- Connection
- Upload Sketch
- Program Running Result
Introduction
The tilt sensor module is equipped with a tilt sensor and a potentiometer. You may attach it to any object and it will determine whether the object is tilted or not. In this lesson, we will learn how a tilt sensor module works and how to use it with the Board for sensing tilt angle or movement.
Preparations
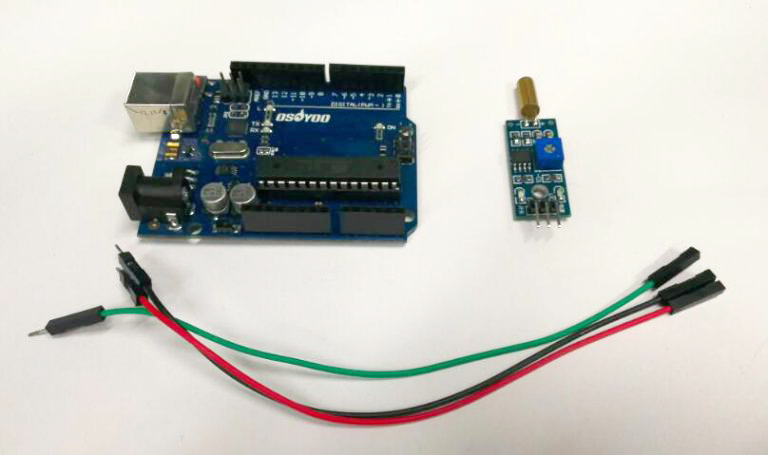
Hardware
- Osoyoo Basic Board (Fully compatible with Arduino UNO rev.3) x 1
- Tilt Sensor Module x 1
- Jumpers
- USB Cable x 1
- PC x 1
Software
- Arduino IDE (version 1.6.4+)
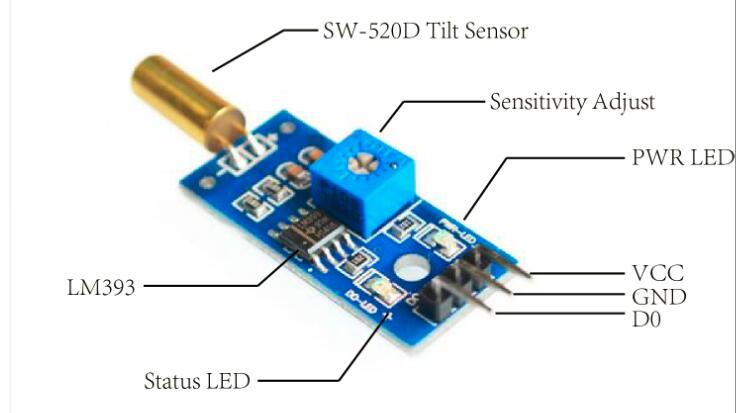
About Tilt Sensor Module
Tilt sensors are essential components in security alarm systems today. Standalone tilt sensors sense tilt angle or movement. Tilt sensors can be implemented using mercury and roller ball technology, and can be mounted using mechanical threading, magnets, or adhesives, depending on what type of surface they are being mounted to.
Feature
- The use of highly sensitive angle switch SW-520D as a sensor
- The comparator output signal clean, good waveform, driving ability, than 15mA
- The working voltage 5V
- The output format: Digital switching output (0 and 1)
- A fixed bolt hole for easy installation
- Small PCB board size: 3.2cm x 1.4cm
- Using a wide voltage comparator LM393
Recent technological advancements in the manufacturing of tilt sensors have improved accuracy, reduced cost, and increased lifetime. The type SW-520D is a commonly available roller-ball type tilt sensor consists of two conductive elements (poles) and a conductive free mass (rolling ball), encapsulated in the same case. When the tilt sensor is oriented so that that end is downwards, the mass rolls onto the poles and shorts them, acting as a switch stroke. Microcontroller-compatible tilt sensor modules based on SW-520D are also available at affordable costs.
Electronics circuitry behind this tiny module is usually centered around the dual- comparator chip LM393. The module features a tilt sensor, a signal amplifier, a standard 4-pin header, a power indicator that signals that the module is correctly powered, and a status indicator that lights up when a tilt is detected by the tilt sensor.
This module will output logic LOW when the sensor is tilted below the threshold angle; logic HIGH when it is tilted above the threshold angle. The threshold angle ranges from 45 degree to 130 degree. Aside from threshold angle, angular velocity also affect the tilt module. It can also be used as a vibration sensor!
Examples
Tilt Switch
In this example, we will use a tilt switch module and an on-board LED that has been attached to pin 13 of the Osoyoo board to build a simple circuit. Then the tilt switch outputs low signals and the LED will be on. Otherwise it will be off.
Connection
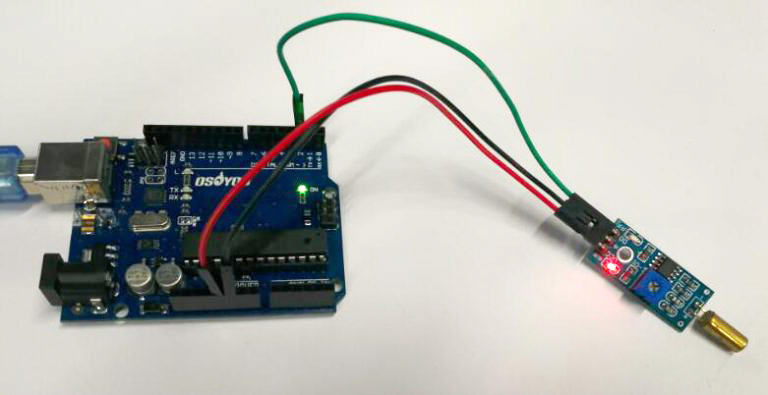
Build the circuit as below:
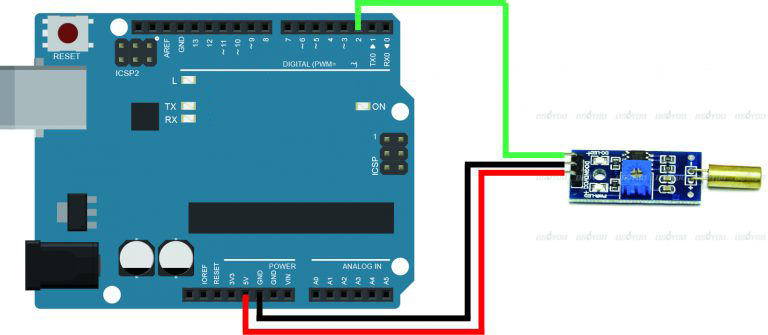
The tilt sensor module can be connected to arduin using suitable jumper wires. First of all connect the power supply lines; VCC and GND of the module to 5V and GND of the Arduino respectively. Next link the digital output (DO) of the module to digital pin 2 (D2). The whole hardware should be powered by a 9V DC / USB source through the DC IN /USB socket of the Arduin board. Keep the tilt switch position in upright position.
Code Program
After above operations are completed, connect the board to your computer using the USB cable. The green power LED (labelled PWR) should go on.Open the Arduino IDE and choose corresponding board type and port type for you project. Then load up the following sketch onto your Arduin.
const int sigPin = 2; // the number of the tilt switch pin
const int ledPin = 13; // the number of the LED pin
// variables will change:
boolean sigState = 0; // variable for reading the tilt switch status
void setup()
{
  // initialize the LED pin as an output:
  pinMode(ledPin, OUTPUT);
  // initialize the tilt switch pin as an input:
  pinMode(sigPin, INPUT);
}
void loop()
{
  // read the state of the tilt switch value:
  sigState = digitalRead(sigPin);
  if (sigState == HIGH)
  {
    // turn LED on:
    digitalWrite(ledPin, LOW);
  }
  else
  {
    // turn LED off:
    digitalWrite(ledPin, HIGH);
  }
}
Running Result
A few seconds after the upload finishes, tilt the switch, When it tilts towards either side, as long as the tilt degree and force meet the condition, the switch will be energized; thus, it will output low level signals, Then the tilt switch outputs low signals and the LED will be on. Otherwise it will be off.