Hack your headphones
Build your own micro:bit music player using headphones.
Duration: ~15 minutes.
Materials
- micro:bit, battery holder and 2 AAA batteries
- Headphones
- Crocodile clips
No crocodile clips!?!?! Use wires or aluminium foil!
Activities
Did you know you could attach your headhpones to the micro:bit to generate sounds?
Step 1

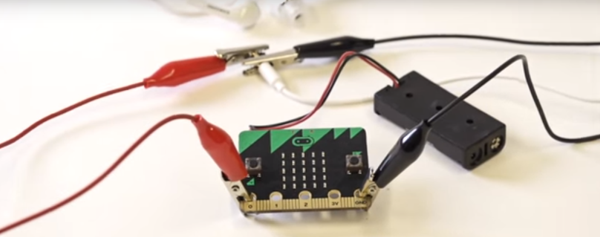
Using the 1st crocodile clip, connect the end of the crocodile clip onto GND pin on the micro:bit.
Step 2

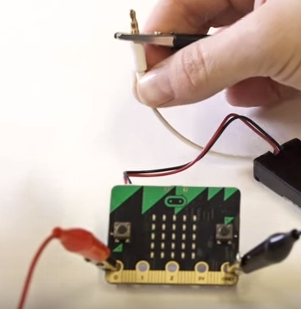
Using the 2nd crocodile clip, connect the end of the crocodile clip onto the 0 pin on the micro:bit.
Step 3
Using the 1st crocodile clip, connect the second end of the crocodile clip onto based of the headphone jack. The base of your headphone jack is considered the ground so it is connected to the GND of the micro:bit.
Step 4
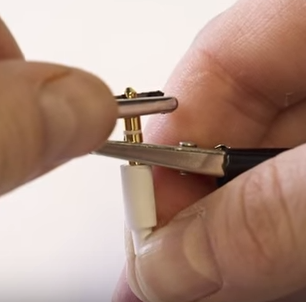

Using the 2nd crocodile clip, connect the second end of the crocodile clip onto the tip of the headphone jack. The tip of your headphone jack feeds into the right speaker on the headphone. You connect from the micro:bit pin 0 to the tip of the right side of your headphone. Use the tip of the headphone jack to play sounds.
Step 5
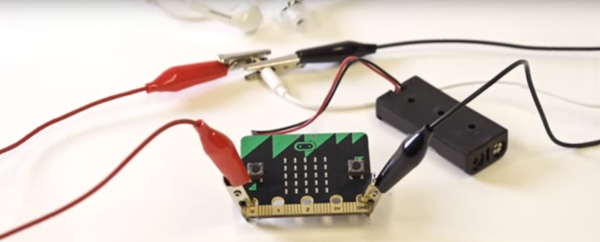
You hacked your headphones!
Code
Have you ever tried to making beat box sounds based on the light level? Let’s try making a beatbox with code!
Let’s start by adding a variable where you can store data. Then rename the variable to “light”. Then set the value of the variable to the block light level from the Input drawer. This will gets the light level from 0 (dark) to 255 (bright). The light is measured by using various LEDs from the screen. Modify your code so that your code looks like this.

Link: https://makecode.microbit.org/_C656hCHCwAiF
We want to play music on button pressed in order to register an event handler that will execute whenever when you run a script and click on button pressed on the simulator. We must start by opening the Input drawer and adding on button pressed A. Then add a block rest to plays nothing for a 1/16 beat. Modify your code so that your code looks like this.

Link: https://makecode.microbit.org/_5zP1puK2D5sL
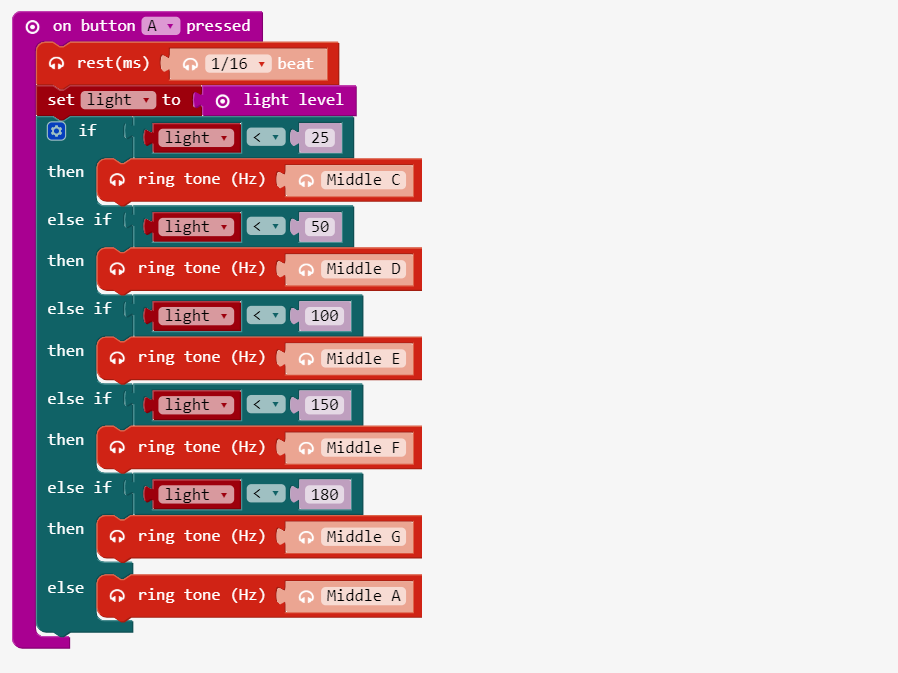
We click on the Logic drawer then insert a if do that will conditionally run code depending on whether the Boolean condition is true or false. Then insert the variable light into the first part of the inequality. The variable “light” will appear in the Variables drawer. Finally, we insert 25. Modify your code so that your code looks like this. If the light level is less than 25, play ring tone C. If this conditions is not true, play ring tone A.

Link: https://makecode.microbit.org/_KbVhzqDssHmc
We click on the Logic drawer then insert a less than sign into the first if conditional that will conditionally run code depending on whether the Boolean condition is true or false. Continue this logic to continue with these conditional statements. Click on the Logic drawer. Then we want to add additional conditional statements by clicking on the gear to the left of the if. Add 05 else if and 01 else inside the if do block structure. If the light level is less than 50, play ring tone D. If the light level is less than 100, play ring tone E. If the light level is less than 150, play ring tone F. If the light level is less than180, play ring tone G. If these conditions are not true, ring tone A.
Link: https://makecode.microbit.org/_6qecgRgKC1fh
click Download and run your code on the micro:bit.


