Introduction
In this lesson we will realize the function of eight of flowing water light, from left to right, each only light one LED,reciprocating cycle.
Preparations
HARDWARE
- Osoyoo UNO Board (Fully compatible with Arduino UNO rev.3) x 1
- Breadboard x 1
- LED x 8
- 200 ohm resistor x 8
- M/M jumper x 20
- USB Cable x 1
- PC x 1
Connection
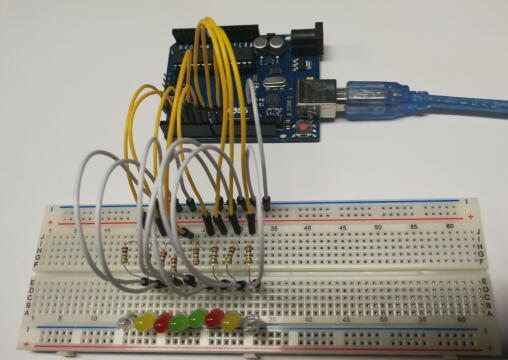
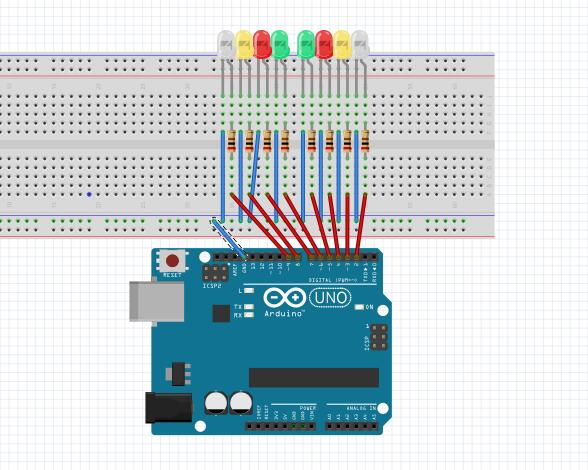
You can wiring your hardware as below :
Why do I empty 0 and 1 and two interfaces? These two interfaces actually use as the board’s serial ports, TX and Rx, that is to say, if you connect led on these two interfaces, you can’t download the normal program. So, generally we will empty out, if must use the case, you need to download a good program first, and then connect the circuit.
Note:
You cannot directly connect an LED to a battery or voltage source. Firstly, because the LED has a positive and a negative lead and will not light if they are the wrong way around and secondly, an LED must be used with a resistor to limit or ‘choke’ the amount of current flowing through the LED – otherwise the LED could burn out!
Code Program
In this lesson, we will conduct a simple yet interesting experiment-using LEDS to create flowing LEDights. As the name suggests, these eight LEDS in a row successively light up and dim one afteranother, iust like flowing water.
If you have connected the wiring diagram, connect the Arduino Uno board to your computer using the USB cable. The green power LED (labelled PWR) should go on.
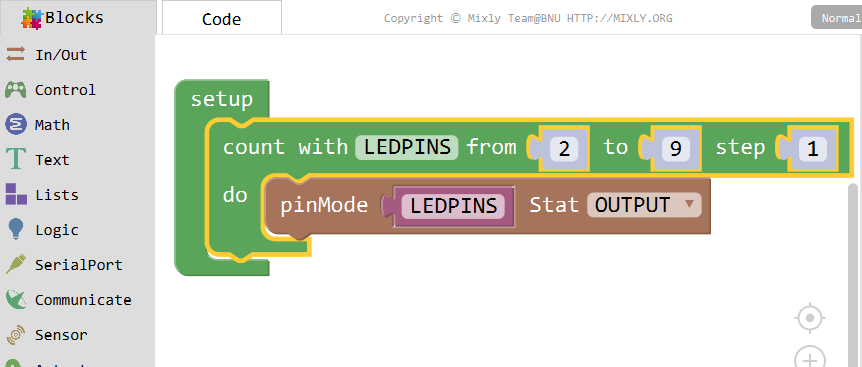
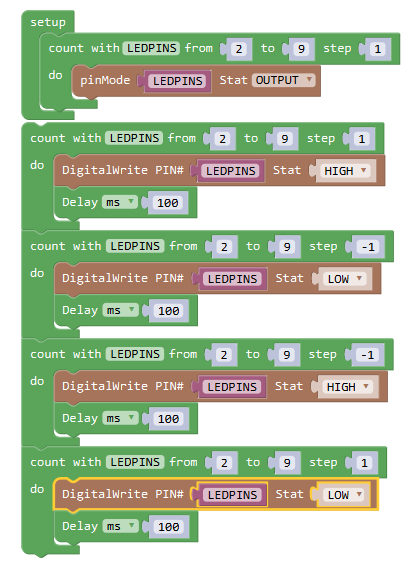
Set pin 2-9 as LEDPINS, and set them as output respectively. Pin number ascends by 1(step)each time.
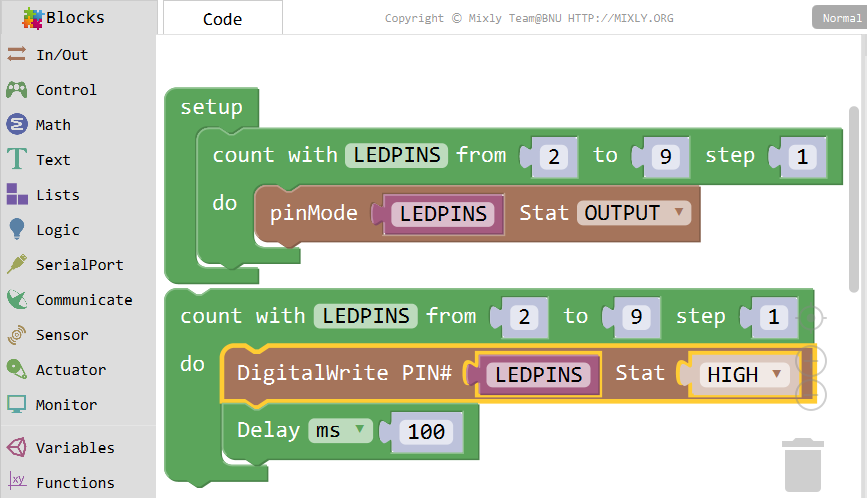
Light up the LEDS connected to pin 2-9 respectively, each lasting for 100ms.
Then, dim them from pin 9-2 respectively, also each lasting for 100ms.
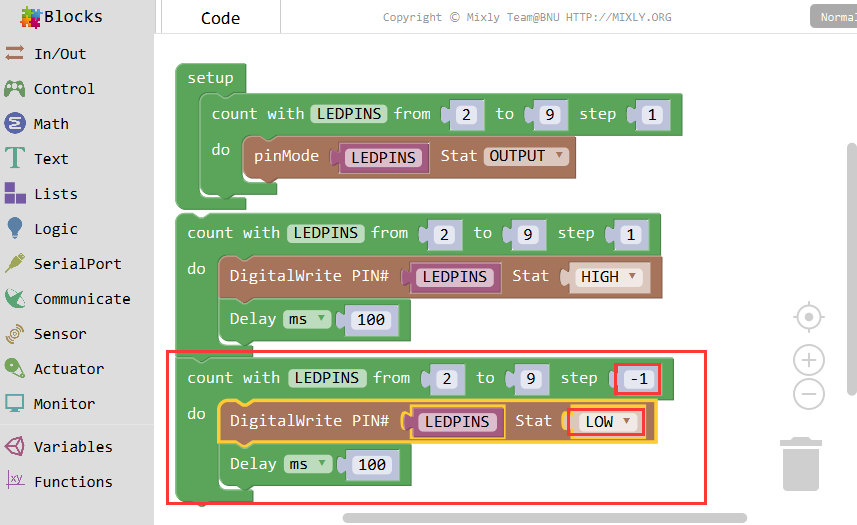
Light them up from pin 9-2(reverse to the previous sequence)respectively for 100ms
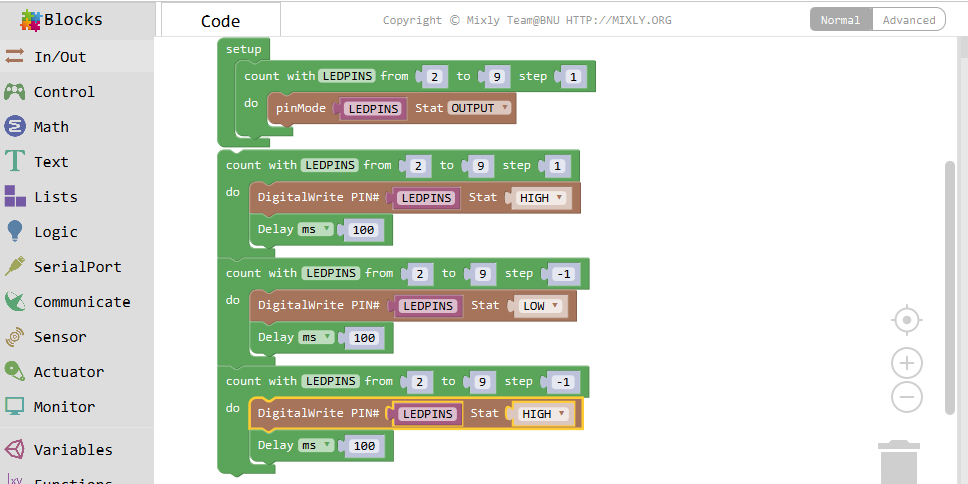
Then dim them from pin 2-9 respectively for 100ms.

The whole code is as follows:
Click Save after all the programming is done . Select the board type and serial port before uploading。
Running Result
Now, you should see eight LEDS brighten one by one from the LED connected to pin 2 to that to9, and then dim in turn from the LED at pin 9 to the one at pin 2. After that, the LEDS will light up fromthe LED at pin 9 to that at pin 2 and dim from the LED at pin 2 to that at pin 9. This whole process wilepeat until the circuit is power off.


