INTRODUCTION
In this projct, we will show how to burn the An-Thinker AT Command firmware for the ESP13 WiFi shield. To complete the next operation, we need to do the following preparations:
Hardware Preparations:
- OSOYOO ESP8266 WiFi Shield x 1
- Basic board x 1
- PC with Windows OS
- Some Jumper wires
Software Preparations:
Wire CONNECTION
- Remove WIFI Shield from Basic board, Keep them separated in whole procedure
- Remove any jumper caps in WIFI Shield
- Connect UNO to WIFI shield by jumper wires as following
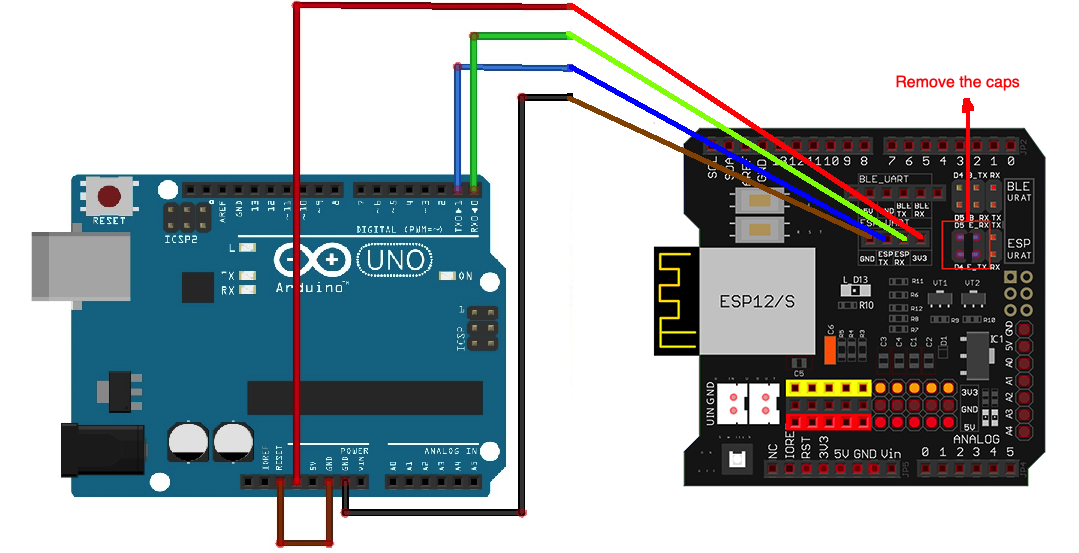
Basic board D0(RX) to WIFI shield E-RX
Basic board D1(TX) to WIFI shield E-TX
Basic board 3.3V to WIFI shield 3.3V
Basic board GND to wifi shield G
Basic board Reset to Basic board GND
SOFTWARE CONFIGURATIONS
First download flash_download_tools and AI-Thinker Firmaware from https://osoyoo.com/driver/FLASH_DOWNLOAD_TOOLS_V3.6.3.zip
double click flash_download_tools_v3.6.3.zip file to unzip the file
After completed above operations, open FLASH_DOWNLOAD_TOOLS_V3.6.3 folder ,
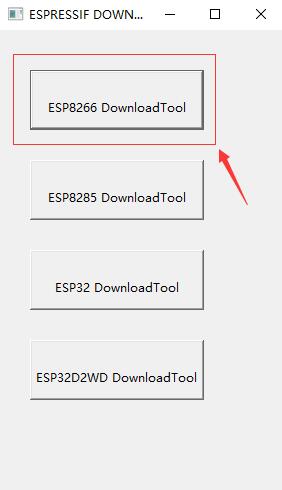
now double click ESPFlashDownloadTool_v3.6.3.exe program file and run the program, now you can config the software settings as per following steps:
Choose the “ESP8266 DownloadTool” for this project.
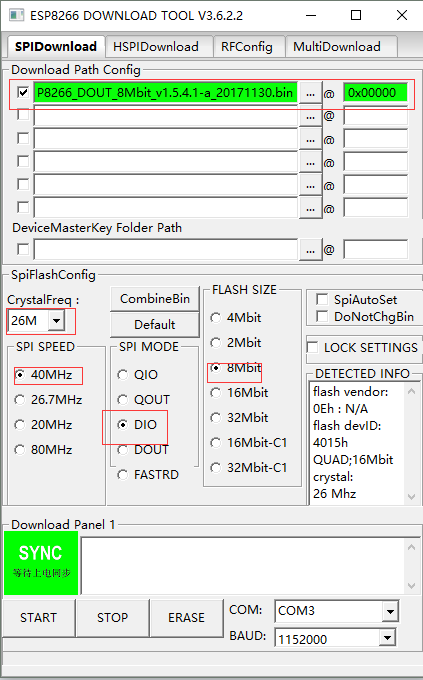
Set the field values as per following instruction:
- Ai-Thinker_ESP8266_DOUT_8Mbit_v1.5.4.1-a_20171130.bin ?? 0x00
- CrystalFreq: 26M
- SPI SPEED: 40MHz
- SPI MODE: DIO
- FLASH SIZE: 8Mbit
- From the COM drop-down menu select the COM port which your adapter is connected to.
Remove Old Firmware
- Make sure your software settings are correct
- Make sure the connections are completed
- Click the “Erase” button on the ESP8266 DownloadTool
- Hold the “Key” button down
- Press the “RST” button for once
- Release the “Key” button, now you will see there is a progress bar extending in the bottom of tool.
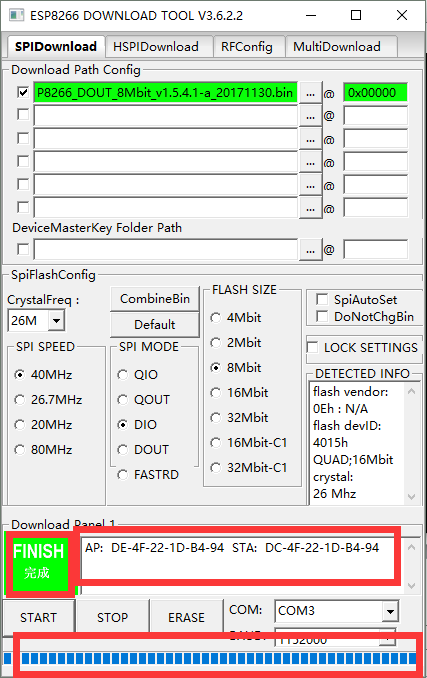
As the below photo, you can see “FINISH” on the software, it means you have removed old firmware successfully.
Burning
- Click the “Start” button on the ESP8266 DownloadTool
- Hold the “Key” button down
- Press the “RST” button for once
- Release the “Key” button, now you will see there is a progress bar extending in the bottom of tool.
 ,
,
As the below photo, when you see “FINISH” on the software, it means you have burned the Ai-Thinker AT Command firmware successfully.
Test AT firmware:
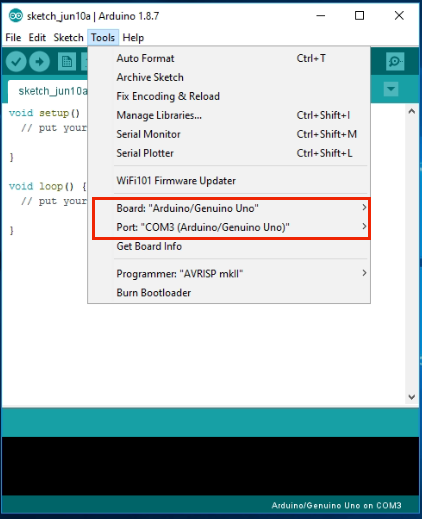
Open your IDE, select correct board and Port :
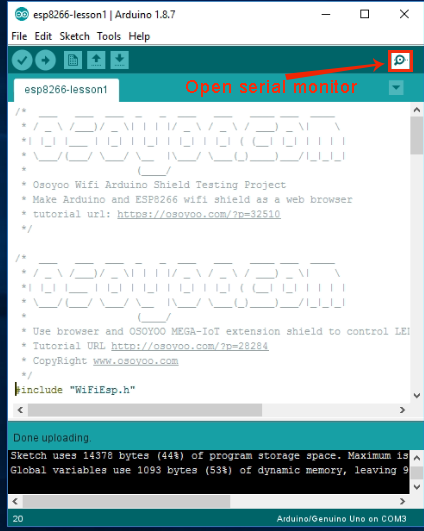
Open Serial Monitor (no need upload any code)
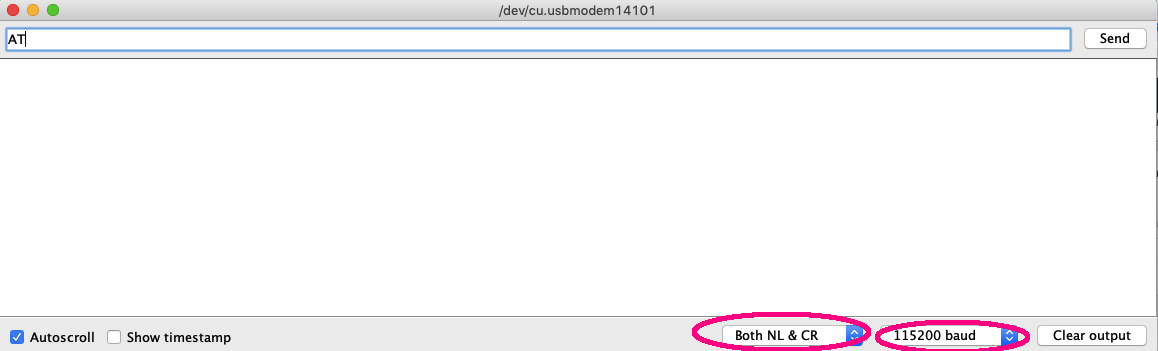
In Serial Monitor ,select 115200 baud rate and Both NL &CR as following picture, then type AT and click Send
Now your serial monitor will see AT OK as following picture:
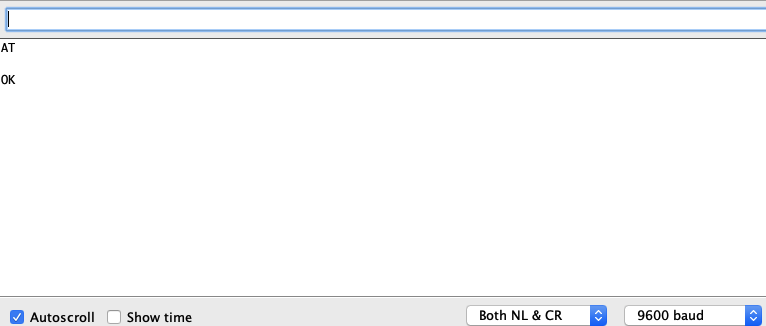
If you can see OK, that means our AT firmware has been installed properly. You can also type AT+GMR command to check the firmware version.


how do you use the shield afterwards? remained wired like the image above, or sandwiched on the arduino nano?
This shield is designed for Arduino UNO board, not for Nano board. You can insert this shield to Arduino UNO board and give UNO board wifi functionality.
Here is the tutorial links for this shield:
https://osoyoo.com/category/iot/arduino-wifi-iot-learning-kit/
You find many projects using this wifi shield.