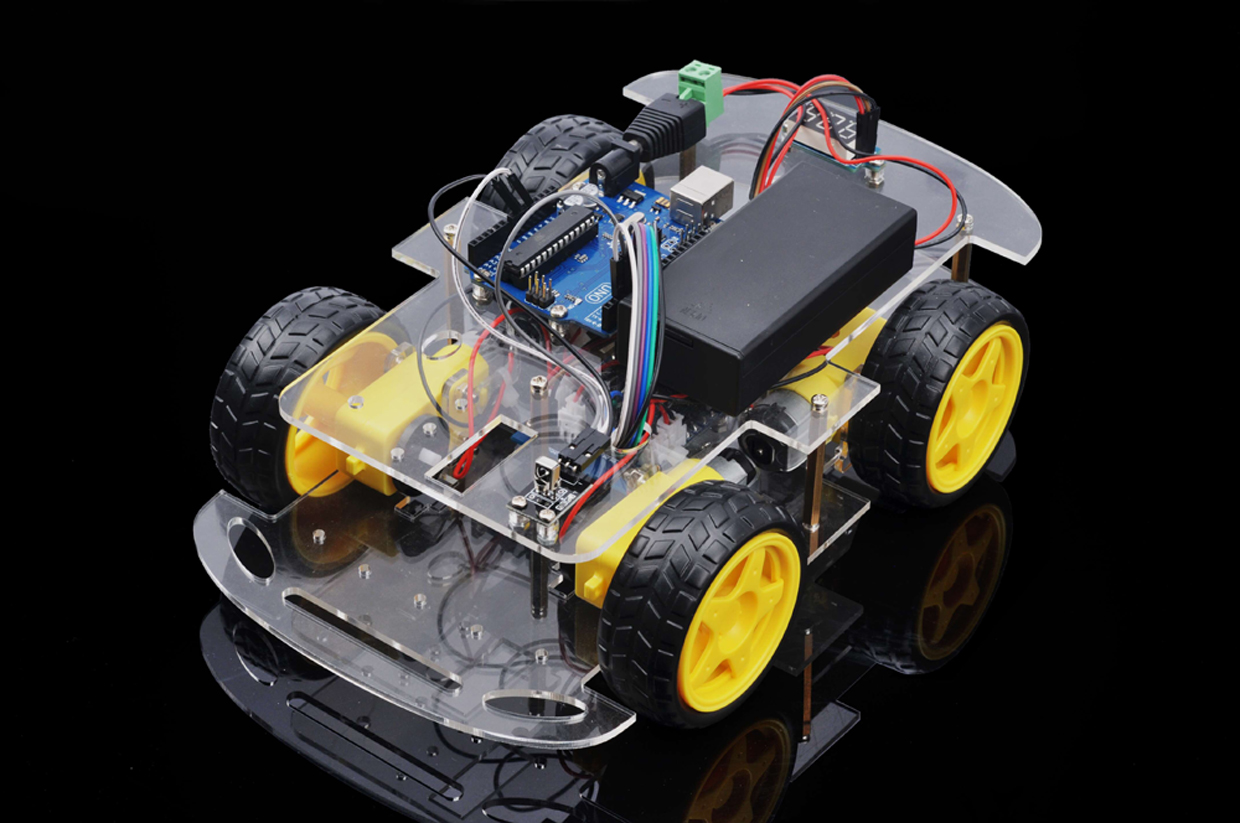
In this tutorial, we will use Osoyoo Smart DIY kit to make a simple remote controlled smart car. Once the car installation is completed, we will use a Infrared Remote to control the car movements including go forward, go back, left turn and right turn.
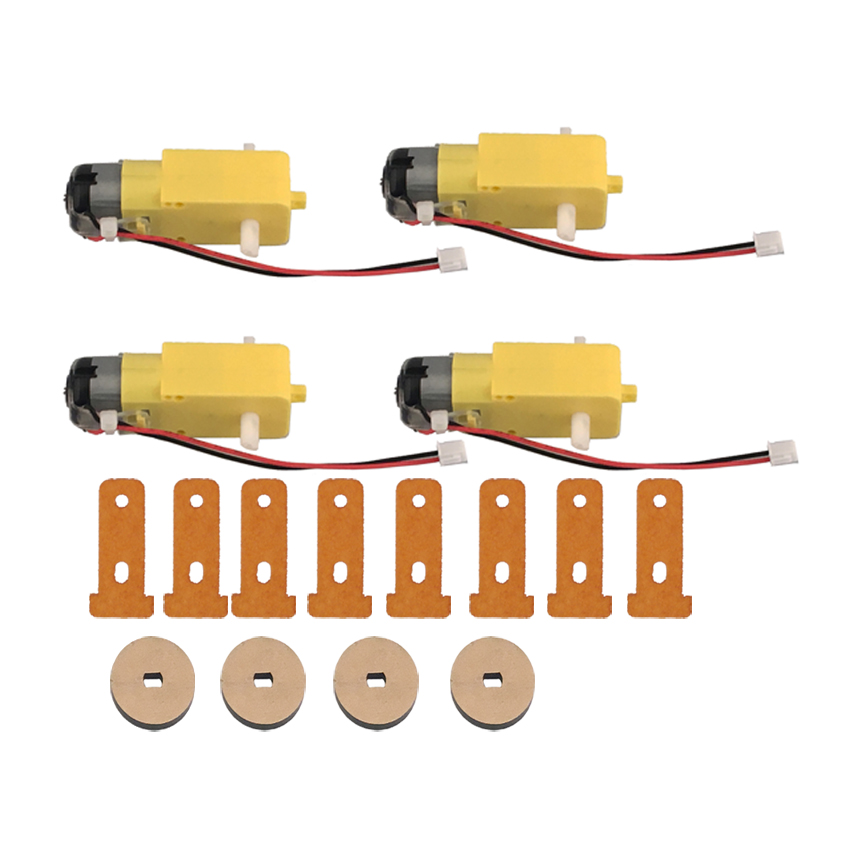
Hardware Installation: Step 1: Install the smart car basic frame work as per Smart Car Lesson 1 . If you have already completed installation in Lesson 1 , just keep it as is.
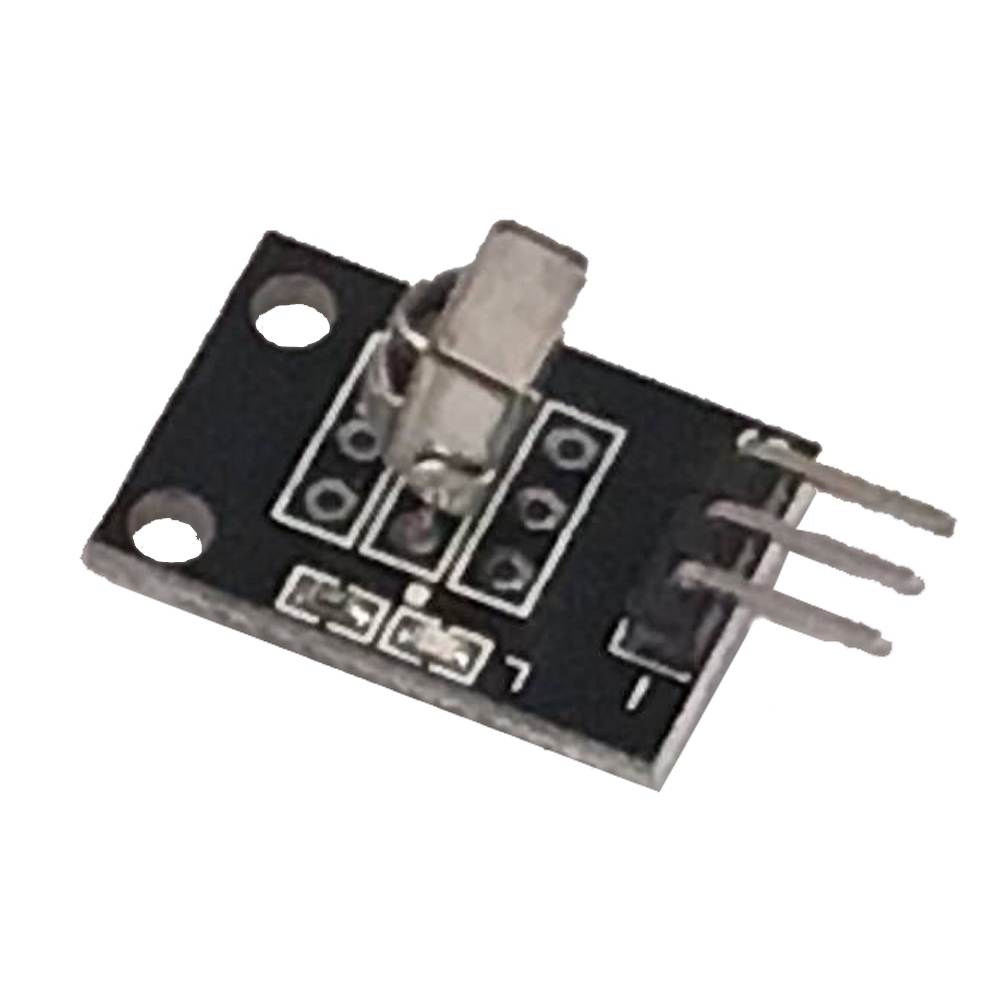
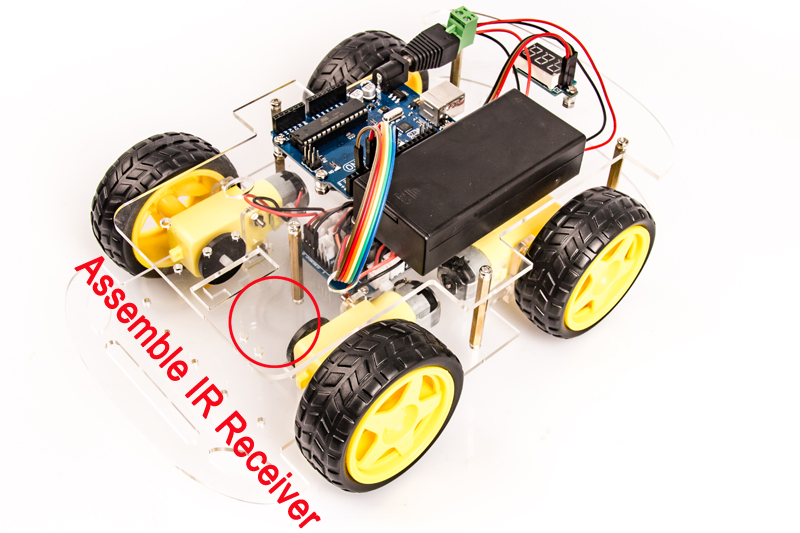
Step 2: Add an IR receiver module onto the car. Install the IR receiver module with M2.5*10 screws and nuts, washers at the front of upper chassis.
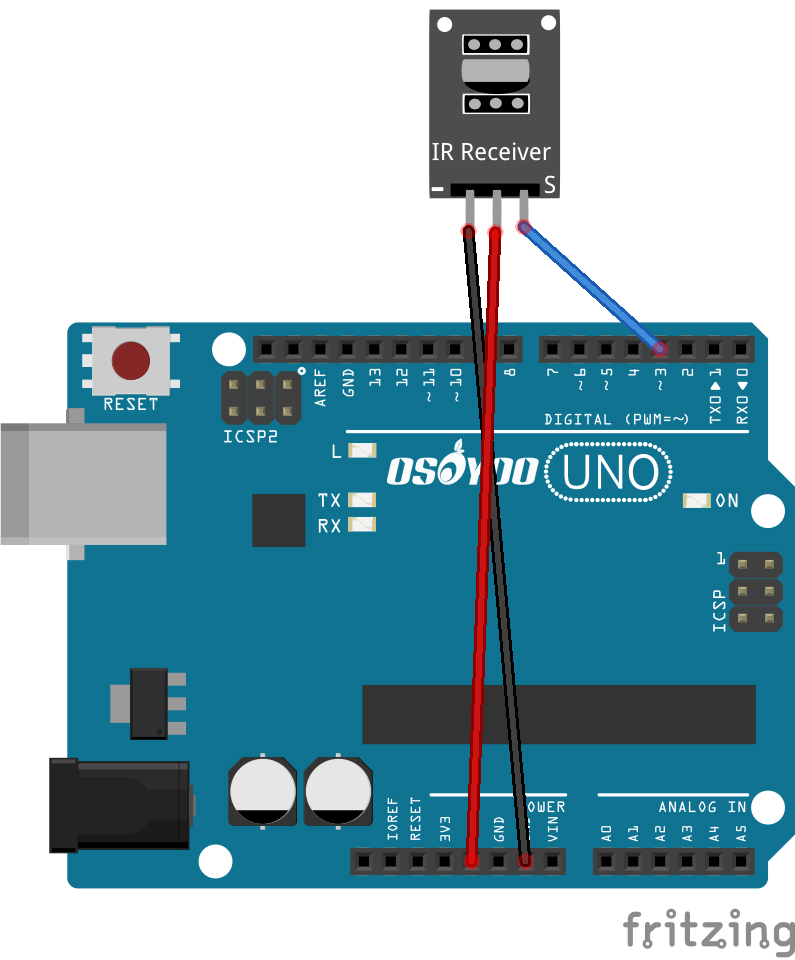
Step 3: Connect the S pin in IR receiver to D3 pin in UNO board, GND to GND, VCC to 5V, as the following photo (Remember : DO NOT remove any existing wires installed in Lesson 1 ) :
Software Installation:
Step 1: Install latest Arduino IDE (If you have Arduino IDE version after 1.1.16, please skip this step)
Download Arduino IDE from https://www.arduino.cc/en/Main/Software?setlang=en , then install the software.
If you have a late version of Arduino IDE with a library IRRobotRemote, it may conflict and you may have to remove that library.Make sure to delete Arduino(root)/libraries/RobotIRremote. Where Arduino(root) refers to the install directory of Arduino. The library RobotIRremote has similar definitions to IRremote and causes errors.
Step 3: Download Lesson 2 IRremote smart car sample code from https://osoyoo.com/driver/smartcar-lesson2.zip and unzip the download zip file smartcar-lesson2.zip, you will see a folder called smartcar-lesson2.
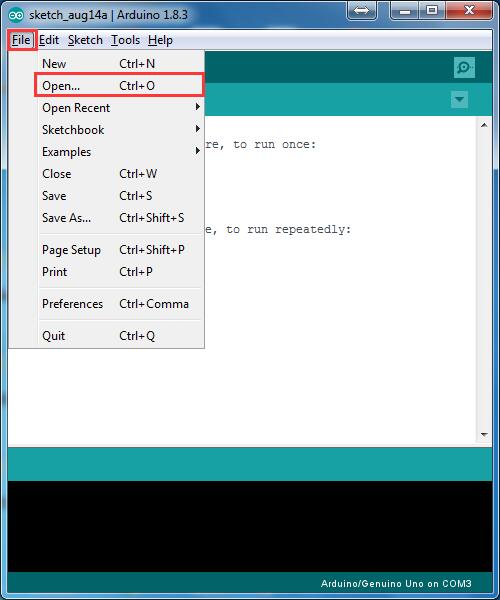
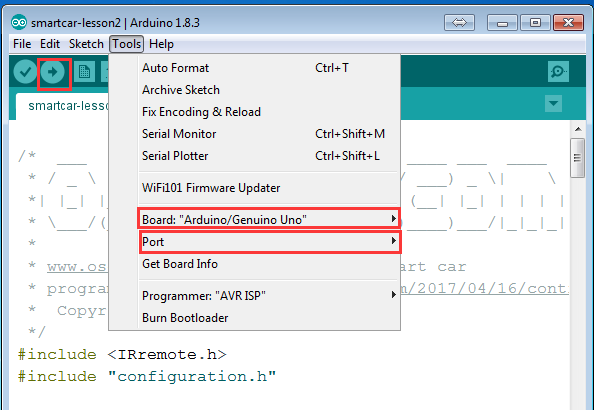
Step 4: Connect UNO R3 board to PC with USB cable, Open Arduino IDE -> click file -> click Open -> choose code “smartcar-lesson2.ino” in smartcar-lesson2 folder, load the code into arduino. Step 5: Choose corresponding board and port for your project,upload the sketch to the board.
Testing:
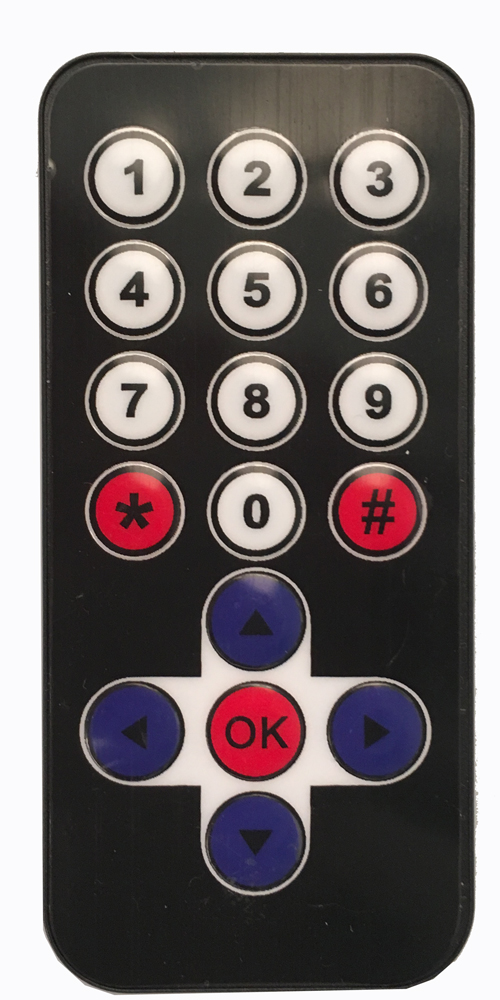
Press IR controller keys to control the car movements as per following instruction table:
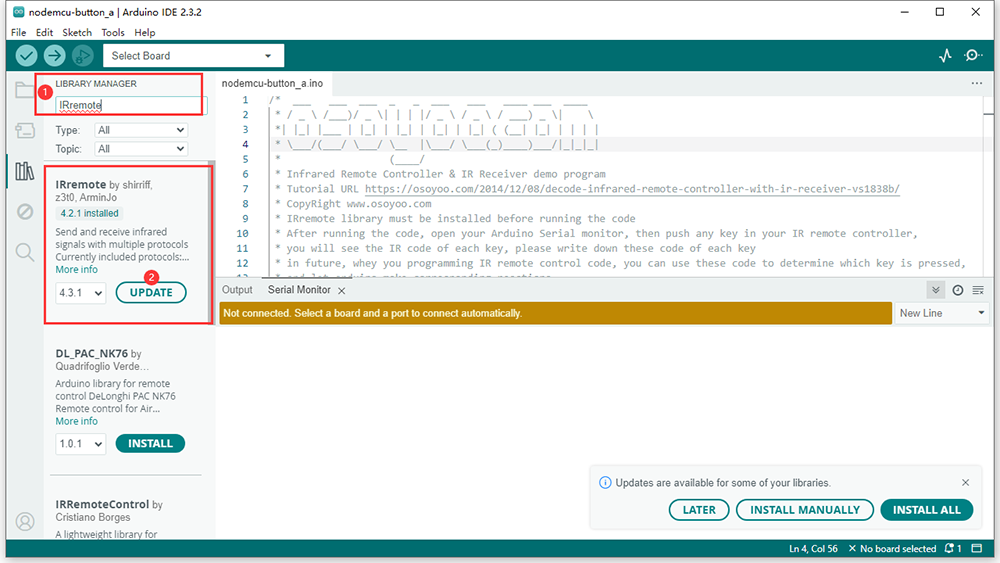
step 2:Install IRremote library into Arduino IDE (If you have already installed IRremote library, please skip this step)
Download IRremote library from https://osoyoo.com/wp-content/uploads/samplecode/IRremote.zip, then import the library into Arduino IDE(Open Arduino IDE-> click Sketch->Include Library->Add .Zip Library)
i have a macintosh and attempted to follow these steps. It turns out that its sending me to a list of unnecessary codes rather then just clicking the zip file from the desktop and moving on to the next step. What advice should i attempt from here?
Hi friend,
Do you solve this issue?
I’m sorry that there are something wrong with our website before, and I can’t see your comment.
If any query, please feel free to contact with my email address: [email protected].
Elaine
/Users/peterkaminski/Desktop/Arduino.app/Contents/Java/libraries/RobotIRremote/src/IRremoteTools.cpp:5:16: error: ‘TKD2’ was not declared in this scope
int RECV_PIN = TKD2; // the pin the IR receiver is connected to
^
exit status 1
Error compiling for board Arduino/Genuino Uno.
Hi friend,
Do you solve this issue?
I’m sorry that there are something wrong with our website before, and I can’t see your comment.
If any query, please feel free to contact with my email address: [email protected].
Elaine
Having the same issue? It appears to upload fine and does nothing. Did you discover anything? Also the test IR code doesn’t work. I am wondering if it is something as simple as the remote battery.
As I understand, OSOYOO put wrong remotes. With different commands.
I have modified lesson 2.
Russian: Похоже, при упаковке положили новые пульты. У меня тоже не работало. Поменял исходники и вывел коды в монитор на комп. Потом поменял на найденные коды. Получилось. Коды внизу.
/**************detect IR code***************/
void do_IR_Tick()
{
if(IR.decode(&IRresults))
{
Serial.print(“IR Code = “);
Serial.println(IRresults.value, HEX); // Print codes to serial monitor to PC
#define IR_ADVANCE 0x3D9AE3F7 //code from IR controller “▲” button
#define IR_BACK 0x1BC0157B //code from IR controller “▼” button
#define IR_RIGHT 0x0449E79F //code from IR controller “>” button
#define IR_LEFT 0x8C22657B //code from IR controller “<" button
#define IR_STOP 0x488F3CBB //code from IR controller "OK" button
#define IR_turnsmallleft 0xF0C41643 //code from IR controller "#" button
#define IR_turnsmallright 0xC101E57B //code from IR controller "#" button
#define IR_PRESS 0xFFFFFFFF //code from IR controller "#" button
But this remote don’t repeat commands. If You hold button it transmin right code once and then transmit code 0xFFFFFFFF with all buttons.
And you have to press button many times to drive the car.
My sun is sad about it.
On the Lego-technics he can press and hold remote button and car will move…
Hi friend,
Do you solve this issue?
I’m sorry that there are something wrong with our website before, and I can’t see your comment.
If any query, please feel free to contact with my email address: [email protected].
Elaine
After downloading the code and IR library only 2 of the 4 wheels will work with the remote. We re-uploaded the code from lesson 1 and all 4 wheels work. However when we upload lesson 2 code again, only 2 wheels work. What are we missing? Ideas?
I believe you are using 9V square battery which has low capacity. wireless IR receiver consumes a lot of current which needs battery capacity >400MA . We recommend you use 18650 li-on battery which has much better performance in the rest of the lessons.


 OSOYOO MODEL X Motor driver module
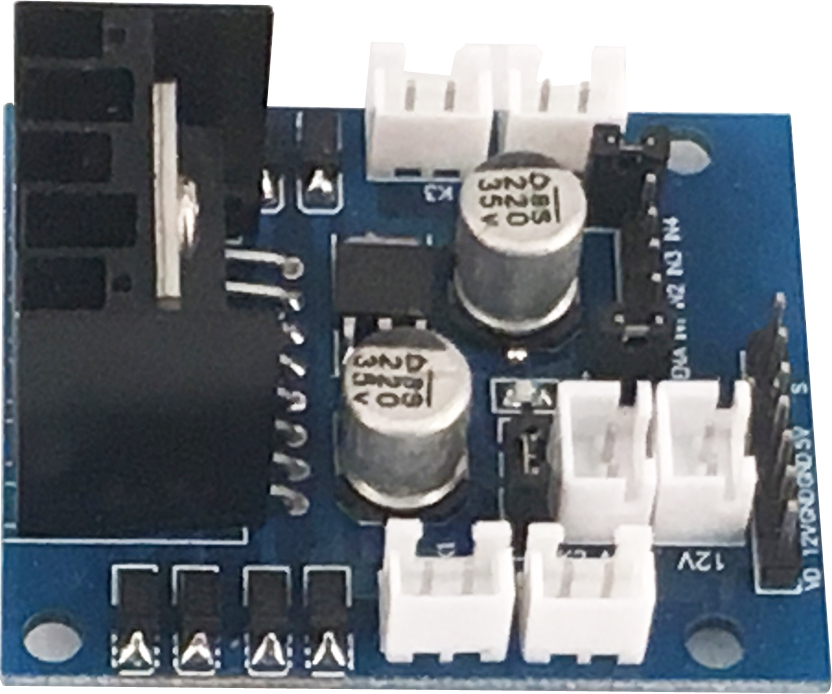


I just received the following error message:
Arduino: 1.8.5 (Windows 10), Board: “Arduino/Genuino Uno”
C:\Users\zaite\Desktop\Osoyoo\smartcar-lesson2\smartcar-lesson2.ino:11:22: fatal error: IRremote.h: No such file or directory
#include
^
compilation terminated.
exit status 1
Error compiling for board Arduino/Genuino Uno.
This report would have more information with
“Show verbose output during compilation”
option enabled in File -> Preferences.
can you please advise?
You should install the library — IRremote.h for your IDE, just follow the Software Installation in this project.
Backwards does not work!
step 2:Install IRremote library into Arduino IDE (If you have already installed IRremote library, please skip this step)
Download IRremote library from https://osoyoo.com/wp-content/uploads/samplecode/IRremote.zip, then import the library into Arduino IDE(Open Arduino IDE-> click Sketch->Include Library->Add .Zip Library)
i have a macintosh and attempted to follow these steps. It turns out that its sending me to a list of unnecessary codes rather then just clicking the zip file from the desktop and moving on to the next step. What advice should i attempt from here?
Hi friend,
Do you solve this issue?
I’m sorry that there are something wrong with our website before, and I can’t see your comment.
If any query, please feel free to contact with my email address: [email protected].
Elaine
I’m receiving the following error message:
/Users/peterkaminski/Desktop/Arduino.app/Contents/Java/libraries/RobotIRremote/src/IRremoteTools.cpp:5:16: error: ‘TKD2’ was not declared in this scope
int RECV_PIN = TKD2; // the pin the IR receiver is connected to
^
exit status 1
Error compiling for board Arduino/Genuino Uno.
Can you please tell me what’s wrong?
The robot can only run one code at a time correct?
yes.
Hi friend,
Do you solve this issue?
I’m sorry that there are something wrong with our website before, and I can’t see your comment.
If any query, please feel free to contact with my email address: [email protected].
Elaine
Installed the receiver and code uploaded successfully, but when I go to use the remote, nothing happens.
Having the same issue? It appears to upload fine and does nothing. Did you discover anything? Also the test IR code doesn’t work. I am wondering if it is something as simple as the remote battery.
As I understand, OSOYOO put wrong remotes. With different commands.
I have modified lesson 2.
Russian: Похоже, при упаковке положили новые пульты. У меня тоже не работало. Поменял исходники и вывел коды в монитор на комп. Потом поменял на найденные коды. Получилось. Коды внизу.
/**************detect IR code***************/
void do_IR_Tick()
{
if(IR.decode(&IRresults))
{
Serial.print(“IR Code = “);
Serial.println(IRresults.value, HEX); // Print codes to serial monitor to PC
if(IRresults.value==IR_ADVANCE)
{
Drive_Num=GO_ADVANCE;
……………
-= Part of file configuration.h =-
#define IR_ADVANCE 0x3D9AE3F7 //code from IR controller “▲” button
#define IR_BACK 0x1BC0157B //code from IR controller “▼” button
#define IR_RIGHT 0x0449E79F //code from IR controller “>” button
#define IR_LEFT 0x8C22657B //code from IR controller “<" button
#define IR_STOP 0x488F3CBB //code from IR controller "OK" button
#define IR_turnsmallleft 0xF0C41643 //code from IR controller "#" button
#define IR_turnsmallright 0xC101E57B //code from IR controller "#" button
#define IR_PRESS 0xFFFFFFFF //code from IR controller "#" button
But this remote don’t repeat commands. If You hold button it transmin right code once and then transmit code 0xFFFFFFFF with all buttons.
And you have to press button many times to drive the car.
My sun is sad about it.
On the Lego-technics he can press and hold remote button and car will move…
Hi friend,
Do you solve this issue?
I’m sorry that there are something wrong with our website before, and I can’t see your comment.
If any query, please feel free to contact with my email address: [email protected].
Elaine
this is the error mesage
smartcar-lesson2:11:10: error: IRremote.h: No such file or directory
compilation terminated.
exit status 1
IRremote.h: No such file or directory
this is the error mesage
smartcar-lesson2:11:10: error: IRremote.h: No such file or directory
compilation terminated.
exit status 1
IRremote.h: No such file or directory
After downloading the code and IR library only 2 of the 4 wheels will work with the remote. We re-uploaded the code from lesson 1 and all 4 wheels work. However when we upload lesson 2 code again, only 2 wheels work. What are we missing? Ideas?
I believe you are using 9V square battery which has low capacity. wireless IR receiver consumes a lot of current which needs battery capacity >400MA . We recommend you use 18650 li-on battery which has much better performance in the rest of the lessons.