Introduction
Tilt switch is a very useful sensor in many applications such as mobile phone,drone(UAV) and gaming device . In this lesson, we use SW520D Tilt Sensor to make a tutorial experiment. When SW520D Sensor tilts, Raspberry Pi will make a LED flash.
Hardware Preparation
1x Raspberry pi
1x SW520D
1x LED diode
1x Breadboard
1x 200Ω resistor
Jumper wires
1x T type GPIO Extension board with 40 pin cable (optional)
Software Preparation Note: In this lesson, we remotely control raspberry pi via PuTTy on PC. To learn how to config raspberry pi, please visit lesson 1: getting started with raspberry pi.
Experimental Principle
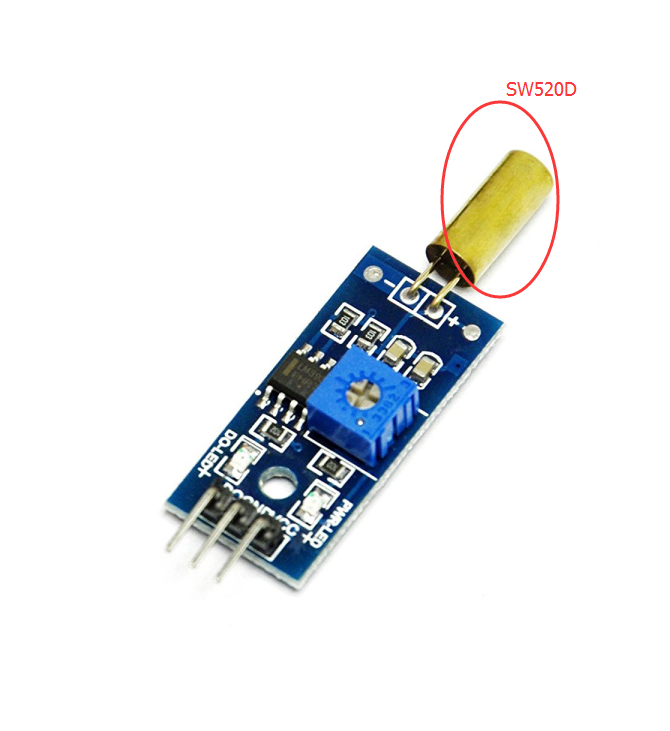
SW520D tilt switch is a common ball tilt switch. It is composed of two conductive electrodes and metal ball. Two conductive electrodes and metal ball are sealed in the golden cover. As photo shown:
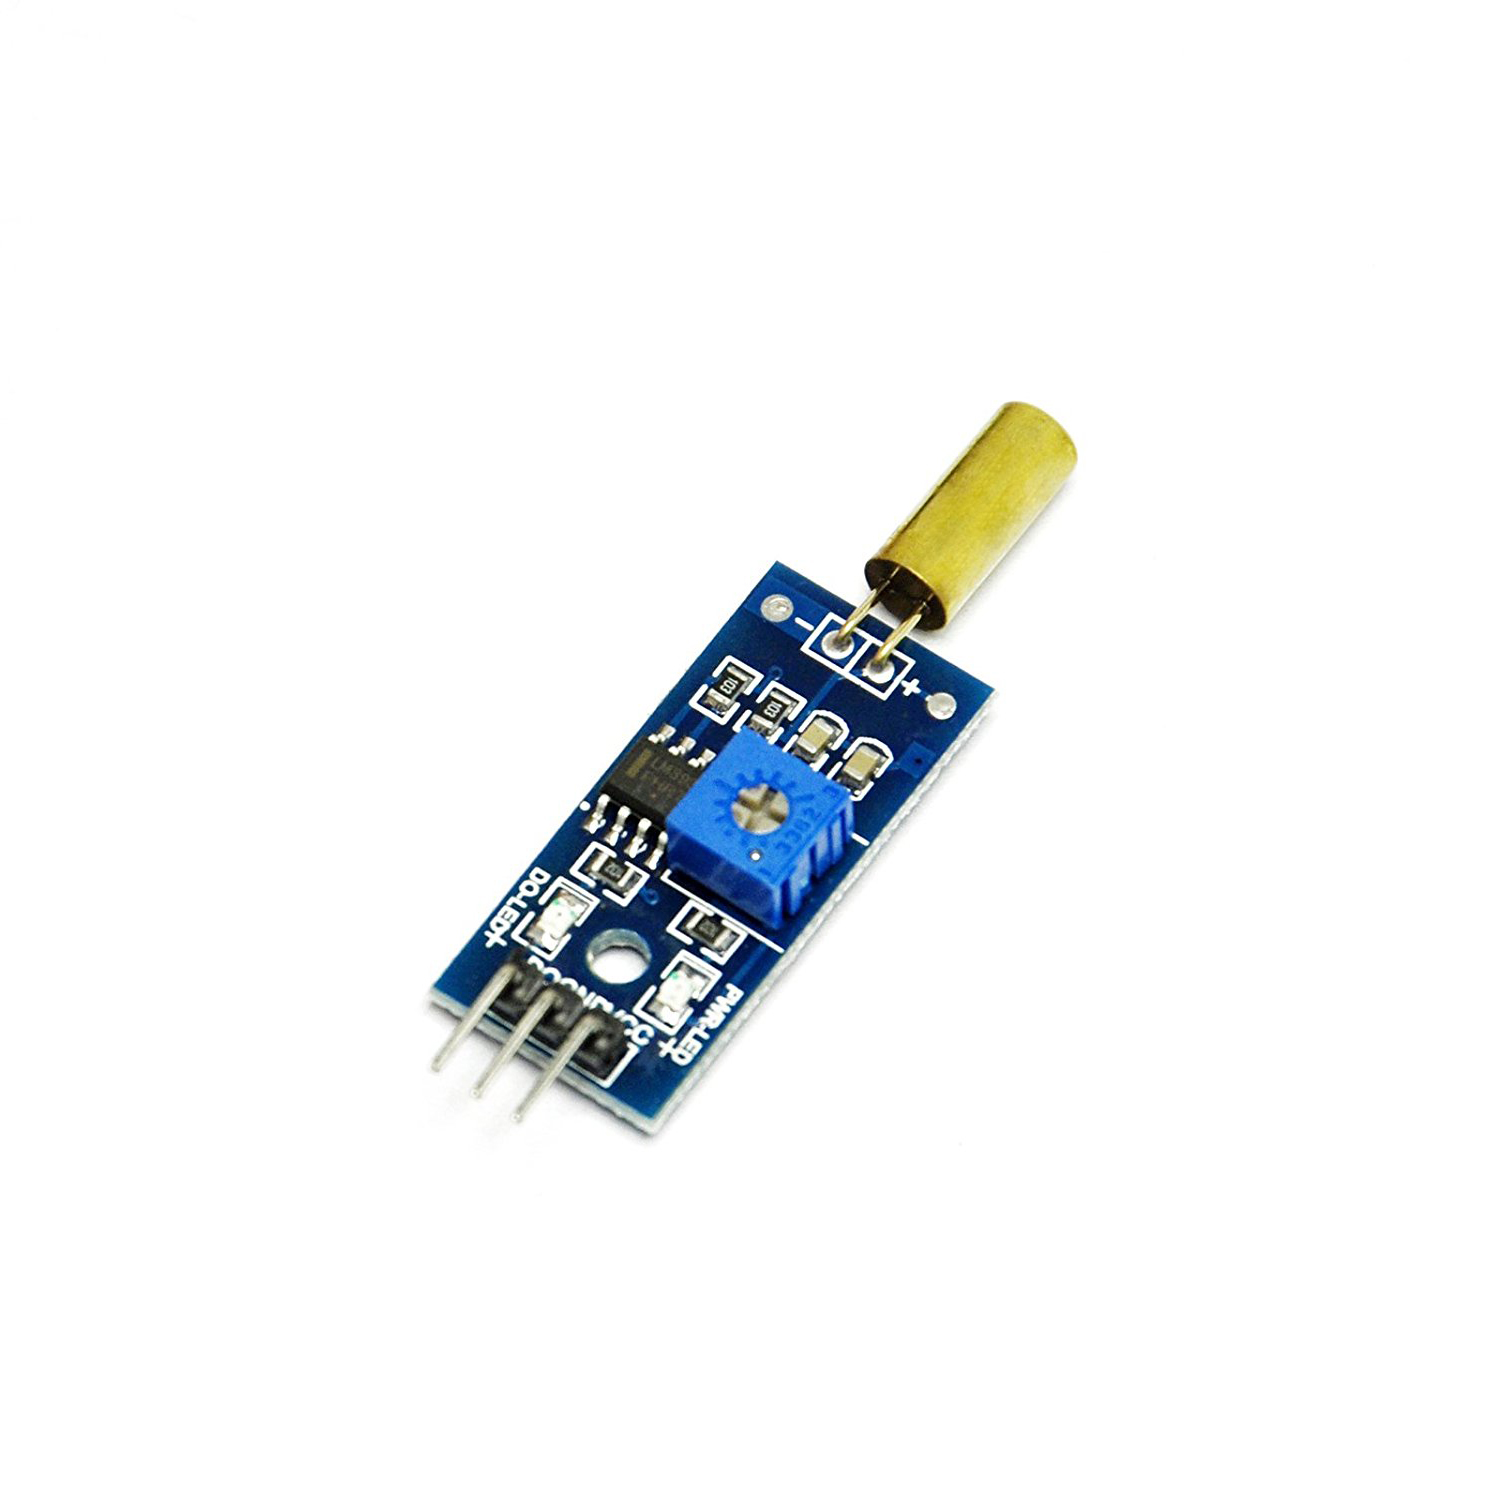
SW520D tilt switch is soldered at a micro PCB board to form a tilt switch module. This module consist of sw520D tilt switch, potentiometer, 3 pins, power indicator and signal indicator (to indicate tilting of tilt switch)
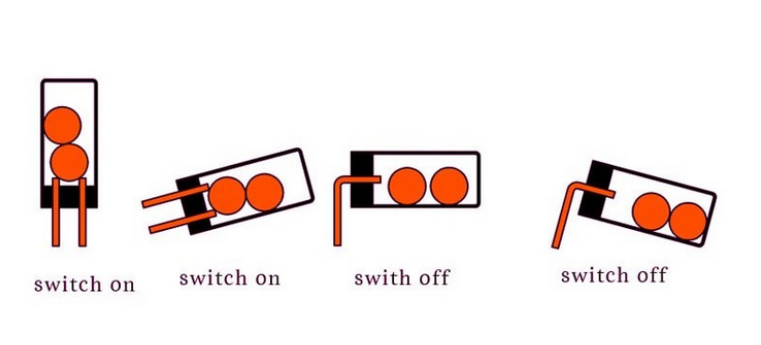
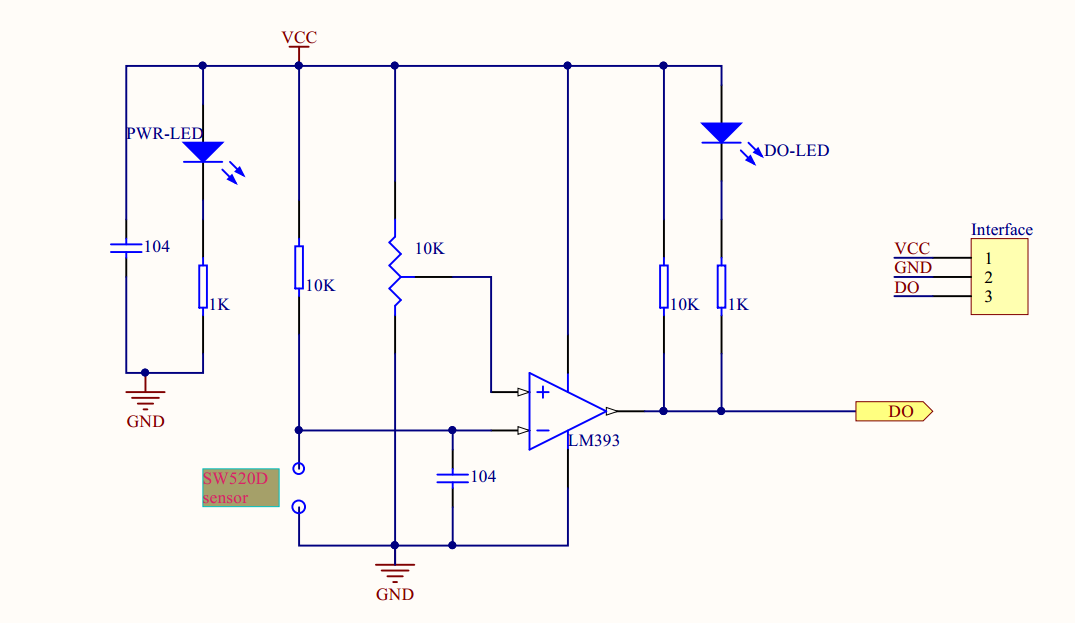
The ball in the tilt-switch changes with different angle of inclination to trigger the circuit. When SW520D tilt switch is vertical, metal ball will touch with conductive electrode and trigger the circuit, so D0 of tilt module will output low level and signal indicator turn on. When tilt switch is tilted to some angle. metal ball break touch with conductive electrode and break circuit, and D0 of tilt module output high level and the signal indicator turn off. The principle diagram of the module is as shown below:
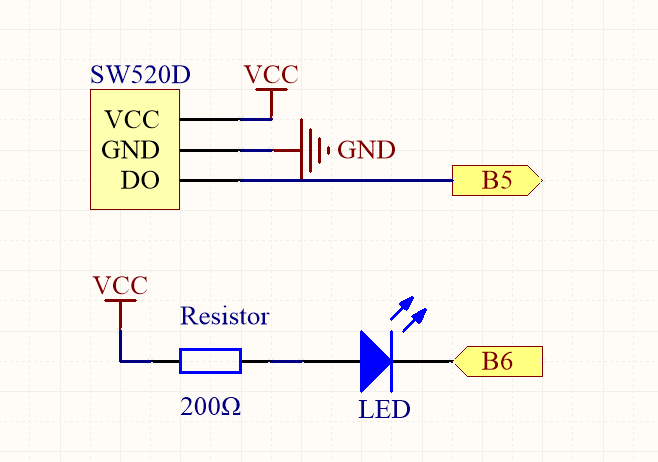
SW520D Tilt Sensor Schematic
Circuit Graph for each parts
*B5 in above graph means BCM GPIO#5 or Physical pin#21 or wiringPi#21.
*B6 in above graph means BCM GPIO#6 or Physical pin#22 or wiringPi#22
Software
There are two kind of common programming languages for raspberry pi. One is C which is similar to programming on Arduino, and the other is Python. In this lesson, we’ll provide codes for both languages. New starters can select one according to their interest or habit.
For C Language users,please follow the next steps:
Please be sure installation wiringpi. If you have not installed wiringPi, read installation wiringpi Step 1) Download sw520d.c by typing following commands in pi terminal: pi@raspberry:~ $ cd ~ pi@raspberry:~ $ sudo wget http://osoyoo.com/driver/pi3_start_learning_kit_lesson_14/sw520d.c
*You can also use also use nano editor to copy and paste code into sw529d.c by typing command sudo nano sw520d.c
Above command will use nano editor to open sw520d.c, you can copy/paste following code into nano editor and type Ctrl-x to save the code into file.
 //Sample code of sw520d.c by osoyoo.com

#include < wiringPi.h>
#include < stdio.h>
#define LedPin        22
#define Sw520dPin 21
int main(void)
{
      // When initialize wiring failed, print messageto screen
      if(wiringPiSetup() == -1){
            printf("setup wiringPi failed !");
            return 1;
      }
      pinMode(LedPin, OUTPUT);
      pinMode(Sw520dPin,INPUT);

      printf("\n");
      printf("\n");
      printf("========================================\n");
      printf("|              LED alarm               |\n");
      printf("|    ------------------------------    |\n");
      printf("|        If SW520D tilt                |\n");
      printf("|                                      |\n");
      printf("|        LED will Blink                |\n");
      printf("|                                      |\n");
      printf("|                                OSOYOO|\n");
      printf("========================================");
      printf("\n");
      printf("\n");

      while(1){
            if(!(digitalRead(Sw520dPin))){
            // LED off
            digitalWrite(LedPin, HIGH);
            printf("\n");
            printf("-------------------|\n");
            printf("|     Not tilt...  |\n");
            printf("-------------------|\n");
            printf("Not tilt...\n");
            delay(1000);
            }
            else{
            // LED blink
            digitalWrite(LedPin, LOW);
            delay(500);
            digitalWrite(LedPin,HIGH);
            delay(500);
            printf("\n");
            printf("===================|\n");
            printf("|     tilting!     |\n");
            printf("===================|\n");
            }
      }
      return 0;
}

//end of sw520d.c
Step 2)Compile Code
C language is high level language. Before running the project, the code need to compile as an executable file. Please enter the following command: pi@raspberry:~ $ gcc -Wall -o sw520d sw520d.c -lwiringPi
Note: gcc: is GNU Compiler Collection. If you want to write your own C code and compile to run it, you need to master gcc. -Wall: to get more error when compile the code -o: to name the compiled file. You can name the file as your like. here we name as sw520d sw520d.c: means the original file which is compiled -lwiringPi: is to load the library wiringPi (l is short for library)
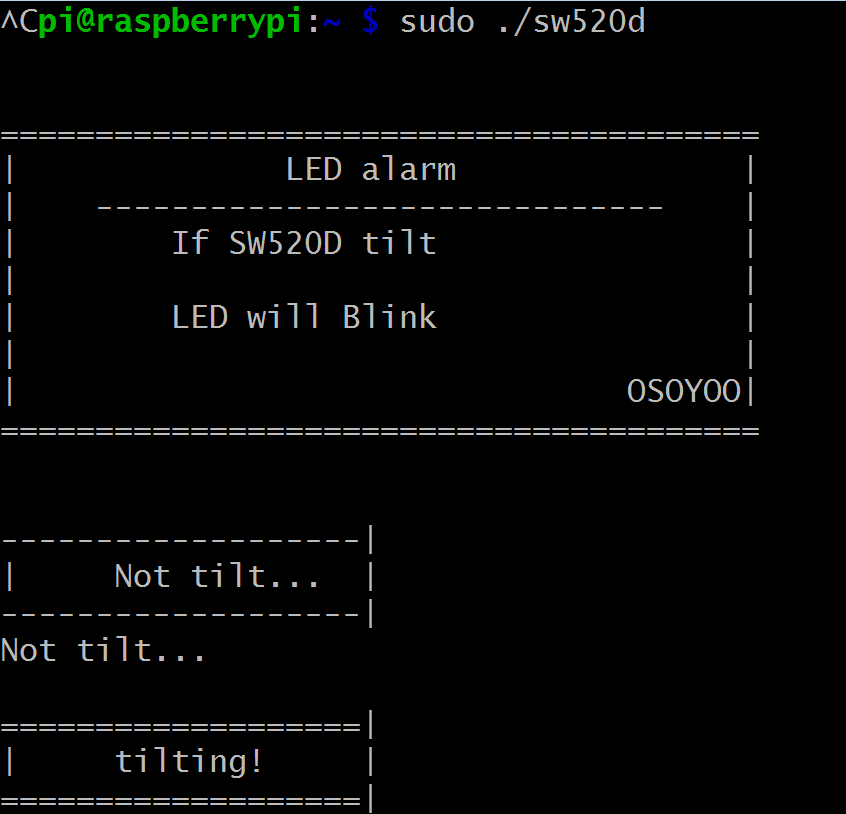
Step 3) Run Project by typing following command in terminal pi@raspberry:~ $ sudo ./sw520d
Step 4) Test project result
After running the project, your terminal will show print message as code, and then the sw520d D0 pin voltage will be sent to BCM#5(wPi#21). If the sw520d tilt switch is vertical, the LED won’t blink and the terminal will show “not tilt”. If the sw520d tilts at some angle, the LED will blink and the terminal will show “tilting”.
C language code explanation
 //include functions in wiringPi library such as digitalWrite,digitalread
#include < wiringPi.h>

//include I/O functions in stdio library such as printf
#include < stdio.h> //include

//Define LED and SW520d GPIO pin.

#define LedPin    22
#define Sw520dPin 21
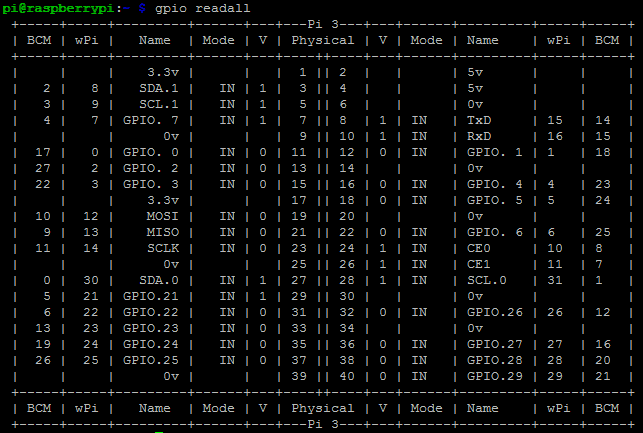
Note: You may be confused with LEDPin 22 and SW520D 21 in above C codes where are different from BCM numbering in previous Python lessons. This is because C uses wPi(wiringPi) numbering method. You can use the command gpio readall to compare BCM pin numbering and wPi numbering and their relation with Raspberry Pi physical pin location: gpio readall command result:
 // When initialize wiring failed, print message to screen

  if(wiringPiSetup() == -1){
    printf("setup wiringPi failed !");
    return 1;
  }

  //Define LedPin as output mode and Sw520dPin as input mode
  pinMode(LedPin, OUTPUT);
  pinMode(Sw520dPin,INPUT);
d)The first part of the following code means it will show as print message first. Go on while loop statement and conditions. The Sw520dPin level will be read again and again, when it is read as low level, it means tilt switch is vertical, and the screen will show “not tilt” and LED will not blink. When this pin is detected as high level, and it means tilt switch is tilting, and the screen will show “tilting” and LED will blink every 500ms(0.5s).
 printf("\n");0
  printf("\n");
  printf("========================================\n");
  printf("|              LED alarm               |\n");
  printf("|    ------------------------------    |\n");
  printf("|        If SW520D tilt                |\n");
  printf("|                                      |\n");
  printf("|        LED will Blink                |\n");
  printf("|                                      |\n");
  printf("|                                OSOYOO|\n");
  printf("========================================");
  printf("\n");
  printf("\n");

  while(1){
    if(!(digitalRead(Sw520dPin))){
    // LED off
    digitalWrite(LedPin, HIGH);
    printf("\n");
    printf("-------------------|\n");
    printf("|     Not tilt...  |\n");
    printf("-------------------|\n");
    delay(1000);
    }
    else{
    // LED blink
    digitalWrite(LedPin, LOW);
    delay(500);
    digitalWrite(LedPin,HIGH);
    delay(500);
    printf("\n");
    printf("===================|\n");
    printf("|     tilting!     |\n");
    printf("===================|\n");
    }
  }
For Python Language users,please follow the next steps:
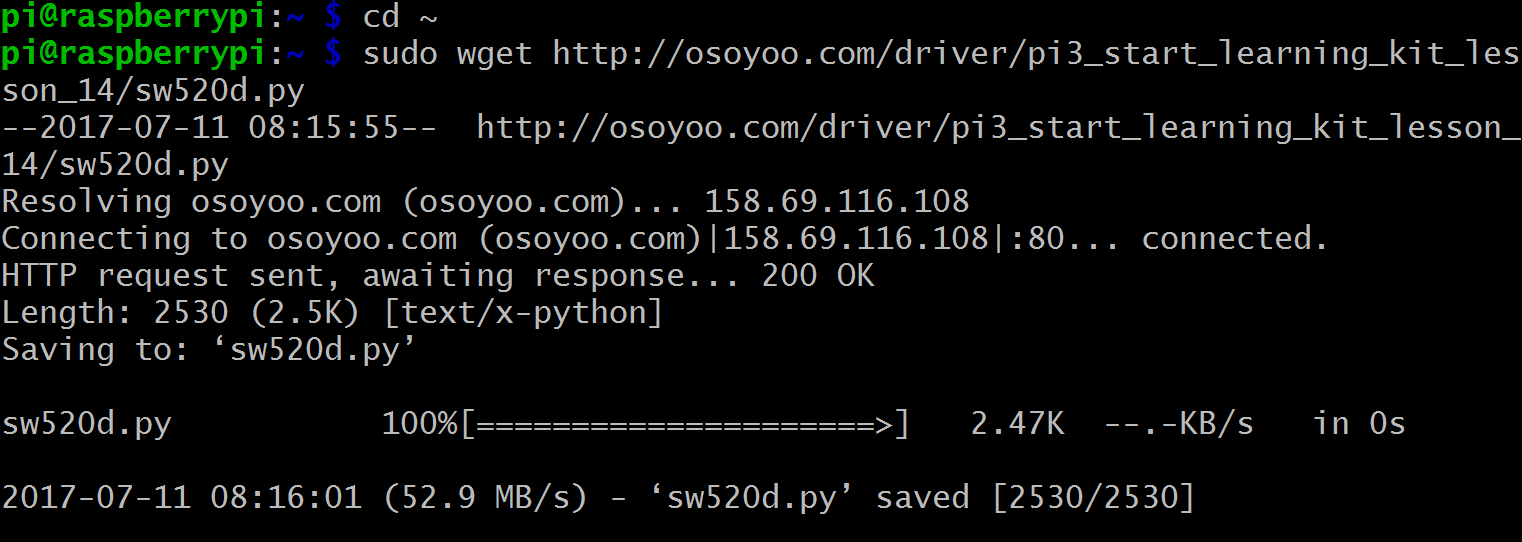
Step 1) download sw520d.c sample code by typing following command in Pi terminal pi@raspberry:~ $ cd ~ pi@raspberry:~ $ sudo wget http://osoyoo.com/driver/pi3_start_learning_kit_lesson_14/sw520d.py
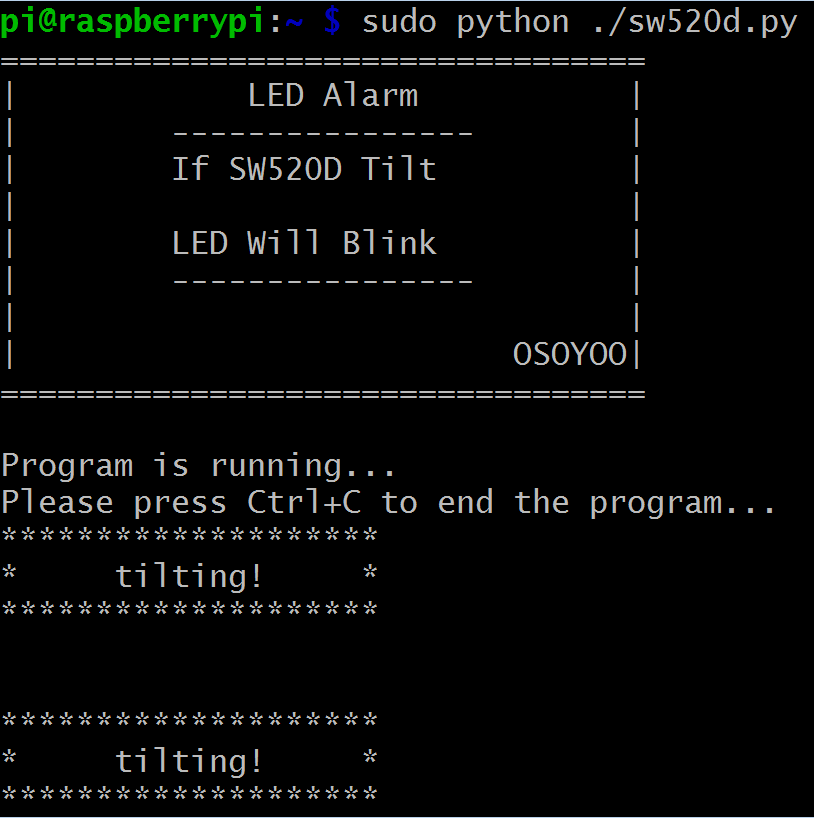
Step 2) Run the python code by typing following command in Pi terminal pi@raspberry:~ $ sudo python ./sw520d.py
*Note: Unlike C, Python is a script language which can be executed without compiling. So we no need to compile sw520d.py source file before running it.
Step 3)Test project result
After running the project, your terminal will show print message as code, and then the sw520d pin level will be read. If the sw520d tilt switch is vertical, the LED won’t blink and the terminal will show “not tilt”. If the sw520d tilts at some angle, the LED will blink and the terminal will show “tilting”.
Python language code explanation
a) The following code is about the module when importing script, Import is a keyword at python language, and means import module.RPi.GPIO is a module to control Raspberry Pi GPIO channels for python. Time is a standard module for python. Delay Functions invokes this module.
import RPi.GPIO as GPIO
import time
b) Define LED and SW520d GPIO. In Python, GPIO use BCM numbering method which is different from wiringPi in C langugage, for detail about the difference, please read Lesson 2 .
# set #6 as LED pin
LedPin = 6
# set #5 as SW520D Pin
Sw520dPin = 5
c) Print_message() is a custom function and show print message on the terminal. Learn more information about function definition, please click here
#print message at the beginning ---custom function
def print_message():
    print ('==================================')
    print ('|            LED Alarm           |')
    print ('|        ----------------        |')
    print ('|        If SW520D Tilt          |')
    print ('|                                |')
    print ('|        LED Will Blink          |')
    print ('|        ----------------        |')
    print ('|                                |')
    print ('|                          OSOYOO|')
    print ('==================================\n')
    print ('Program is running...')
    print ('Please press Ctrl+C to end the program...')
d) GPIO.setmode(GPIO.BCM) function sets up BCM numbering method as GPIO numbering method. GPIO.setup(LedPin,GPIO.OUT,initial=GPIO.HIGH) function sets up LedPin as output mode and set high level as LedPin’s initial level . GPIO.setup(Sw520dPin,GPIO.IN) function sets up sw520d as input mode.
#setup function for some setup---custom function
def setup():
    GPIO.setwarnings(False)
    #set the gpio modes to BCM numbering
    GPIO.setmode(GPIO.BCM)
    #set LedPin's mode to output,and initial level to HIGH(3.3V)
    GPIO.setup(LedPin,GPIO.OUT,initial=GPIO.HIGH)
    GPIO.setup(Sw520dPin,GPIO.IN)
e) Main function main() invokes print_message() function first, and the terminal will show the print message, and then go on while loop statement and conditions. The sw520d pin level will be read. If the pin level is read as high level, and it means tilt switch at the status of “tilting”, and the terminal will show “tilting” and LED will blink every 0.5s(500ms). when it is read as low level, it means tilt switch at the status of “not tilt”, and the terminal will show “not tilt” and LED will not blink.