(the metal chassis kit don’t include the batteries,click it to buy it separately)
Above robot cars are controlled by Arduino. if you have raspberry pi board, actually the robot car can also be controlled by Raspberry Pi. You can visit the following link to learn basic movement with raspberry pi.
link- https://osoyoo.com/?p=31428
In this lesson, you must complete lesson 1 before you continue on with this lesson. we use the ultrasonic module to “see” obstacle and measure the distance. If the distance is less than predefined threshold value, the buzzer will beep and the car will turn around from the obstacle automatically.
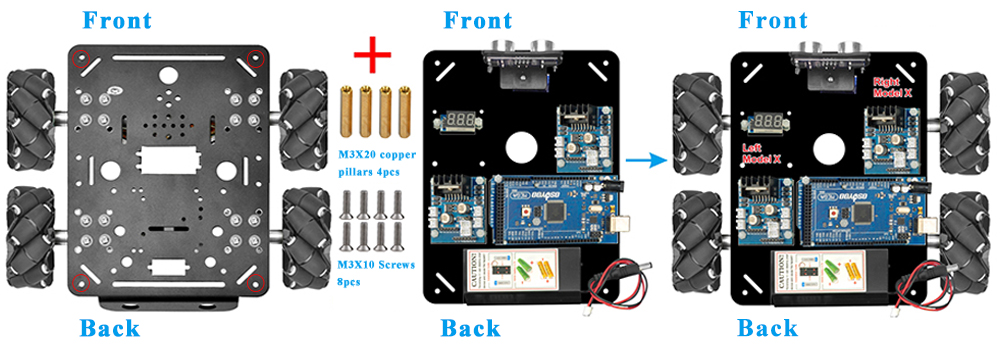
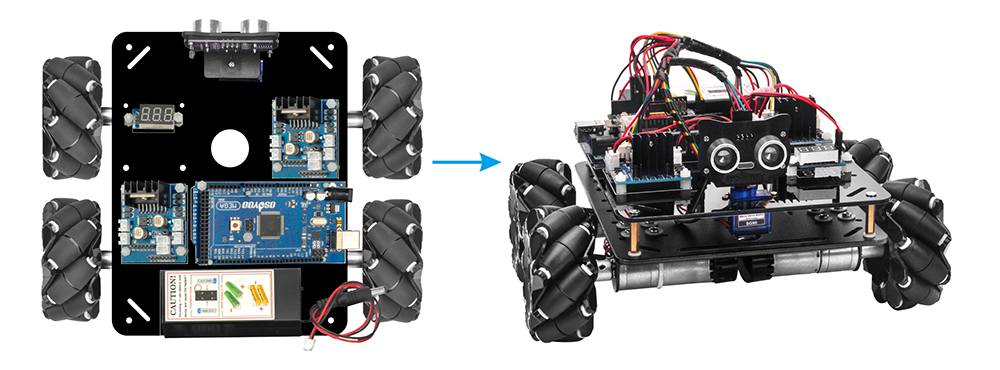
OSOYOO Mecanum Wheels Robotic Car Chassis x 1 (2xleft-wheels/2xright-wheels and Motor x 4)
OSOYOO Mega2560 board fully compatible with Arduino x 1
OSOYOO V1.0 WIFI shield x 1
OSOYOO Model X motor driver x 2
OSOYOO MG90 servo motor x 1
OSOYOO Ultrasonic sensor module x1
OSOYOO Mount holder
OSOYOO Battery box x 1
18650 Batteries(3.7V) x 2
You must complete lesson 1 (assembling the car) before you continue on with this lesson.In this lesson3, we will add a mg90 servo motor and to the robotic car built in Lesson 1.
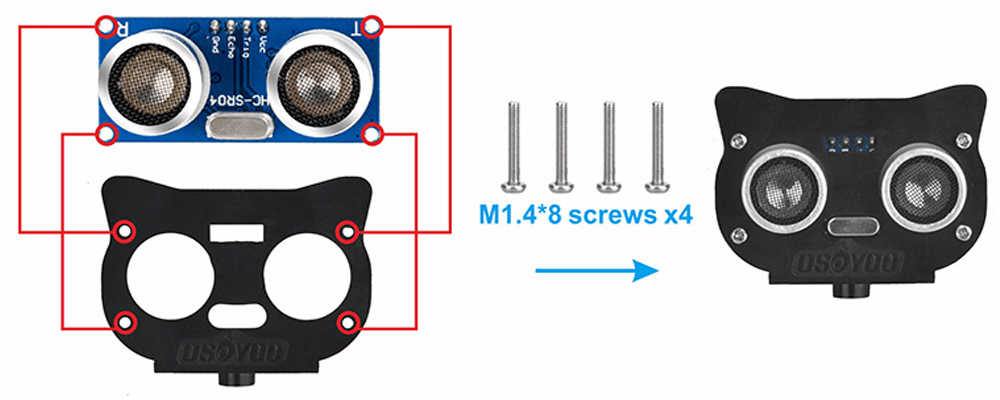
STEP1: Install Ultrasonic Module to mount holder with 4pcs M1.4*8 screw and M1.4 nuts
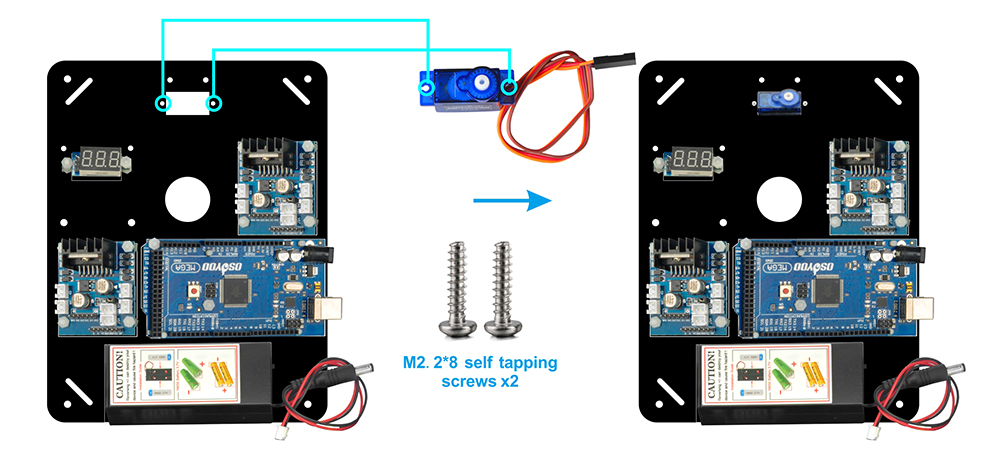
Step 2: take down the upper arcylic chassis from the car,then installed servo motor at the front of upper car chassis with 2pcs M2.2*8 Self Tapping Screws.
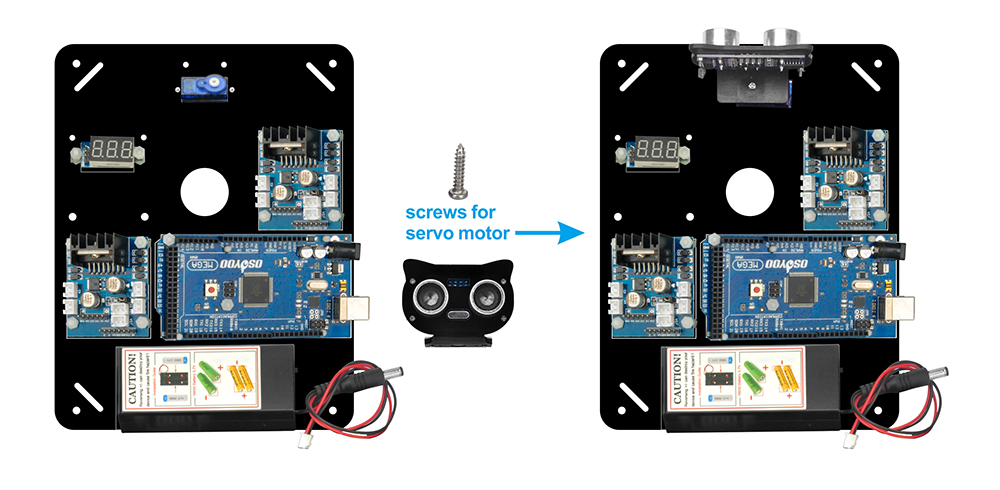
Step 3: Install mount holder for ultrasonic module on servo motor with M2*4 Self Tapping screw.
Step 4. Install upper acrylic chassis again as the following pictures.
Step 5. You must complete lesson 1 (assembling the car) circuit connection. No need change anything, just keep the hardware wire connection as it is.
If you just finishes Lesson 1, please keep all lesson 1 connections same as it is. Before connecting wires, make sure you have inserted OSOYOO WIFI Shield onto MEGA2560 board already.
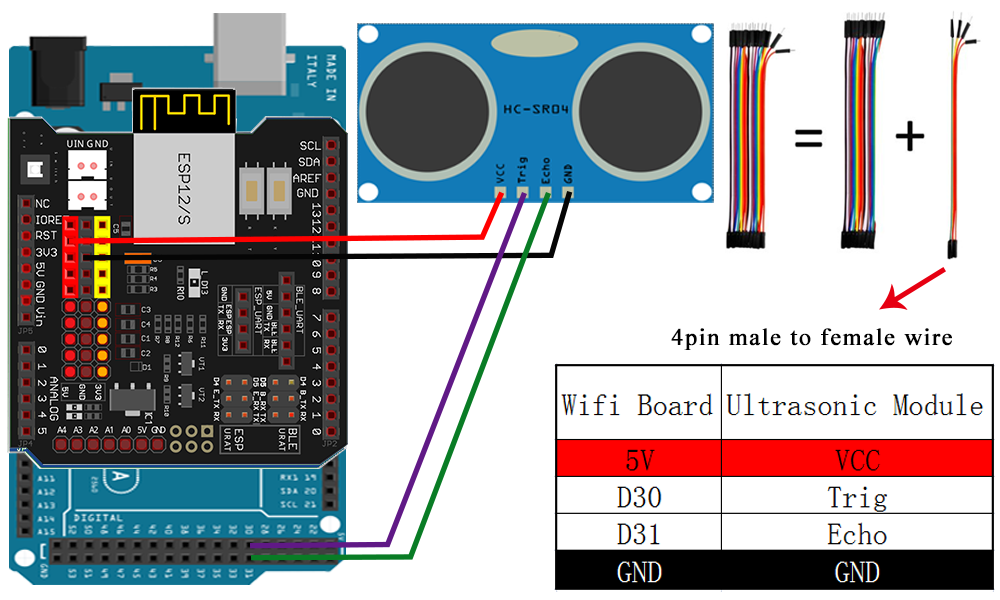
STEP6: Connect Servo 3-pin head to any Model X board servo slot (yellow to S pin, red to 5v,brown to G pin), then connect another S pin to WIFI board D13.
(Note: You need split 1 pcs of male-to-female jumper wires from our 10-pc jumper wire bundle. Any color from the bundle will be ok. The rest of wires are as spare parts for potential broken or damaged wires.)
STEP7: Connect VCC,Trig,Echo,GND of ultrasonic module to 5V,D30,D31,GND of
wifi board with 4 pcs of male-to-female jumper wires.
(Note: You need split 4 pcs of male-to-female jumper wires from our 10-pc jumper wire bundle. Any color from the bundle will be ok. The rest of wires are as spare parts for potential broken or damaged wires.)
Step 1: Install latest Arduino IDE (If you have Arduino IDE version after 1.1.16, please skip this step). Download Arduino IDE from https://www.arduino.cc/en/Main/Software?setlang=en , then install the software.
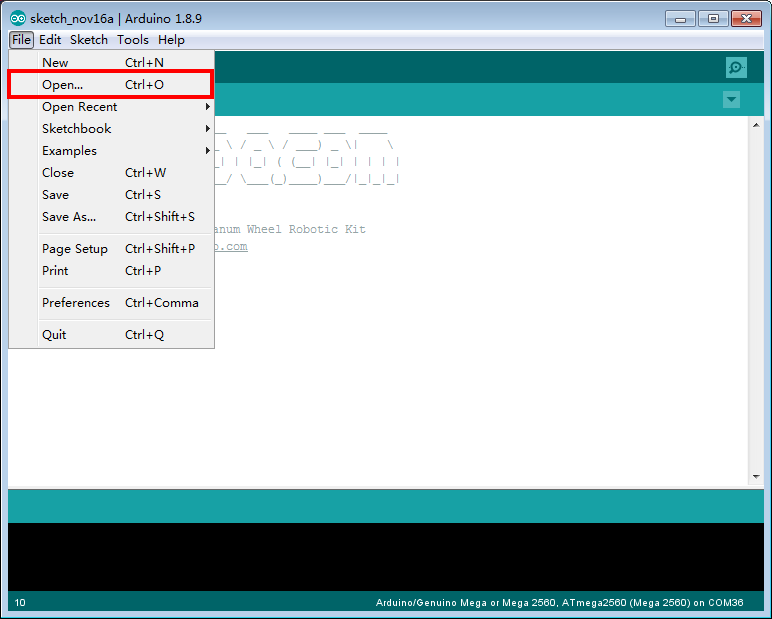
Step 3: Connect Mega2560 board to PC with USB cable, Open Arduino IDE -> click file -> click Open -> choose code “lesson2.ino” in lesson folder, load the code into Arduino as following.
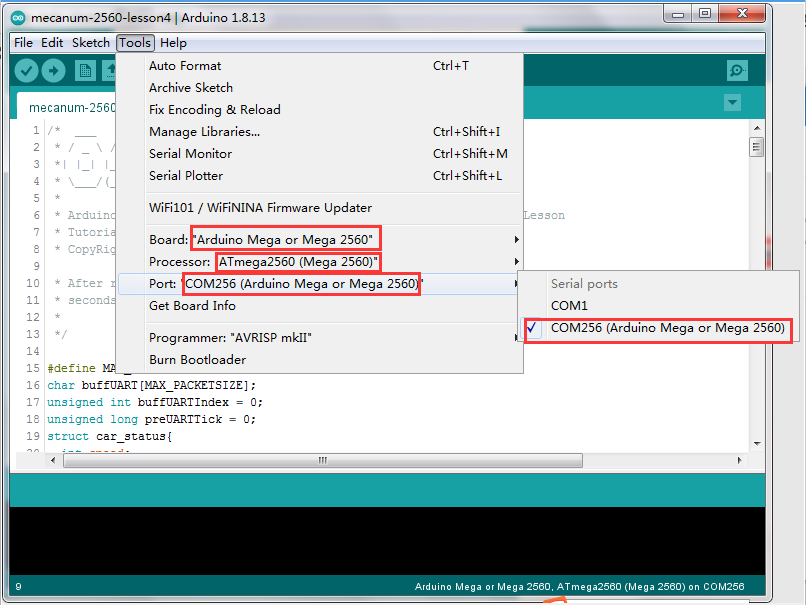
Step 4: Choose corresponding board/port for your project,upload the sketch to the board.
Step 5:Ultrasonic sensor servo initial direction alignment
After turning on the battery, the servo will make some movement and finally stops at a direction for 5 seconds.
During this first 5 seconds, you must make sure the Ultrasonic sensor(two eyes) is facing straight forward.
If it is not straight forward, you should turn off battery immediately and remove the sensor from servo, reinstall it and make it facing straight forward direction as following picture. Otherwise the obstacle avoidance program will not work properly.
After adjusting sensor direction, turn on battery again. If its direction is not straight forward, turn off battery and do direction alignment again.
If the ultrasonic module turn to front view position, that means you no need adjust sensor position anymore. Just wait 5 seconds. If no obstacle is detected, the car will go forward. If any obstacles is detected, the car will stop, the ultrasonic module will turn from right to left to detect surrounding obstacle. The robot car will decide to make left turn, right turn or backward according to obstacle sensor data and our obstacle avoidance algorithm.
Sometimes your car might have collision and make your Ultrasonic sensor position change, you must remember to do sensor direction alignment again.
The robot car will decide to make left turn, right turn or backward according to obstacle sensor data and our obstacle avoidance algorithm. Sometimes your car might have collision and make your Ultrasonic sensor position change, you must remember to do sensor direction alignment again.
Important parameters in the sketch file
Following parameters in Line 32 to 39 of mecanum-2560-lesson2.ino are very important to make performance tuning. See the comments in the #define statements:
#define FAST_SPEED  110   //The difference between FAST_SPEED and SPEED determines the slight turning sharpness
#define SPEED  80     //forward moving speed
#define TURN_SPEED  110   //Turning Speed
#define FORWARD_TIME 200   //FORWARD_TIME determines Forward distance
#define BACK_TIME  300  //  determines BACK MOVEMENT distance
#define TURN_TIME  250  //Determines turning sharpness
#define OBSTACLE_LIMIT 30  //minimum distance in cm to obstacles at both sides
(the car will allow a shorter distance sideways)