In this lesson, we will show you how to use ultrasonic sensor to detect distance and how to use MEGA-IoT Shield to report the intruder status to a remote Mobile APP (Blynk).
Blynk is a very powerful open source APP which allows user to customize their own IoT APP UI and control remote Arduino or Raspberry Pi devices. In this lesson , you will also learn how to setup your own IoT APP with Blynk.
OSOYOO MEGA2560 Board x 1
OSOYOO MEGA-IoT extension board x 1
USB Cable x 1
Red LED PnP module x 1
Green LED PnP module x 1
Yellow LED PnP module x 1
White LED PnP module x 1
Ultrasonic distance SensorPnP module x 1
3-pin PnP cable x 4
4-pin PnP cable x 1
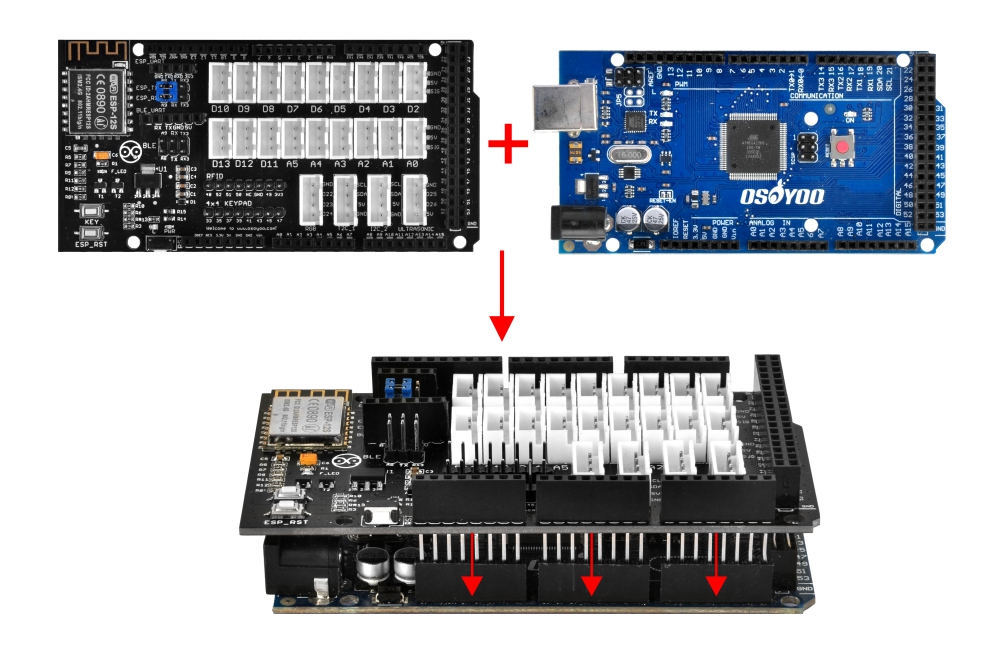
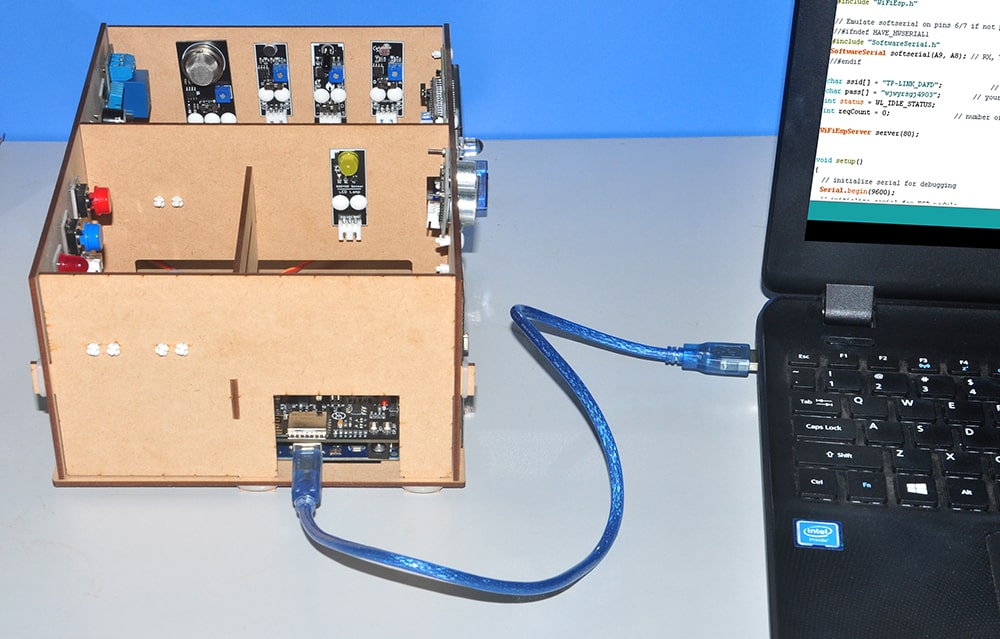
First, please plug OSOYOO MEGA-IoT Extension Board into MEGA2560 board:
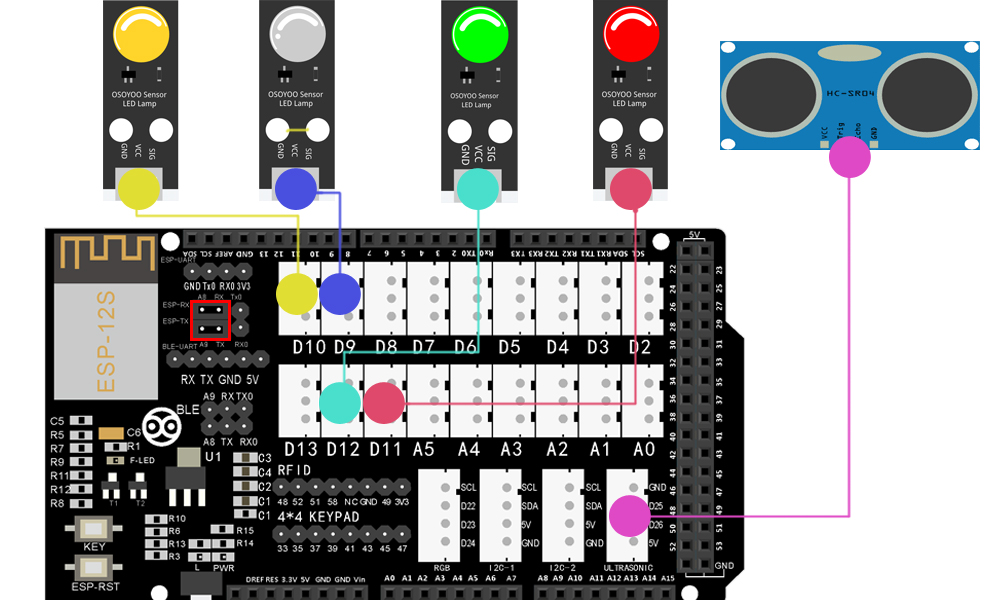
Then connect the modules with the OSOYOO MEGA-IoT Extension Board with four 3-pin PnP cables as below:
(Jumper Cap should connect ESP8266 RX with A8, TX with A9)
White LED Module – D9
Yellow LED Module – D10
Red LED Module – D11
Green LED Module – D12
Ultrasonic distance SensorPnP module- Ultrasonic port (4-pin PnP cable)
Notice: Shut off your battery or Unplug your power adapter when upload sketch code to Arduino.
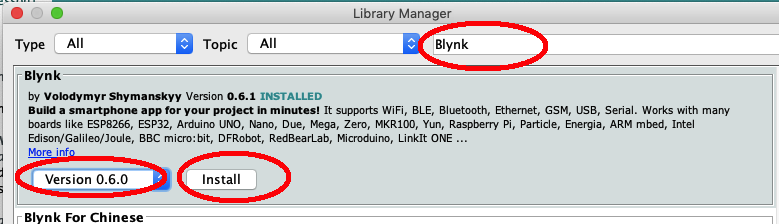
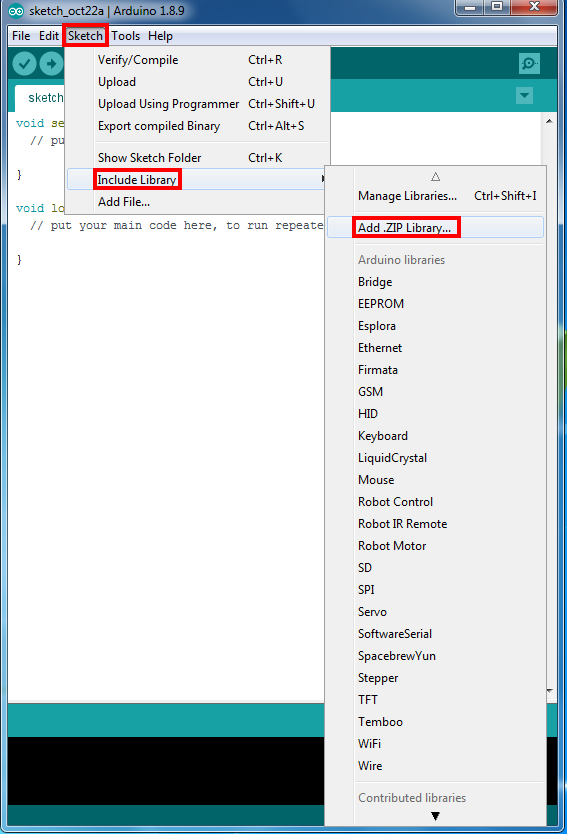
Step 2 ) (skip this step if you have installed Blynk library) Download Blynk Library by click Sketch ->Include Library ->Manager Libraries, then search Blynk and install the library file as following: Step 3) (skip this step if you have installed BlynkESP8266 library) Download BlynkESP8266_Lib library from: https://osoyoo.com/driver/blynk/BlynkESP8266_Lib.zip
Then click Sketch->Include Library->Add Zip library and upload BlynkESP8266_Lib.zip
Step 3 After installing above library, please download the main code from following link, unzip it, you will see a folder called “smarthome-lesson17B”:
Step 4 After above operations are completed, connect OSOYOO MEGA2560 Board to PC with USB cable.
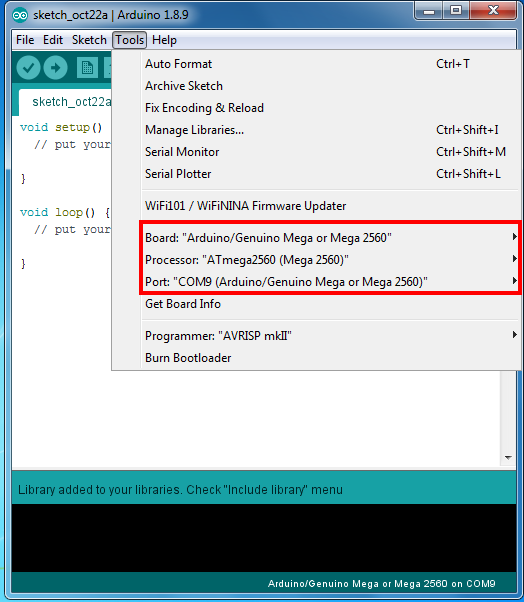
Step 5 Arduino IDE: Choose corresponding board type and port type for you project .
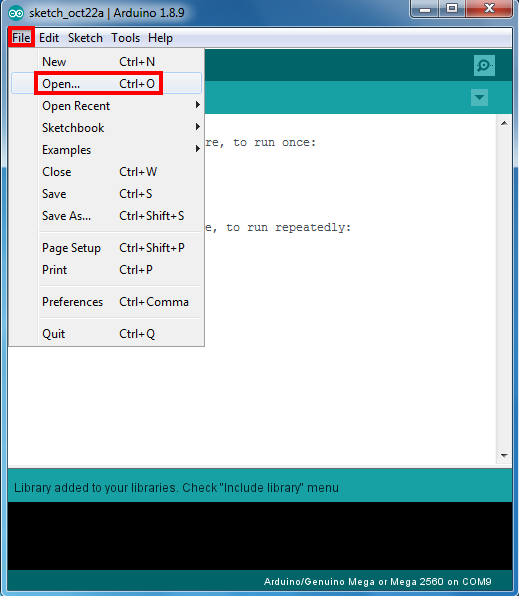
Step 6 Arduino IDE: Click file – Open, then choose code “smarthome-lesson17B.ino” in the folder, load up the sketch onto your Arduino.
Note: In the sketch, find lines 21 to 25, replace your local server IP, your wifi ssid/password, and your blynk token(To get Blynk token, read https://osoyoo.com/?p=39249#token) as following:
char server_ip[]="192.168.0.45"; // your local Blynk Server IP address
char auth[] = "******"; // your Blynk Auth token from Blynk APP

char ssid[] = "******"; // replace ****** with your network SSID (name)
char pass[] = "******"; // replace ****** with your network password
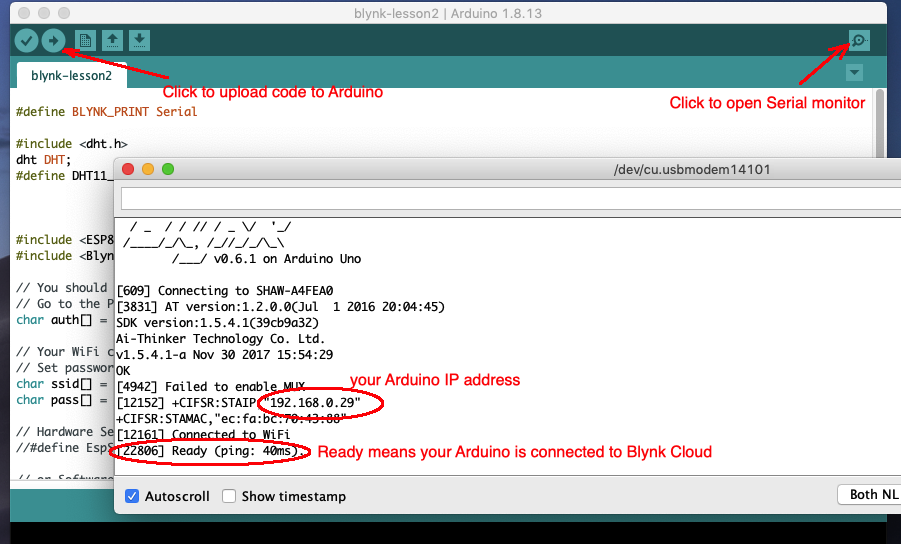
After change above lines, upload the sketch code to Arduino board. Then open your Serial monitor in Arduino, you will see :
Once you see the “Ready” message in Serial monitor, your Arduino is connected to Blynk cloud.
Customize your Blynk APP User Interface with nice Widgets
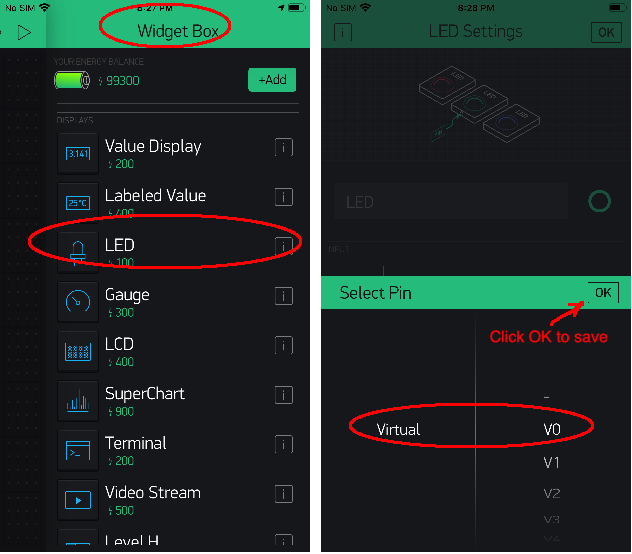
Step 1) Add a New Project in Blynk APP and give it a name , i.e Lesson 17 Step2) Open Blynk App Lesson 17 Project, In widget Box , add LED widget , select LED pin to Virtual pin V0 and click OK to save:
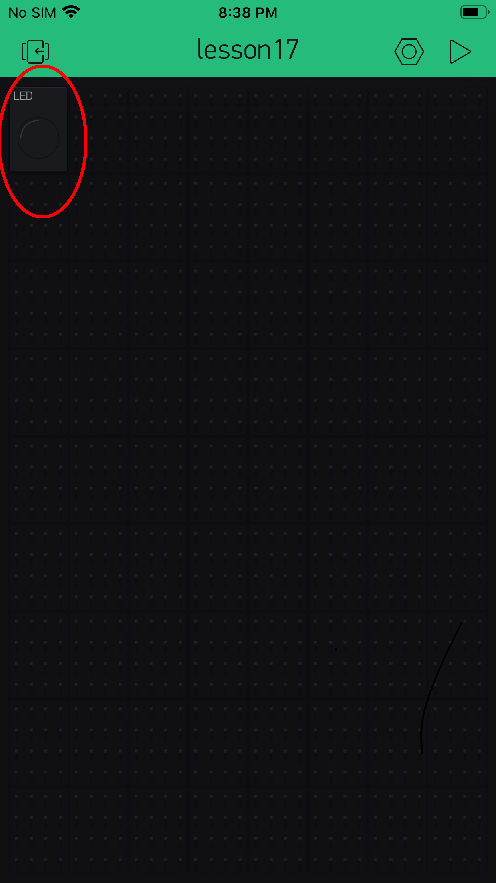
Now in your APP UI, you will see a LED widget which connects to Virtual Pin V0 as following image, we will use this LED to show intruder alert :
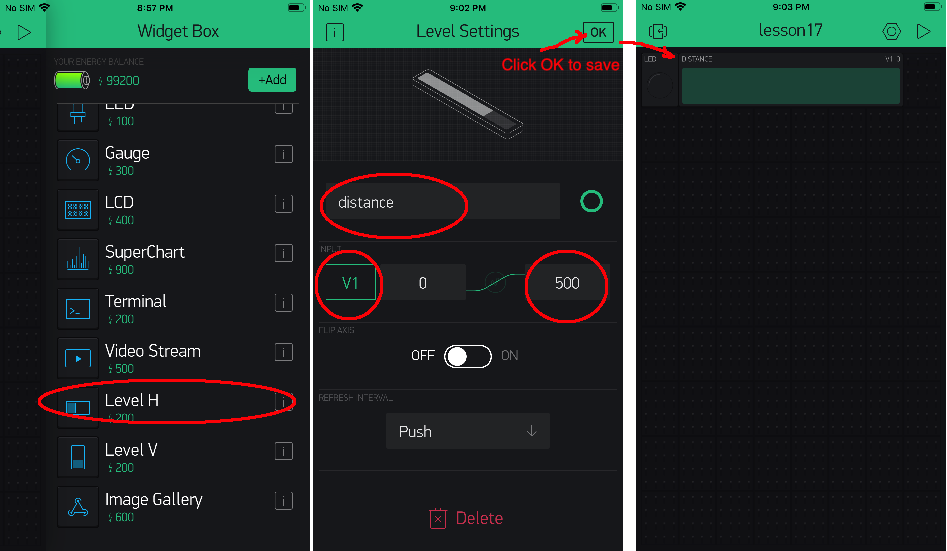
Now Add another Widget called Level H, associate this widget to Virtual Pin V1, value range from 0 to 500 as following picture, we will use this Level widget to display object distance:
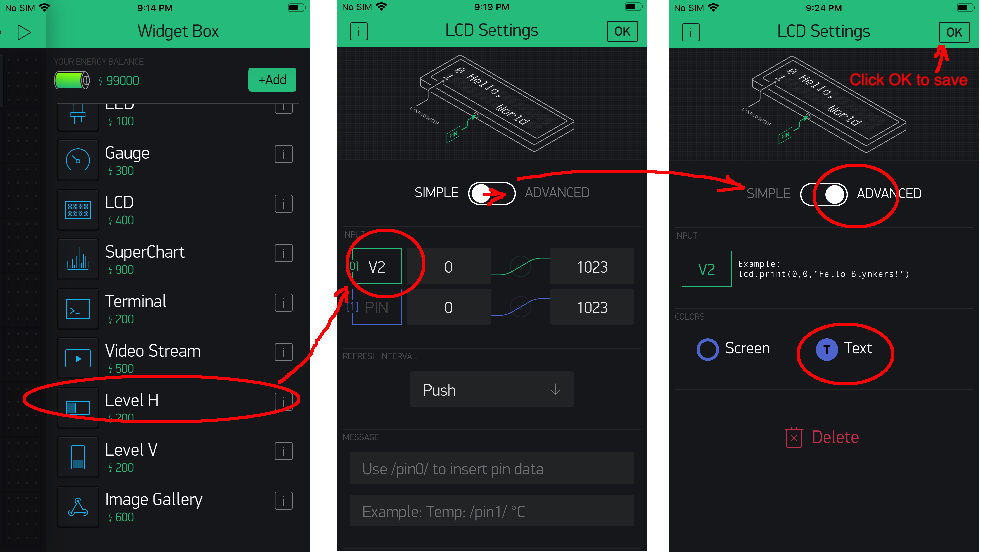
The last step is to add a LCD widget which will show text message, Set the LCD to Virtual Pin V2, Set Advanced property to TEXT and click OK to save as following image:
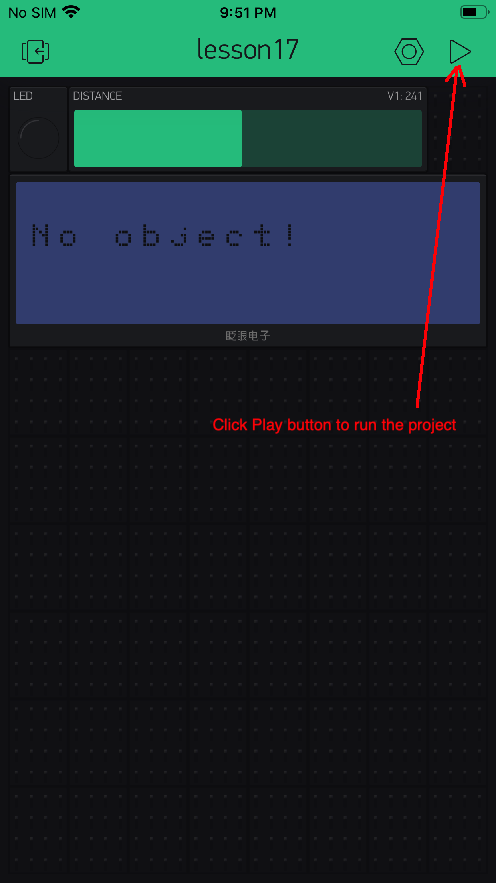
Now in our APP, we can see our APP complete User Interface as following picture:
After click the Play button ► in APP, your APP starts to communicate with your Arduino, you will see following scenarios:
When there is NO object in front to ultrasonic sensor, ALL LEDs are off. Your APP LED is also off, your APP LCD shows No object!
Now put your hand from far way very slowly to the sensor front, Red LED will first turn on, Your APP LED is also ON, your APP LCD shows No object!
Slowly move your hand closer to sensor, the Green LED will turn ON, your APP LCD shows Object is far!
Keep moving your hand closer to sensor slowly, the YELLOW LED will turn ON, your APP LCD shows Object is near!
When your hand is very very close to sensor, the White LED will turn on , your APP LCD shows Object very near!
During the whole procedure, the Distance Level bar will changing length and value as per the distance between your hand and the sensor. See following demo video.


 In this lesson, we will show you how to use ultrasonic sensor to detect distance and how to use MEGA-IoT Shield to report the intruder status to a remote Mobile APP (Blynk).