| Buy from US |
Buy from UK |
Buy from DE |
Buy from IT |
Buy from FR |
Buy from ES |
ここでご購入を! |
 |
 |
 |
 |
 |
 |
 |
説明
Osoyoo NodeMCUにはLuaインタープリターがあらかじめプログラムされていますが、それを使う必要はありません!Arduino IDEでNodeMCUボードを使用すると、ファームウェアに直接書き込みが行われ、NodeMCUのファームウェアが消去されます。
NodeMCUのプログラミングはArduinoと同じくらい簡単で、主な違いはnodemcuボードのピンの分布です。以下の操作に従って、初めてのNodeMCUとIDEの旅を楽しんでください!
1.NodeMCUをコンピュータに接続する
USBケーブルを使ってNodeMCUをコンピュータに接続します。電源が入ると、オンボードの青いLEDが点滅しますが、点灯し続けることはありません。
2.COM/シリアルポートドライバのインストール
ESP8266にコードをアップロードし、シリアルコンソールを使用するには、任意のデータ対応マイクロUSBケーブルをESP8266 IOTボードに接続し、反対側をコンピュータのUSBポートに接続します。
新しいバージョン NodeMCUv1.0 には CP2102 シリアル チップが付属しており、ここからドライバーをダウンロードしてインストールできます。
NodeMCUv0.9 には CH340 シリアル チップが付属しており、ここからドライバーをダウンロードしてインストールできます。
3.Arduino IDE 1.6.4以上をインストールします。
Arduino.ccからIDE をダウンロードします(1.6.4以上) – 1.6.2は使用しないでください!すでにIDEがインストールされている場合は、既存のIDEを使用することができます。
プロキシに問題がある場合は、ESP8266-projectからReady-to-goパッケージをダウンロードすることもできます。
4.ESP8266ボードパッケージをインストールする
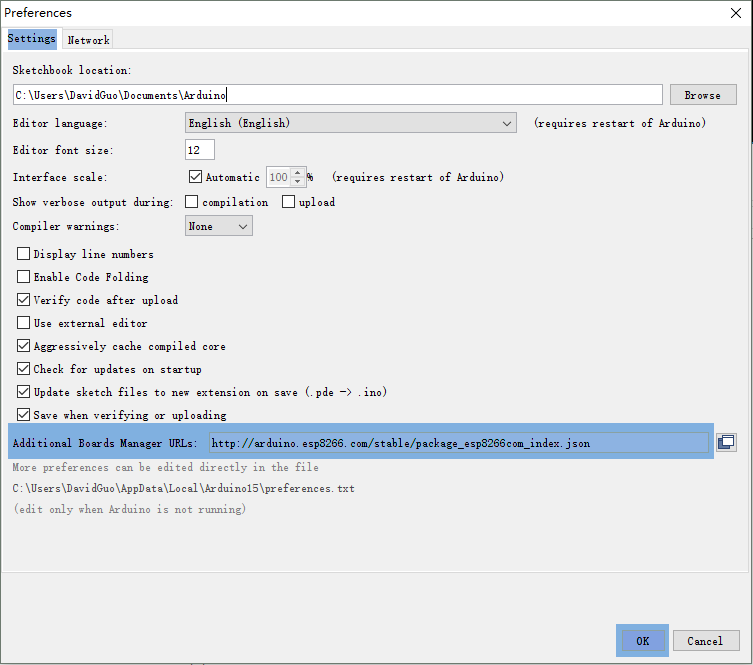
Arduino v1.6.4+の環境設定(Open Arduino IDE->File->Perferences->Settings)のAdditional Board Manager URLs欄にhttp://arduino.esp8266.com/stable/package_esp8266com_index.json。
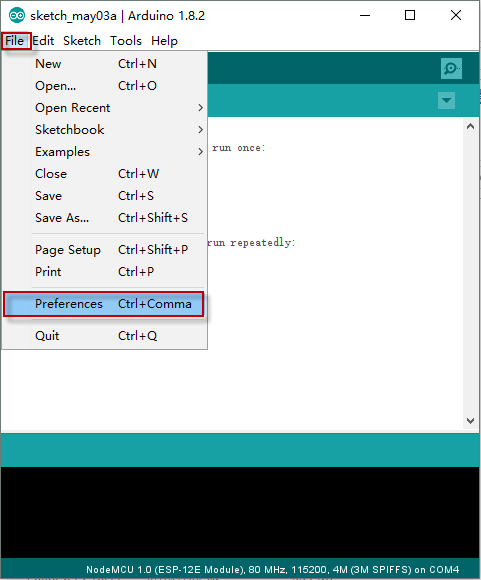
リンクを入力し、”OK “をクリックして変更を保存します。
次に、ボードマネージャを使ってESP8266パッケージをインストールします。
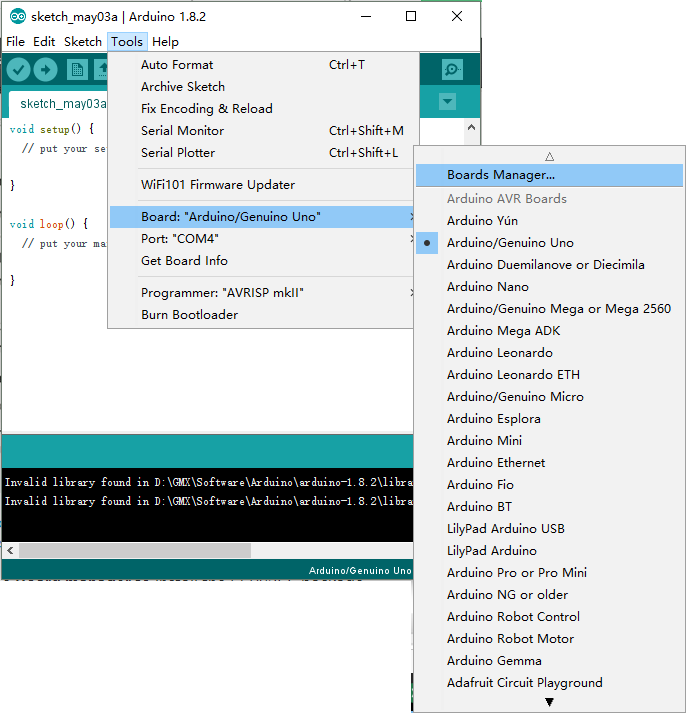
ボードマネージャーに入り、以下のようにボードタイプを見つけます:
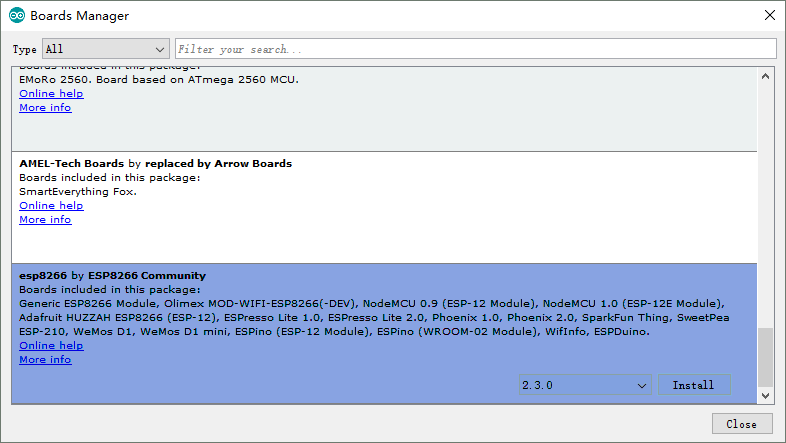
Broads Manager 画面を一番下までスクロールすると、「esp8266 by esp8266 Community」というモジュールが表示されます (次の図を参照)。最新バージョンを選択して「インストール」をクリックします。
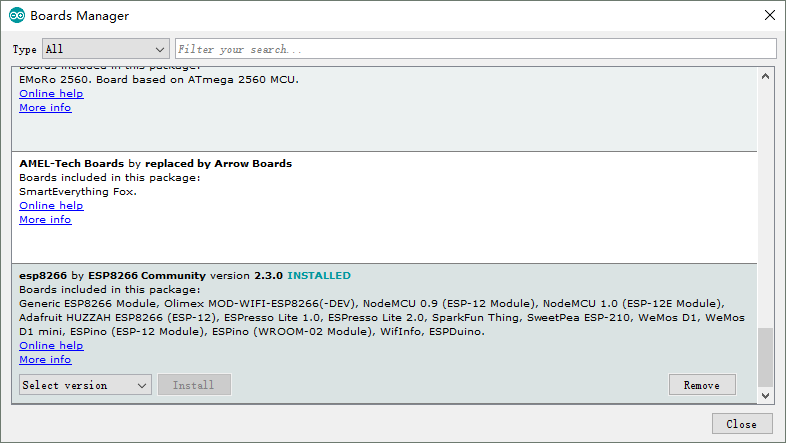
ESP8266パッケージが正常にインストールされました。
注意: Arduino IDEを一旦終了し、再度起動してください。
5.ESP8266サポートのセットアップ
再起動したら、ツール->ボードのドロップダウンからNodeMCU 1.0を選択します。
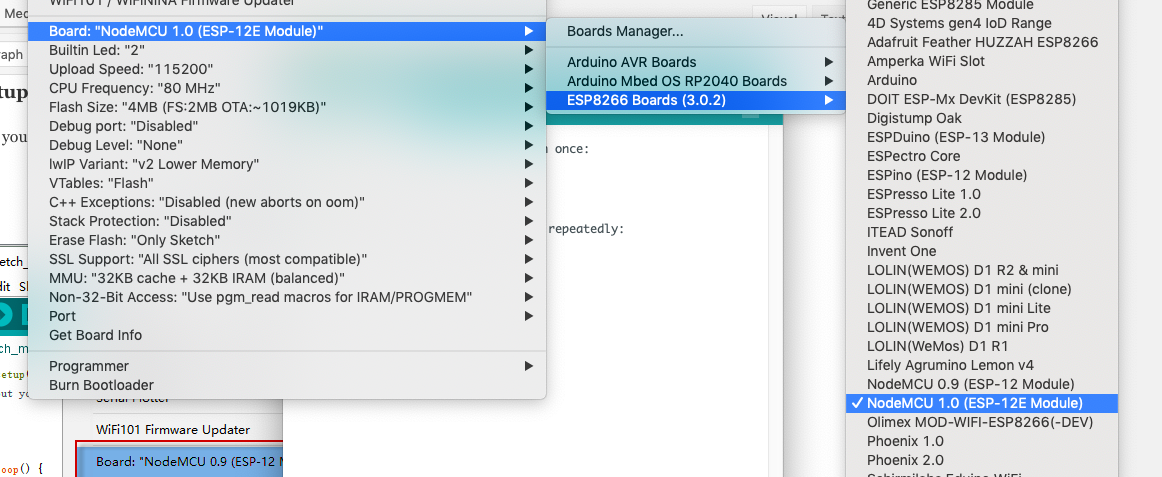
再起動したら、ツール->ボードのドロップダウンからNodeMCU 1.0を選択します。また、NodeMCUのポートと一致するPortを選択する必要があります。

上記のマニュアルの写真はMacBook Arduino IDEに基づいています。Windows PCをお使いの場合、マニュアルはMacBookコンピュータとは若干異なる場合があります。
あとはArduinoと同じように進めてください: スケッチを開始します!
注: アップロード速度は 115200 ボーから始めるのが適切です。後でより高速を試すこともできますが、115200 ボーから始めるのが安全です。