Introdution
PN532 NFC RFID Module is a highly integrated transmission module for Near Field Communication at 13.56MHz. With the mode switch on board, you can change easily between I2C, SPI, and UART modes. In addition, it supports RFID reading and writing, and NFC function with Android phone, which makes it quite convenient for wireless connection. This module is equipped with two 3mm mounting holes, of which the small dimension makes it easy for using in your project!
Features
- Supports I2C, SPI and HSU (High Speed UART), easy to switch between these modes.
- Works in the NFC mode and RFID reader/writer mode.
- Maximum distance for communication: 3 cm.
Hardware Preparation
1 * Arduino UNO/Mega 2560 board
1 * PN532 NFC Module
1 * Blank NFC card supporting the ISO14443A
1 * PC with Arduino software installed
Several jumper wires
Schematic Diagram
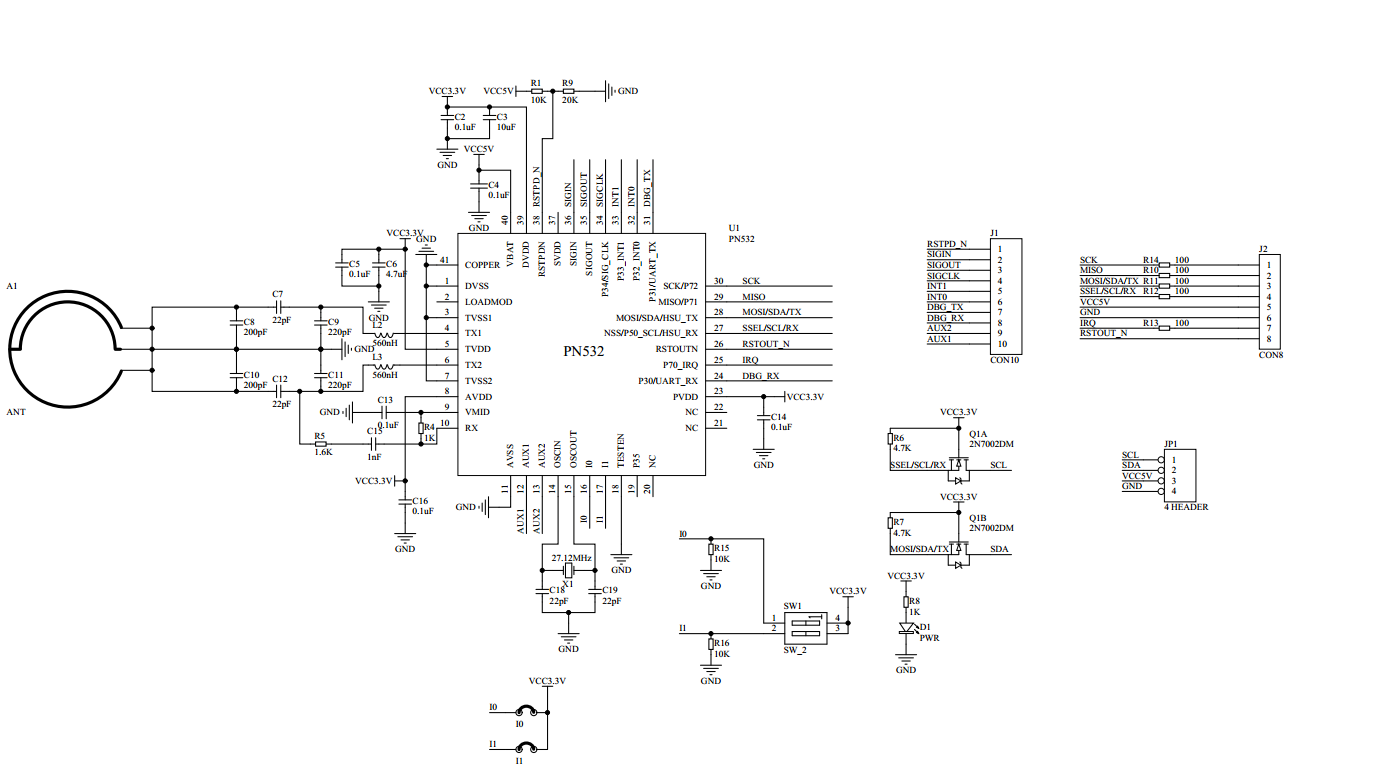
datasheet
Software
setp 1: Install some dependent packages.
- sudo apt-get update
- sudo apt-get install libusb-dev libpcsclite-dev i2c-tools -y
step 2: Download and unzip the source code package of libnfc.
step 3: Compile and install libnfc.
- cd libnfc-1.7.1
- ./configure –prefix=/usr –sysconfdir=/etc
- make
- sudo make install
Test I2C Mode
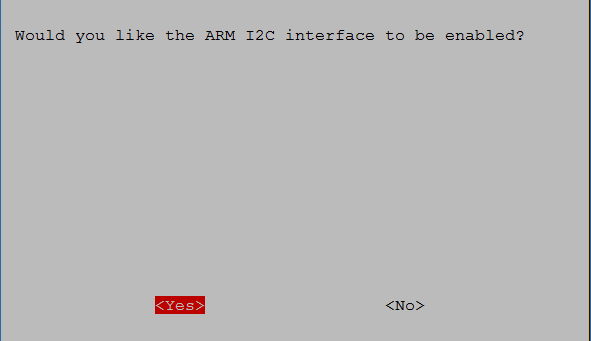
step 1: Open I2C interface
slect Advanced Options -> A7 I2C -> Yes -> Ok -> Finish



step 2: Write the configuration file for NFC communication
- sudo mkdir /etc/nfc
- sudo nano libnfc.conf
add the following line:
# Allow device auto-detection (default: true)
# Note: if this auto-detection is disabled, user has to set manually a device
# configuration using file or environment variable
allow_autoscan = true

# Allow intrusive auto-detection (default: false)
# Warning: intrusive auto-detection can seriously disturb other devices
# This option is not recommended, user should prefer to add manually his device.
allow_intrusive_scan = false

# Set log level (default: error)
# Valid log levels are (in order of verbosity): 0 (none), 1 (error), 2 (info), 3 (debug)
# Note: if you compiled with --enable-debug option, the default log level is "debug"
log_level = 1

# Manually set default device (no default)
# To set a default device, you must set both name and connstring for your device
# Note: if autoscan is enabled, default device will be the first device available in device list.
#device.name = "_PN532_SPI"
#device.connstring = "pn532_spi:/dev/spidev0.0:280000"
device.name = "_PN532_I2c"
device.connstring = "pn532_i2c:/dev/i2c-1"
save & close this file
step 3: Wiring
Toggle the switch to the I2C mode
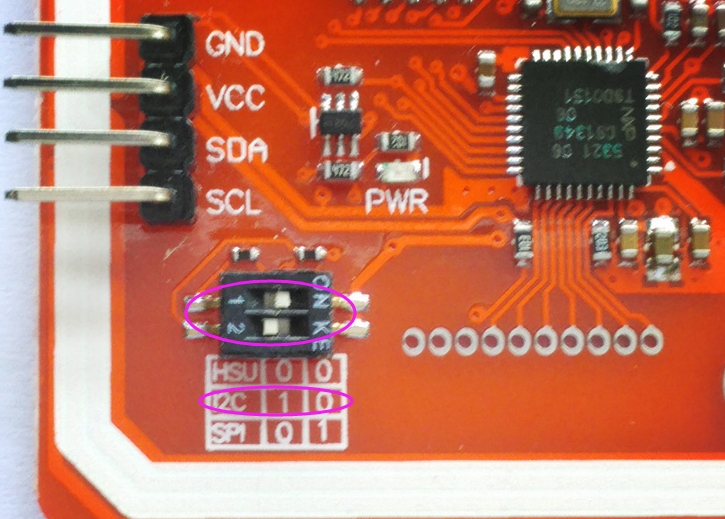
Connect the devices:
| PN532 NFC |
Raspberry Pi |
| VCC |
5V |
| GND |
GND |
| SDA |
SDA1 |
| SCL |
SCL1 |
step 4: Run i2cdetect –y 1 to check whether the I2C device is recognized
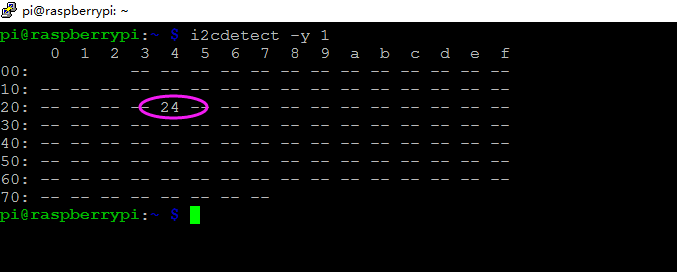
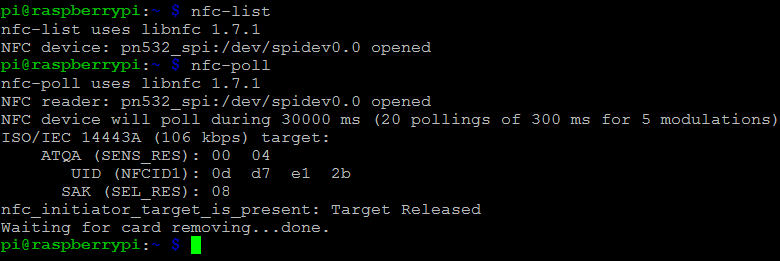
If yes, it means both the module and the wiring work well.Then type in nfc-list to check the NFC module,and run nfc-poll to scan the RFID tag and you can read information on the card.
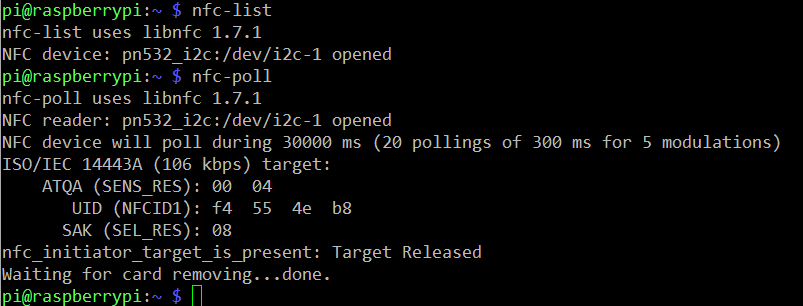
Test SPI Mode
step 1: Open SPI interface
slect Advanced Options -> A6 SPI -> Yes -> Ok -> Finish
step 2: Modify /etc/nfc/libnfc.conf file
- sudo nano /etc/nfc/libnfc.conf
Follow the picture below to modify it
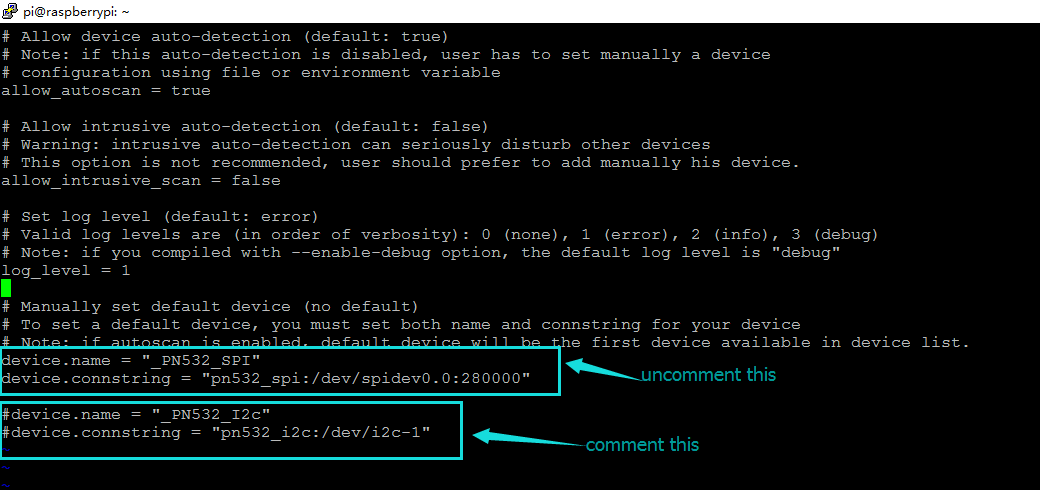
save & close this file
step 3: Wiring
Toggle the switch to the SPI mode
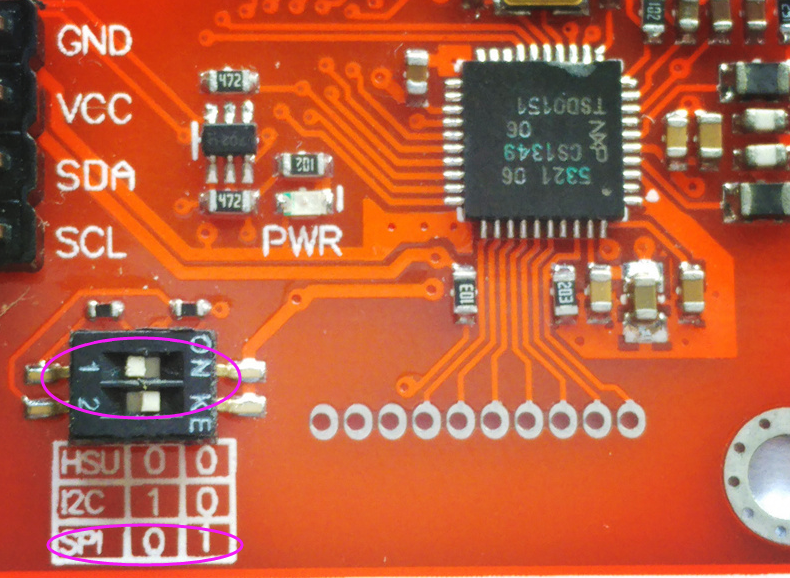
Connect the devices:
| PN532 NFC |
Raspberry Pi |
| VCC |
5V |
| SCK |
SCKL |
| MISO |
MISO |
| MOSI |
MOSI |
| SS |
CE0 |
step 4: Run ls /dev/spidev0.* to check whether the SPI is opened or not

If yes, it means both the module and the wiring work well.
Then type in nfc-list to check the NFC module

Run nfc-poll to scan the RFID tag and you can read information on the card
