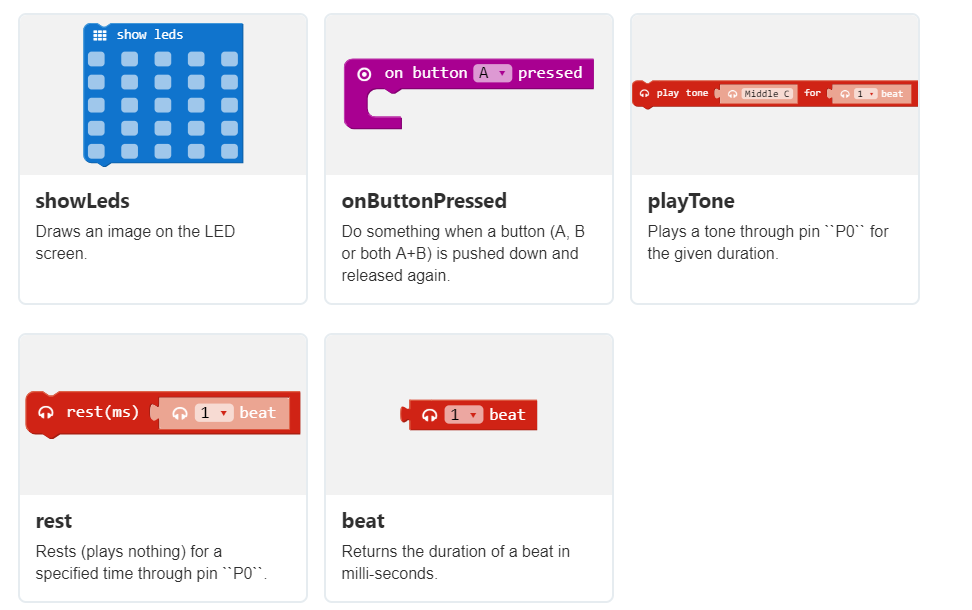
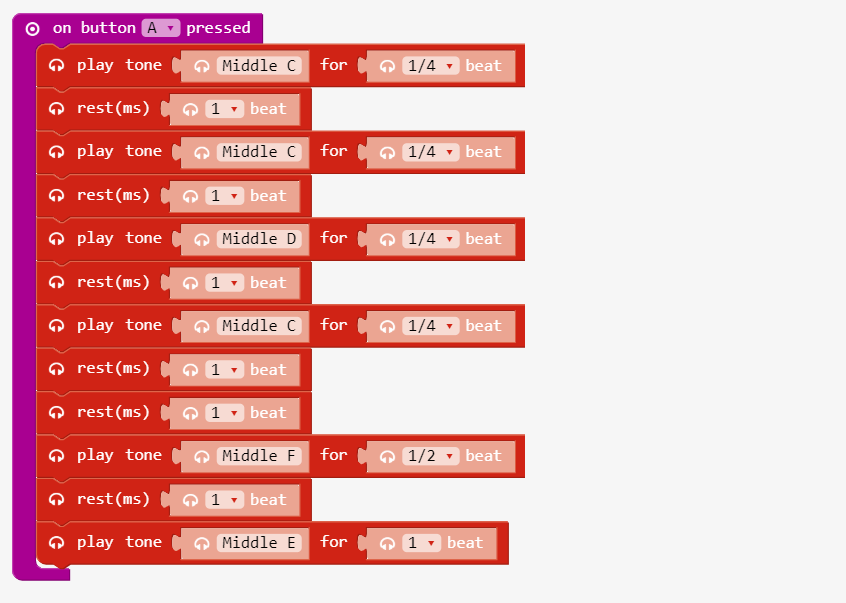
The play tone block allows a range letter note tones from C to B5. Songs are played using sequences notes. Like the beginning of a birthday song (C, C, D, C, F, E).
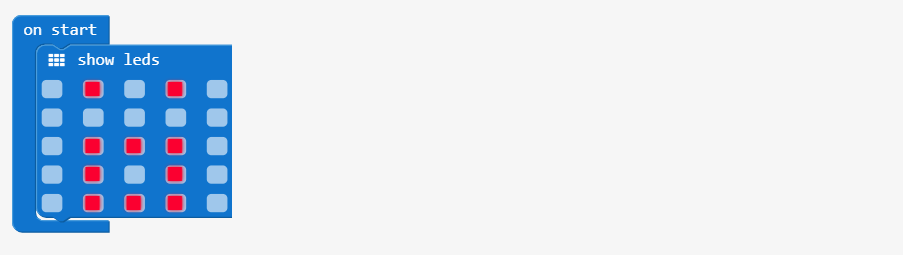
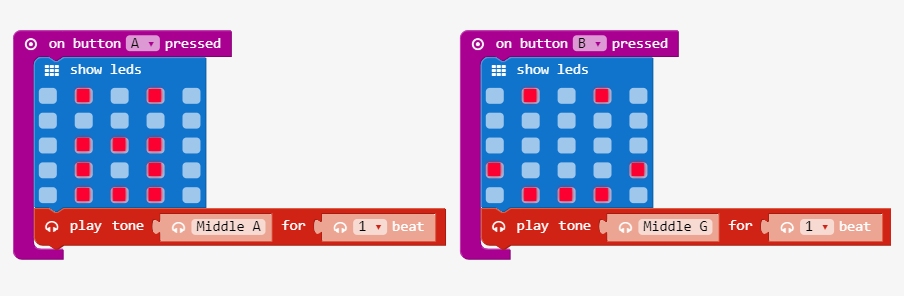
From Music, drag play tone C for 1 beat block under the show leds in Button A Pressed
modify tone by choosing a note (letter) and experiment with high and low pitches
set beat to 1
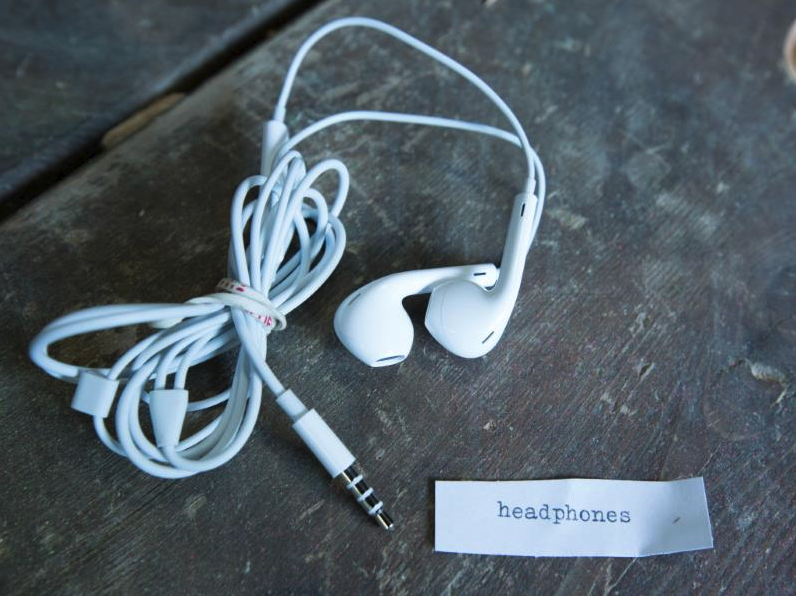
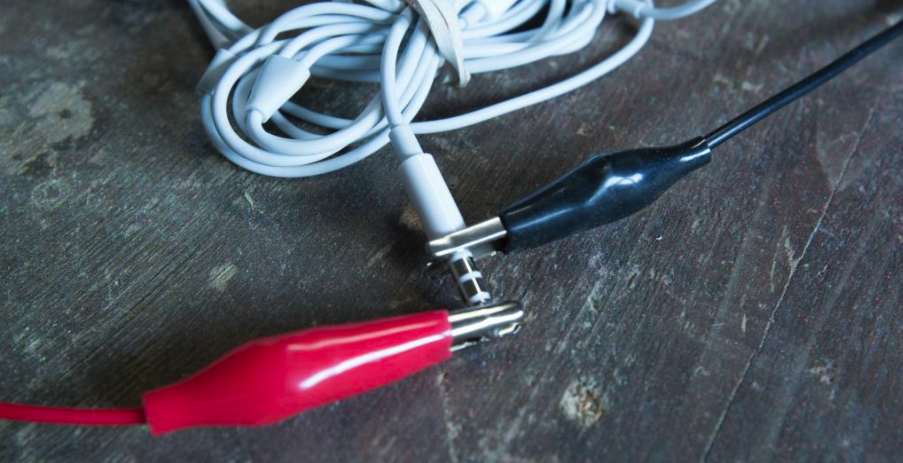
Repeat for Button B event Download the code to the micro:bit Try the A & B buttons with headphones and power connected
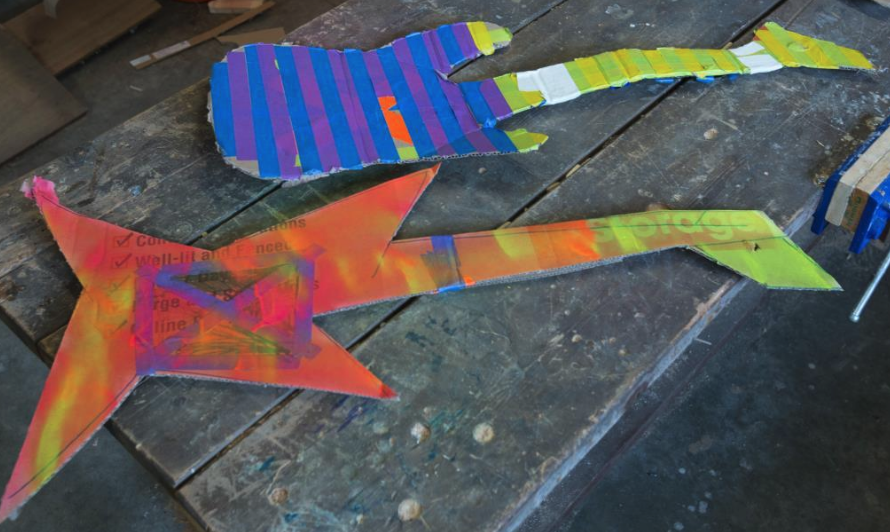
Congratulations on completing the basic guitar!
Challenge: Create samples of longer music to play for each button instead of the single tone Tip*: Search for “ABC music notation” or “Easy Music Notes” + the name of a song
the micro:bit can detect external light level intensity reaching the LEDs
the light level block reports a reading of values 0 (dark) to 255 (bright)
a Forever Loop is required to continually measure the current light level and control the tone
Forever Loop
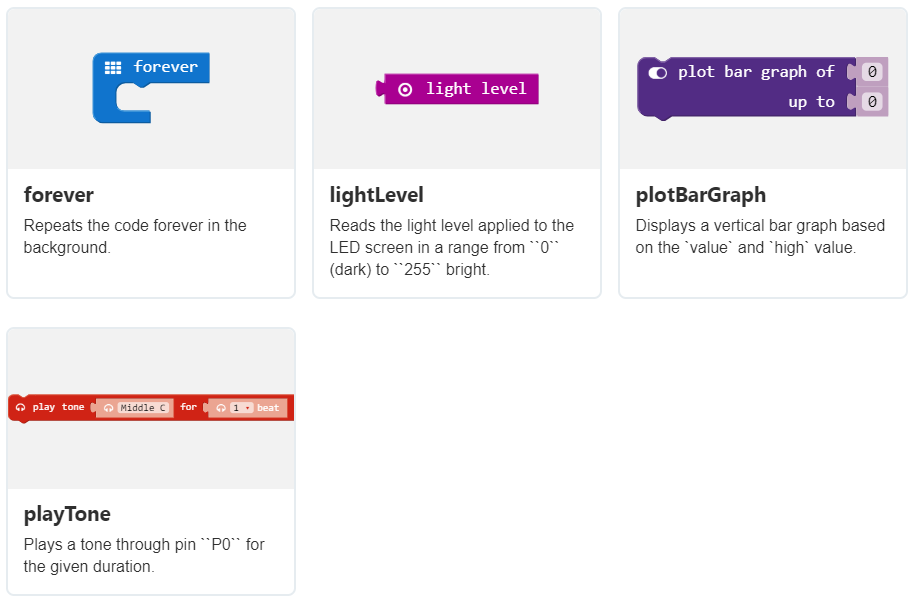
The forever loop really does run forever. The forever loop is useful when there is a need to continually check for an event or use a changing value in code.
Blocks
Step 1: Create a light level detector
Build the blocks From Basic drag a forever loop block into the coding area From Led drag a plot bar graph block into the forever loop From Input drag a light level block into **plot bar graph of*
Set the plot bar graph value up to = 255
Step 2: Test the light required to move the bar graph height
graphing light input https://youtu.be/pqU7bTcfQ_s Experiment to see the effect on graph height when the plot bar graph value up to is changed
255 is the maximum light input reading, try numbers smaller than 255 Find a value that allows the graph to show 1 – 5 bars
Frequency
Frequency measured in Hz which are cycles per second or vibrations per second A healthy human ear can detect frequencies in the range of 20Hz to 20,000Hz. The micro:bit + headphones reliably produce detectable output ~50Hz – 6,000Hz.
261Hz represents a C note
play tone blocks can specify a numeric Frequency by replacing the letter C note with a numberblock that has the value it represents
Step 3: Multiply Frequency using Math blocks
Create a **play tone** block using a **Math** section, **multiplication** block to set *tone*
Next
Add a B button block that multiplies the 261 tone by a number other than 2 to set tone.
Download the code to the micro:bit.
Test the sound for multiples of the 261Hz C frequency.
Step 4: Control the Frequency with the light input
Create a forever loop containing a play tone block
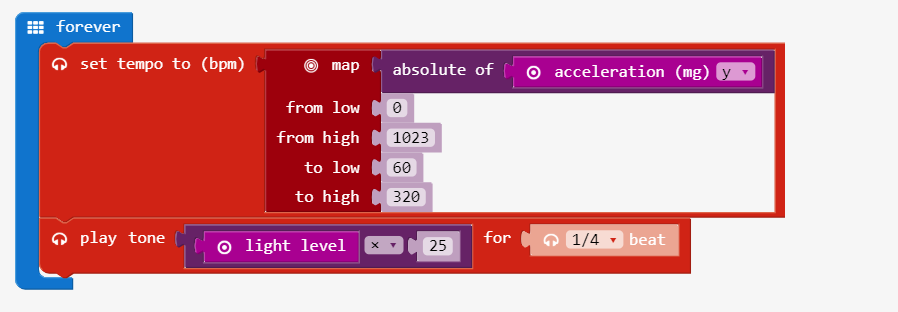
Set tone, using Math multiplication block that multiplies light level input by 25 or experiment with multipliers larger and smaller than 25
Test light tone control on the guitar Cover the LEDs with your hand to vary light detected to control the tone
Good work, this guitar is sounding good!
Challenge: Create a variable for the light level multiplier that you can change using buttons (optional)
Accelerometer Beat control
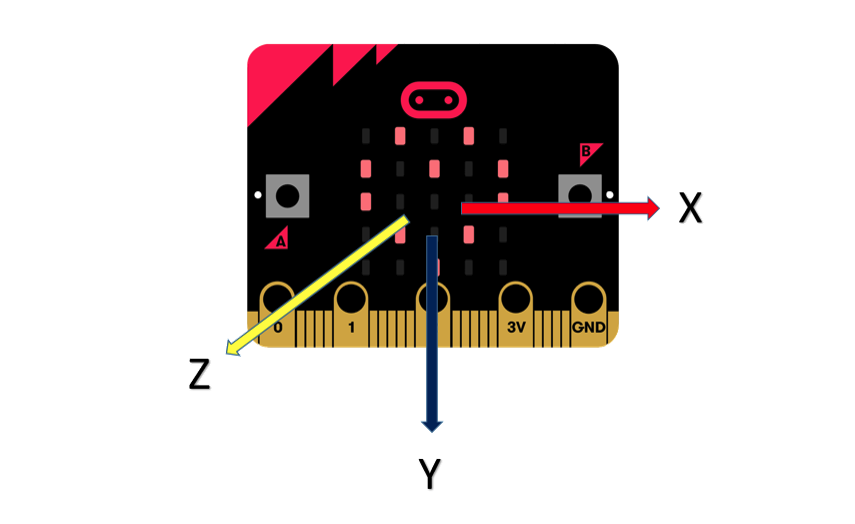
Use the Accelerometer to control guitar tempo Concepts: Gravity Acceleration X, Y, Z coordinates Tempo Beat Mapping Graphing * Absolute value
The micro:bit contains an accelerometer sensor that is able to measure forces applied to the board. On earth, we are subject to the gravity force which pulls us to the ground!
When the micro:bit is flat on a table, with the screen pointing up, the gravity force is aligned with the Z axis of the micro:bit.
If you tilt it up and down, the force will align with the Y axis – this is how we can detect tilting!!! If the force along Y grows, the micro:bit is tilting more and more vertically!
Measuring Acceleration along different coordinates (X, Y, Z axis)
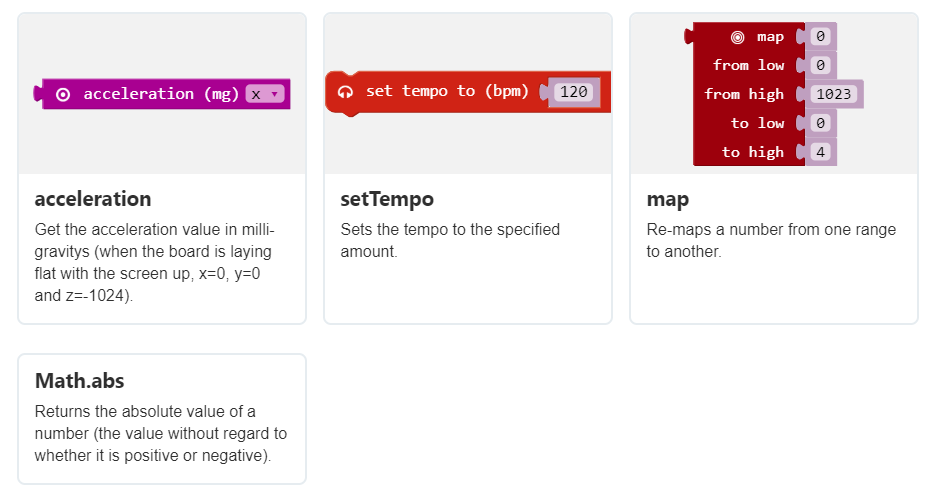
The acceleration block approximately measures milli-g, which is 1/1000 of a g or the acceleration of gravity.
Step 1: Graphing Acceleration
Create the code that measures the change in the Y axis acceleration as a graph on the LEDsDowload the code to the micro:bit Test the movements that move the graph from 1 to 5 bars on the LEDs
Extra
Try graphing the acceleration along the X and Z axis. Can you explain the differences?
MAPPING
It is common to map one standard to another – such as with temperature。
Step 2: Mapping acceleration to Beat
micro:bit sensors produce signal values between 0 to 1023. The map block converts the signal to a desired range.
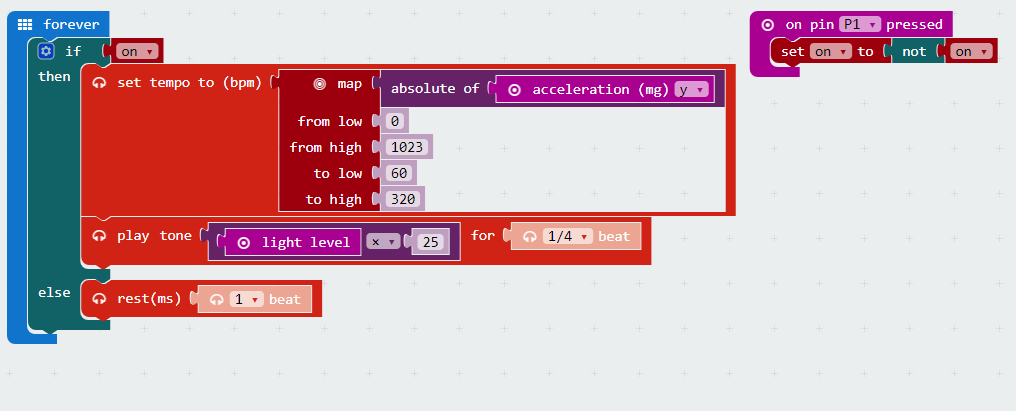
Create the code that Maps Y axis acceleration as tempo Download the code to the micro:bit on the guitar Test the movements that speed and slow the tempo
Combine the code above with the light sensor tone control code from the previous activityDownload the code to the micro:bit on the guitar Now play the guitar adjusting tone and tempo using the light sensor and accelerometer!
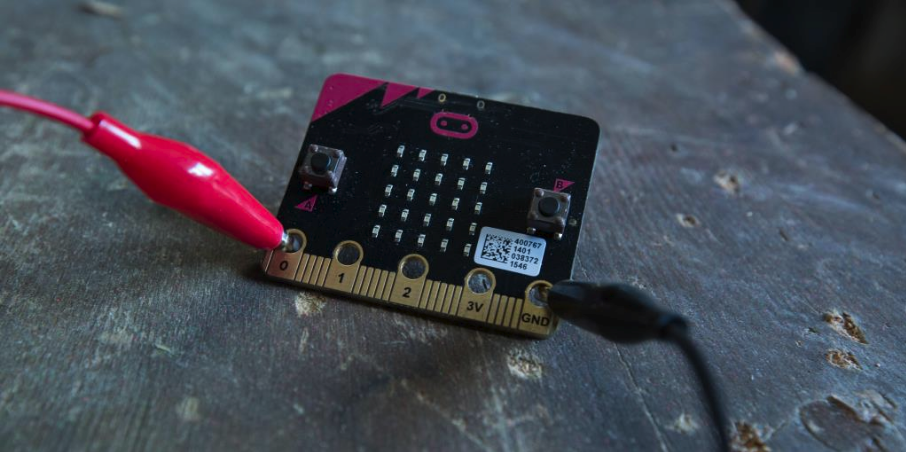
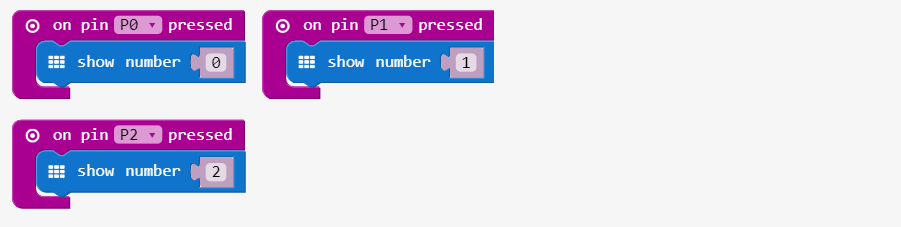
Hold the micro:bit touching The GND pin with one hand with the other hand alternately touch the 0, 1 and 2 pins. The electric signal traveled from pins, between your hands to GND and the micro:bit detected the electric signal!
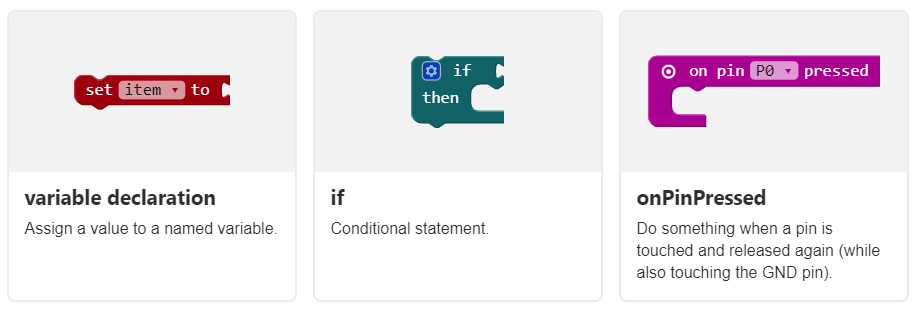
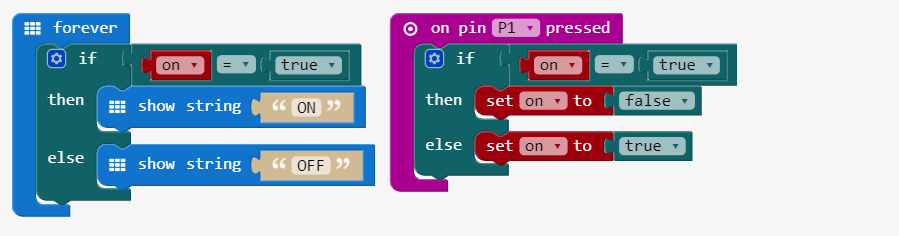
Step 3: Add a switch to turn the guitar ON and OFF
Using the on global variable we can switch the message on the micro:bit between ON and OFF.
Create the ON/OFF switch codeDownload the code on the micro:bitTest by touching P1 to toggle the LED message between ON and OFF Final code TODO: do we want to use on = !on; or be more direct in flipping the switch? on = true; on = false;