Objective
In last lesson,we learned that Blynk APP can use Button widget to control a remote digital pin and turn on/off LED light.
In this lesson, we will add a DHT11 Temperature and Humidity sensor into the circuit. We will also add two Gauge widget in Blynk APP. This two new widget can display the temperature and humidity data from remote DHT11 sensor.
Add New Widget into App
Step 1) Add Humidity Gauge Widget
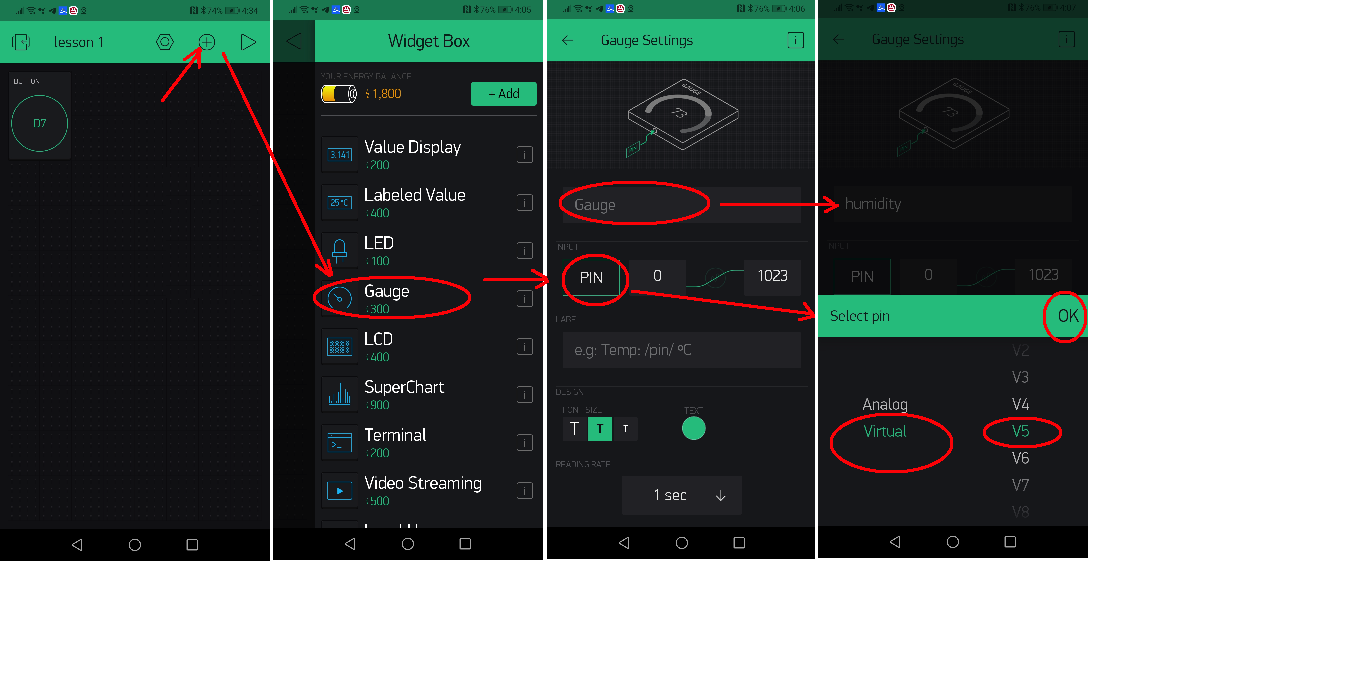
i)Open Blynk App Lesson 1 Project, Click (+) icon to add a widget
ii)Select Gauge from Widget box, you will see a new Gauge icon in your APP, click that icon to configure its property
iii)Change the Gauge name to humidity
iii)Click PIN drop down manual, set pin as Virtual V6 and click OK as following diagrams:
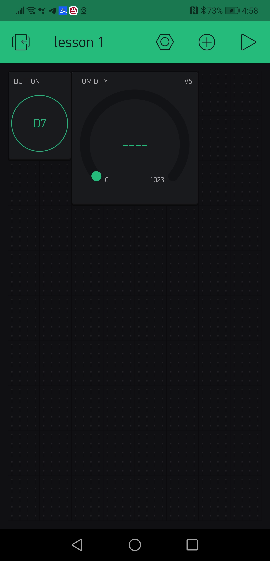
After the humidity widget properties are set, click <- go back to primary UI, you will see:
Now Repeat same procedure and add another Gauge Widget (we name it temperature) and set it to Virtual Pin V6 as following:
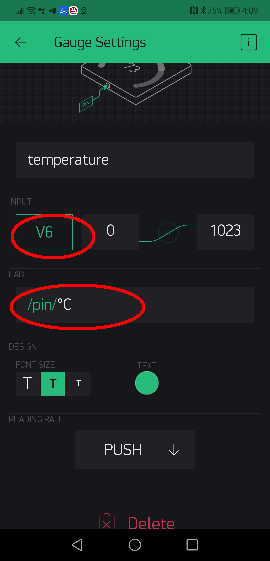
You may noticed in above picture , we set the temperature label value as /pin/ºC , this will display temperature with ºC unit. i.e. 30 degree in the widget will shows 30ºC. For same reason , we also set /pin/% label for humidity widget.
Now click <- to go back , you will see UI as following left picture:
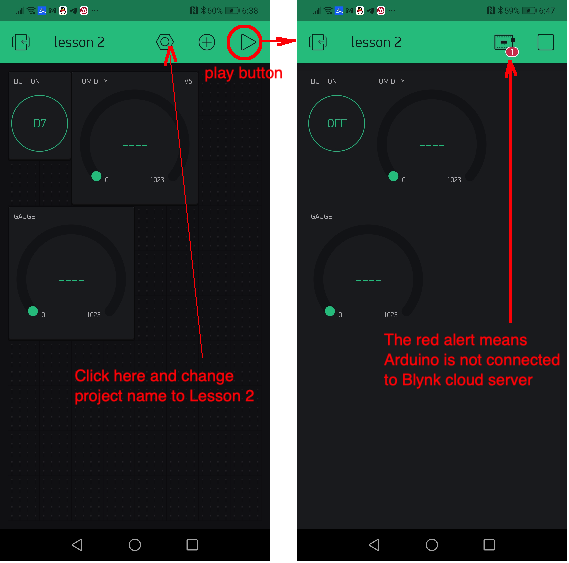
you can click the setting icon and change the Project name to Lesson 2.
After you click play button ►, you will see a small red alert sign in the upper right corner(see above picture right part). This means the board has not been detected by Blynk because we haven’t completed hardware and software for lesson 2.
Hardware circuit connection
In this lesson, we will keep original circuit in lesson 1 , and add a DHT11 sensor into the circuit, see following picture.
We will keep LED pin connected to D7 and connect DHT11 Signal pin(S). to D8.
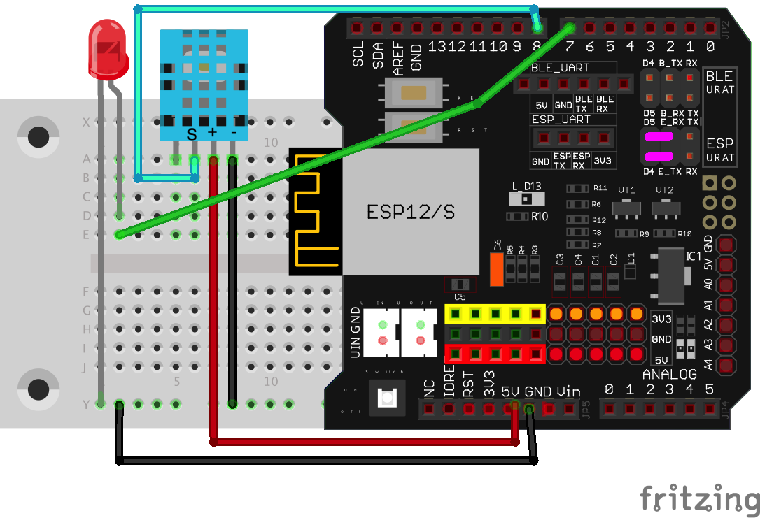
remember E_TX must connected to D4 and E_RX must connect to D5 by jumper caps as the pink line.
Software download and install:
1)Install Libraries:
If you haven’t install IDE and Blynk Library, please read lesson 1, then install them properly.
You also need to install DHT11 library for this lesson. If you have never installed DHT11 library, Please download the zip file from:
https://osoyoo.com/driver/DHT.zip
In IDE Sketch -> Include Library -> Add .ZIP Library to install above zip file.
2)Download and install Lesson 2 Sketch from following link:
https://osoyoo.com/driver/blynk-iot-lesson2/blynk-lesson2.zip
Unzip the file and open blynk-lesson2.ino file in IDE.
You need to change line 15 to 21, replace **** with your Blynk Authentication token, wifi ssid and wifi password
char auth[] = "****"; //replace **** with your Blynk Auth token

// Your WiFi credentials.
// Set password to "" for open networks.
char ssid[] = "****"; //replace **** with your network SSID (name)
char pass[] = "****"; //replace **** with your network password
After change above lines, upload the sketch code to board. Then open your Serial monitor in mainboard, you will see :
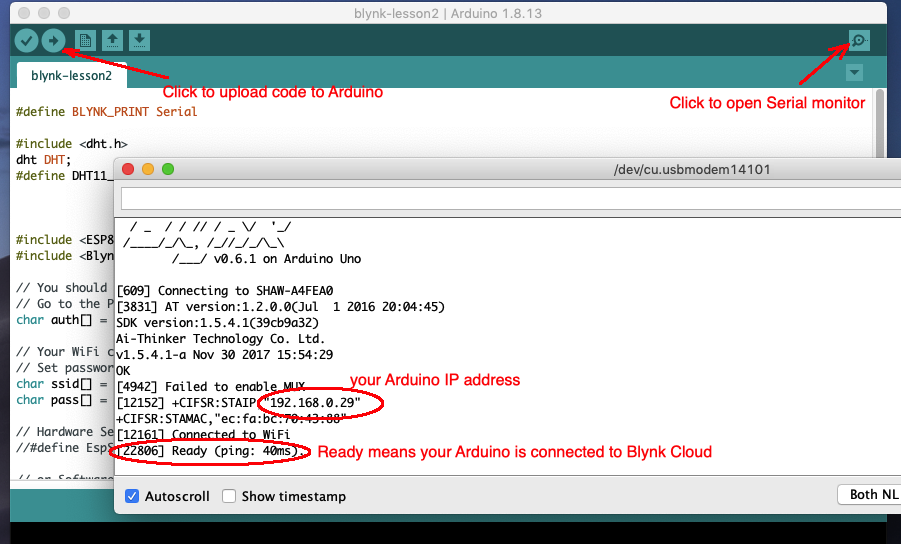
Once you see the “Ready” message in Serial monitor, your mainboard is connected to Blynk cloud.
Test the APP:
Now go back to Blynk APP lesson 2 project, click play button ► , you will see following UI
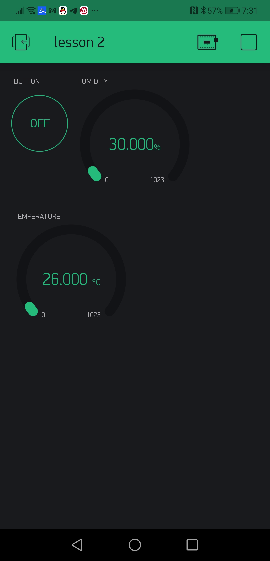
You will see Humidity and Temperature from your remote DHT11 sensor, you can also use the button to turn on/off the LED same as lesson 1.


