Osoyoo 3.5″ HDMI Screen V2.0 – Introduction & Setup Guide
Product: Osoyoo 3.5″ HDMI Touchscreen Display
Resolution: 480×320 (Physical) / Up to 1920×1080 (Input)
Compatible: Raspberry Pi 3B/3B+/4/5, Pi Zero, PC/Laptop, etc
Touch Support: Raspberry Pi OS only
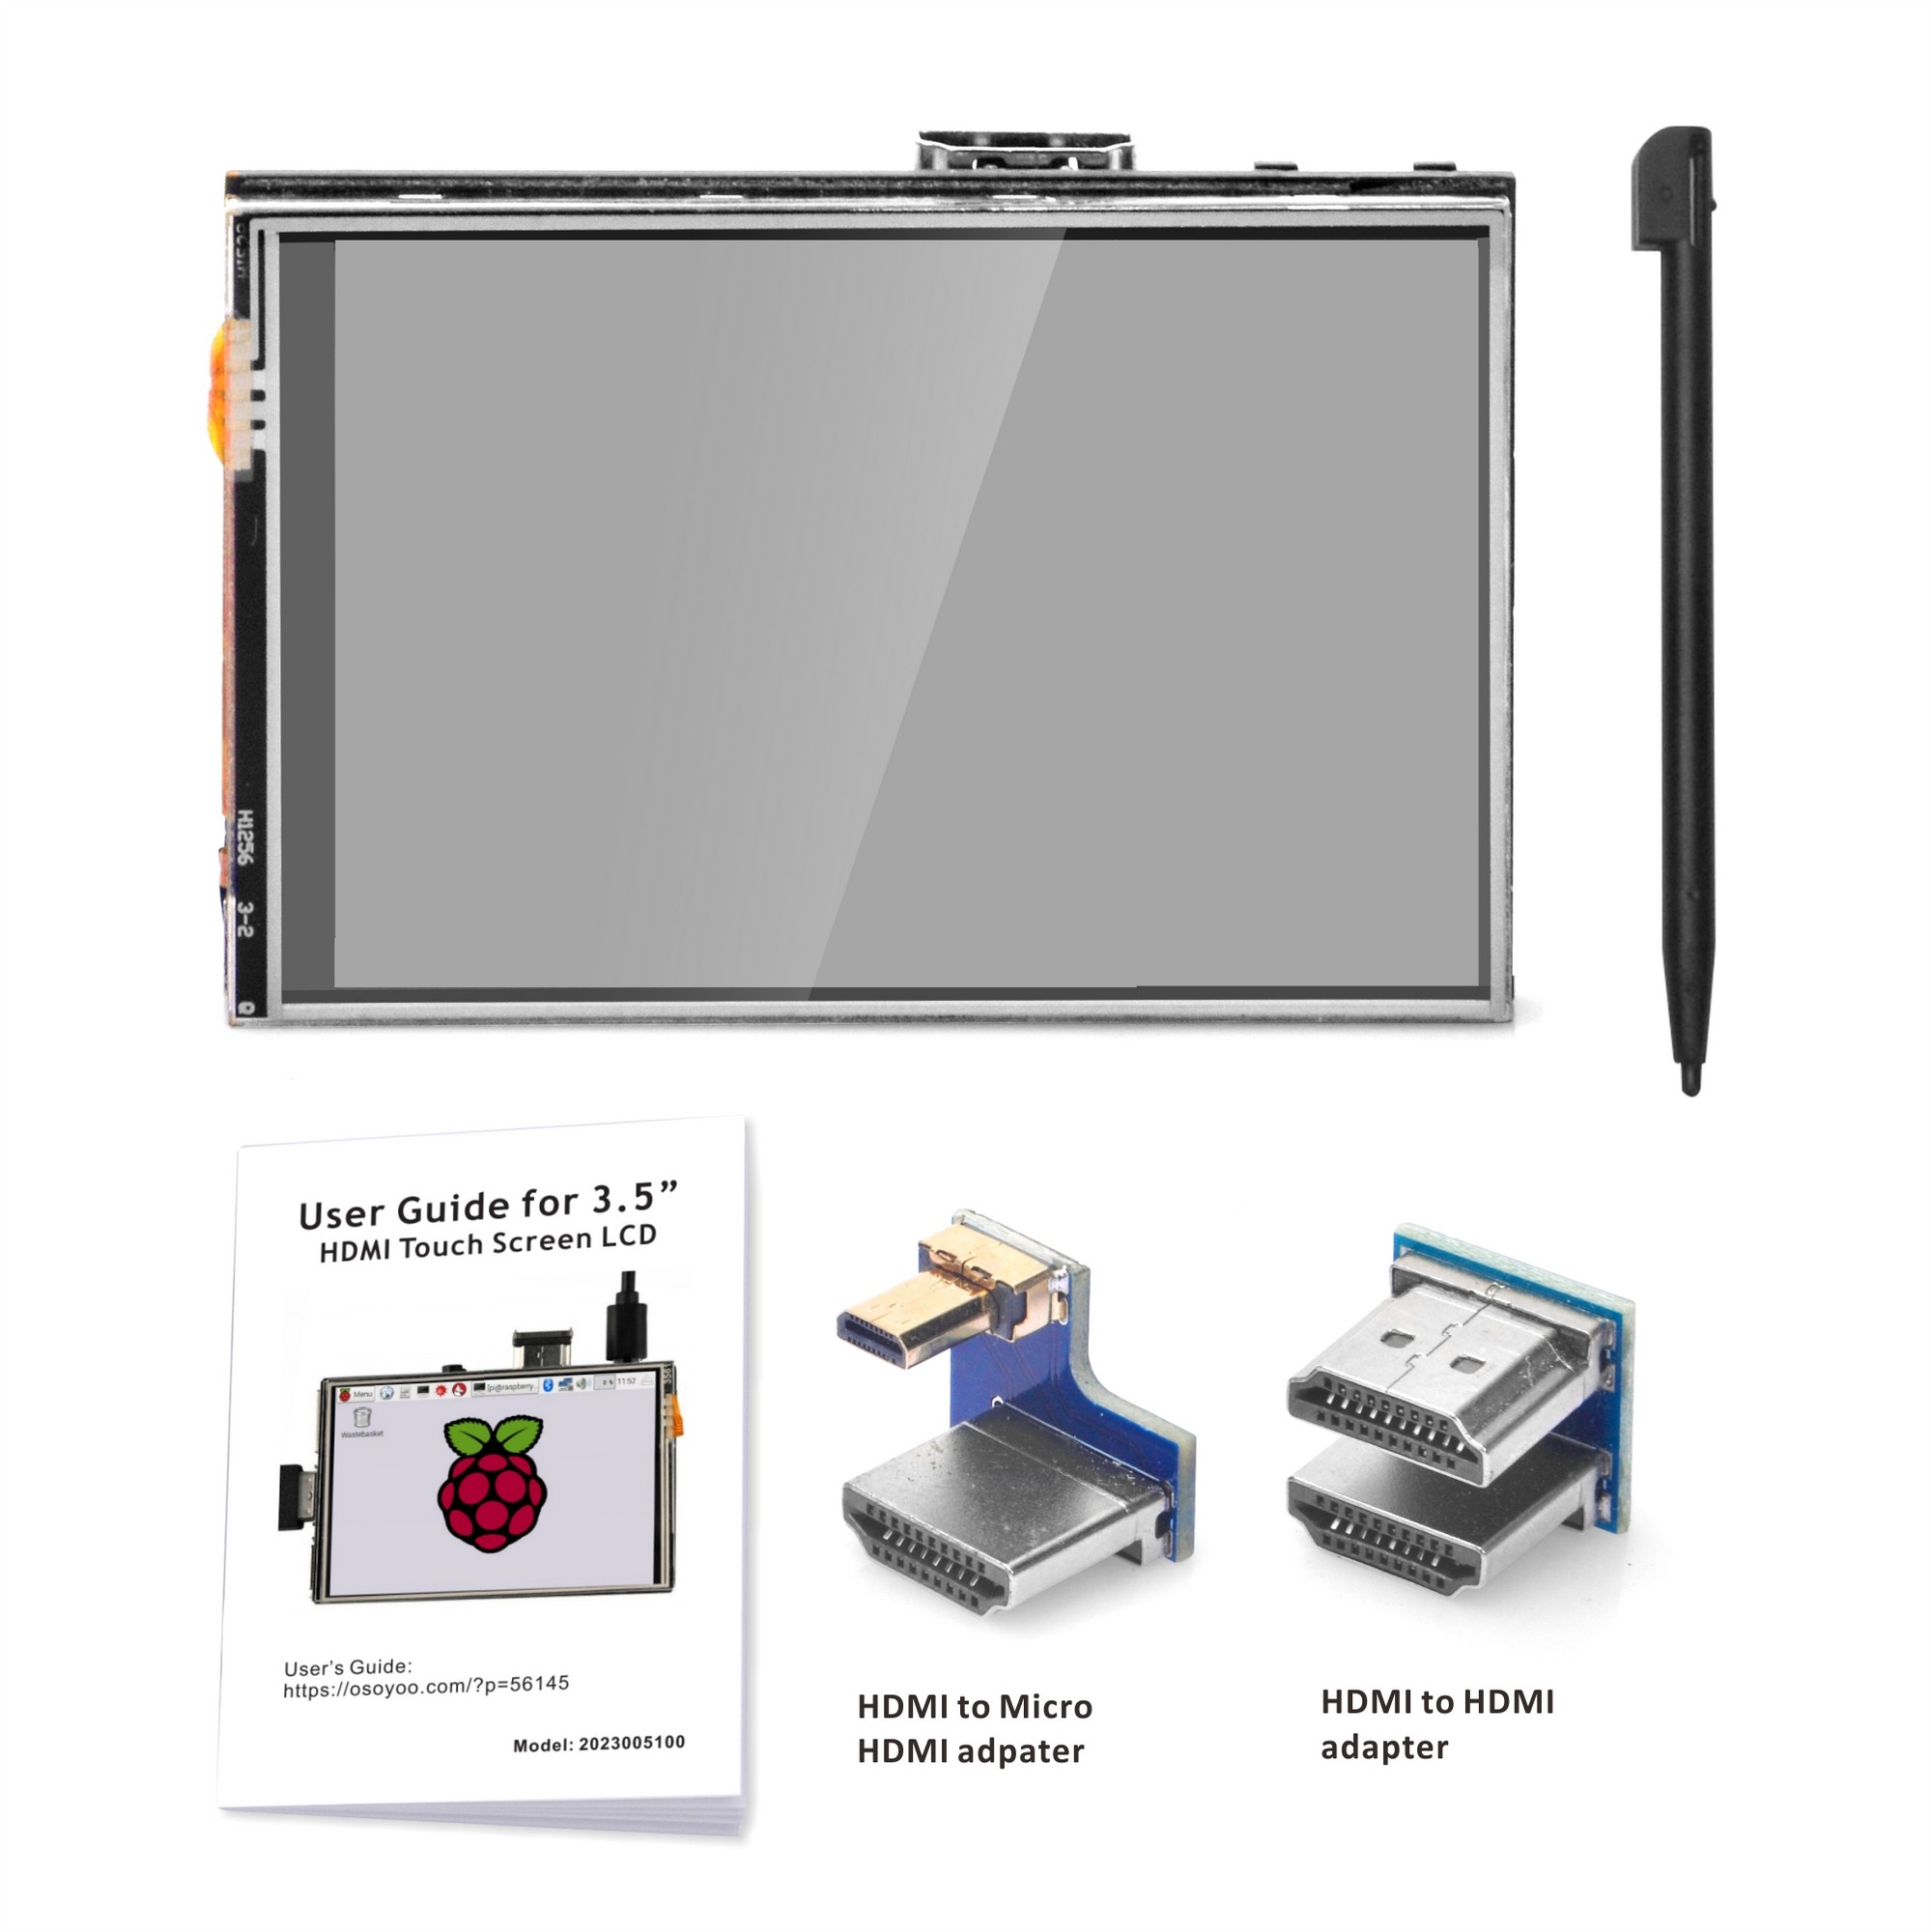
Buy 3.5″ HDMI Screen with Case:
1Overview
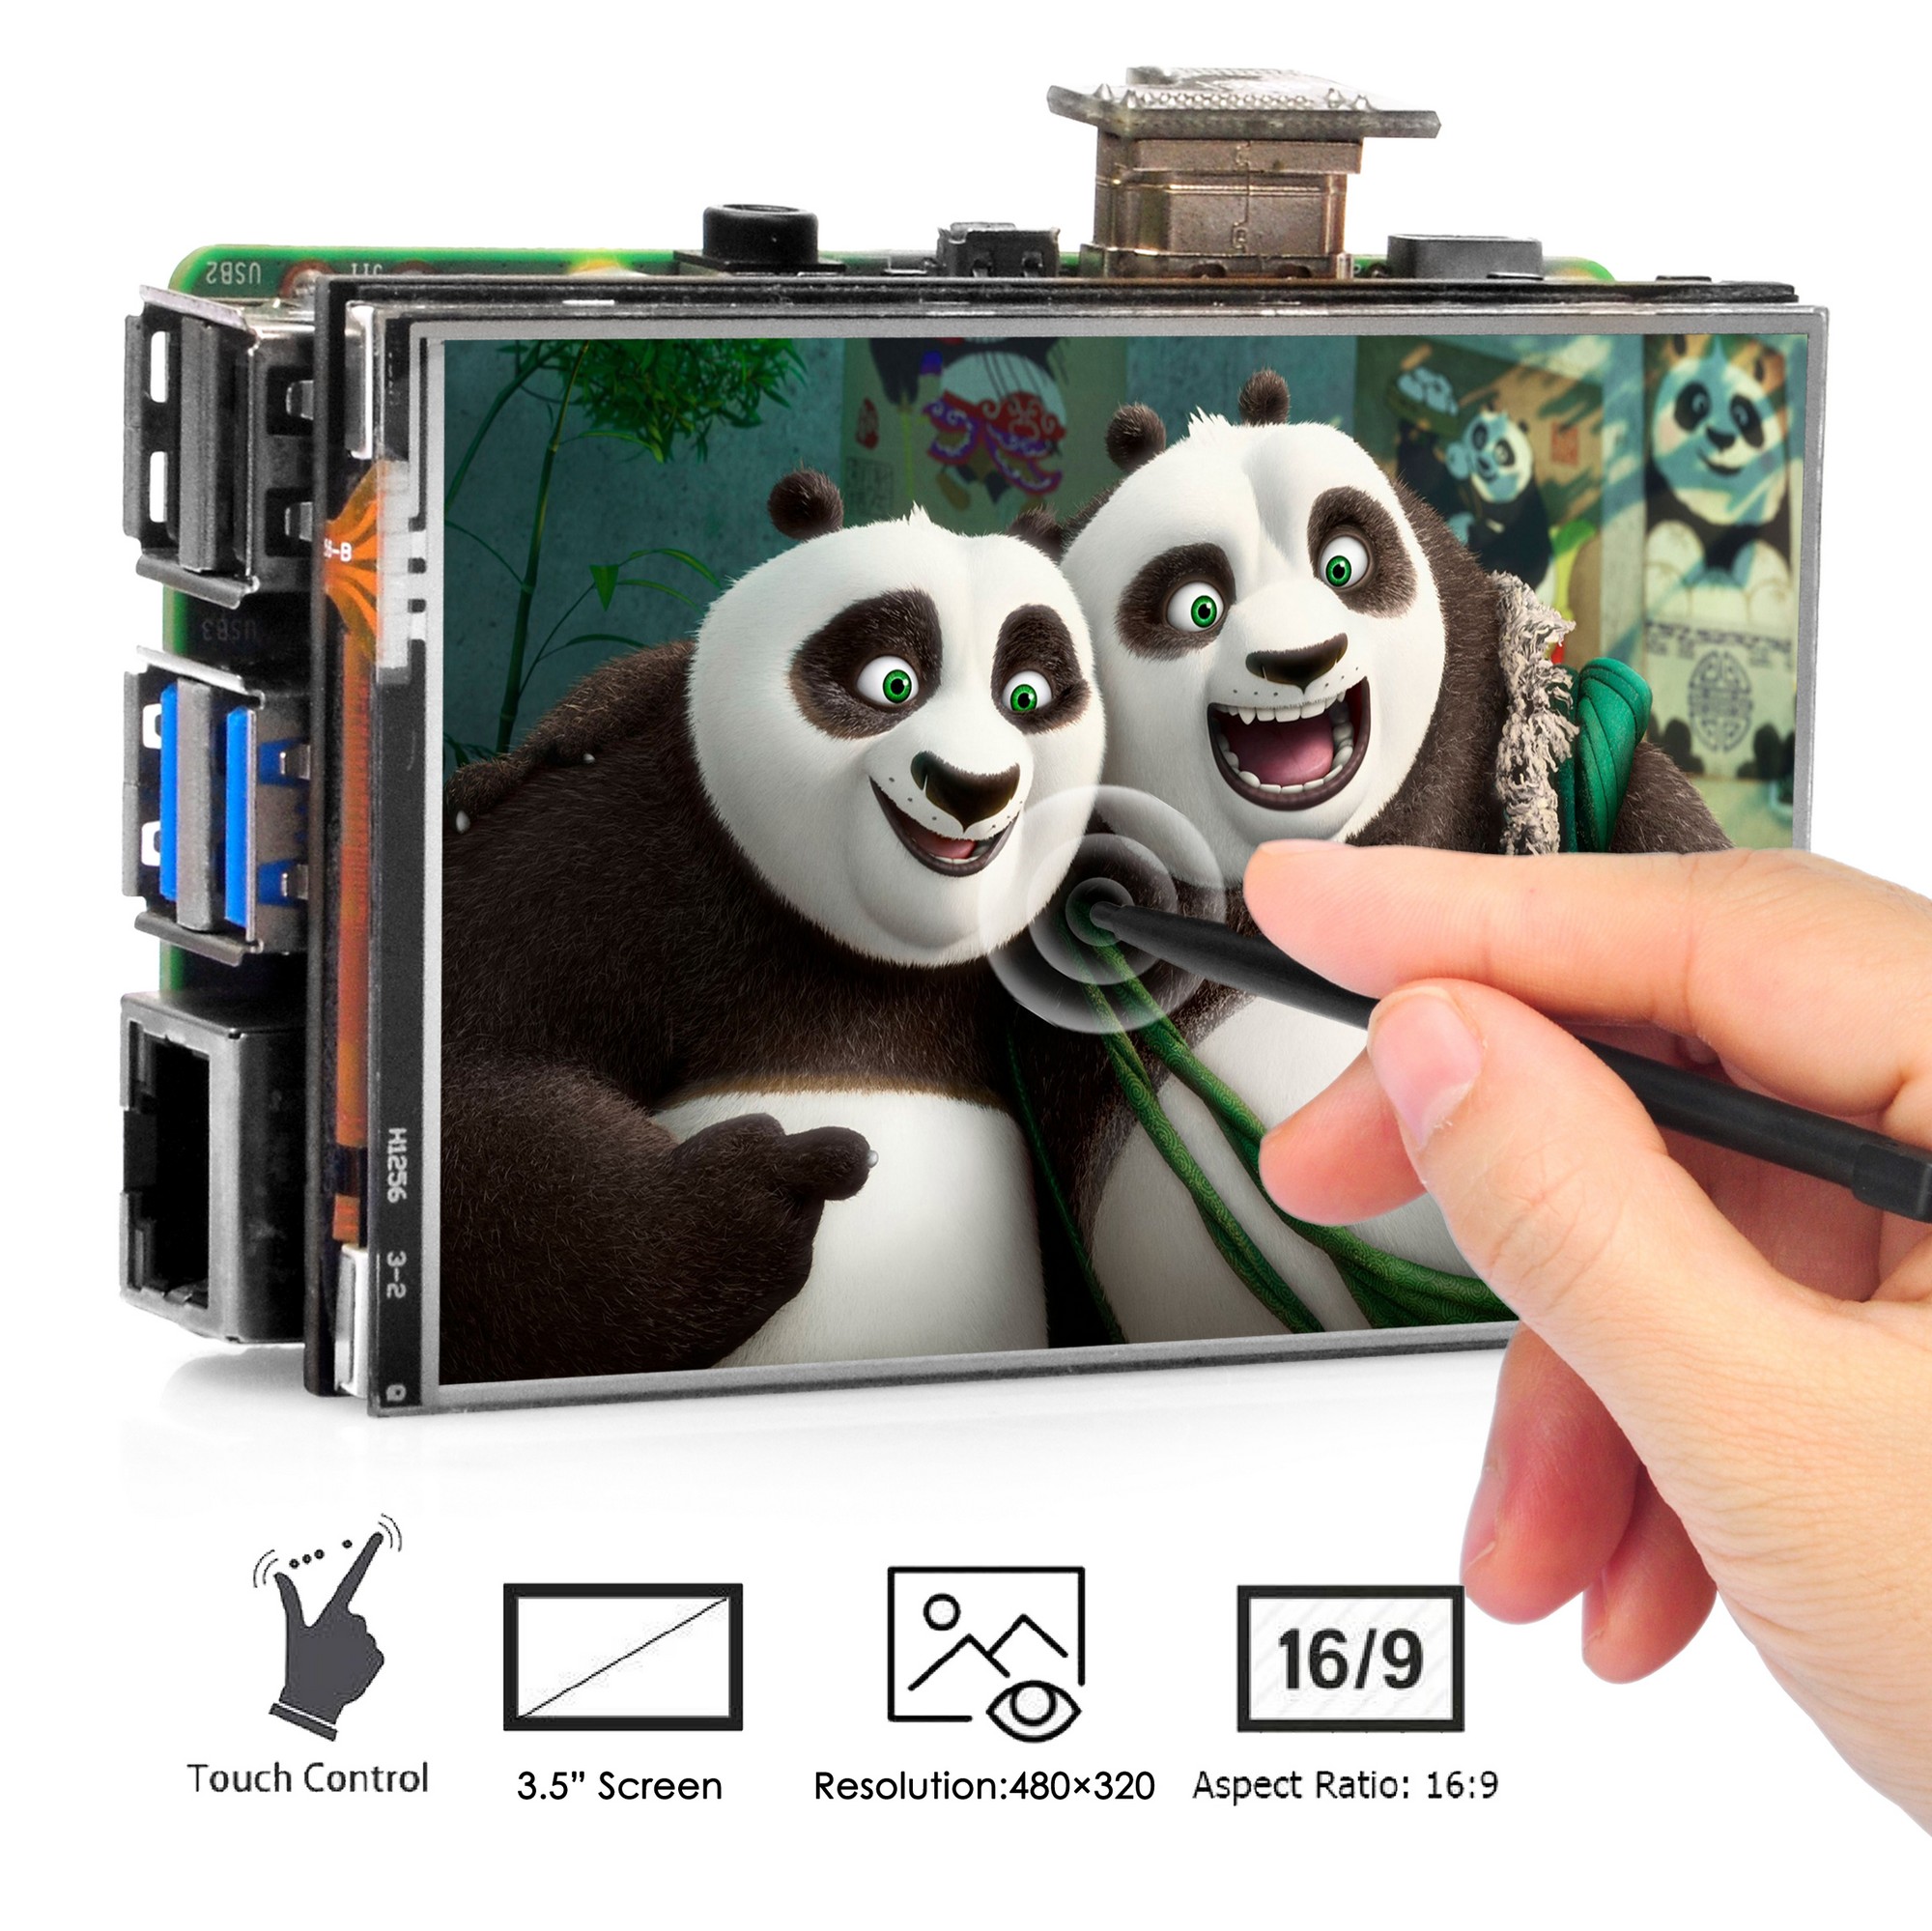
OSOYOO 3.5 inch HDMI screen is a touchscreen display designed for Raspberry Pi. It can also be used as a general purpose HDMI monitor for PC/laptop (display only, no touch).
Note: Touch input function only works with Raspberry Pi OS. When using with PC/laptop, only display function is available.
2Features
- Power Supply: GPIO 5V pin or USB Type-C (5V/1A for display, 5V/3A if also powering Pi)
- Power Switch: Toggle on/off (suspend mode), LED indicates status
- Brightness Button: Adjusts 10~100% in 10% steps, value saved
- Display Rotation: Hold brightness + press power = rotate 180°
- DDC/CI Support: Adjust brightness, contrast, colors via HDMI commands
- Auto Scaling: RTD2660 chip scales any resolution (up to 1920×1080) to 480×320
3Specification
- Physical LCD resolution: 3.5 inch 480×320 (ILI9488)
- Configurable software resolution: max 1920×1080, 60~75fps
- Default video resolution: 720×480 (3:2 ratio)
- Auto fill screen area
- TN LCD, View angle 12 O’Clock
- XPT2046 Resistive touch with pen
- LED power status indicator (Off: active, On: suspend)
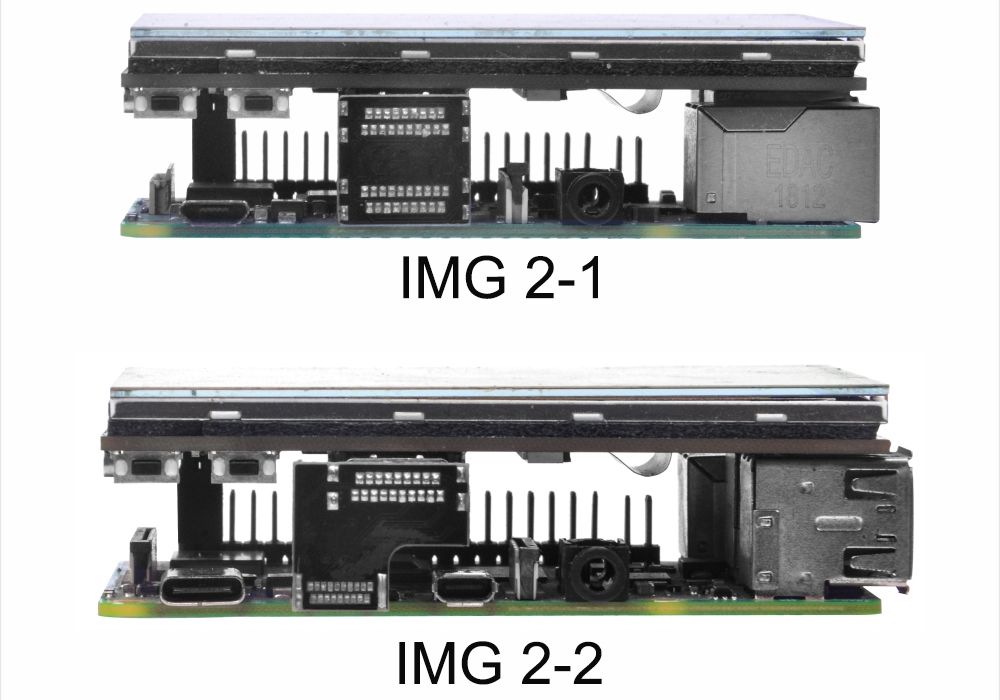
- USB Type-C port for power supply only
- Mechanical size: Board 85mm × 56mm, LCD view area 73.4mm × 49mm
- Full Compatible with Raspberry Pi 3B, 3B+, 4, 5
- Touch driver compatible with: Raspberry Pi OS
- Display function works with all HDMI devices
- Only touch function requires GPIO; display doesn’t use GPIO
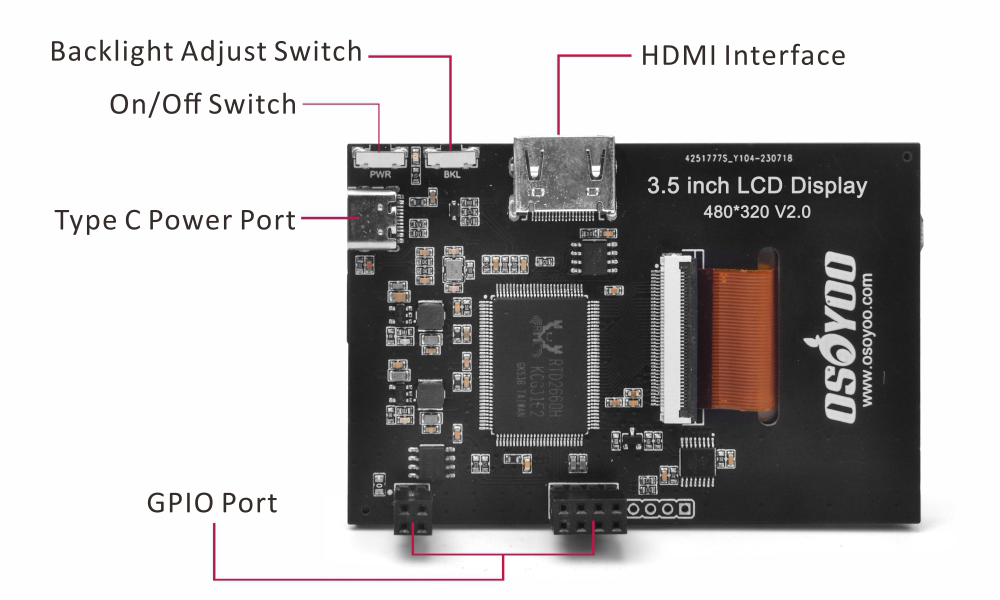
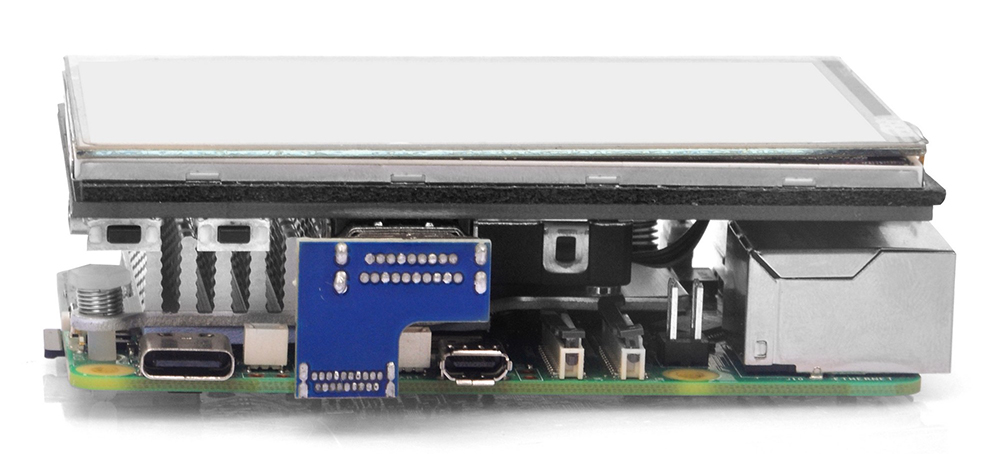
4Interface
- HDMI interface: HDMI signal input
- Backlight adjust switch: Short press = 10% change, long press 3s = close backlight
- On/Off switch: Turn on/off the backlight
- Type C power port: Provide power (5V 1A)
- GPIO Port: Gets power and returns touch data. Pins marked “NC” are not occupied by LCD.
GPIO Pin Assignment
| Pin |
ID |
Description |
| 1 |
NC |
Not Connected |
| 2 |
5V |
Power (5V input) |
| 3 |
NC |
Not Connected |
| 4 |
5V |
Power (5V input) |
| 19 |
TP_SI |
SPI data input of touch panel |
| 20 |
GND |
Ground |
| 21 |
TP_SO |
SPI data output of touch panel |
| 22 |
TP_IRQ |
Touch interrupt (Low when pressed) |
| 23 |
TP_SCK |
SPI clock signal of touch panel |
| 24 |
NC |
Not Connected |
| 25 |
GND |
Ground |
| 26 |
TP_CS |
Touch panel chip select (Active Low) |
5Getting Started
5.1 Hardware Connection
- Connect GPIO interface: Raspberry Pi has 40 GPIO pins, screen has 12 pins. Match corresponding pins.
- Connect HDMI: Use HDMI connector between screen and Pi.
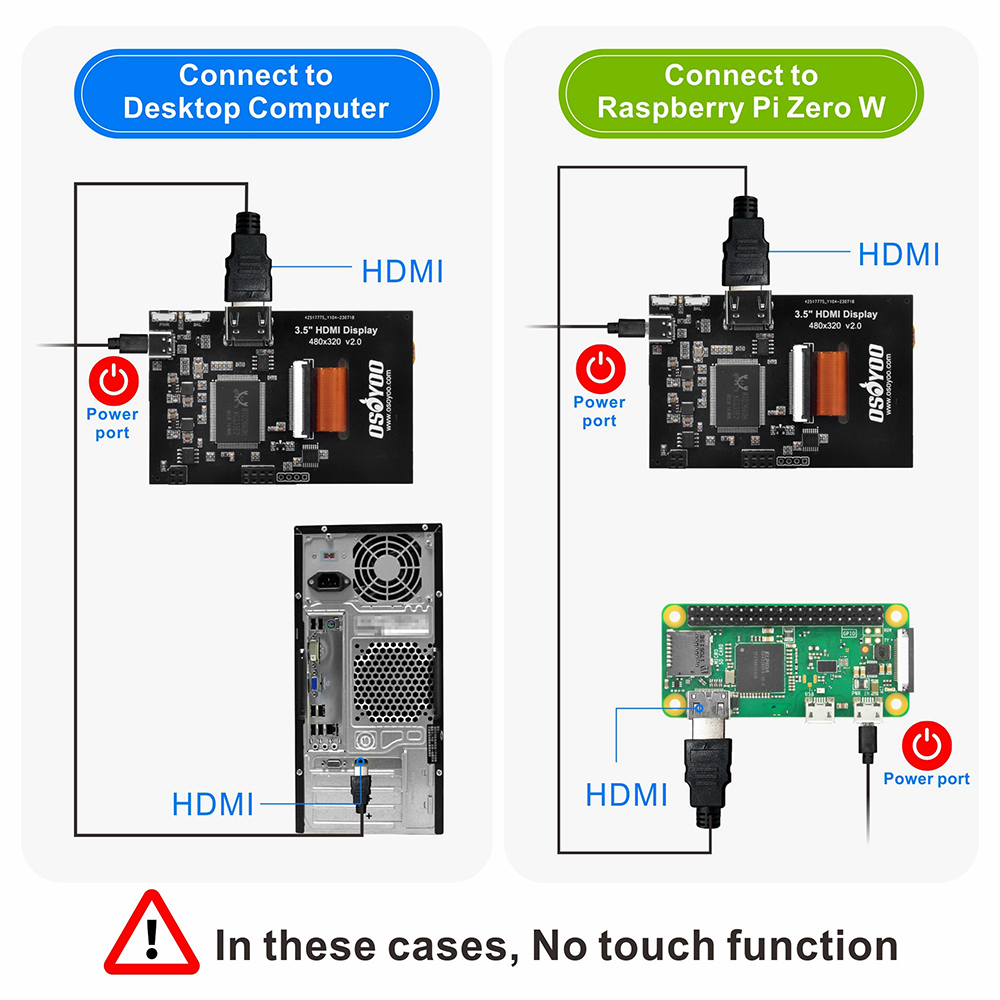
Note: Raspberry Pi Zero / Zero 2 W needs an additional HDMI adapter cable.
5.2 Installation for Configured Image
If you have difficulty installing the driver, try our pre-configured images. No driver installation needed!
- Connect touch screen LCD display to your Raspberry Pi
- Download image from the table below
- Unzip the downloaded image file
- Format Micro SD card (8G/16G/32G recommended). Use SDFormatter
- Use Raspberry Pi Imager to write image to SD card
- Expand filesystem:
sudo raspi-config → 6 Advanced Options → A1 Expand filesystem
| Image Name |
Version |
Support |
Password |
Download |
| Raspios-Bullseye-arm64 |
2024-3-12 |
Pi5/4/3B+/3/2 |
pi / raspberry |
Google Drive |
| Raspios-bookworm-arm64 |
2023-12-05 |
Pi5/4/3B+/3/2 |
pi / raspberry |
Google Drive |
| Raspios-bookworm-arm64 |
2024-03-15 |
Pi5/4/3B+/3/2 |
pi / raspberry |
Google Drive |
5.3 Manual Installation of Touch Driver
Select the driver that matches your Raspberry Pi OS version:
5.4 Advanced Settings: Brightness & Color Adjustment
The display’s brightness, contrast, and colors can be updated by DDC/CI commands from the HDMI port DDC channel.
6How to Use as PC Monitor and Pi Zero
- Connect computer HDMI output to the LCD HDMI interface using HDMI cable
- Connect the LCD’s USB Power interface to the USB port of the device
- If there are several monitors, unplug other monitor connectors first, use LCD as the only monitor for testing
Note: Touch function can only be used for Raspberry Pi 2/3/4/5.
8Tech Support
Need help or have feedback? Submit a ticket and our team will get back to you within 1-2 working days.
Working Time: 9 AM – 6 PM GMT+8 (Monday – Friday)
Contact Us: [email protected]