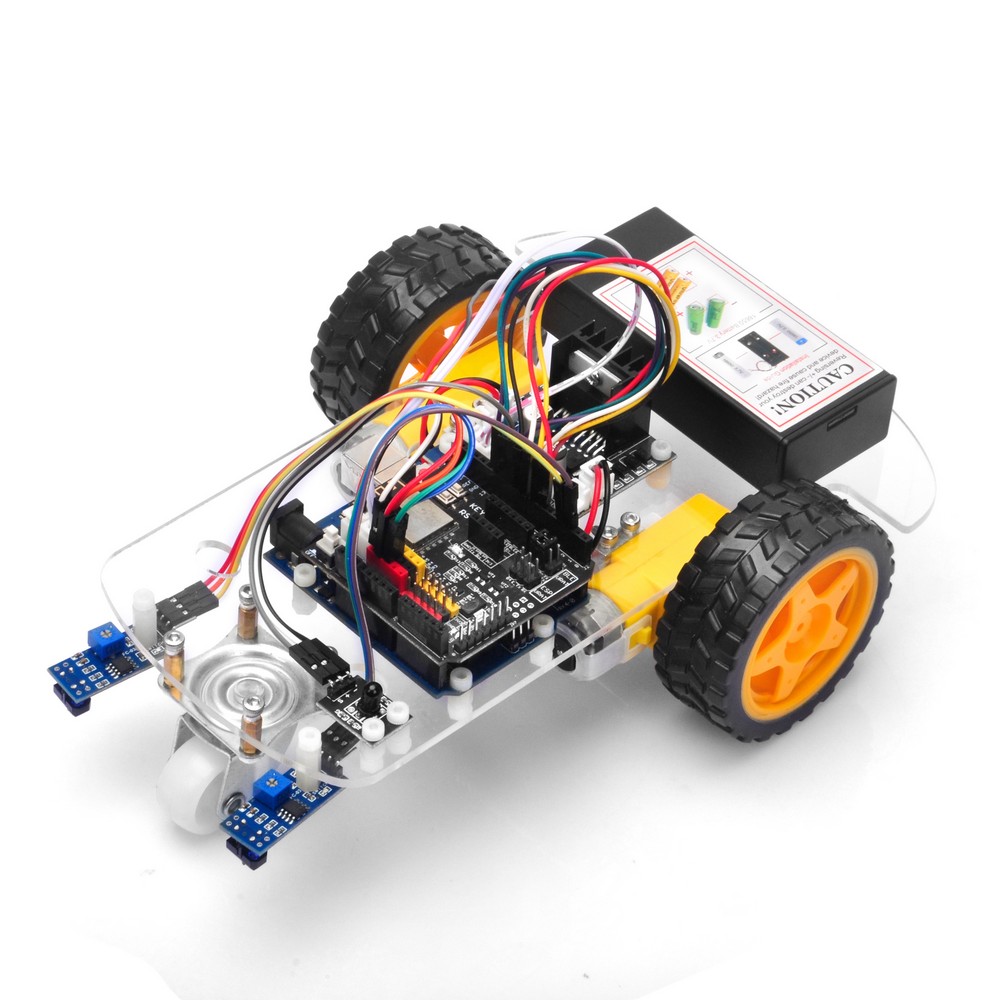
In this lesson, we will use 2WD Robot Car Starter Kit to make a simple remote controlled car. Once the car installation is completed, wewill use a Infrared Remote to control the car movements including go forward, go backward, stop, turn left and turn right.
Hardware Installation
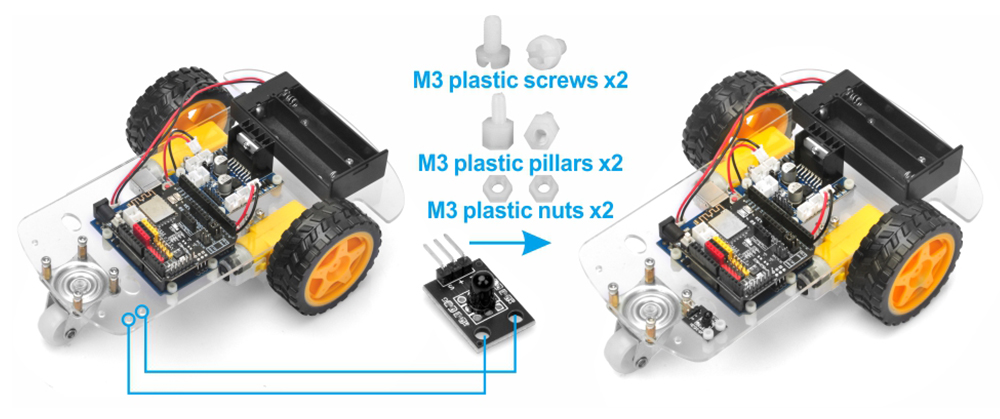
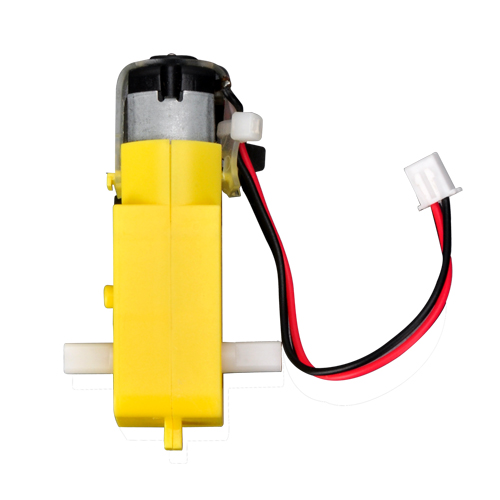
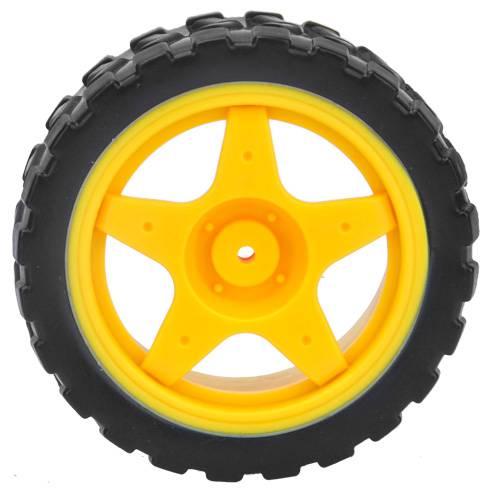
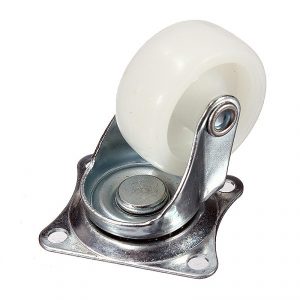
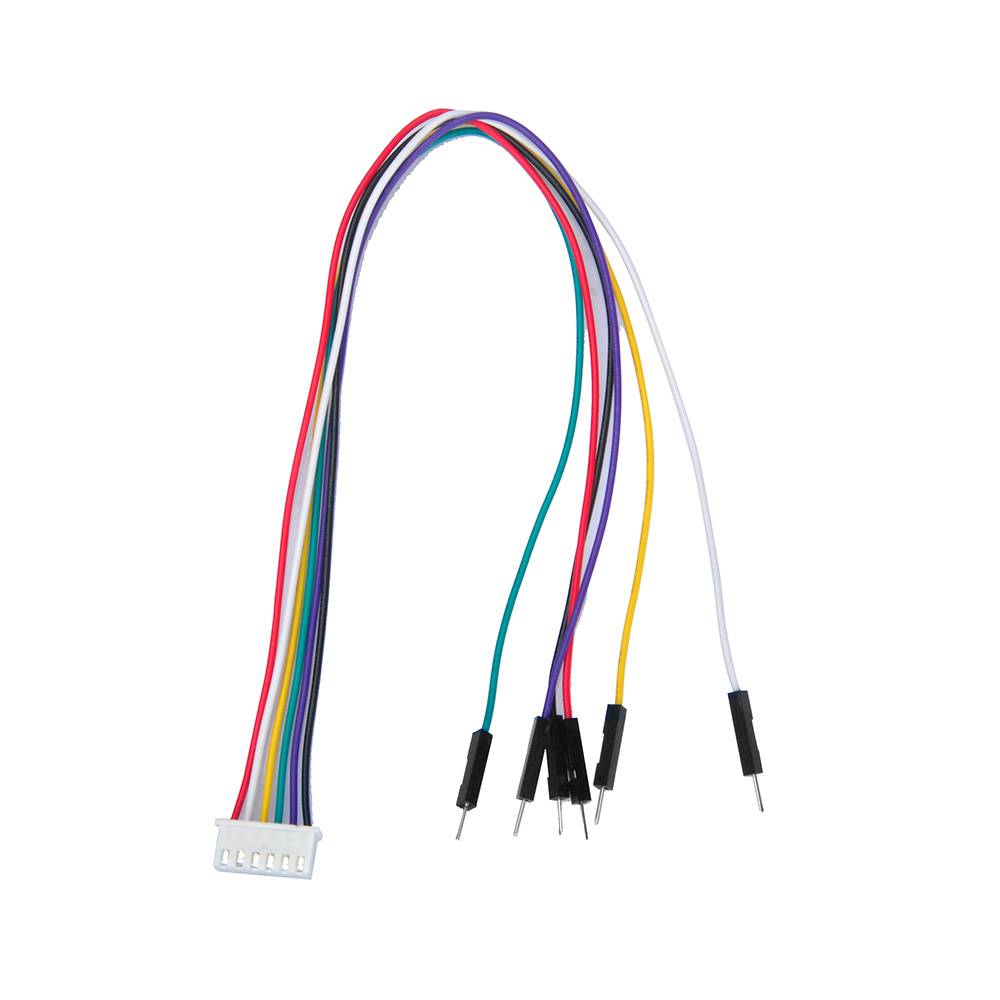
1) Install the 2WD Robot Car
Install the robot car basic framework as per Lesson 1. If you have already completed the installation in Lesson 1, just keep it, no need to remove any module installed.
More information about this module please refer to:
Step 2: Install IRremote library into IDE (If you have already installed IRremote library, please skip this step)
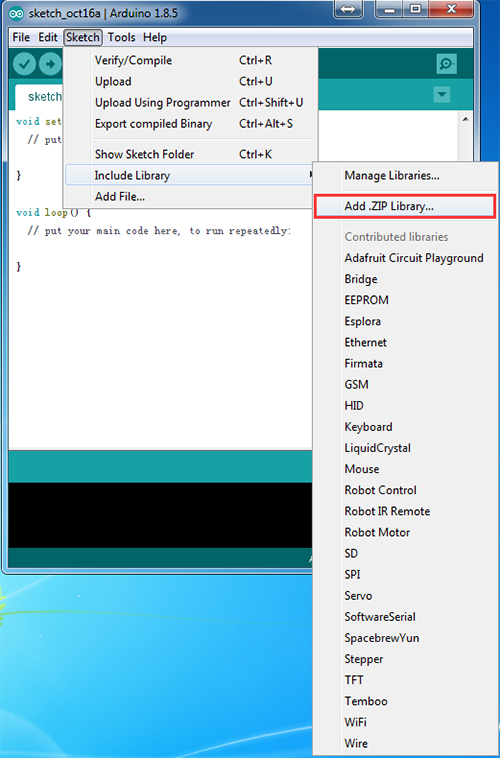
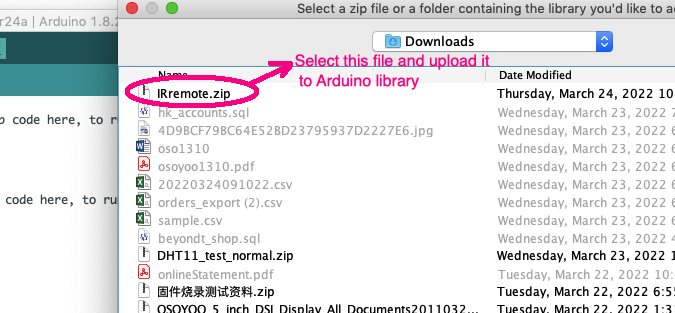
Download IRremote library from https://downloads.arduino.cc/libraries/github.com/z3t0/IRremote-4.3.1.zip, then import the library into IDE(Open IDE-> click Sketch→Include Library→Add .Zip Library)
In the pop-up window, go to your downloads’ folder, select the IRremote.zip file you downloaded just now.
NOTE!!
If you have a late version of Arduino IDE with a library IRRobotRemote, it may conflict and you may have to remove that library.Make sure to delete Arduino(root)/libraries/RobotIRremote. Where Arduino(root) refers to the install directory of Arduino. The library RobotIRremote has similar definitions to IRremote and causes errors.
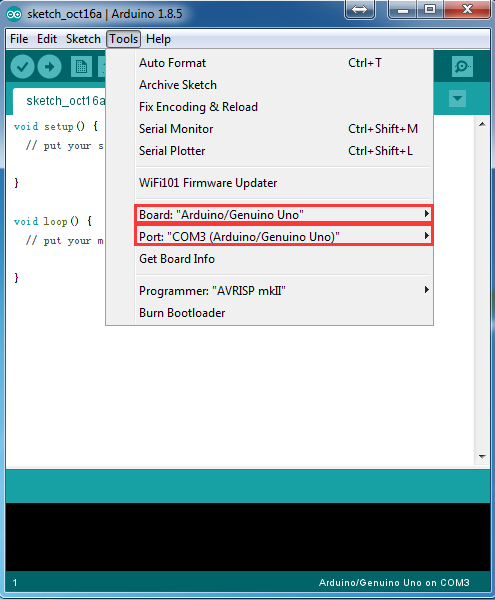
Step 4: Connect UNO R3 board to PC with USB cable, open Arduino IDE, choose corresponding board and port for your project
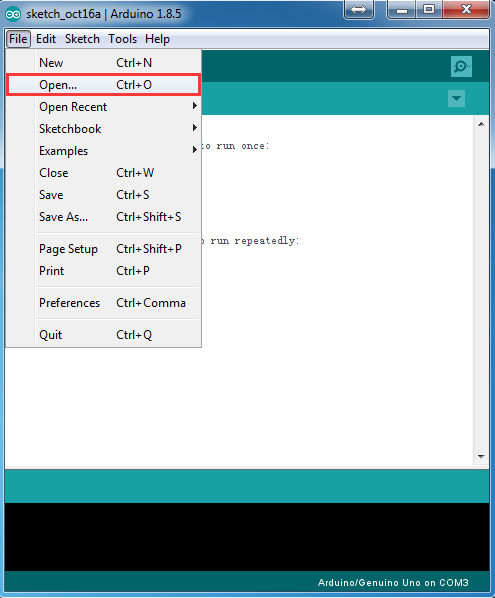
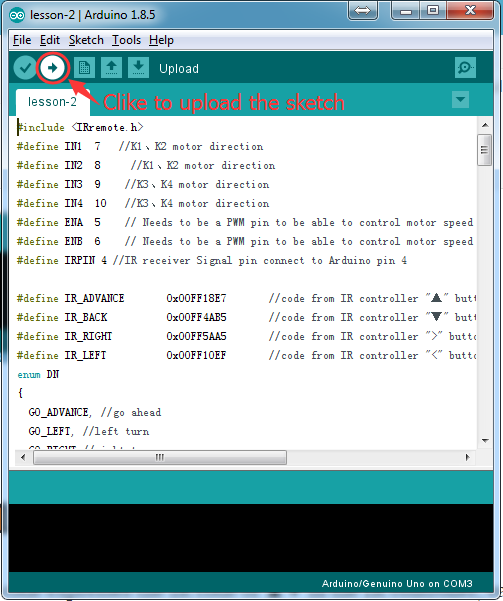
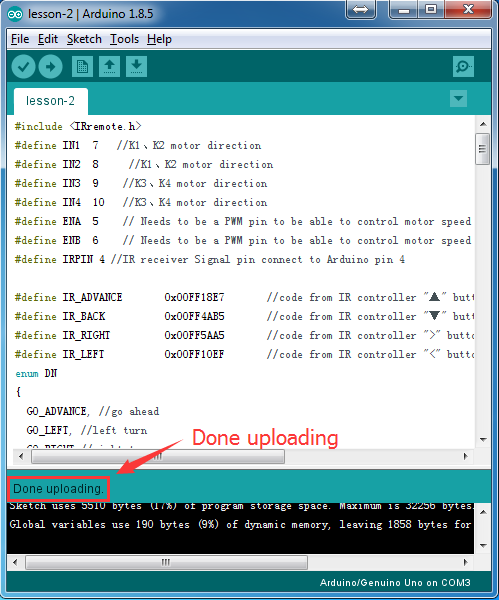
Step 5: Arduino IDE: Click file → click Open → choose code “lesson2.ino” in lesson2 folder, load the code into Arduino, upload the sketch to the board.
Code Explanation
The following lines of code expresses the IR code of ∧∨ in the IR controller, each IR code of the button can get from the IR sample code:
#define IR_ADVANCE 24 //code from IR controller “▲” button
#define IR_BACK 82 //code from IR controller “▼” button
#define IR_RIGHT 90 //code from IR controller “>” button
#define IR_LEFT 8 //code from IR controller “<” button
#define IR_STOP 28 //code from IR controller “OK” button
#define IR_turnsmallleft 13 //code from IR controller “#” button
Decodes the infrared signal and compares the received infrared signal with a predefined value, if it is equal, assigns the corresponding value to Drive_Num
This piece of code is the core of the infrared control code, press the corresponding key, the car perform the corresponding action, if the pressed key is not defined in the program, the car will not respond.
void do_Drive_Tick()
     switch (Drive_Num)
    {
      case GO_ADVANCE:go_Advance();JogFlag = true;JogTimeCnt = 1;JogTime=millis();break;//if GO_ADVANCE code is detected, then go advance
      case GO_LEFT: go_Left();JogFlag = true;JogTimeCnt = 1;JogTime=millis();break;//if GO_LEFT code is detected, then turn left
      case GO_RIGHT:  go_Right();JogFlag = true;JogTimeCnt = 1;JogTime=millis();break;//if GO_RIGHT code is detected, then turn right
      case GO_BACK: go_Back();JogFlag = true;JogTimeCnt = 1;JogTime=millis();break;//if GO_BACK code is detected, then backward
      case STOP_STOP: stop_Stop();JogTime = 0;break;//stop
      default:break;
    }
    Drive_Num=DEF;
   //keep current moving mode for  200 millis seconds
    if(millis()-JogTime>=200)
    {
      JogTime=millis();
      if(JogFlag == true)
      {
        stopFlag = false;
        if(JogTimeCnt <= 0)
        {
          JogFlag = false; stopFlag = true;
        }
        JogTimeCnt--;
      }
      if(stopFlag == true)
      {
        JogTimeCnt=0;
        stop_Stop();
      }
    }
Testing
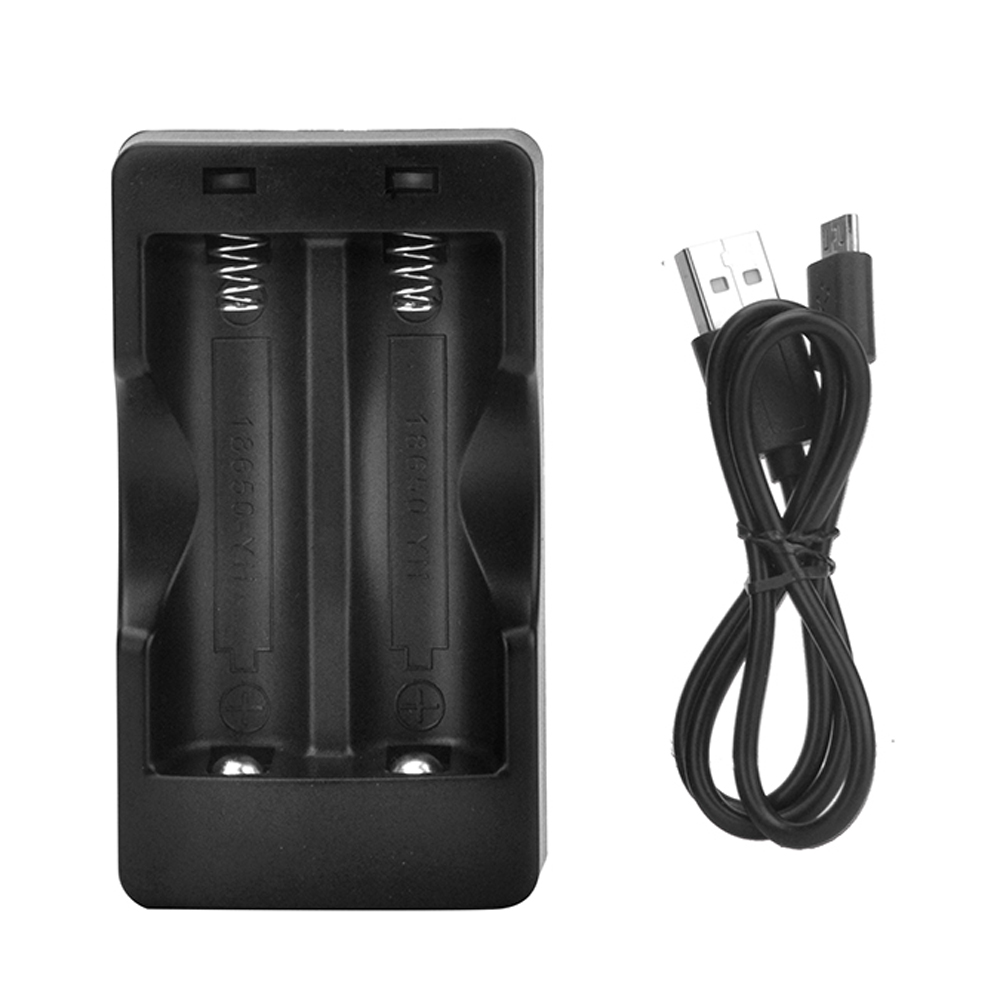
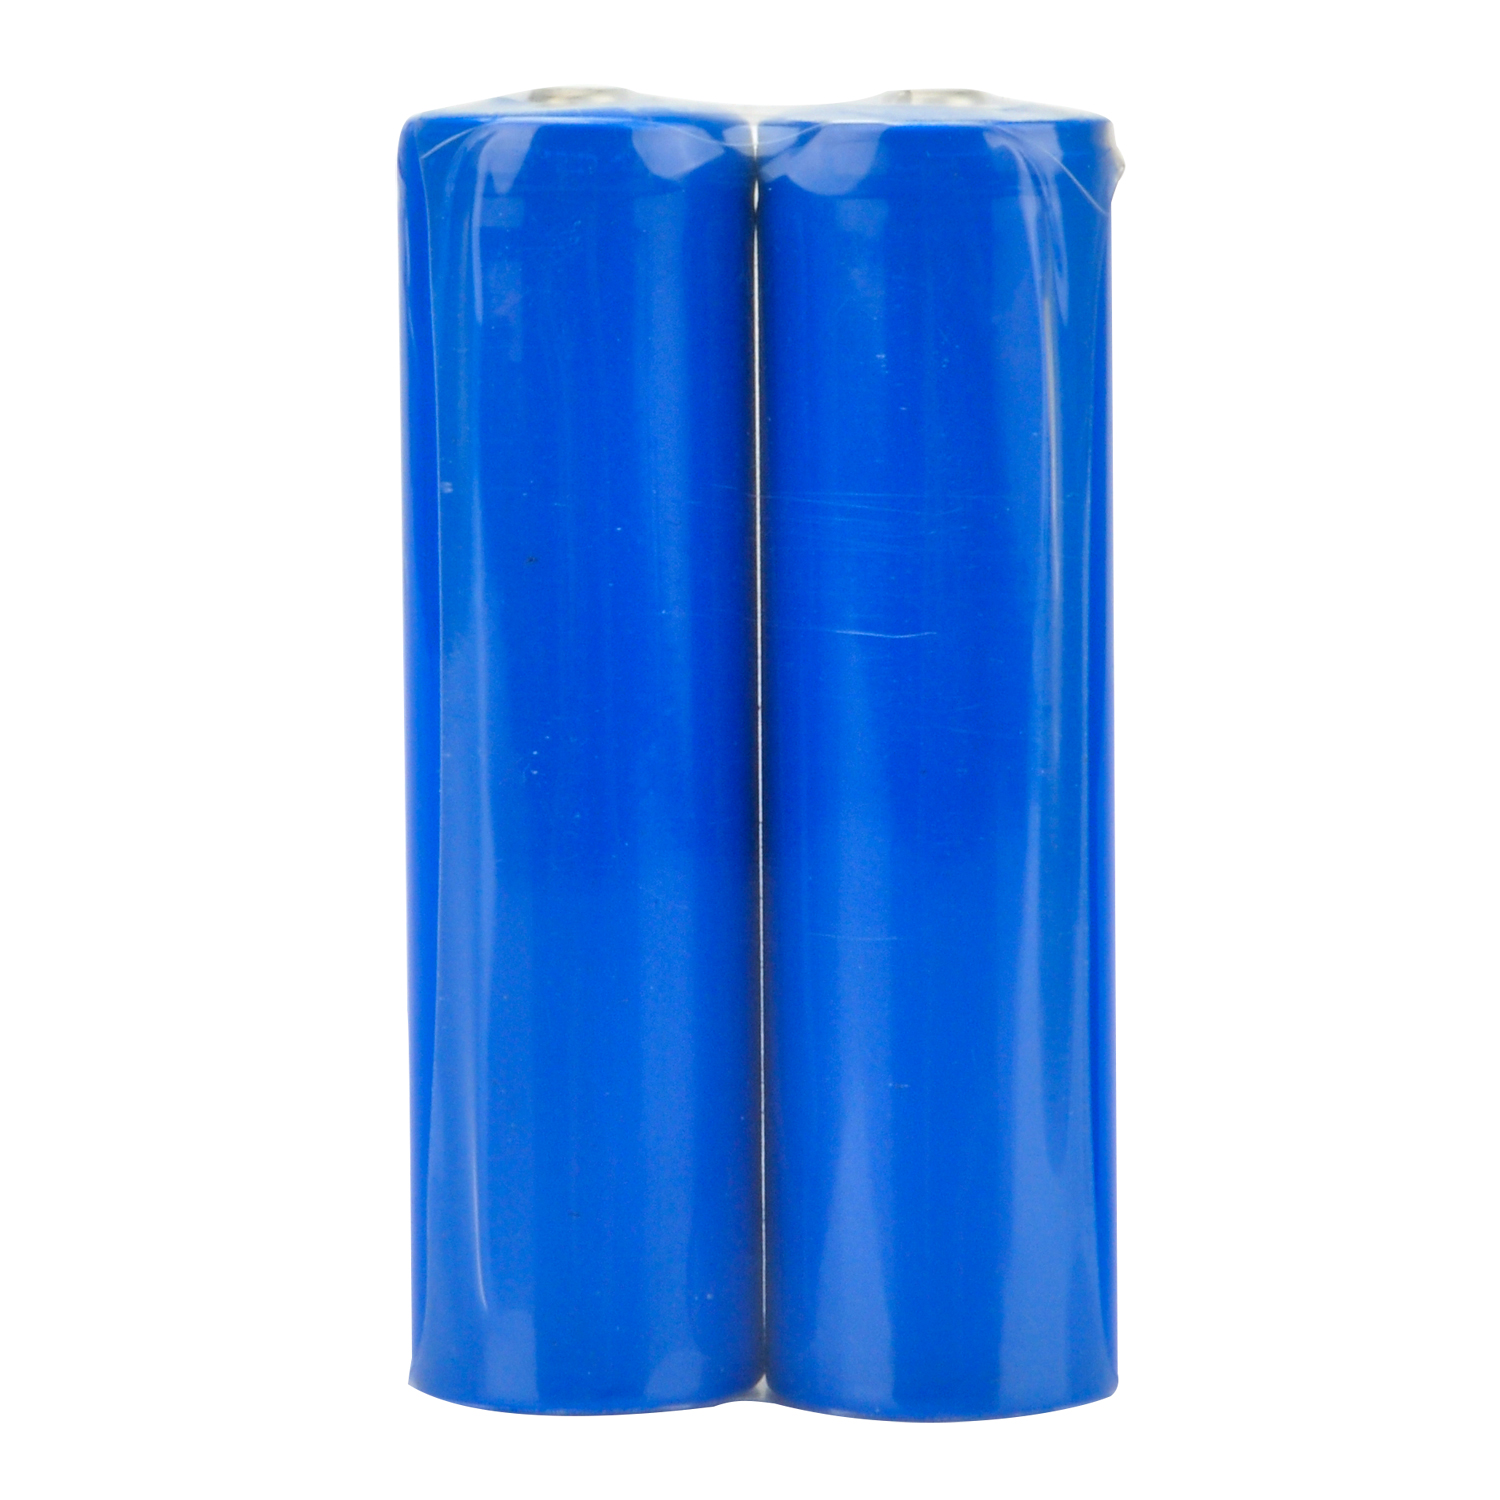
Disconnect OSOYOO UNO R3 board from PC, put 2 fully-charged 18650 battery into battery box (check the box instruction and make sure polar direction is correct). Open the power switch in the battery box.
Press IR controller keys to control the car movements:
▲: Forward
▼: Backward
◄: Turn left
►: Turn right
Troubleshooting:
If the car can’t move, please check the following:
If the battery can work;
If the IR controller is too far away from the receiver;
If the connection is right
If above 3 points are all checked and the IR control still doesn't work. The reason might be the IR remote sends a different button code which does not match our sample code. In order to solve this problem. Please take following steps: Step A) Get the IR code of each button in your IR remote from following link. https://osoyoo.com/driver/2wd/IR_print_commands_v4.zip
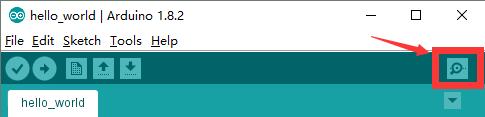
unzip the file upload above sketch into your board and open the serial monitor in your upper-right corner.
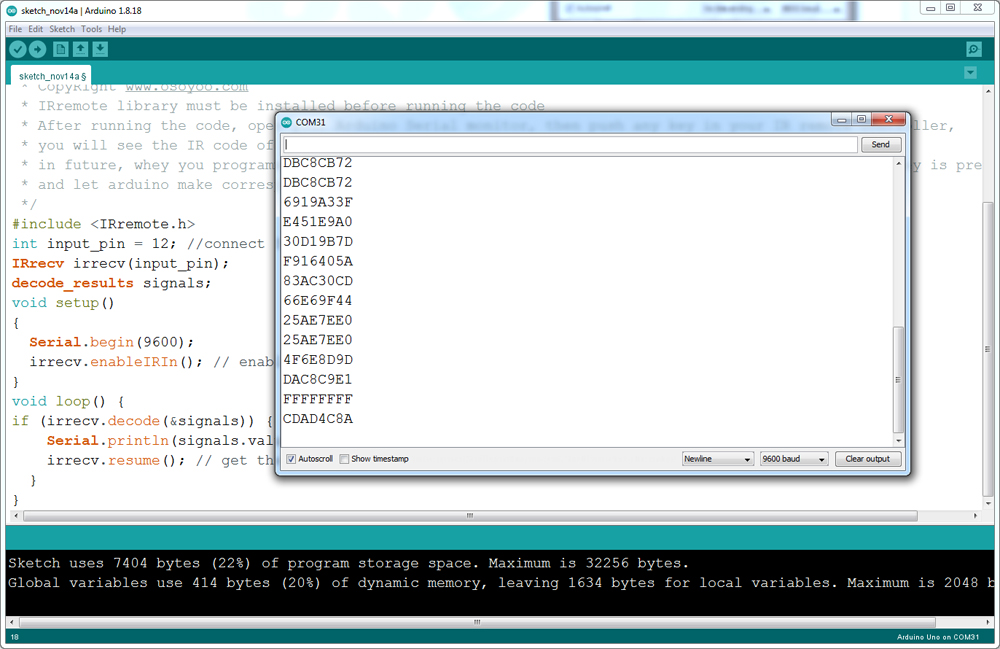
Press the ◄ ► ▲ ▼ “OK” button in your remote, you will see their IR code as following picture:
Write down the IR code of your control buttons ◄ ► ▲ ▼ “OK” button,
STEP B)replace the IR code in lesson 2 sketch file:
Open your Lesson 2 code again, then you will see following lines define the IR CODE of each button:
#define IR_ADVANCE 24 //code from IR controller “▲” button
#define IR_BACK 82 //code from IR controller “▼” button
#define IR_RIGHT 90 //code from IR controller “>” button
#define IR_LEFT 8 //code from IR controller “<” button
#define IR_STOP 28 //code from IR controller “OK” button
#define IR_turnsmallleft 13 //code from IR controller “#” button
Please change the value of each button in above lines to match the code from Step A). If you don’t know how to change, just Send Email to us and give us the code of each button from Step A), I can help you to change the code and email new sketch file to you.
Above method can also allow you to use other IR sending device (i.e TV remote, DVD remote, air conditioner remote etc) to control the car. Just use Step A) to get the key code of your remote and change the sketch file in Step B), it will work.
Note:
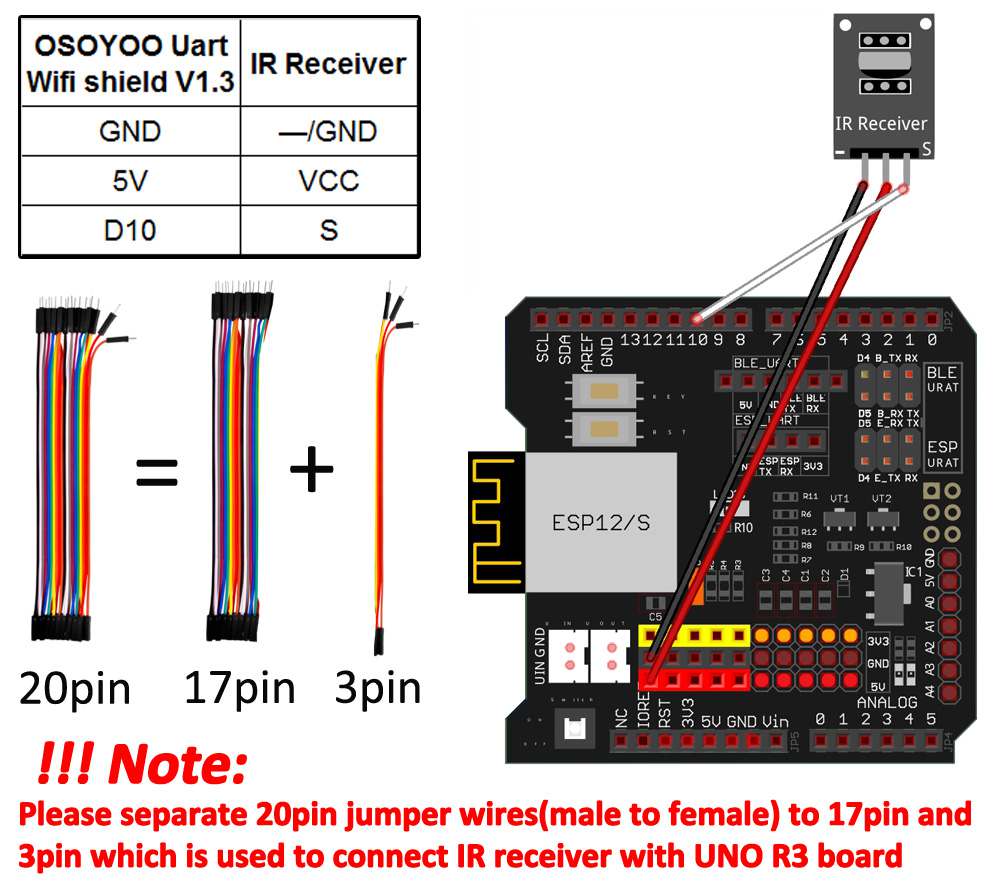
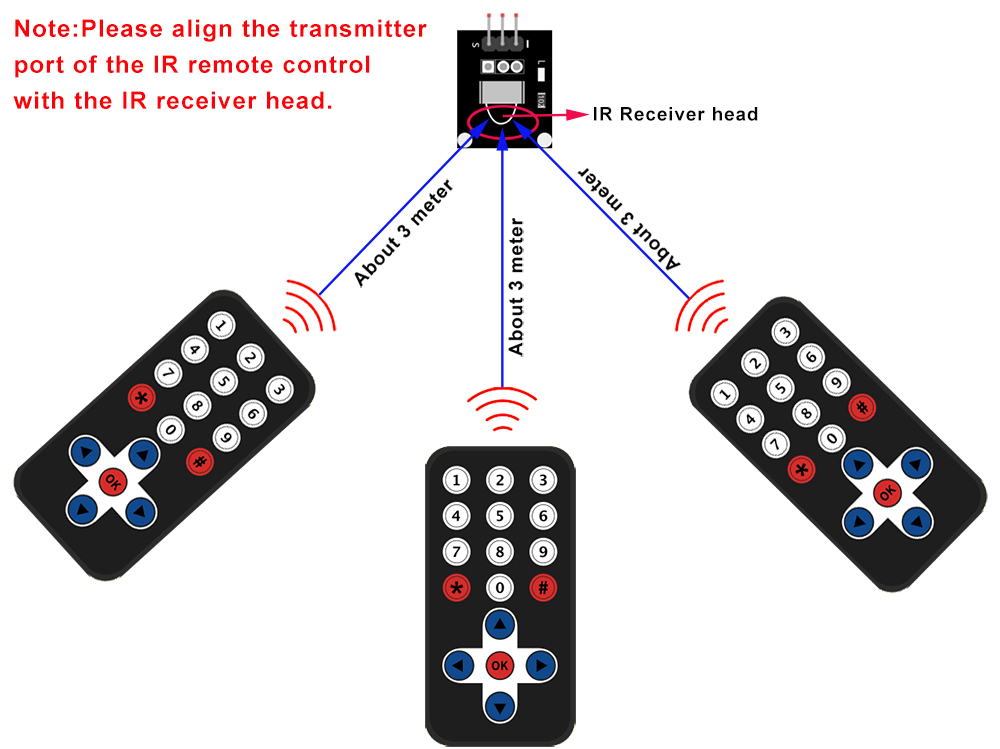
1) Please try to align the transmitter port of the IR remote control with the IR receiver head as the picture in the attachment.
2) Please press remote control gently and at regular intervals
Can sketches be combined? Can the IR control be used to activate the Robot movement from lesson 1, for example? Or, can the IR remote be used at the same time as the line follow?
Can an obstacle avoidance module be added to the 2WD Robot Kit?
Thanks
I’m having difficulty with this lesson. I have the library imported and code loaded with no errors. When I try the IR remote, I see the sensor blinking showing it is receiving the signal, but the car only sometimes goes and only for a split second. The batteries are new and fully charged and the IR Remote is close and unhindered. The code in lesson one worked perfectly, so that eliminates the wiring/boards with the exception of the IR receiver.
It seems that your IR receiver did not send the data to Arduino. I believe the wire from IR receiver S pin to extension S4 pin is loose or broken. Please change a new wire and try again. if it does not work, then let me know I will tell you how to make further test.
Ok. Please keep all your current wire connection (make sure IR receiver S pin is connected to D4) and then download an IR test sketch from https://osoyoo.com/driver/IRrecvDemo.ino
Above sketch will tell you of the IR code of each key on a remote controller. After upload above sketch into Arduino, Open the serial monitor, then press ∧ V > < (the direction arrow keys) in the remote,
it will show result in following sequence.
00FF18E7
00FF4AB5
00FF5AA5
00FF10EF
They are the IR codes of ∧ V > < four keys.
Please let me know :
1)Does the serial monitor show any message ?
2)if 1) answer is yes, then what is the IR code of your IR remote ∧ V > < four keys.
now I understand what is your problem. Your remote sends different IR code to our receiver. Ok, that is easy to fix.
Please open your lesson2.ino file, you can see line 10,11,12,13 as follows:
#define IR_ADVANCE 0x00FF18E7 //code from IR controller “▲” button
#define IR_BACK 0x00FF4AB5 //code from IR controller “▼” button
#define IR_RIGHT 0x00FF5AA5 //code from IR controller “>” button
#define IR_LEFT 0x00FF10EF //code from IR controller “<" button
Change above code to follows which match your IR code :
#define IR_ADVANCE 0x3D9AE3F7 //code from IR controller “▲” button
#define IR_BACK 0x1BC0157B //code from IR controller “▼” button
#define IR_RIGHT 0x449E79F //code from IR controller “>” button
#define IR_LEFT 0x8C22657B //code from IR controller “<" button
Also please double check the key > , this key code should be 8 digits , but you only give me 7 digits. I double you might have typed wrong code. If I am correct, please put change line 12 with correct code.
I just assembled this kit and I’m trying lesson 2 (with the IR). The code itself seems to want to use pin 12 for the IR receiver and the code to simply print the codes received wants to use pin 2
I think these are for the line following sensor – no ? the IR is connected to Pin 10
Nothing works – not the original code or if I change your debugging code (to print just the codes) to use pin 10
It will ask you to run a testing program irdemo.ino , open your Serial monitor and run irdemo.ino file, press ^ key in your IR controller, let us know if you can see any response, if not , please email to [email protected] and we will give you solution.


Can sketches be combined? Can the IR control be used to activate the Robot movement from lesson 1, for example? Or, can the IR remote be used at the same time as the line follow?
Can an obstacle avoidance module be added to the 2WD Robot Kit?
Thanks
the code on the cd does not work …. IRremote.H: no such file or directory
please help!
please read the software installation STEP 2, https://osoyoo.com/2017/09/21/2wd-robot-car-infrared-remote/#4
You need install the IRremote library first.
I’m having difficulty with this lesson. I have the library imported and code loaded with no errors. When I try the IR remote, I see the sensor blinking showing it is receiving the signal, but the car only sometimes goes and only for a split second. The batteries are new and fully charged and the IR Remote is close and unhindered. The code in lesson one worked perfectly, so that eliminates the wiring/boards with the exception of the IR receiver.
Any thoughts? Thank you!
hi, TheMuffinMan,
It seems that your IR receiver did not send the data to Arduino. I believe the wire from IR receiver S pin to extension S4 pin is loose or broken. Please change a new wire and try again. if it does not work, then let me know I will tell you how to make further test.
thanks
admin
Hello, and thanks for the quick response.
I went ahead and replaced all the wiring, assuring that they were all were snug.
The issue still persists though. Any suggestions would be much appreciated.
Thank you,
TheMuffinMan
Ok. Please keep all your current wire connection (make sure IR receiver S pin is connected to D4) and then download an IR test sketch from https://osoyoo.com/driver/IRrecvDemo.ino
Above sketch will tell you of the IR code of each key on a remote controller. After upload above sketch into Arduino, Open the serial monitor, then press ∧ V > < (the direction arrow keys) in the remote, it will show result in following sequence.
00FF18E7
00FF4AB5
00FF5AA5
00FF10EF
They are the IR codes of ∧ V > < four keys.
Please let me know :
1)Does the serial monitor show any message ?
2)if 1) answer is yes, then what is the IR code of your IR remote ∧ V > < four keys.
I will tell you solution after I got your answer.
Thank you for getting back with me. I did output in the serial monitor. Here’s the code output:
∧ = 3D9AE3F7
V = 1BC0157B
> = 449E79F
< = 8C22657B
now I understand what is your problem. Your remote sends different IR code to our receiver. Ok, that is easy to fix.
Please open your lesson2.ino file, you can see line 10,11,12,13 as follows:
#define IR_ADVANCE 0x00FF18E7 //code from IR controller “▲” button
#define IR_BACK 0x00FF4AB5 //code from IR controller “▼” button
#define IR_RIGHT 0x00FF5AA5 //code from IR controller “>” button
#define IR_LEFT 0x00FF10EF //code from IR controller “<" button
Change above code to follows which match your IR code :
#define IR_ADVANCE 0x3D9AE3F7 //code from IR controller “▲” button
#define IR_BACK 0x1BC0157B //code from IR controller “▼” button
#define IR_RIGHT 0x449E79F //code from IR controller “>” button
#define IR_LEFT 0x8C22657B //code from IR controller “<" button
Also please double check the key > , this key code should be 8 digits , but you only give me 7 digits. I double you might have typed wrong code. If I am correct, please put change line 12 with correct code.
Let me know if above code works.
I just assembled this kit and I’m trying lesson 2 (with the IR). The code itself seems to want to use pin 12 for the IR receiver and the code to simply print the codes received wants to use pin 2
I think these are for the line following sensor – no ? the IR is connected to Pin 10
Nothing works – not the original code or if I change your debugging code (to print just the codes) to use pin 10
any suggestions ?
hi, mattganis,
You are right, the code has some error, you need to change the receiver port to 10 instead of 12 in our code line 12.
If it still not working , then please read following link:
https://osoyoo.com/2017/09/21/2wd-robot-car-infrared-remote/#tbst
It will ask you to run a testing program irdemo.ino , open your Serial monitor and run irdemo.ino file, press ^ key in your IR controller, let us know if you can see any response, if not , please email to [email protected] and we will give you solution.
i followed instructions but when i reverse the car the right wheel doesnt turn, it works fine otherwise
Can your car run lesson 1 very well? or only in lesson 2 reverse movement has problem?