INTRODUCTION
In this projct, we will show how to burn the OSOYOO smartcar firmware for the ESP13 WiFi shield. To complete the next operation, we need to do the following preparations:
Hardware Preparations:
- ESP13 WiFi Shield x 1
- USB to TTL adapter x 1(We use the CP1202 here.)
- Computer x 1
- Some Jumpers
Software Preparations:
Before install firmware, you need download following software first:
Unzip above files into c:flash_download_tools_v3.6.3 folder.
CONNECTION
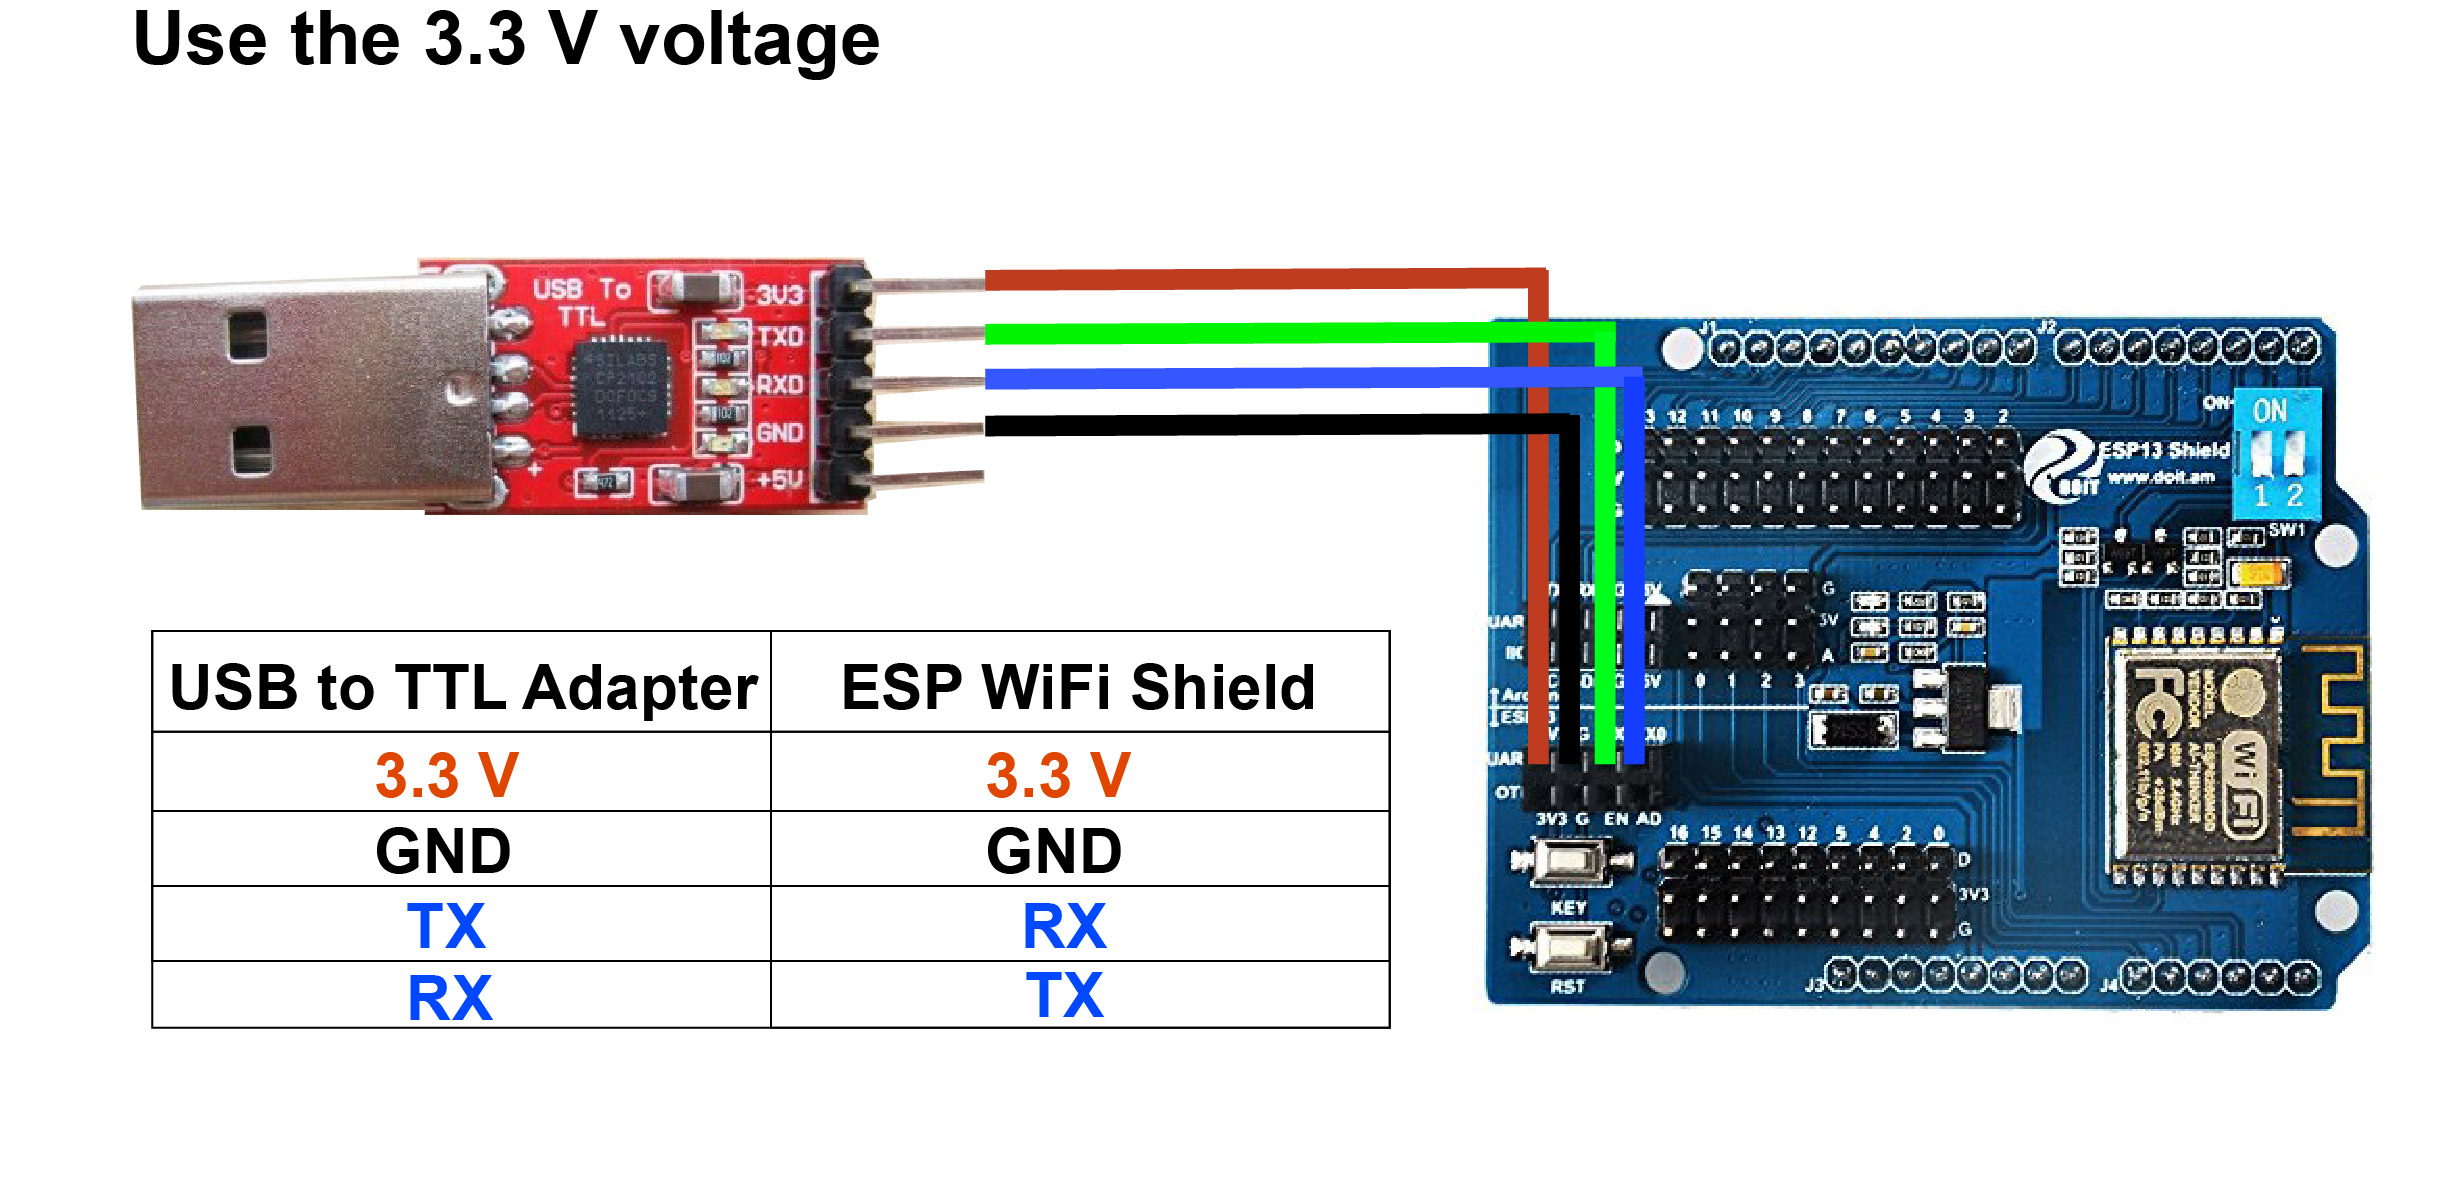
Overhere, we use the CP1202 USB to TTL adapter. There are two kinds of voltage modes,you can use this addpter to connect the ESP WiFi Shield to computer as follows:
Use the 3.3 V voltage
Note:
- Do not connect the ESP13 WiFi Shield to Arduino,connect the shield with the adapter directly
- Connect the adapter to computer
Use the 5 V voltage

Note:
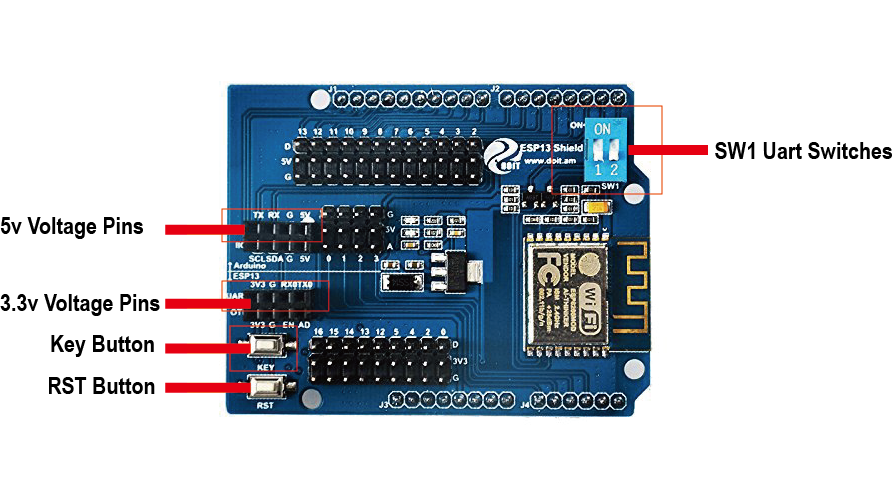
- Hit the two dialing switches on the upper right to “ON” position
- Do not connect the ESP13 WiFi Shield to Arduino,connect the shield with the adapter directly
- Connect the adapter to computer
SOFTWARE CONFIGURATIONS
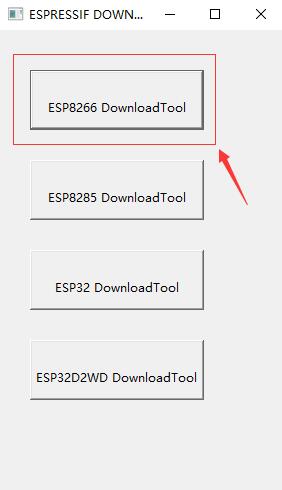
After completed above operations, open C:FLASH_DOWNLOAD_TOOLS_V3.6.3 folder and run ESPFlashDownloadTool_v3.6.3.exe program file, now you can config the software settings as per following steps:
Choose the “ESP8266 DownloadTool” for this project.
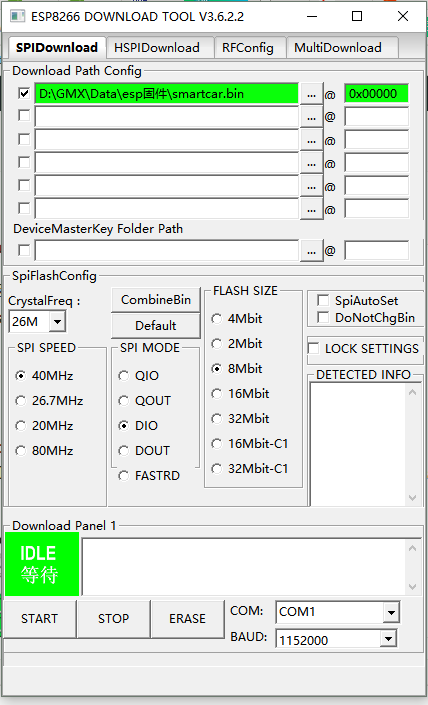
Set the field values as per following instruction:
- smartcar.bin 0x00
- CrystalFreq: 26M
- SPI SPEED: 40MHz
- SPI MODE: DIO
- FLASH SIZE: 8Mbit
- From the COM drop-down menu select the COM port which your adapter is connected to.
Burning Firmware
- Make sure your software settings are correct
- Make sure the connections are completed (Overhere we choose the 5V voltage)
- Dial the SW1 switches to 1,2 Position
- Hold the “Key” button down
- Press the “RST” button for once
- Release the “Key” button,
- Click the “Start ” button on the ESP8266 DownloadTool

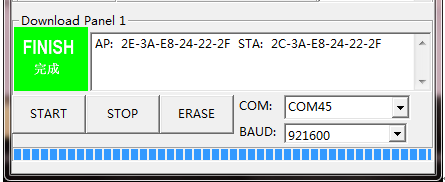
As the below photo, you can see “FINISH” on the software, it means you have burned the smartcar firmware successfully.
 ,
,
Notices:
When we have burned the firmware, if the ESP WiFi Shield restarts again and again, or the softAP can’t be built up, please click the “ERASE” button to erase the flash, then repeat the above steps.


