In this lesson, we will show how to use the analog mode to detect the sound. The microphone sensor will detect the sound intensity of your surroundings and will light up an LED if the sound intensity is above a certain threshold.
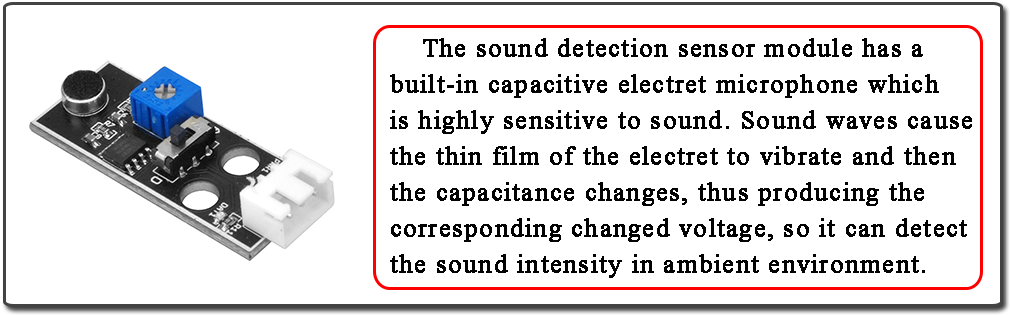
Since the change is extremely weak, it needs to be amplified. You can adjust the sensitivity with by adjusting the Potentiometer. When the sound level exceeds the set point, an LED on the sensor module is illuminated and the output is sent low.
OSOYOO Basic Board for Arduino (Fully compatible with Arduino UNO rev.3) x 1
OSOYOO Magic I/O Shield for Arduino x 1
OSOYOO Sound Detection Sensor x 1
OSOYOO 3-Pin PnP cable x2
USB Cable x 1
PC x 1
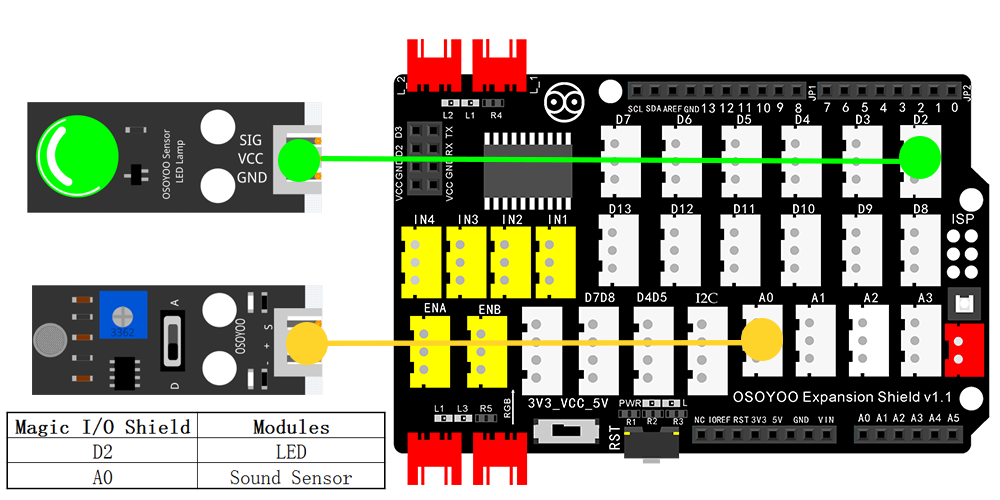
First you need insert the OSOYOO Magic I/O shield into UNO board. Then plug the sound sensor module to A0 port of the Magic I/O shield with a 3-pin PNP cable as following:
Notice: Shut off your battery or Unplug your power adapter when upload sketch code to OSOYOO Basic Board for Arduino.
You can download the code directly, then click “Open” in Mixly to choose the code you download:
After above operations are completed, connect the OSOYOO Basic Board for Arduino to your computer using the USB cable. The green power LED (labelled PWR) should go on.Open the Graphical Programming softwareMixly and follow the next operations:
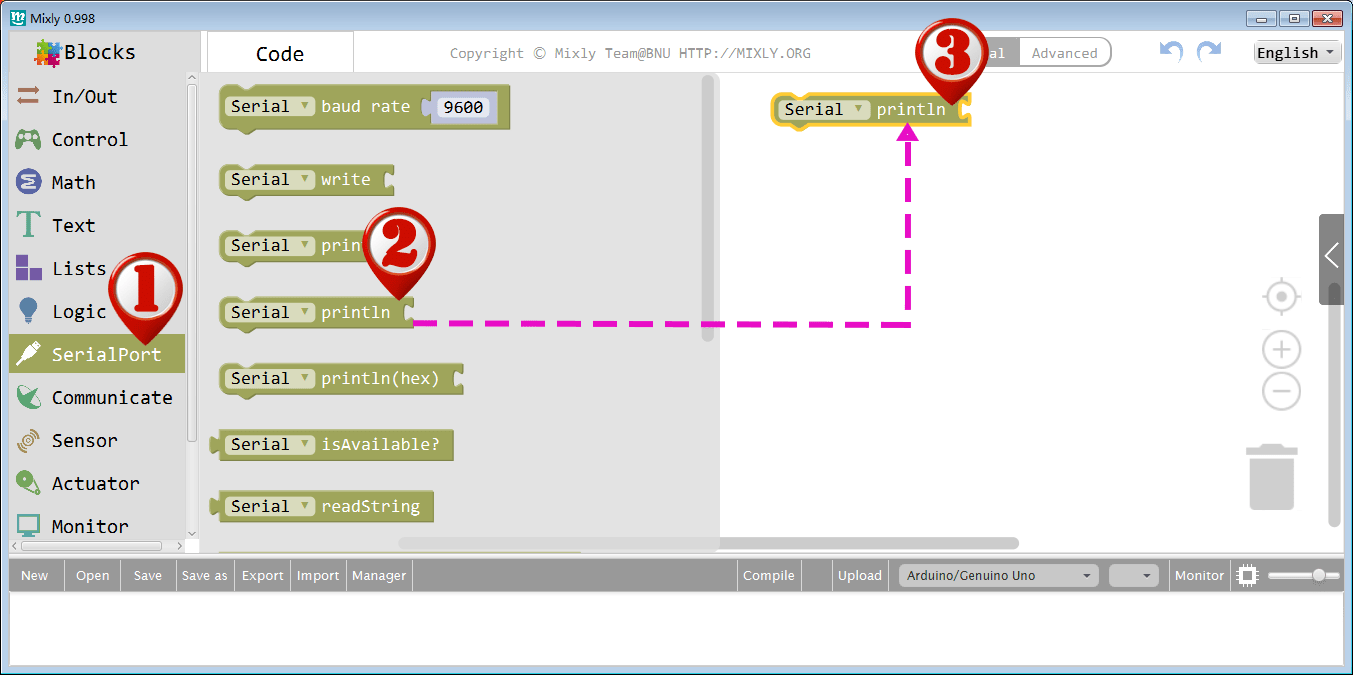
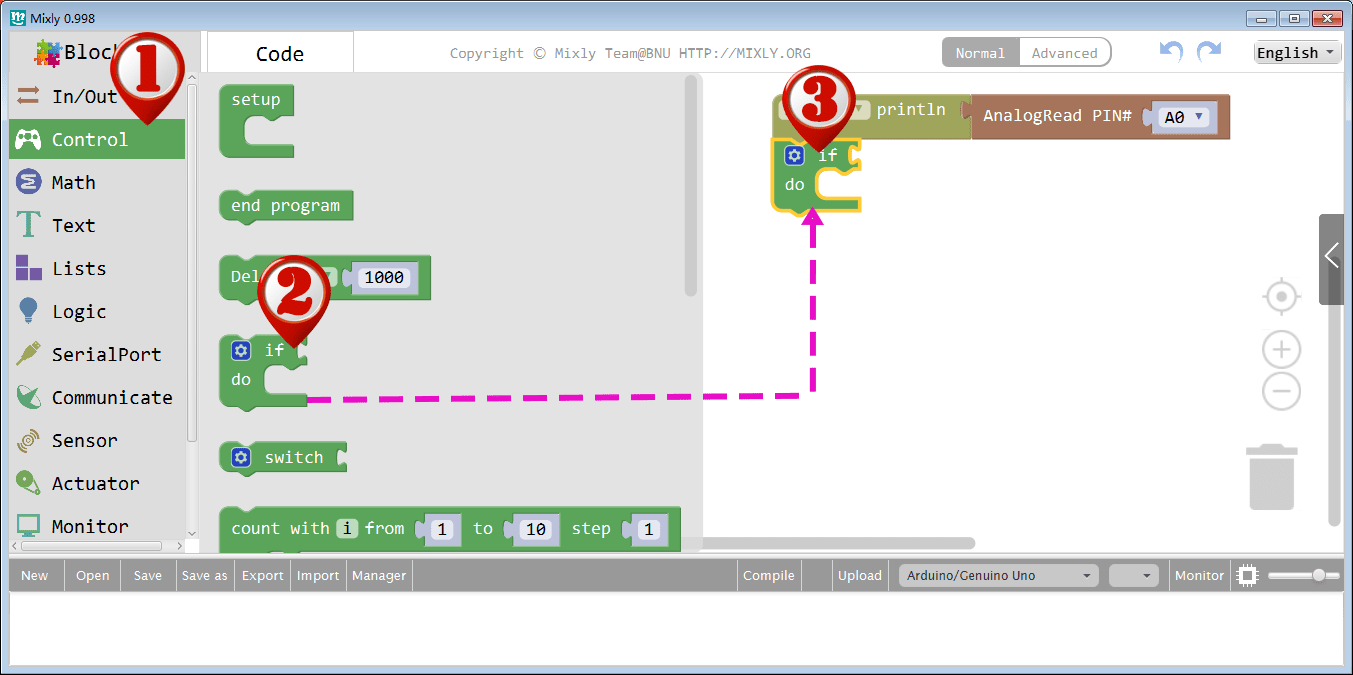
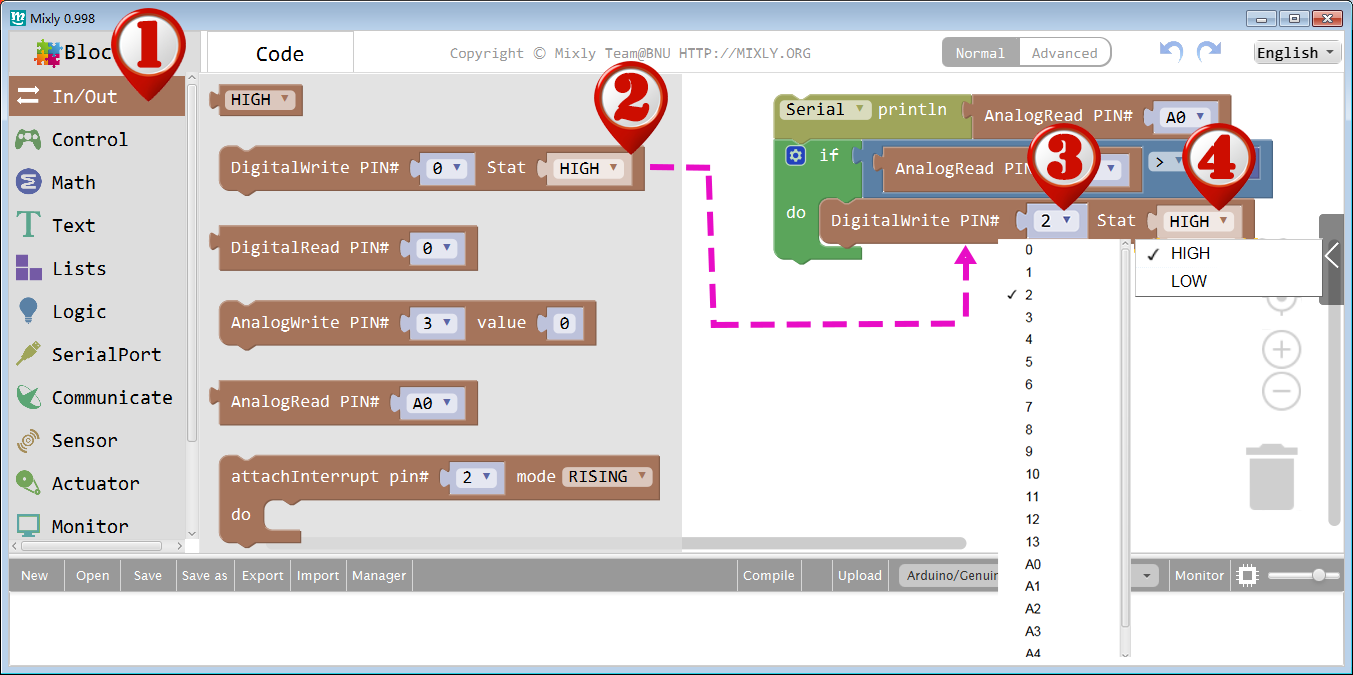
Drag out the Serial printIn block from the SerialPort category ,set pin 3 as input.
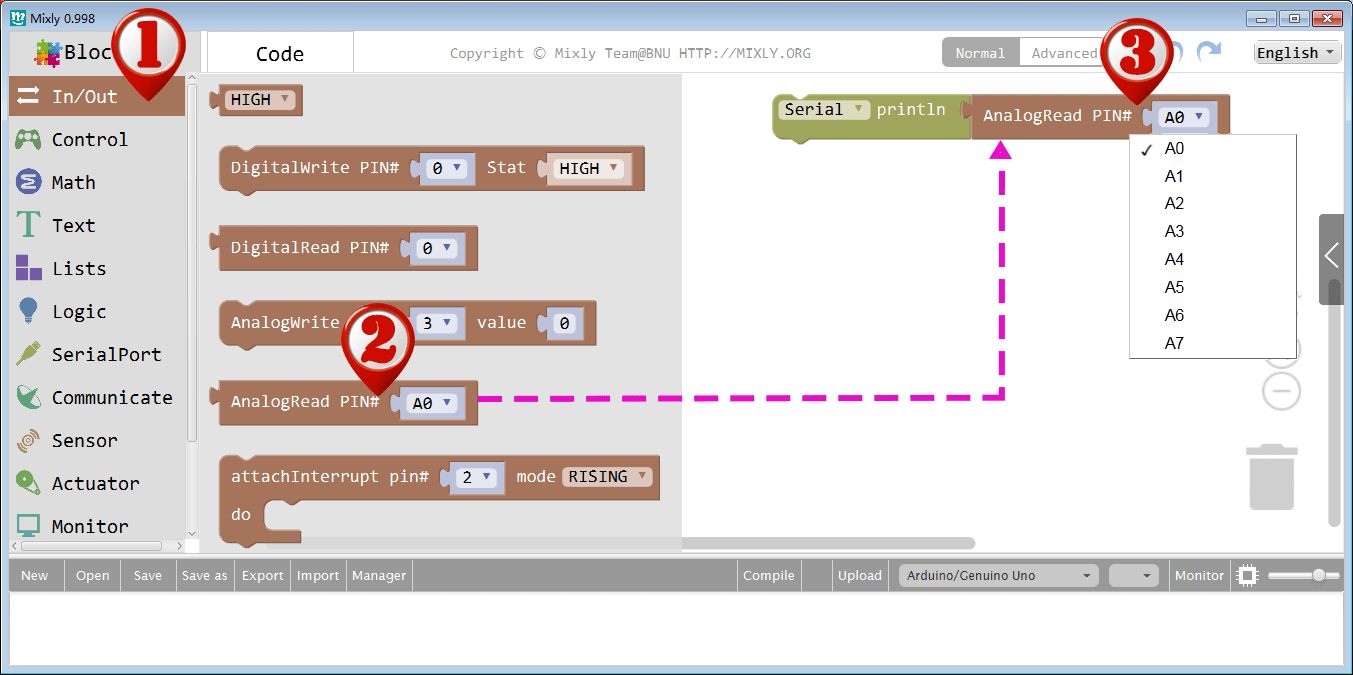
Drag out the AnalogRead PIN# block from the In/Out category ,set pin A0 as input.
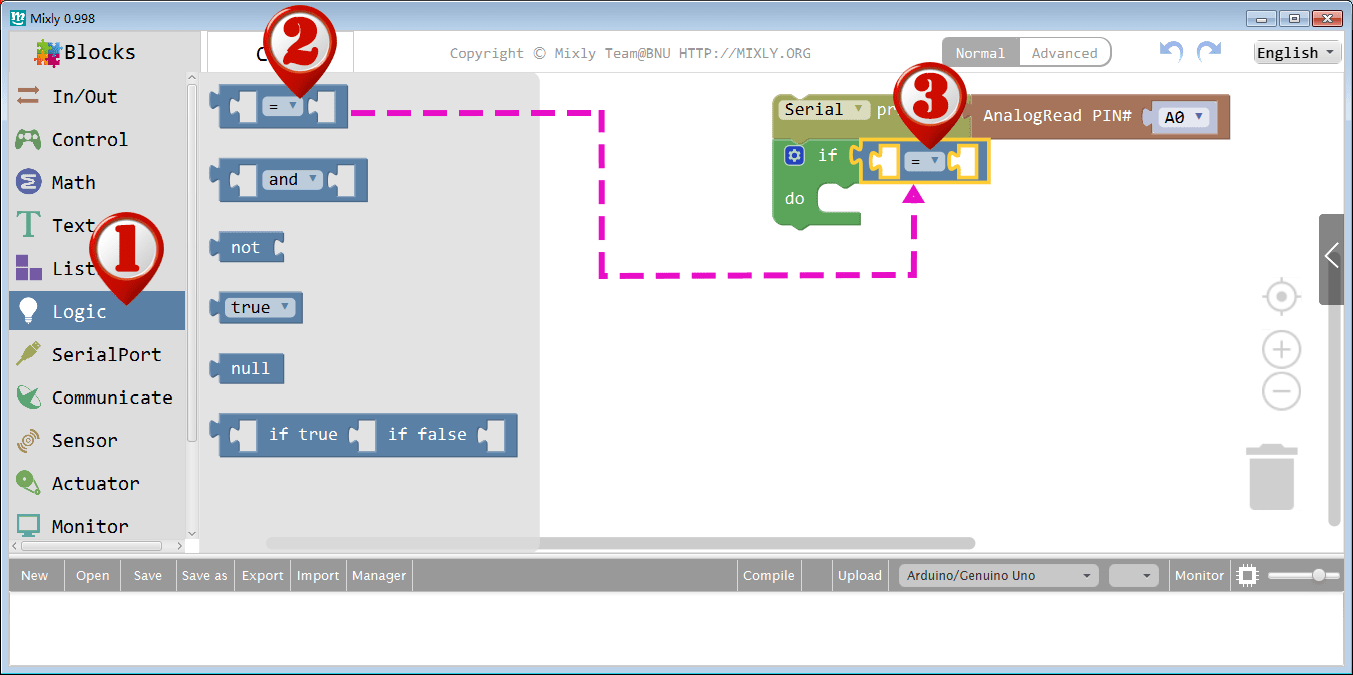
Drag out the if block from the Control category and drag out the first block in Logic category.
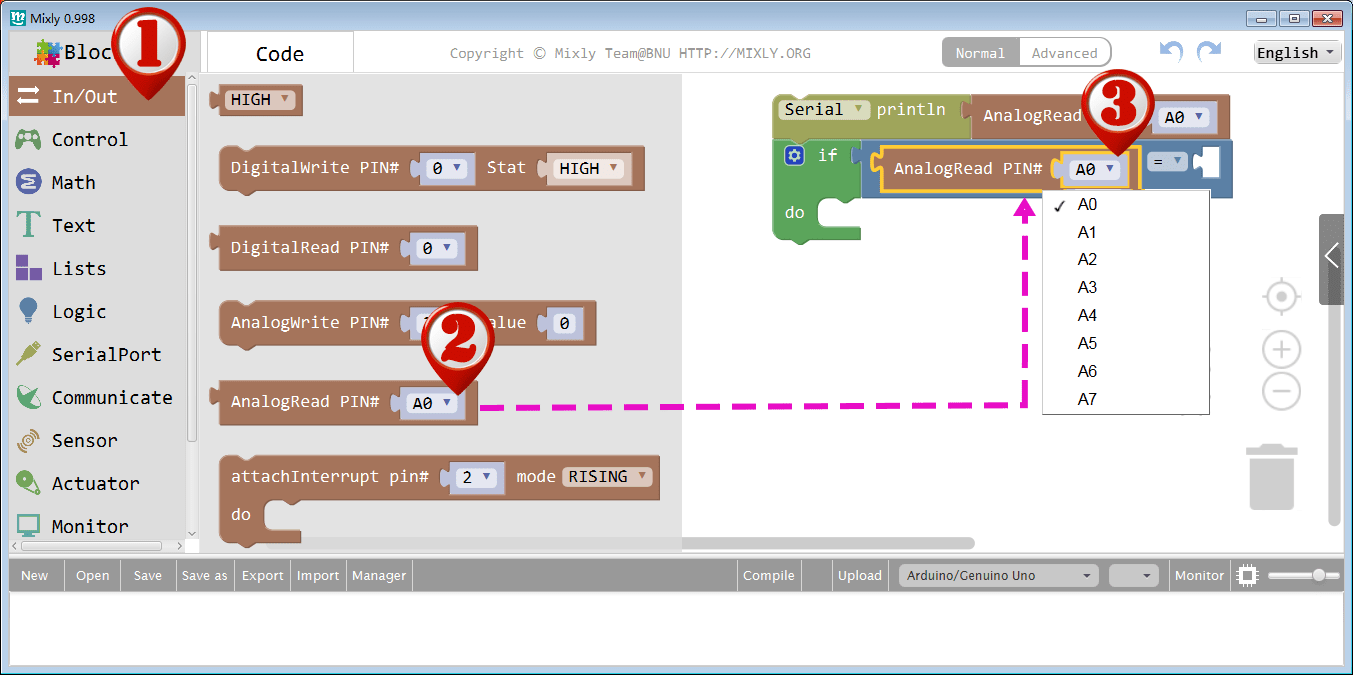
Drag out the AnalogRead PIN# block from the In/Out category ,set pin A0 as input.
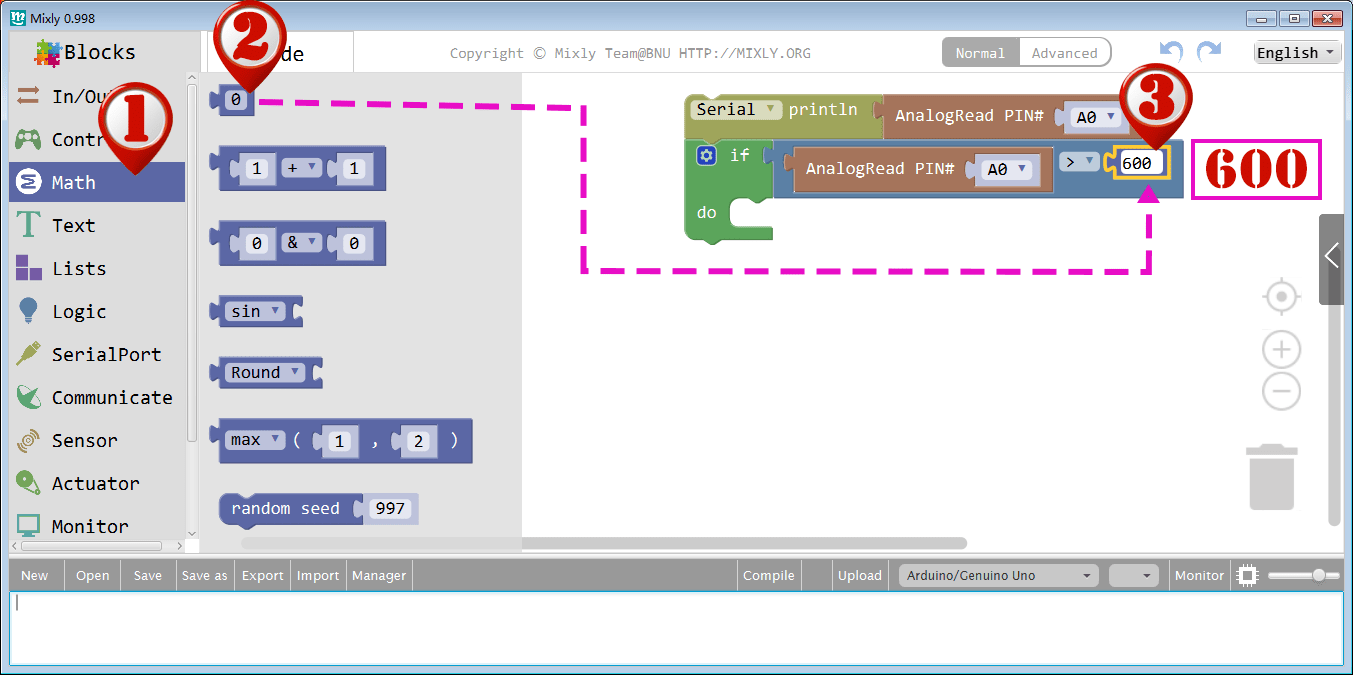
Then Drag out the 0 block from Math Category, set 600 as value.
Drag out a DigitalWrite PIN# block from the In/Out category ,set pin 13 as input, HIGH as stat.
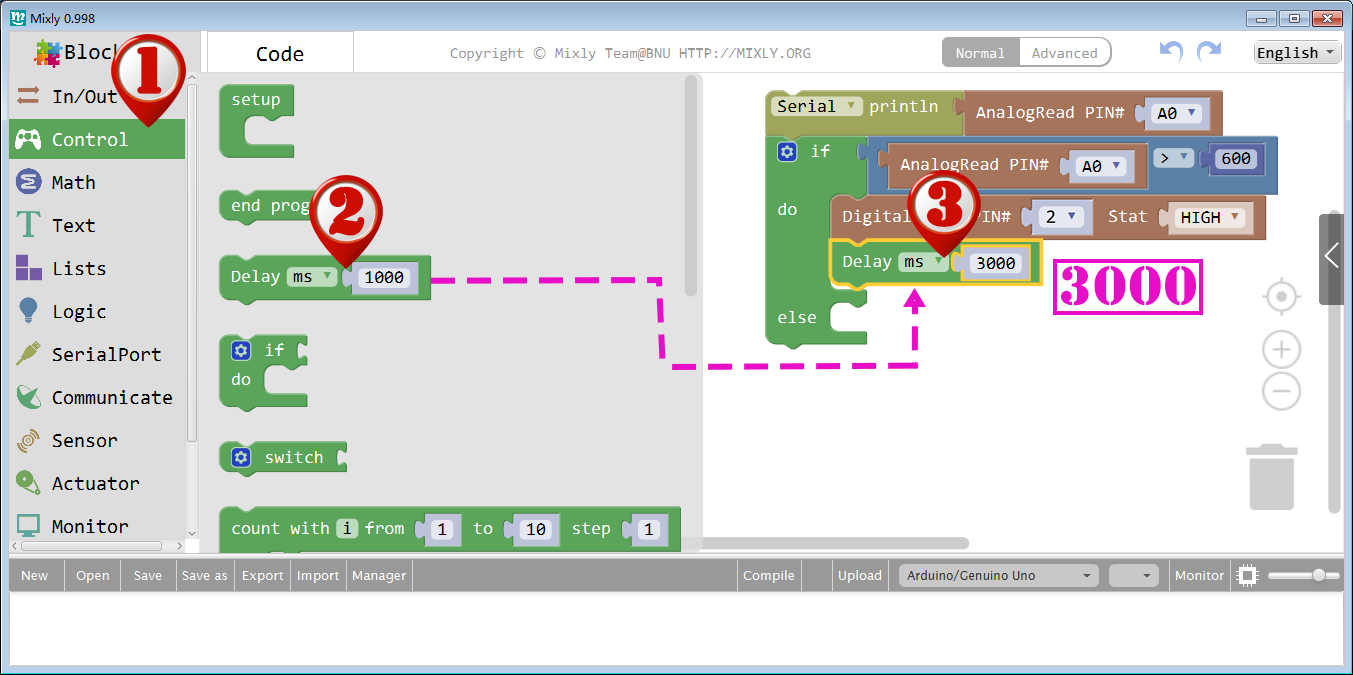
Then drag out the Delay block from Control Category,set 3000 as value.
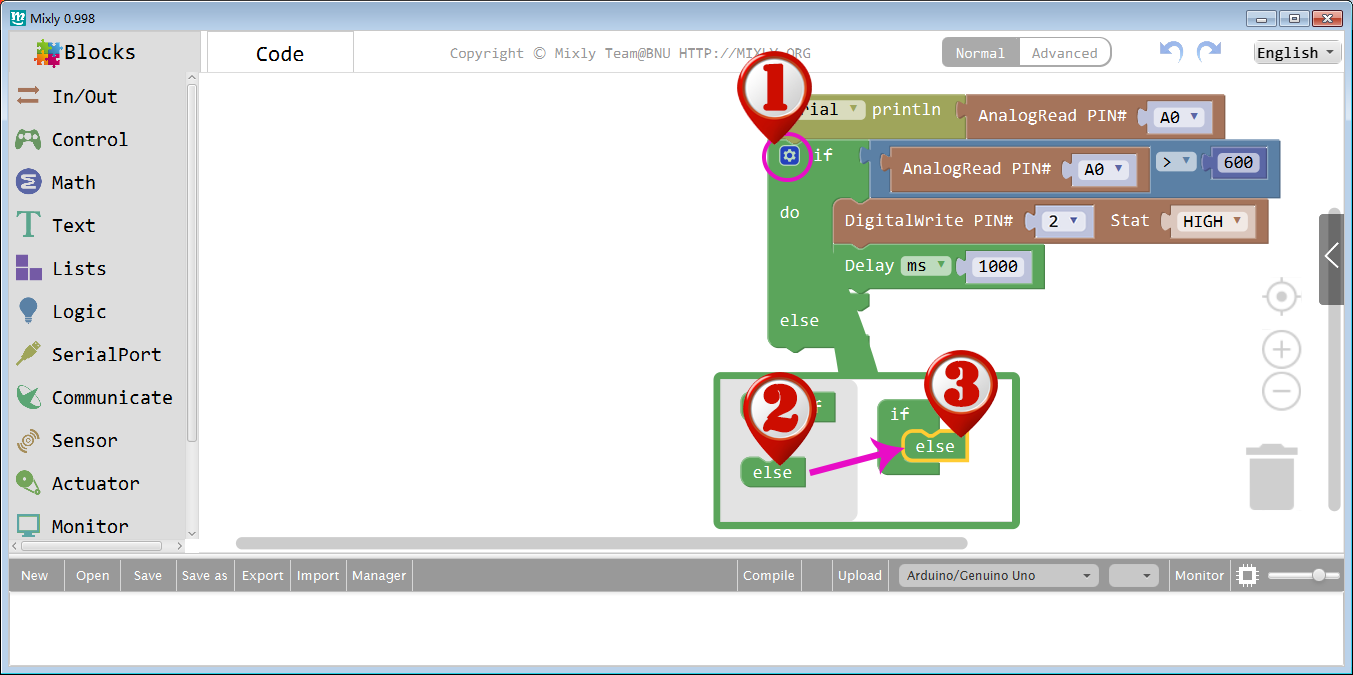
We also need add an else sub-block to this if do block. To do this, just click the setting icon inside if do block, drag out an else sub-block and connect it to if block, then Click setting again to turn off the setting window.
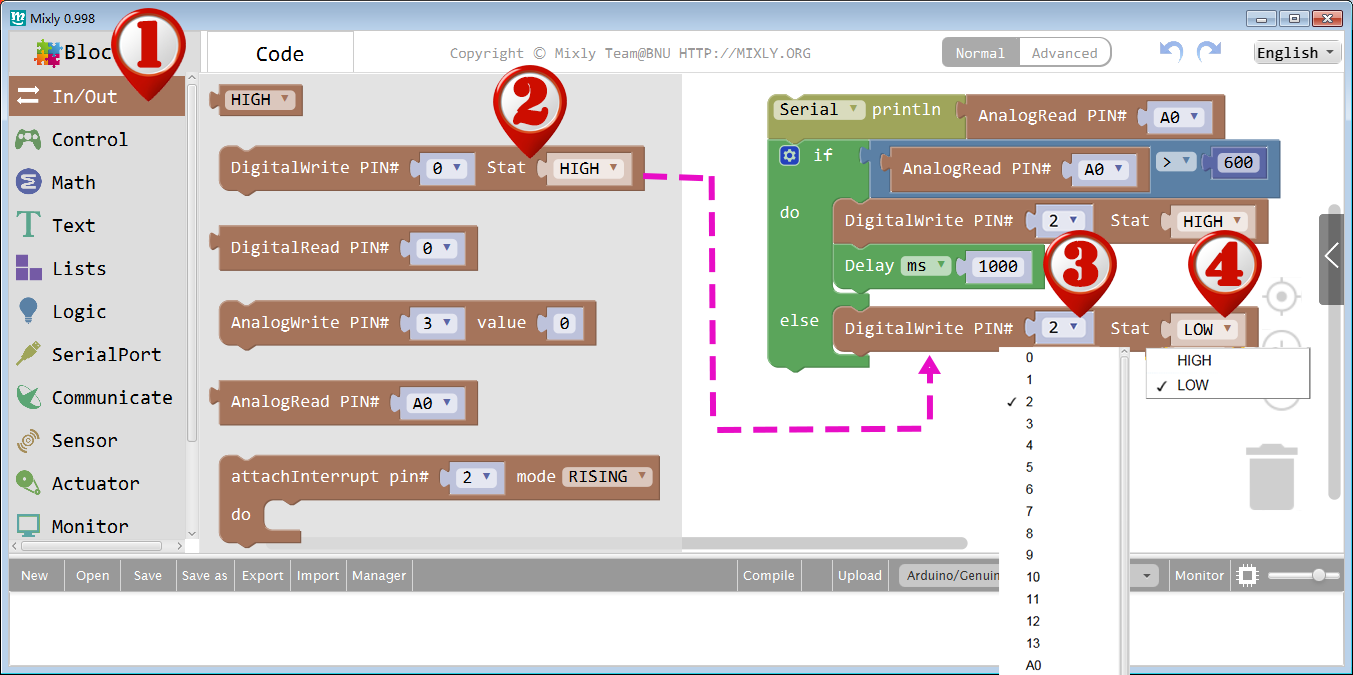
Drag out the DigitalWrite PIN# block from the In/Out category ,set pin 13 as input, LOW as stat.
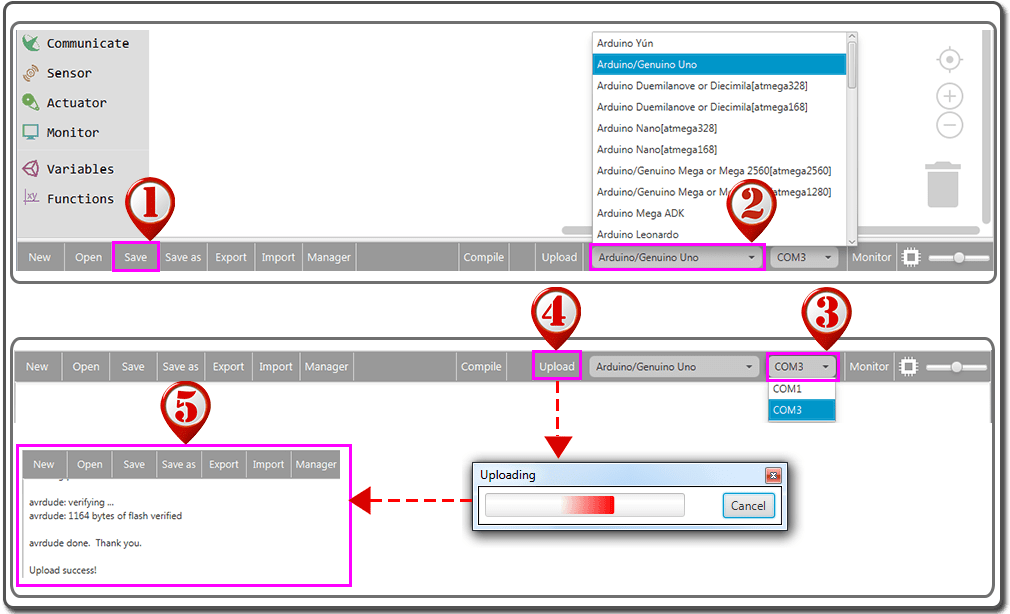
Save and upload program to OSOYOO Basic Board for Arduino.
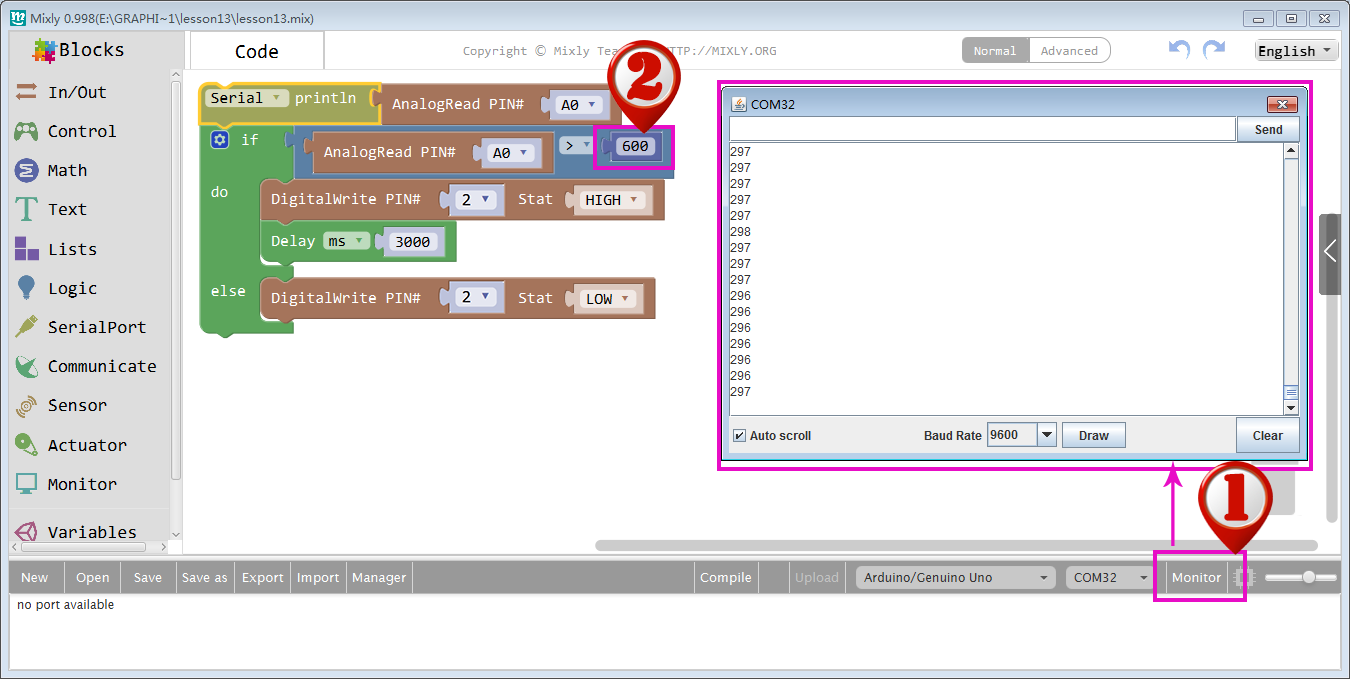
You can open the Serial Monitor by going to Tools > Serial Monitor or pressing the magnifying glass-button in the Arduino IDE software window.
What prints out is the analog and digital values of from the sound sensor module. The analog value should spike up when a noise occurs and stabilize when it gets quiet again.
After uploading this code, when the volume reaches to a certain value (sometimes you need to blow a breath to make the sound loudly), the LED attached to pin 13 on the Uno board will light up. If the sound does not sense very well, try changing the threshold value or changing the sensor sensitivity by rotating the potentiometer in the module .
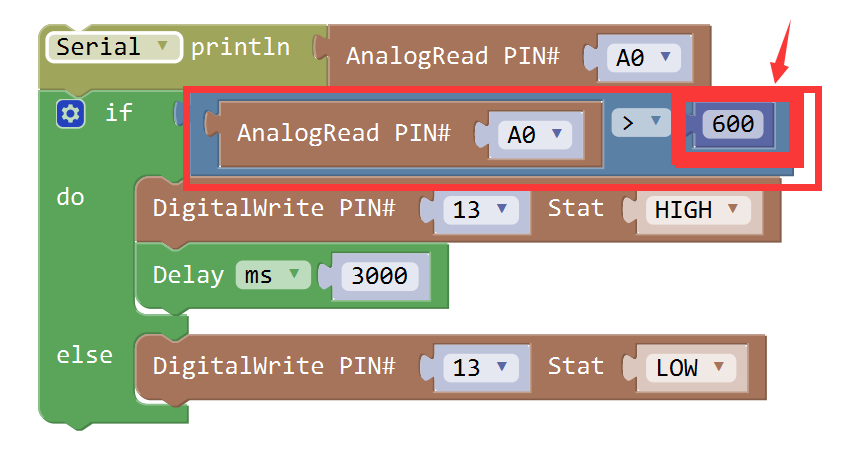
Now in the code there is an “AnalogRead(A0) > 600” line that needs to be changed to something very close but higher than the value you get from the Serial Monitor when it is quiet around you. For instance if you see an analog value of 600, then threshold should be changed to perhaps 603 or 605. When a sound occurs, the analog value will rise and go above the threshold value. When that happens your LEDs will turn on. When it gets quiet again the analog value will go back to 603 and the LEDs go dark again.


The schematic forgets the green diode seen in the video.