The radio module on the micro:bit is super useful. Information gathered by one micro:bit can be transmitted to other micro:bits in the same radio group. Which can then perform actions based on the information received.
In this tutorial, we will utilize MakeCode’s radio blocks to have one micro:bit transmit a signal to a receiving micro:bit on the same channel. Eventually, we will control a OSOYOO Robot Car wirelessly using parts from the micro:Bit Board!
Do you already have a micro:bit project you’d like to control from afar? Partner up with a friend, or grab a spare micro:bit, to make a remote controlled project with 2 micro:bits.
2 x BBC micro:bit (mark A and B)
1 x Micro USB cable
1 x 9V battery
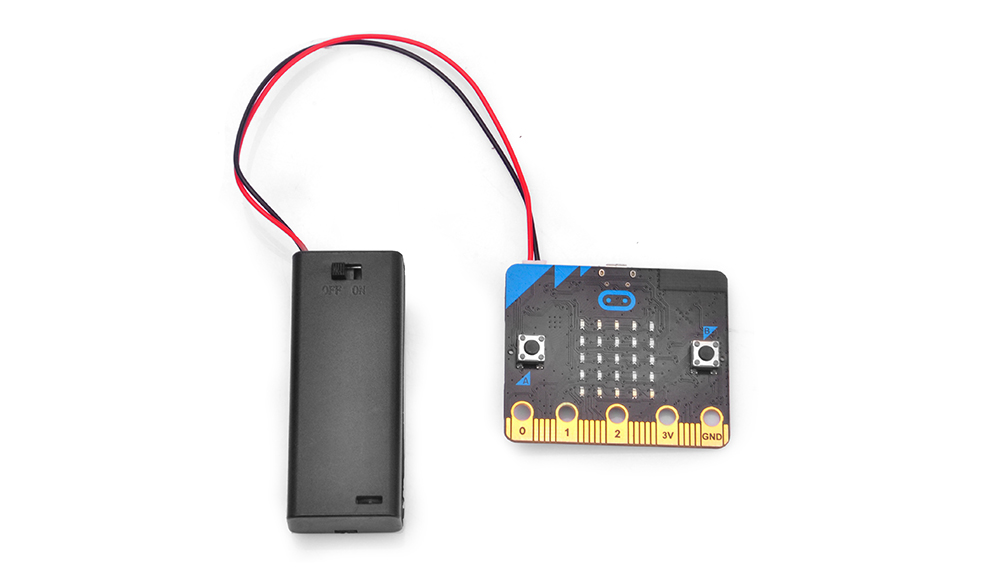
2 x AAA battery
1 x AAA battery case
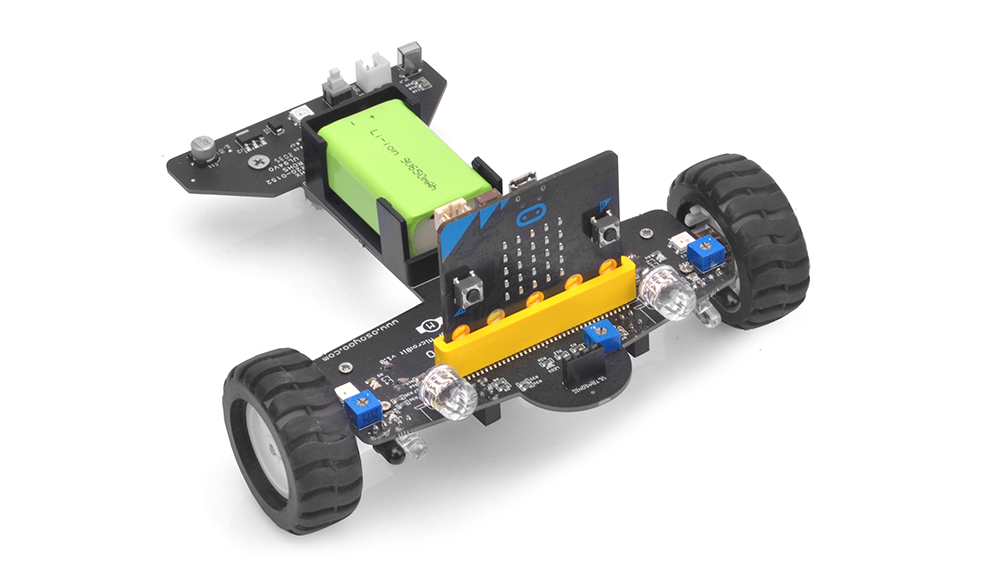
1 x OSOYOO photon robot
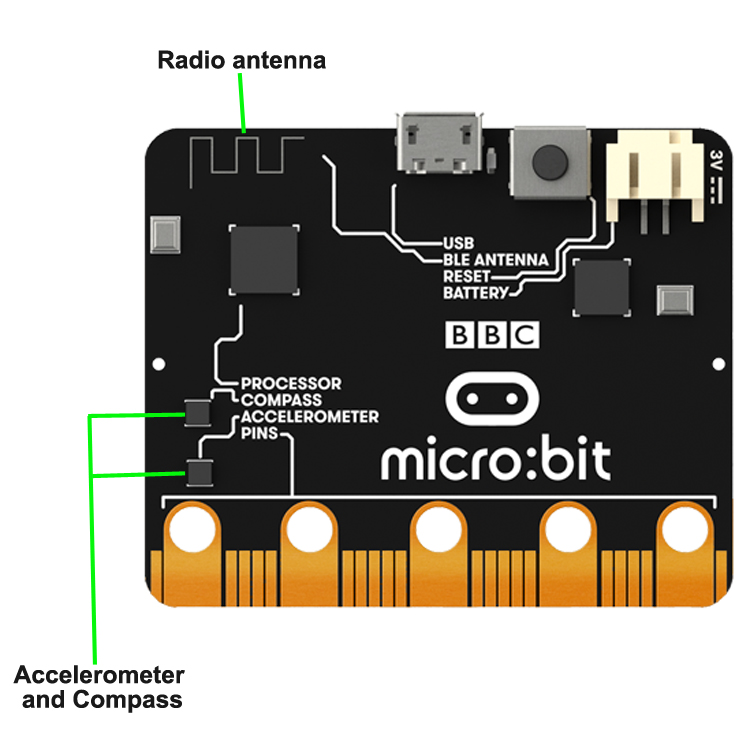
The micro:bit accelerometer measures the acceleration of your micro:bit; this component senses when the micro:bit is moved. It can also detect other actions, e.g. shake, tilt, and free-fall.
The micro:bit compass detects the earth’s magnetic field, allowing you to detect which direction the micro:bit is facing. The compass has to be calibrated before it can be used.
The micro:bit radio antenna feature allows you to communicate wirelessly between micro:bits. Use the radio to send messages to other micro:bits, build multiplayer games, and much more!
Block
Analyse
Examples
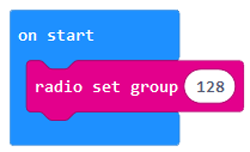
From Category Radio
Make a program have the group ID you tell it for sending and receiving with radio.
From Category Radio
Make the radio signal of the micro:bit stronger or weaker.
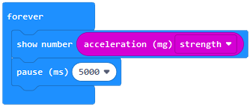
From Category Input
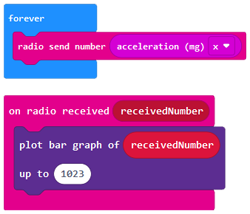
Get the acceleration value (milli g-force) in one of three dimensions, or the combined force in all directions (x, y, and z).
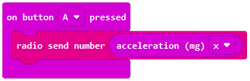
From Category radio
Broadcast a number to other micro:bits connected via radio.
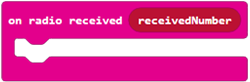
From Category radio
Run part of a program when the micro:bit receives a number over radio.
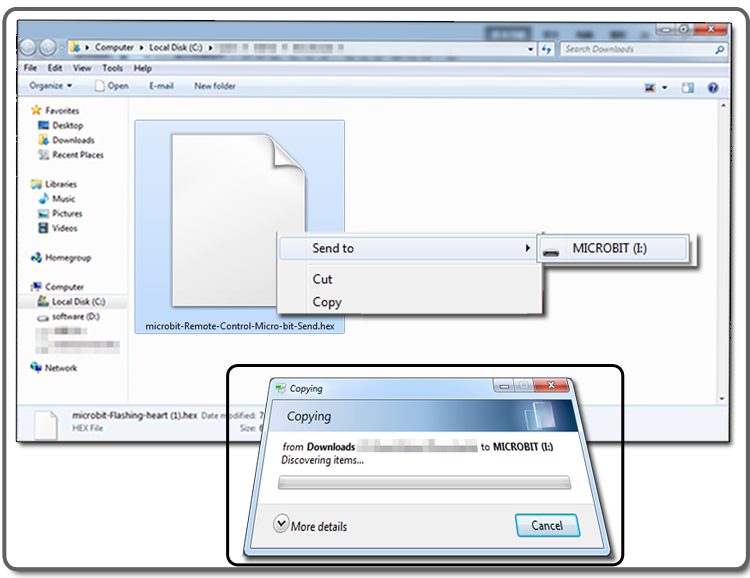
(The whole code for the project is as below. You can also click “Edit” to download the whole project or edit the project according to your own ideas)
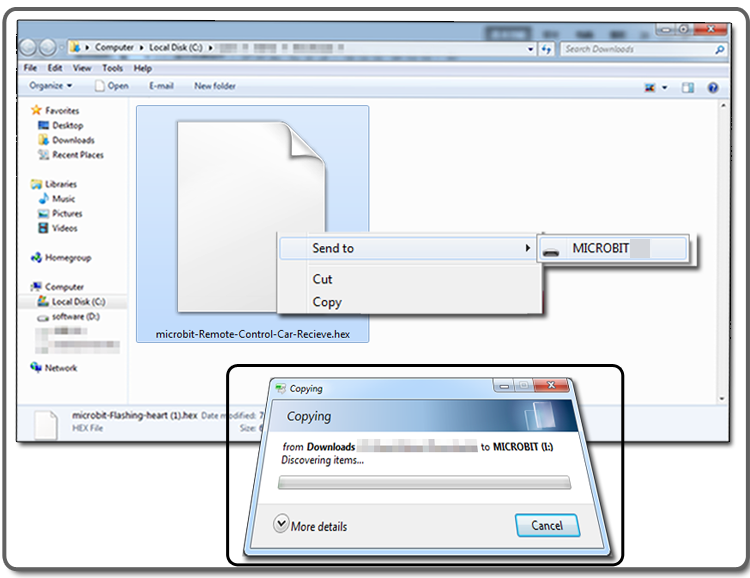
Step B)Connect the micro:bit A with the computer through USB cable, and the computer will pop up a U disk and send the download file(.hex)to your micro:bit.
Step C)Install 2pcs AAA batteries into the AAA battery box (or other way to power for the micro:bit A) and connect with micro:bit A
(The whole code for the project is as below. You can also click “Edit” to download the whole project or edit the project according to your own ideas)
Step 2)Connect the micro:bit B with the computer through USB cable, and the computer will pop up a U disk and send the download file(.hex)to your micro:bit.
Step 3)Insert the micro:bit B into the robot, and install a 9v battery into the battery box.
1)Turn (or power) on the micro:bit A, and Turn the POWER switch ON of OSOYOO photon robot
2)When you rotate micro:bit A to left, the OSOYOO photon robot will go advance, and the LED of both micro:bit show ˄
3) When you rotate micro:bit A to right, the OSOYOO photon robot will go back, and the LED of both micro:bit show ˅
4) When you long-press button A of micro:bit A, the OSOYOO photon robot will turn left, and the LED of both micro:bit show < 5) When you long-press button B of micro:bit A, the OSOYOO photon robot will turn right, and the LED of both micro:bit show >
6) When you long-press button A+B of micro:bit A, the OSOYOO photon robot will pause, and the LED of micro:bit A show P, and the LED of micro:bit B show X, when you move the micro:bit A, the car will start running again.