In this tutorial, we will learn how to use OSOYOO IoT kit in combination with Blynk APP to make a multifunctional access control system. This system can open the door remotely through the mobile phone APP or use the access card to open the door, after opening the door, the mobile phone will receive the APP notifications, and the local LCD screen will also display the door opening information.
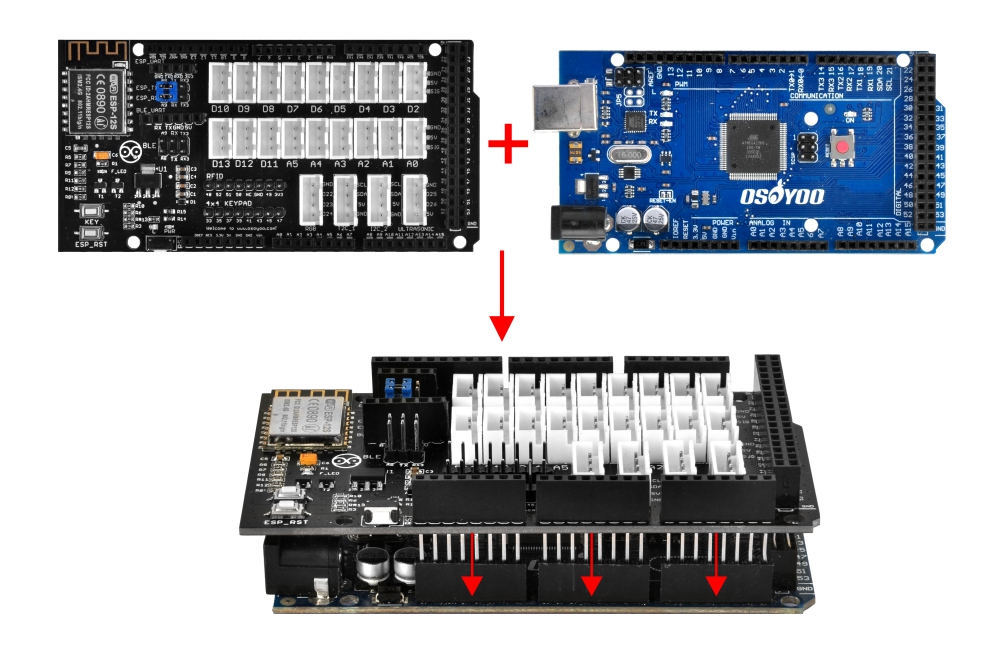
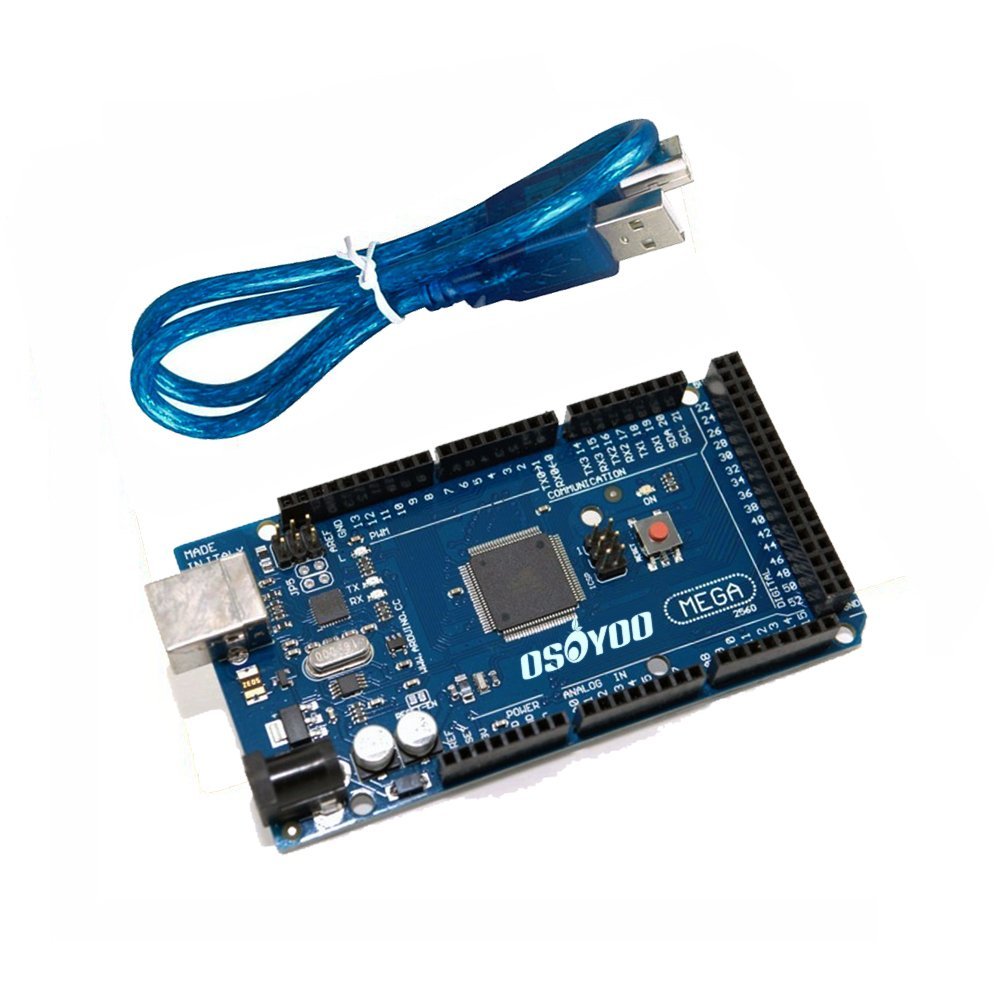
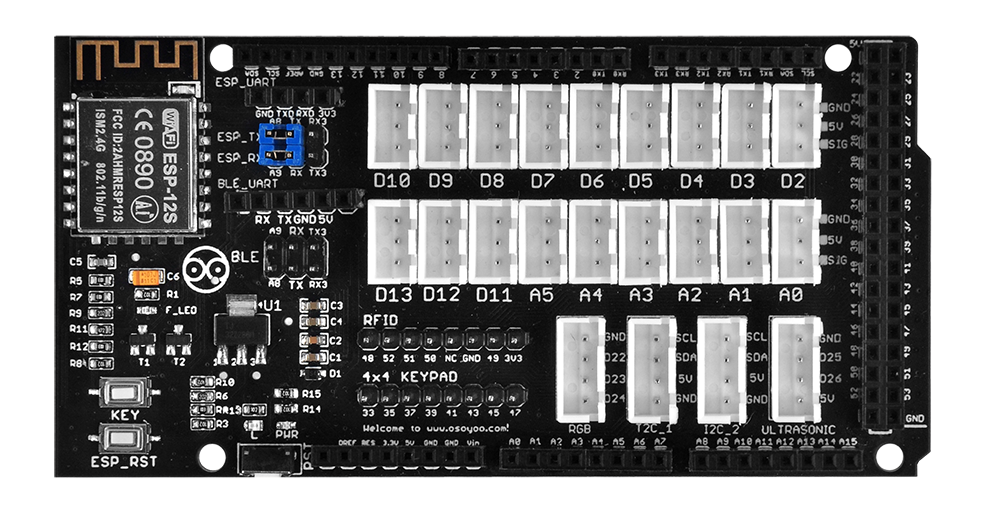
First, please plug OSOYOO MEGA-IoT Extension Board into MEGA2560 board:
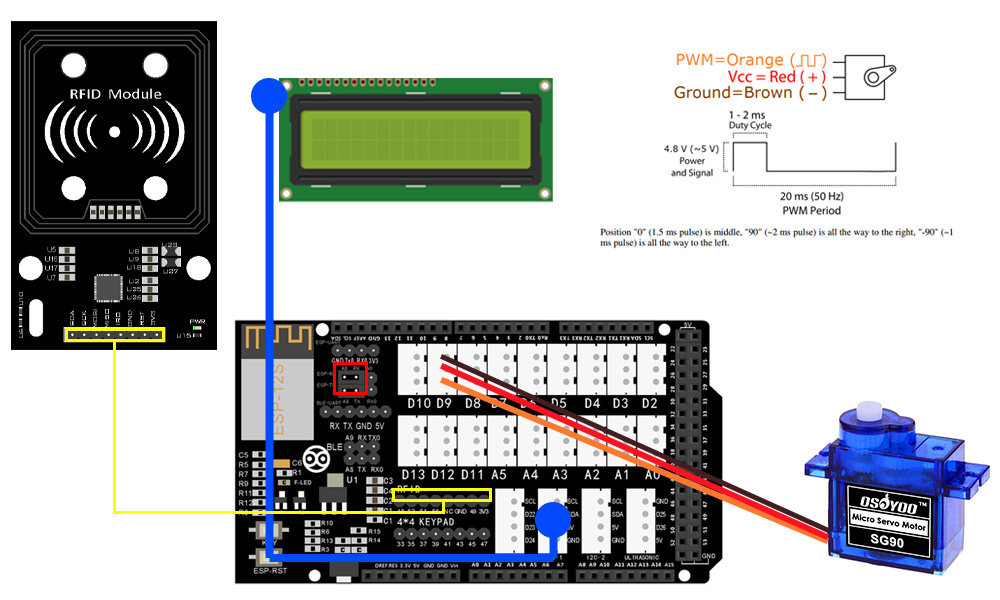
Build the circuit as below:
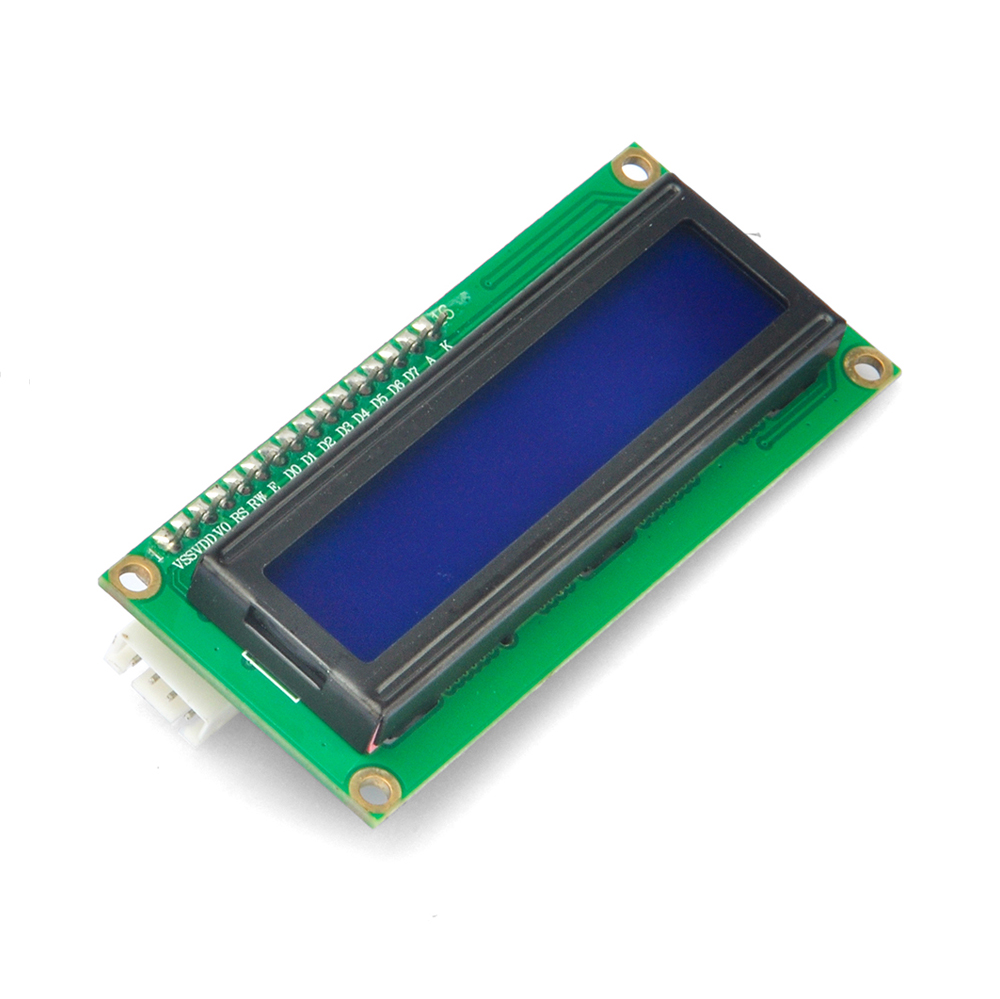
I2C 1602 LCD Display—-I2c
RFID Module —- RFID
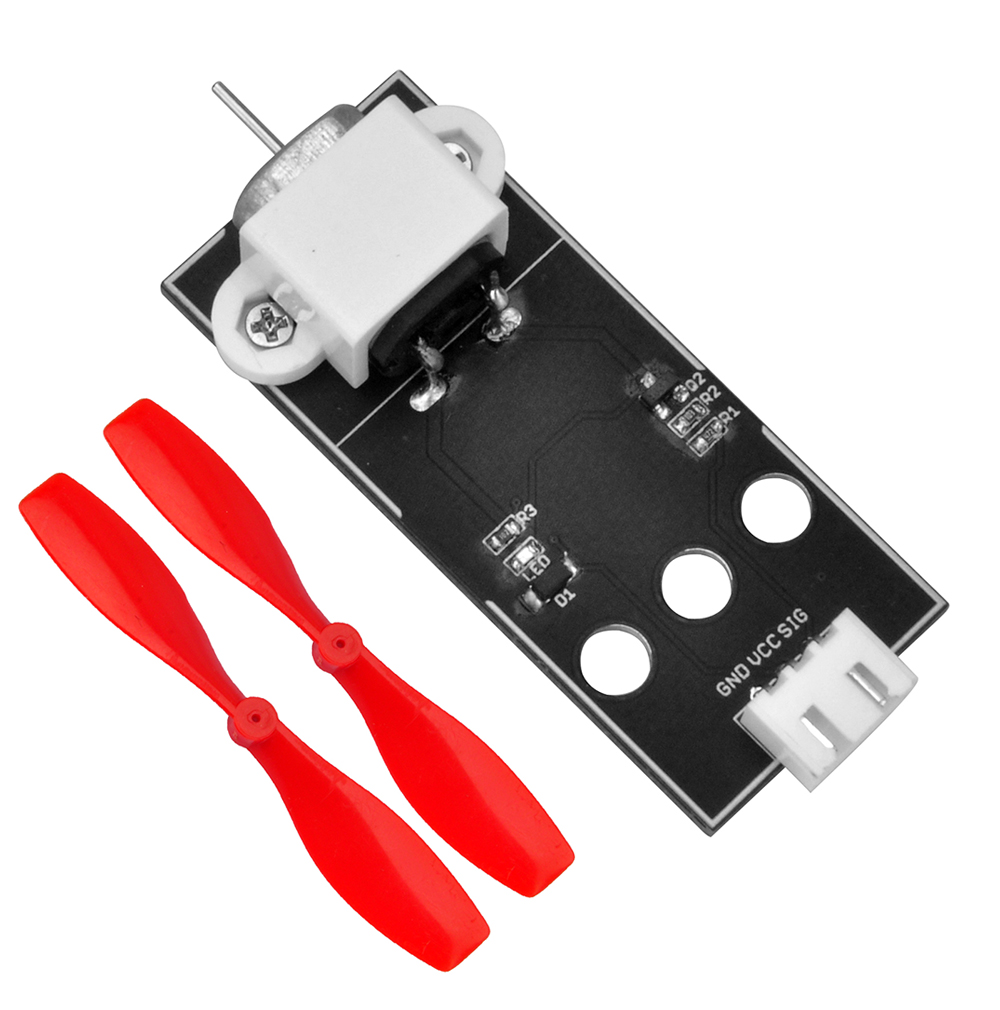
servo ——- D9
Prerequisite:
You need to install Local Blynk Server, Blynk APP, Arduino IDE, Blynk Libraries before running the code of this lesson. We suppose you have installed them in previous lessons. If you haven’t done these installations, please read following contents in lesson2-1 link:
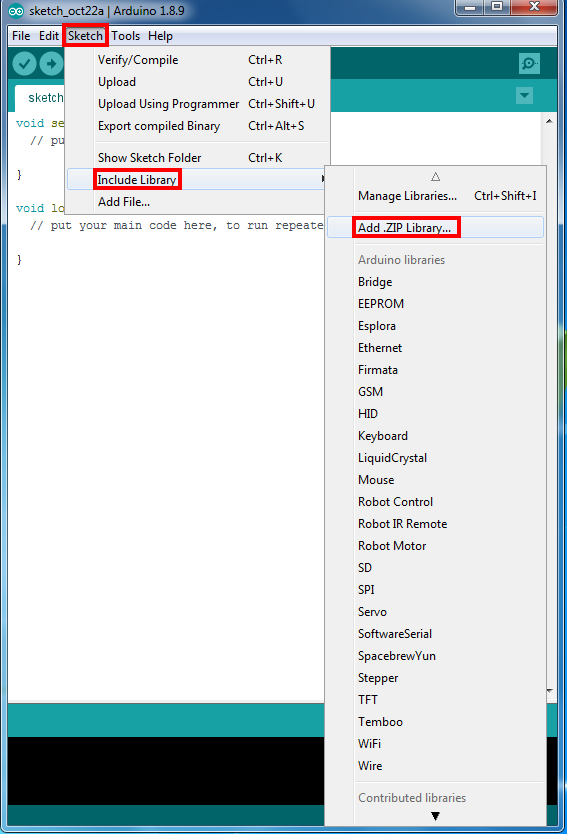
In Arduino IDE, click Sketch->Include Library ->Add .ZIP library and upload the library zip files to the IDE.
If you haven’t done servo test in lesson 2-5, please read Door Servo Test and do the servo test first. If you have adjusted the servo before, please skip this step.
After you complete library installation and servo adjustment, you can go to next stage:
Note: In the sketch, find these code in line 13,14 as following:
char auth[] =”0ByWpc50cmOJ5O6OyHMaK4OSHkDvUeI-”;
char server_ip[]=”192.168.1.81″; // replace this line with your Blynk Server IP addres;
Replace 0ByWpc50cmOJ5O6OyHMaK4OSHkDvUeI- with your local Blynk Token.
Replace 192.168.1.81 with your local Blynk Server LAN IP address.
If you don’t know how to get token and Server IP address, read this article.
In lines 17,18 and replace *** with your wifi ssid/password
char ssid[] = "***";//replace this line with your wifi ssid
char pass[] = "***"; //replace this line with your wifi password
please replace the *** with your correct wifi SSID and password, otherwise your project can not connect to Internet.
Upload the sketch to the board. Wait until you see something like this:
Done uploading
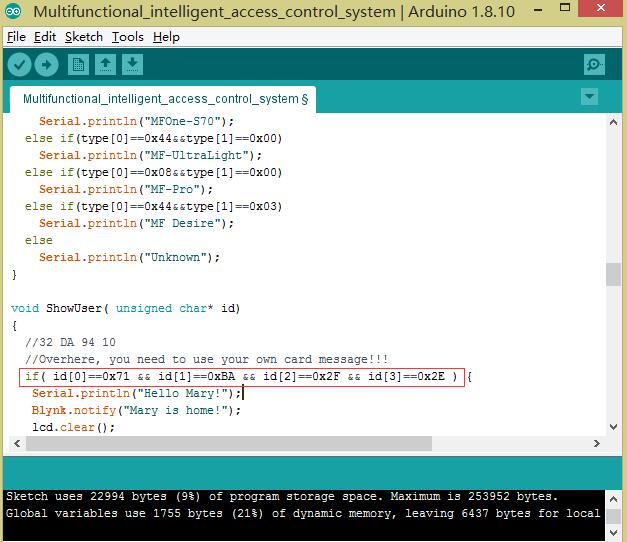
Add your own RFID Card id:
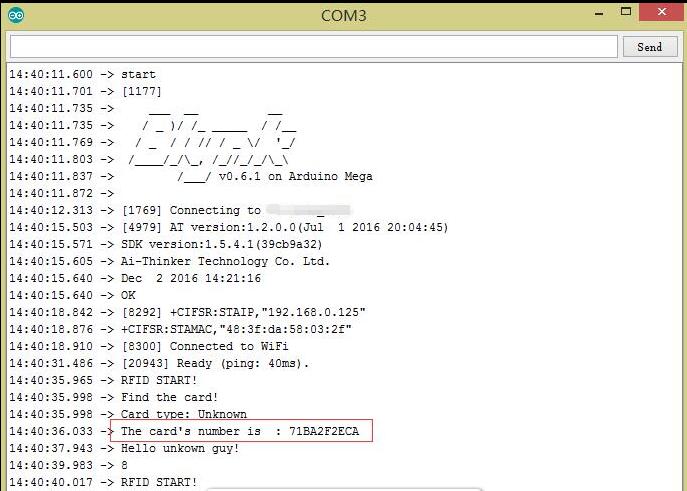
After completing the above steps and uploading the code, open the IDE serial monitor, you can see that the system is initialized successfully, and then put your RFID card in the RDID module recognition area, you will see your serial monitor will display your The card information is as follows:
RFID START!Find the card!Card type: UnknownThe card's number is : 71BA2F2ECA
In the same way, you can add or modify your card information at will, and finally, re-upload the code to the Arduino and continue the experiment
Done uploading
Now open your Serial Monitor, you will see Arduino is trying to talk to Blynk server. After 20 to 30 seconds, your Serial monitor will finally shows Arduino’s IP address and a “Ready (ping: 25ms)” ending message.
Congratulations! You are all ready! Your hardware is now connected to the Blynk server.
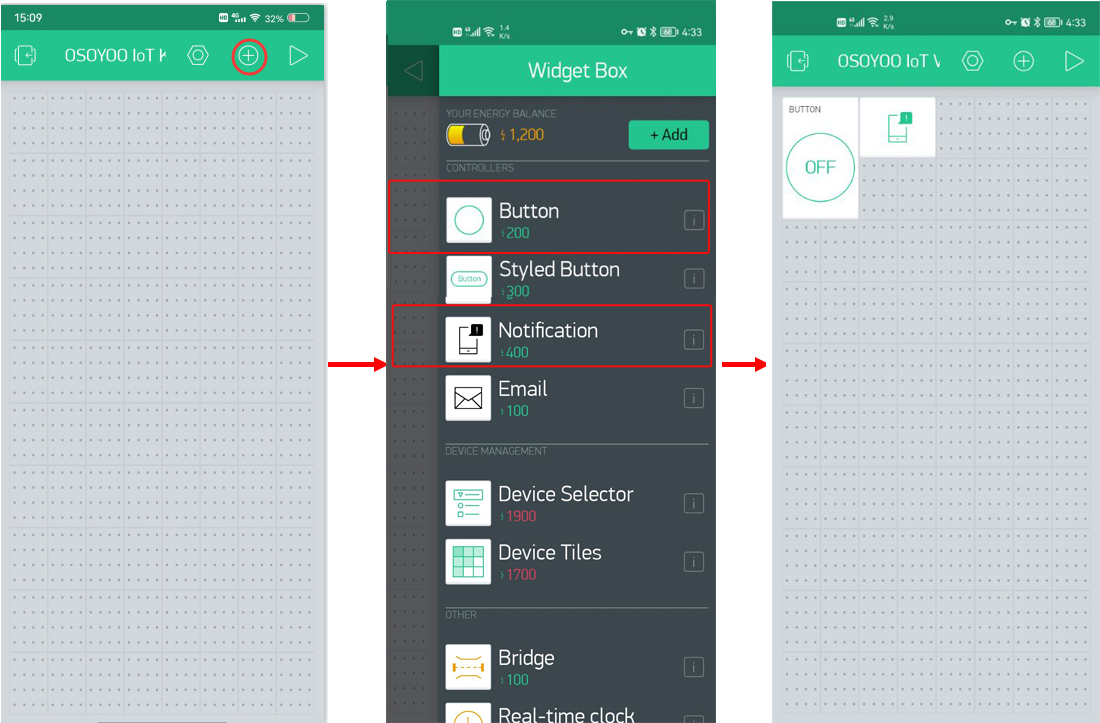
Add Widgets in Blynk legacy APP
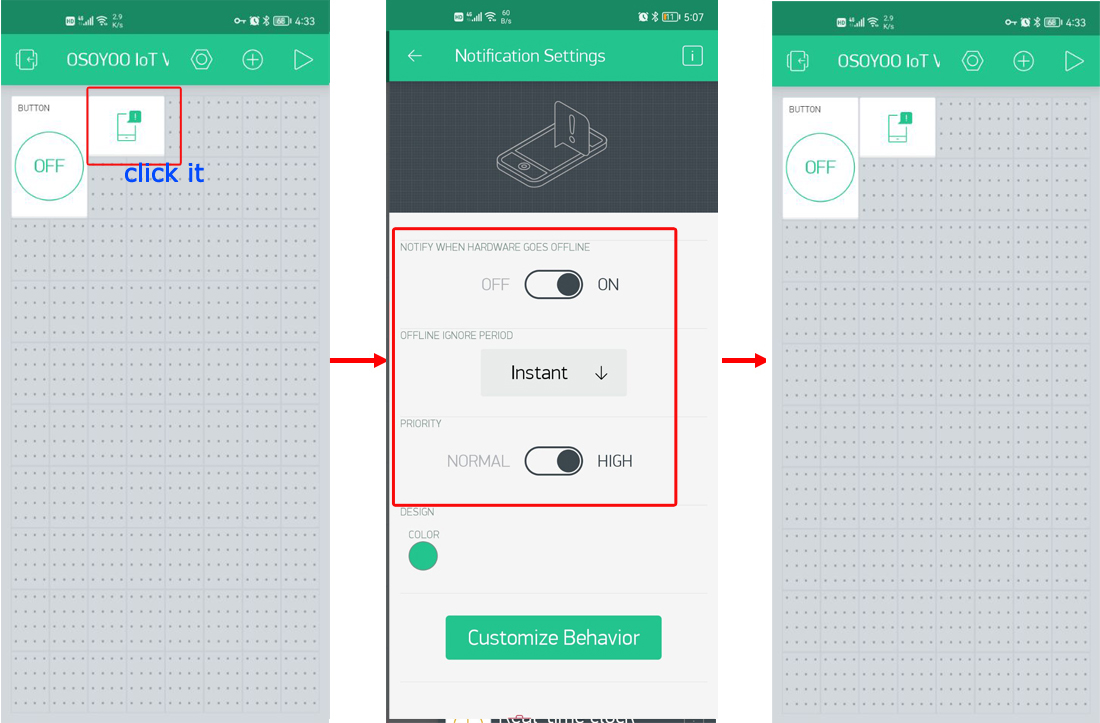
Here we need to add the Notification and Button widgets, and config it as below:
Notification widget:
Notify when hardware goes offline: ON
Offline ignore period: Instant
Priority: HIGH
Then set the Blynk notification to the highest authority in the phone settings.
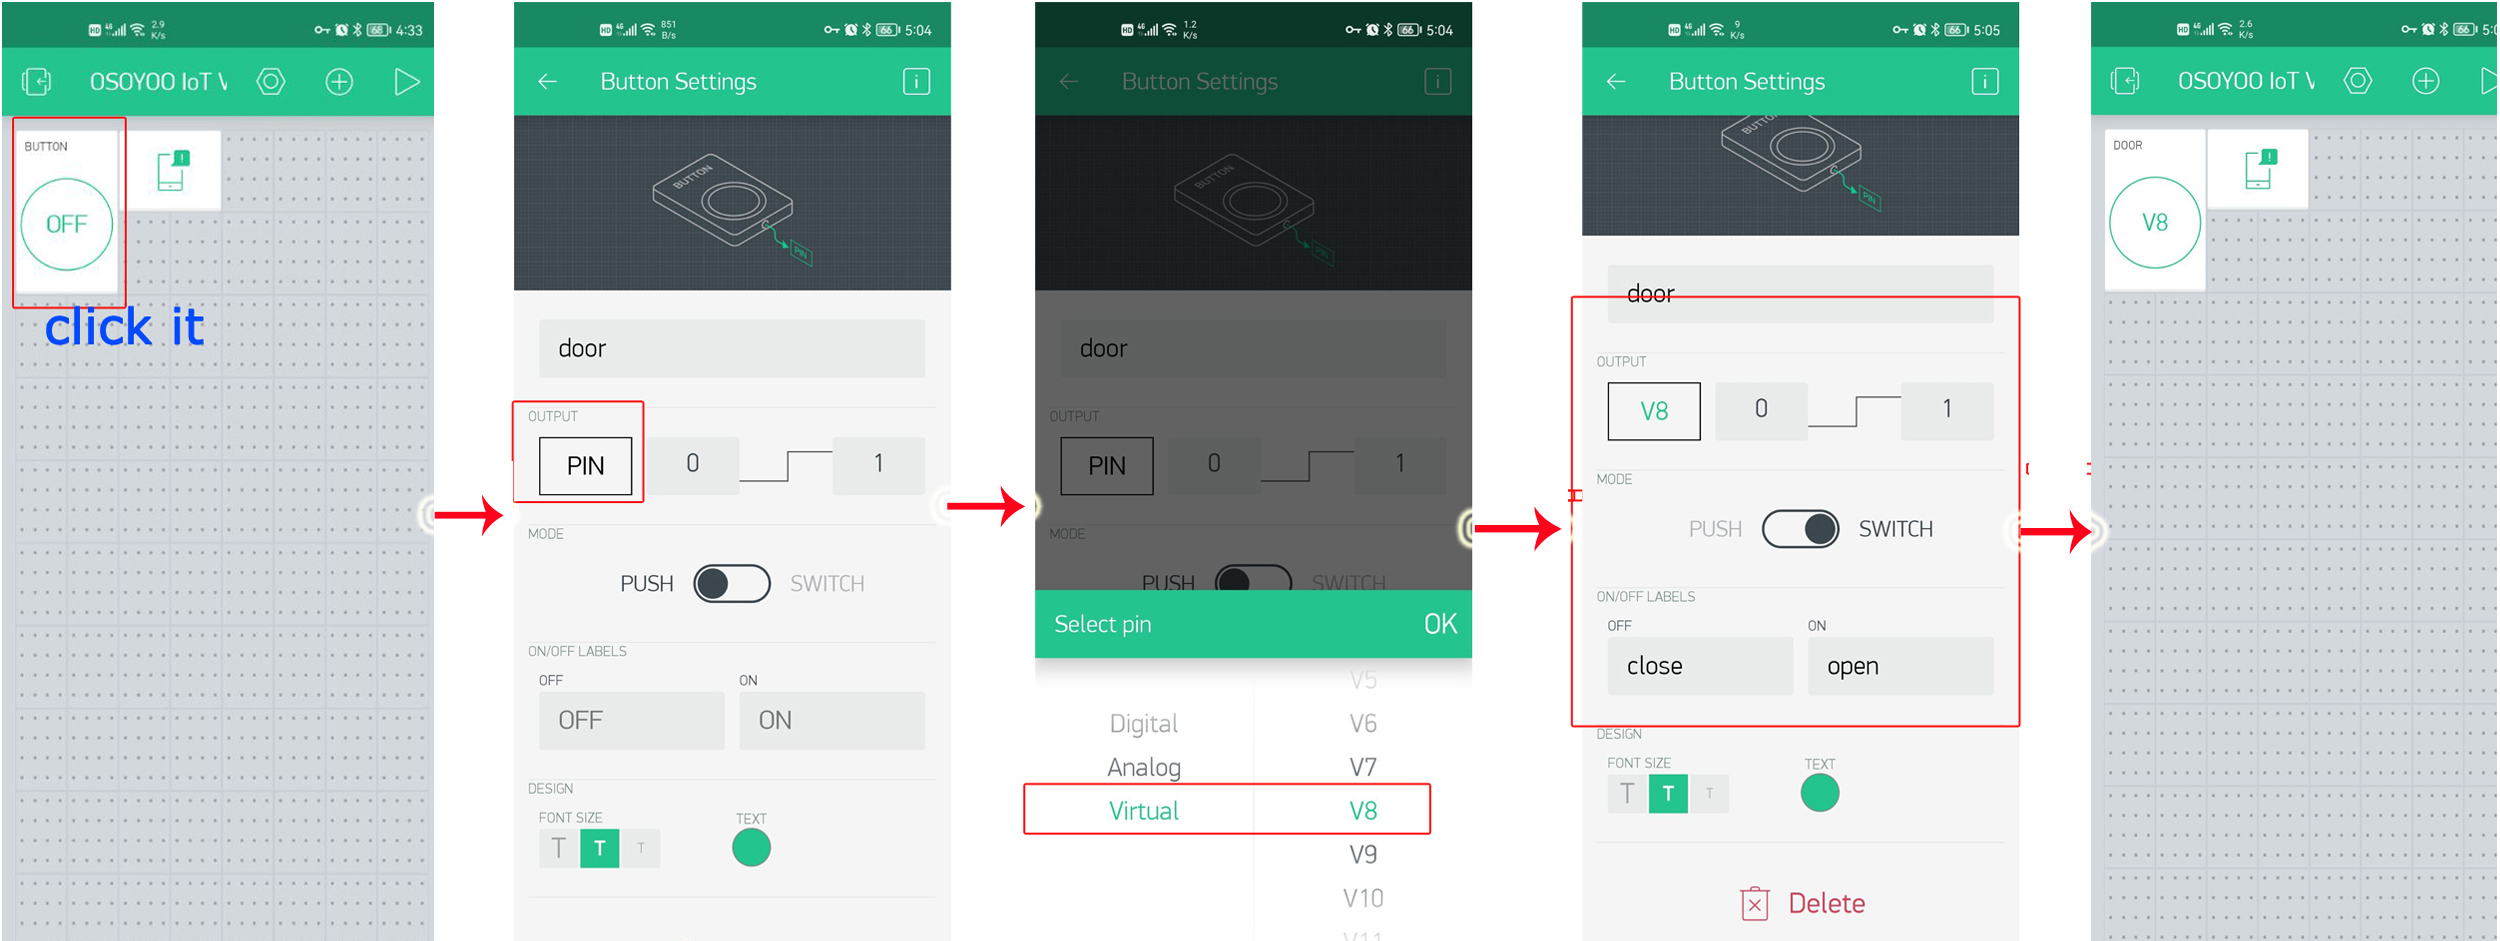
Button widget:
Name: Door
OUTPUT: V8; 0~1.
MODE: SWITCH
ON/OFF LABELS: OFF-CLOSE, ON-OPEN
Then back to the project page. and press the “▷” button to start your project.
As the creator of this system, when you stand at the door of your house, you can use the RFID card in your hand to open the door. When you open the door, you can see the screen prompt at the door: “Hello, David! Welcome home!” , At the same time, Blynk on your mobile phone will also receive a push reminder: “David is home!”. When other family members open the door with an RFID card, a similar prompt will appear on the door screen. The same is true for your mobile phone, so you can Know who has gone home.
If there is no one at home when a friend visits, you can use the Blynk APP to open the door for your friend remotely, and the screen at the door will display “Hello, guys!”.
When someone wants to open the door with an unverified RFID card, the screen at the door will show an “Unknow user!” warning, and your phone will also receive a push notification “Unidentified user is ready to open the door!”
If you find the device is offline, please check your code, wiring and app settings, and try again.