In this lesson, we will show you how to use Python3 Flask and M-Jpeg Streamer software to control a Raspberry Pi Robot Car through Internet. You will monitor the car’s real-time movement through its’ eye(front camera).
Step 1: You must complete and test lesson 2 before you continue on with this lesson , then install a new SG90 blue servo onto the servo position. Connect SG90 servo to OSOYOO PWM HAT board port 14.
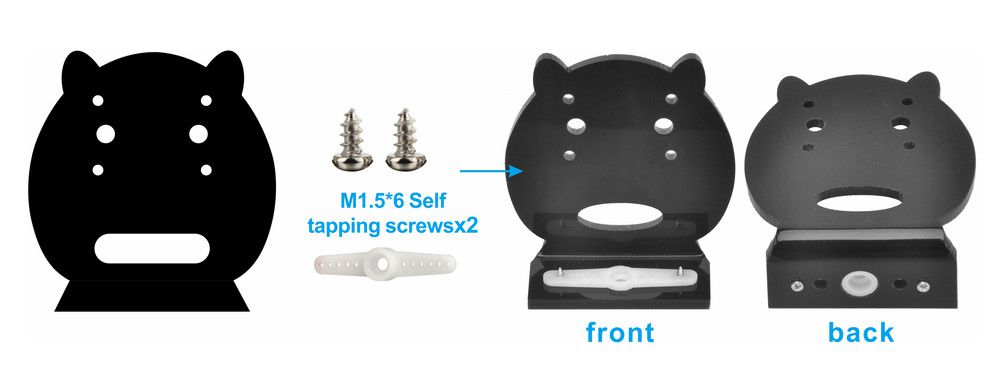
Step 2: Choose slotted bracket in servo motor to cross Camera holder from top to bottom and fix blade with M1.5*6 Self Tapping Screws
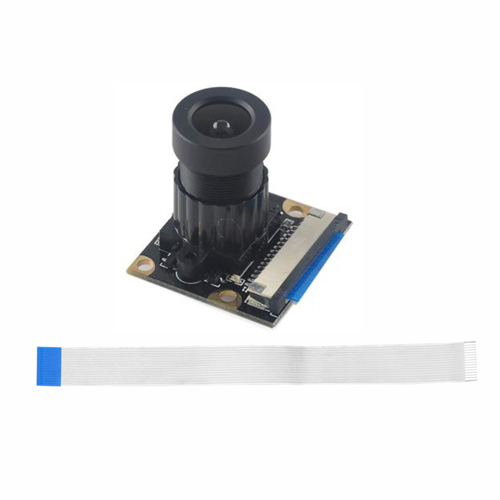
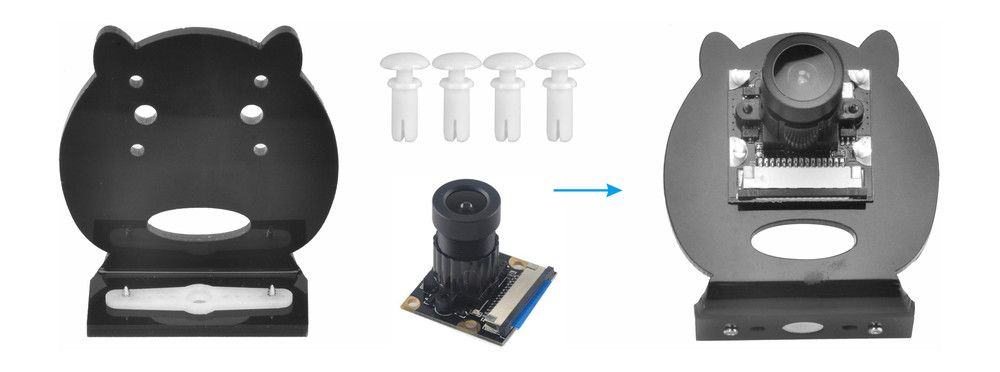
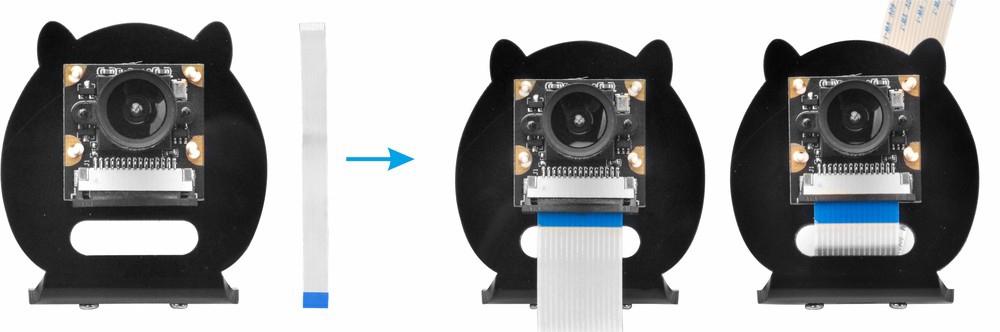
Step 3: Install CSI camera to holder with 4pcs M2 push pin rivets.
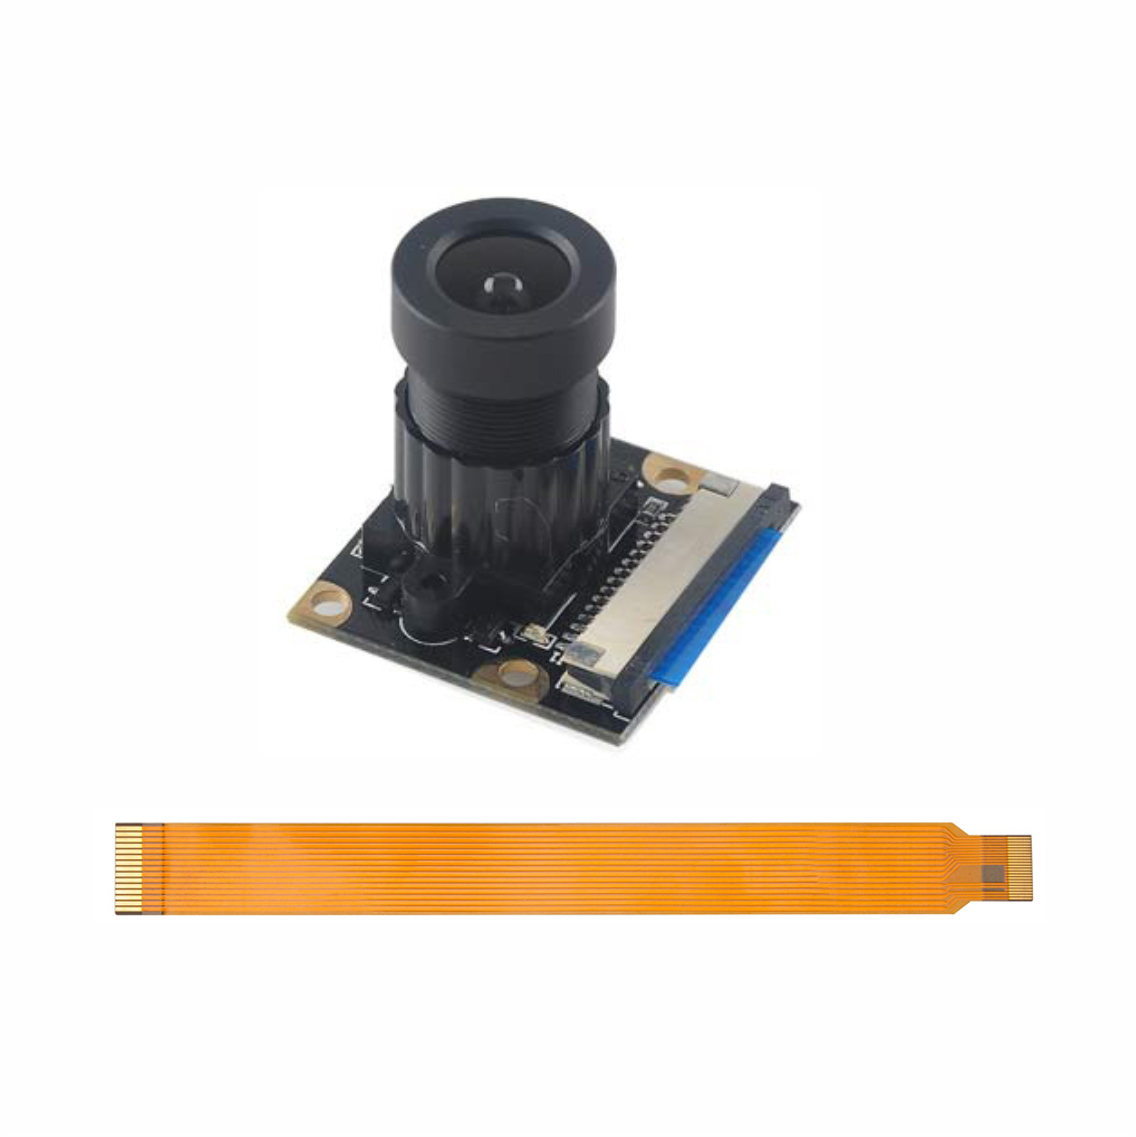
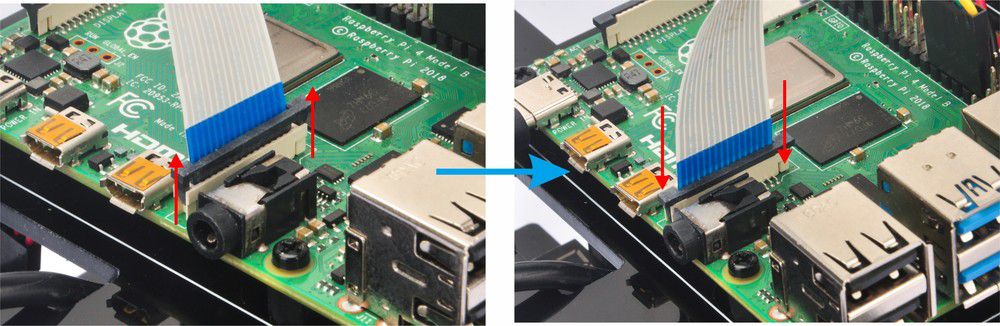
Step 4: Connect CSI camera with CSI ribbon cable (Please pay attention the connections of the cable before you install it.)
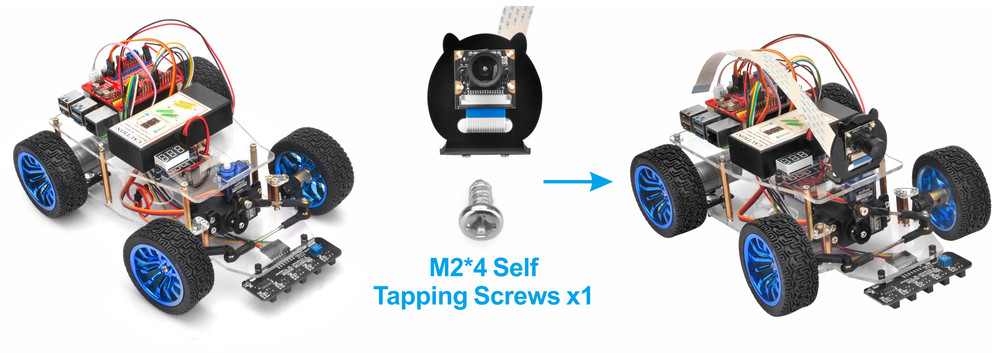
Step 5: Install Camera holder on servo motor with 1pc M2*4 self tapping screws.
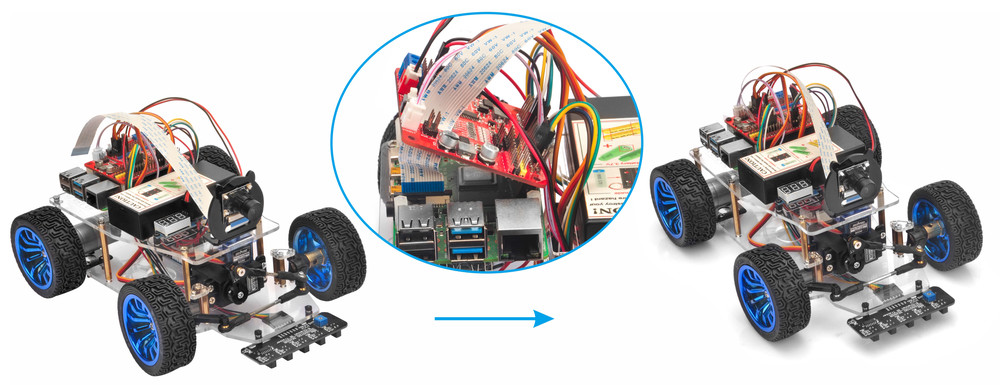
Servo must be installed and connected OSOYOO PWM HAT board 15 port. Connect CSI camera to CSI Slot of Raspberry Pi with CSI ribbon cable (Please pay attention the connections of the cable before you install it.)
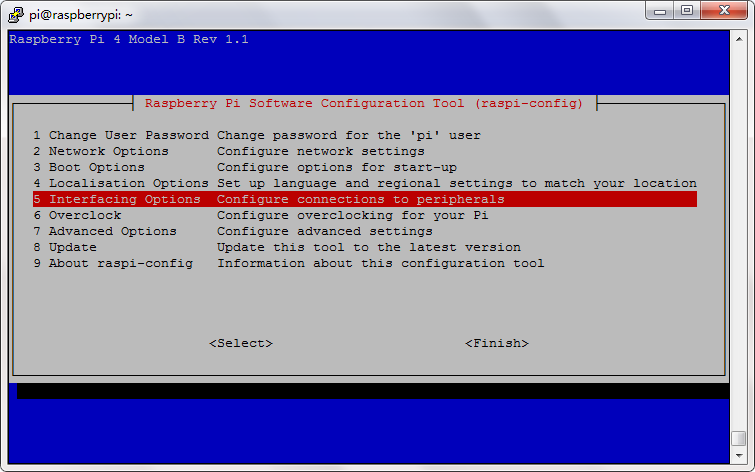
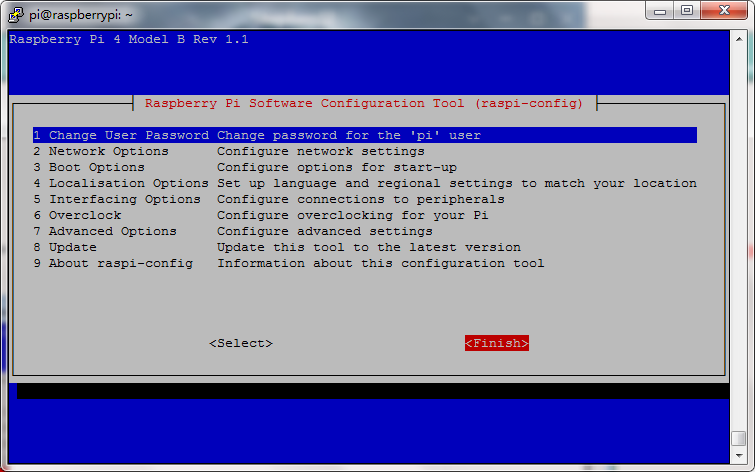
Step 1) Please enable Camera in Raspberry Pi by typing following command
sudo raspi-config
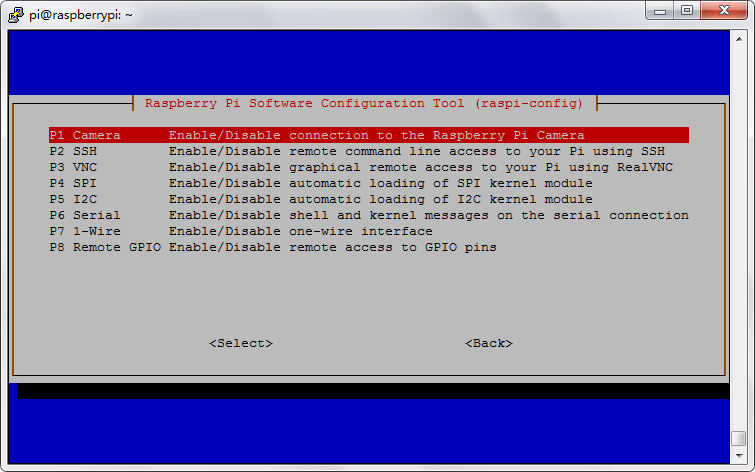
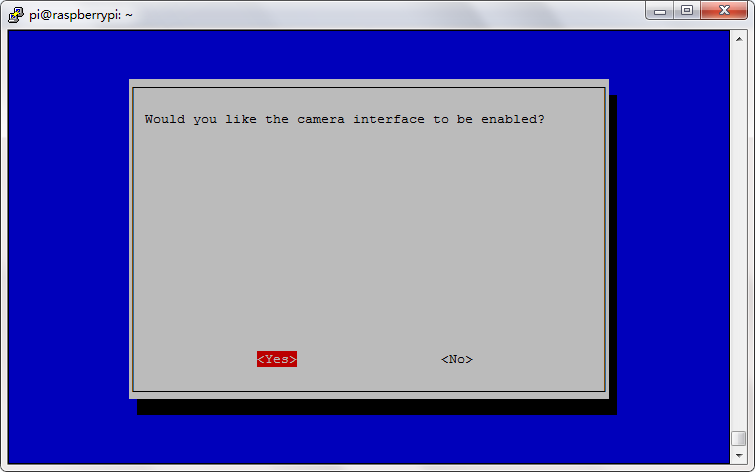
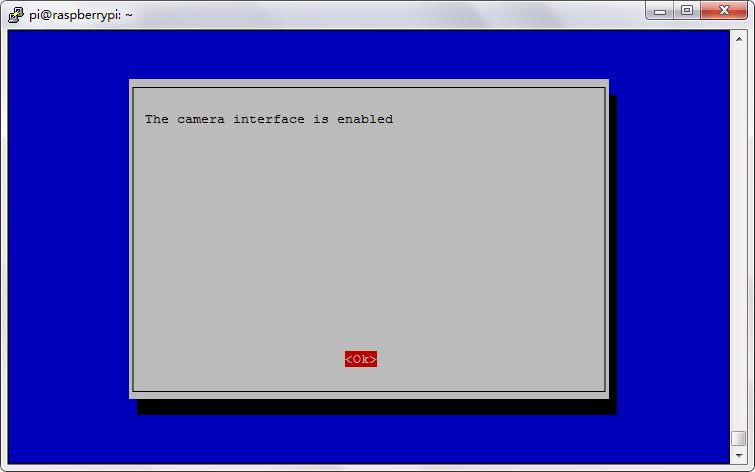
Then select ->5 Interfacing Options->P1 Camera->Yes->Ok->Finish (Please reboot the raspberry pi according to the notice.)
Step 2: Type following command to download Camera Stream Software :
wget https://osoyoo.com/driver/picar/camera.sh
Step 3: Install Osoyoo Camera Stream Software, this is an one-time installation task, you only need to install the software once by typing the following command:
bash camera.sh
After running above commands, Osoyoo Camera Stream software is installed in your Raspberry Pi. So Simple!
NOTE: Camera Stream Software only need install ONCE! So if you want to run camera stream in future, you just follow next step (STEP 4) and execute python startcam.py file.
Step 4: Start After you have installed camera server, you can start the Camera Server by running following command in your Pi terminal:
python startcam.py
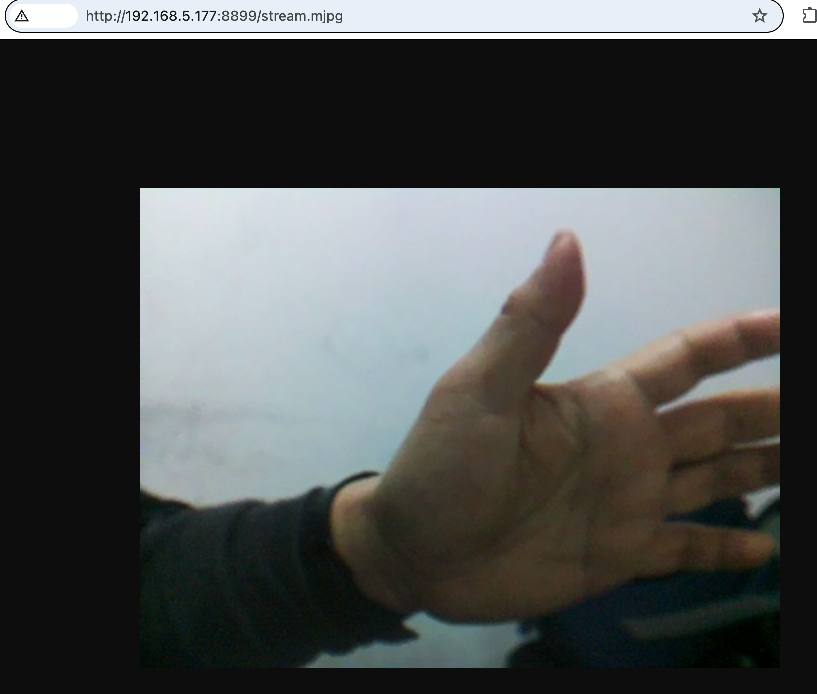
Step 5: Now you can use your browser to test the surveillance video. Now please visit http://your_raspberry_pi_ip:8899/stream.mjpg (in my case http://192.168.68.227:8899/stream.mjpg), you will see the video surveillance.
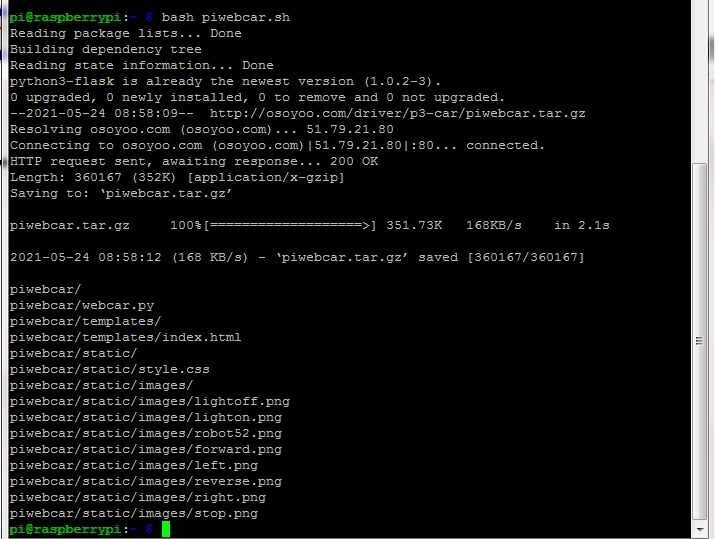
Step 5: Open a new terminal window and run the following code to install the OSOYOO web camera controlled robot car software
wget http://osoyoo.com/driver/p3-car/piwebcar.sh -O piwebcar.sh


and then type the following command:
bash piwebcar.sh
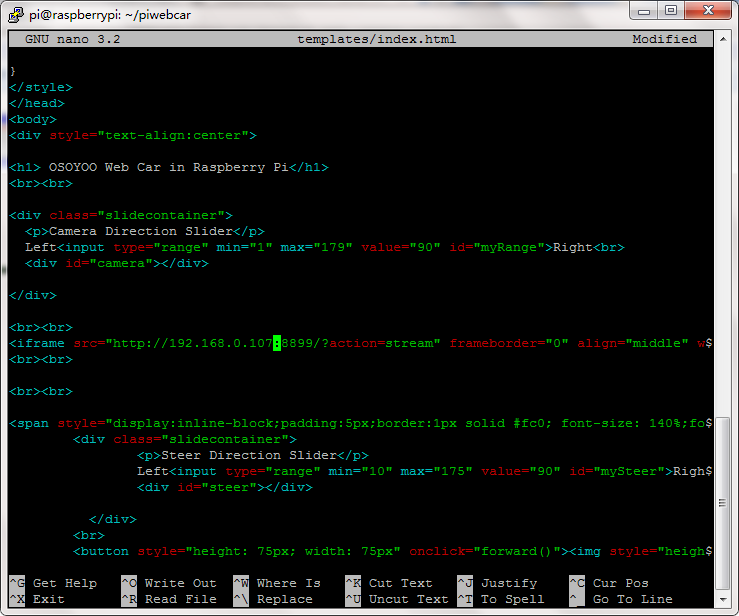
Step 6: Then type the following command to edit the file templates/index.html
nano ~/piwebcar/templates/index.html
Please change 10.0.0.89 in line 34 to your pi’s ip address, and cick “Ctrl”+”X” then “Y” to save the file and then click “enter” to exit
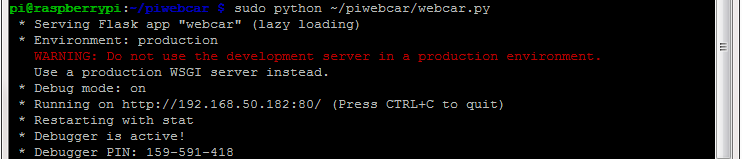
Step 7: Run the code by typing command
sudo python ~/piwebcar/webcar.py
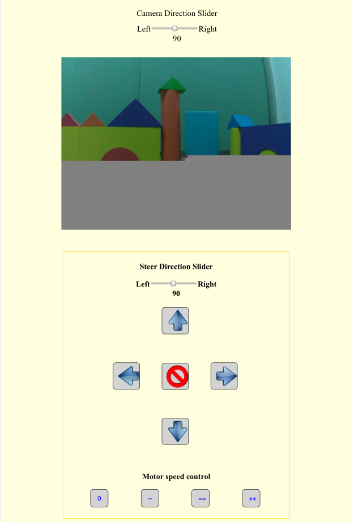
Step 10: In your PC or cell phone which is the same wifi network of your Raspberry Pi, open the browser and visit http://your_RaspberryPi_ip_address, you will see following UI
The arrows buttons are direction control keys, red circle button in the middle is the STOP key. There are four speed control buttons in the bottom:
In the top of the page, there is a Camera Direction Slider, you can move the slider in order to rotate the servo and change the camera orientation.
Before the upper Arrow button, there is a Steer Direction Slider, you can move this slider to rotate your front steering wheels (just like rotate your steering wheel when driving a car).


 and then type the following command: