| Buy from US |
Buy from UK |
Buy from DE |
Buy from FR |
Buy from IT |
Buy from ES |
ここでご購入を! |
 |
 |
 |
 |
 |
 |
 |

In this lesson, we will show you how to use a Keypad to verify user id and to control the servo locally. We will also use UDP protocol to send user information to remote Cell phone APP.

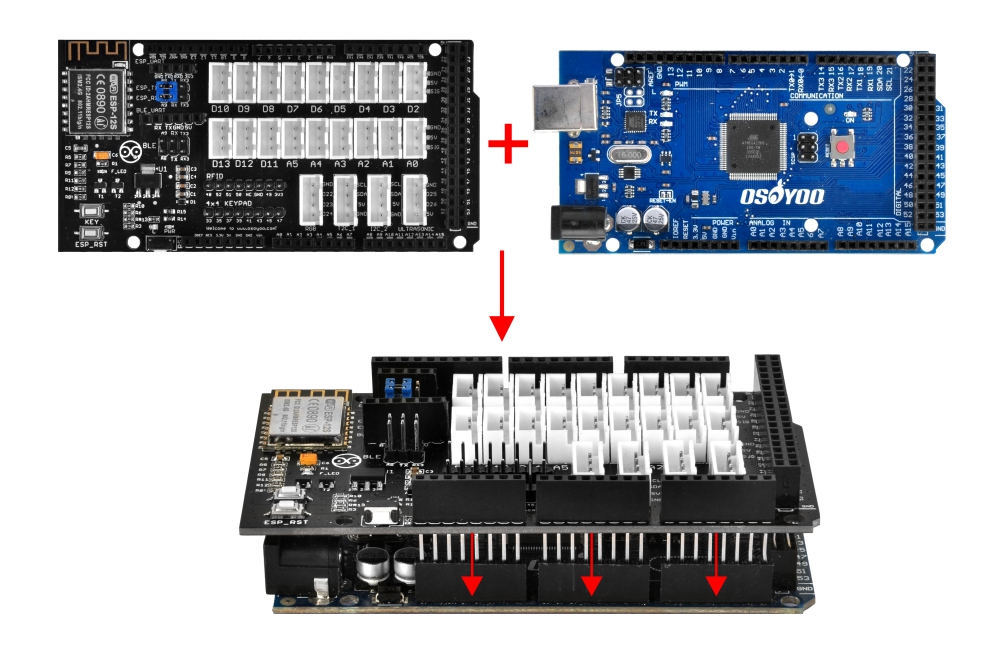
- OSOYOO Advanced Board for Arduino MEGA2560 x 1
- OSOYOO MEGA-IoT Extension Board x 1
- LED PnP Module x 1
- I2C LED x 1
- Servo x 1
- OSOYOO 3-Pin PnP Cable x 1
- USB Cable x 1
- 4 x 4 Keypad
- PC x 1

First, please plug OSOYOO MEGA-IoT Extension Board into OSOYOO Advanced Board for Arduino MEGA2560:
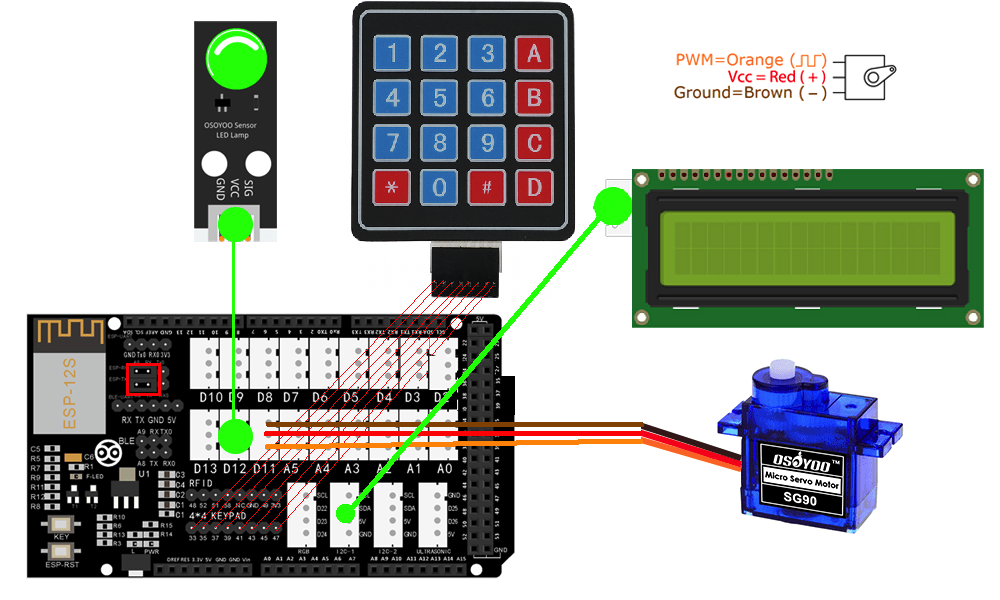
Parts Connection (see following picture):
LED module to the D12 port
Door Servo motor to the D11 port
I2C LCD connect to I2C 1 slot
4×4 Keypad connect to Keypad slot

Notice: Shut off your battery or Unplug your power adapter when upload sketch code to OSOYOO Advanced Board for Arduino MEGA2560.
Step 1 Library Installation (if you have installed following libraries in previous lessons, please skip this step)
In order to use the keypad, you also need download and install a keypad library from:
https://osoyoo.com/driver/smarthome/Keypad.zip
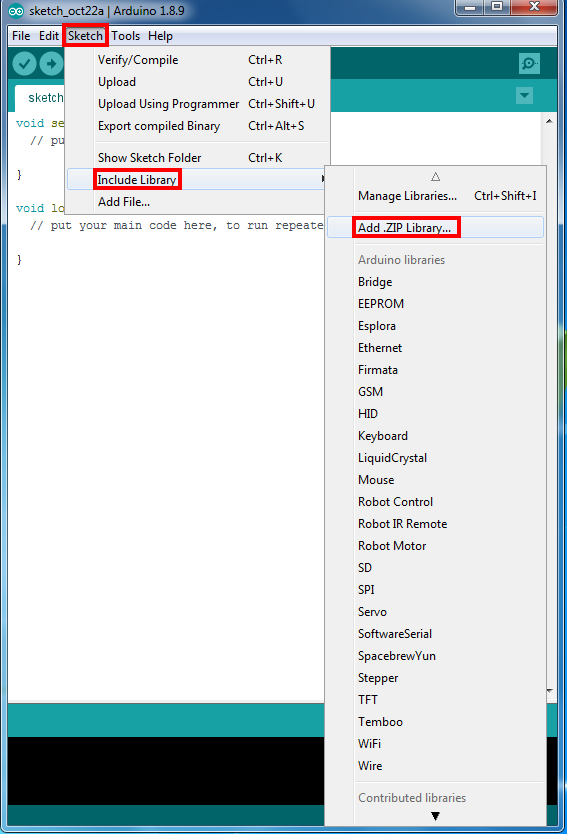
Open IDE, click Sketch – Include Library- Add .Zip library to load above zip files into IDE.
Step 3) Download and Edit Lesson2-7 Arduino code file from following link:
https://osoyoo.com/driver/smart-home-v2-udp/lesson7/smarthome2-7.zip
After installing above library, please download the code from following link, unzip it:
Then connect OSOYOO MEGA2560 Board to PC with USB cable.
Notice: Shut off your battery or unplug your power adapter when upload sketch code to Arduino.
Step 4) Now open a folder called “smarthome2-7”, double click smarthome2-7.ino file to open it.
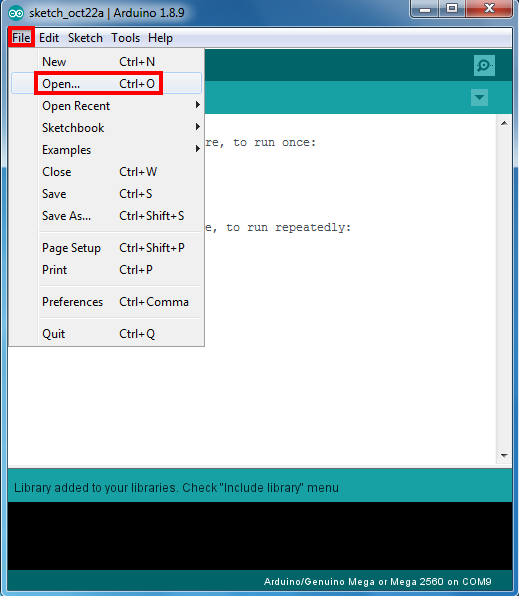
You can also open this file by Clicking file – Open, then choose code “smarthome2-7.ino” in the folder, double click the file and open the sketch onto your OSOYOO Advanced Board for Arduino MEGA2560.
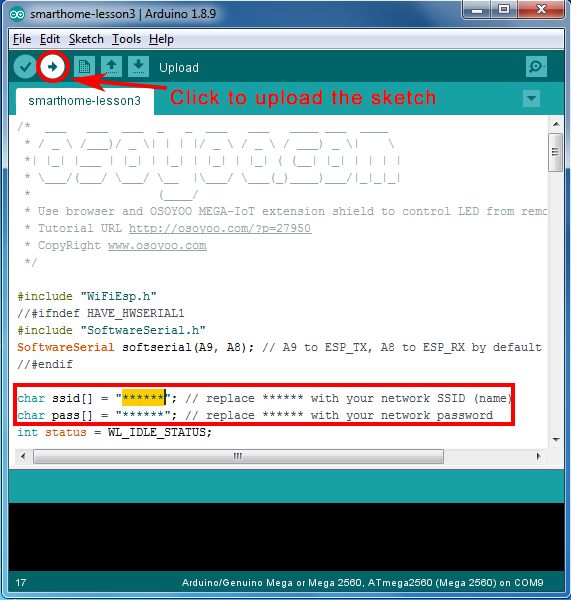
Note: In the sketch, find line following lines:
char ssid[] = "******"; // replace *** your network SSID (name)
char pass[] = "******"; // replace *** your network password
please replace the ****** with your correct wifi SSID and password, otherwise your project can not connect to Internet.
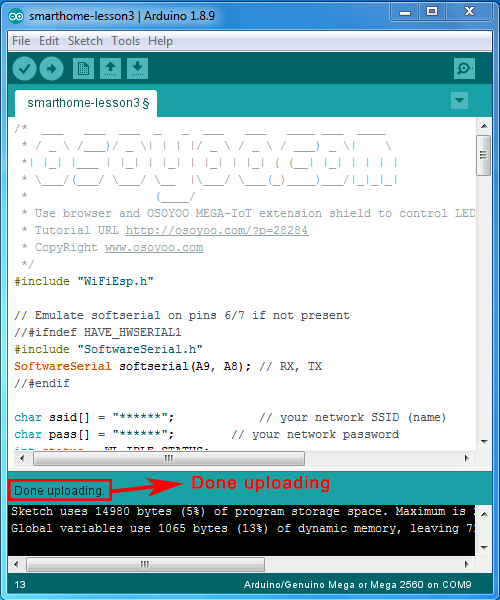

After loading the sketch to OSOYOO Advanced Board for Arduino MEGA2560 , OPEN the serial monitor in the upper-right corner of IDE as following: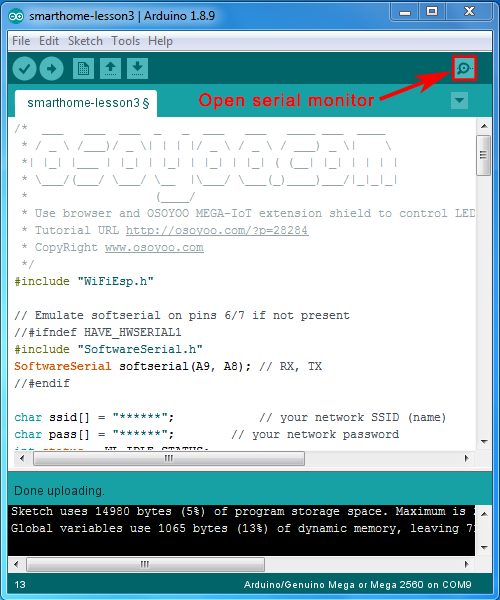
You will get the IP address and Port Number as following:
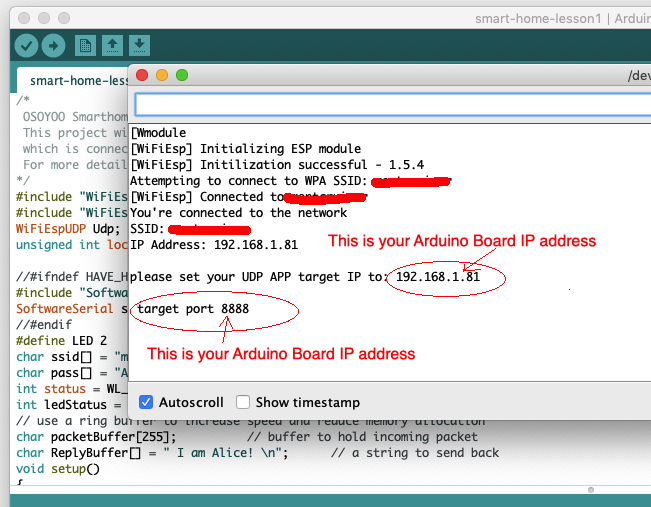
In above example, 192.168.1.81 is the IP address of my IDE, we need to set this IP address in our APP in next step.
APP Installation and Setting:
Step 1) If you haven’t installed OSOYOO IoT Robot APP, please search OSOYOO IoT Robot Car APP in Google Play or Apple Store to install this APP.
You read following tutorial link for more information about APP install :
https://osoyoo.com/2022/02/06/smart-house-iot-learning-kit-v2-0-lesson-1-wireless-lighting-control/#installapp
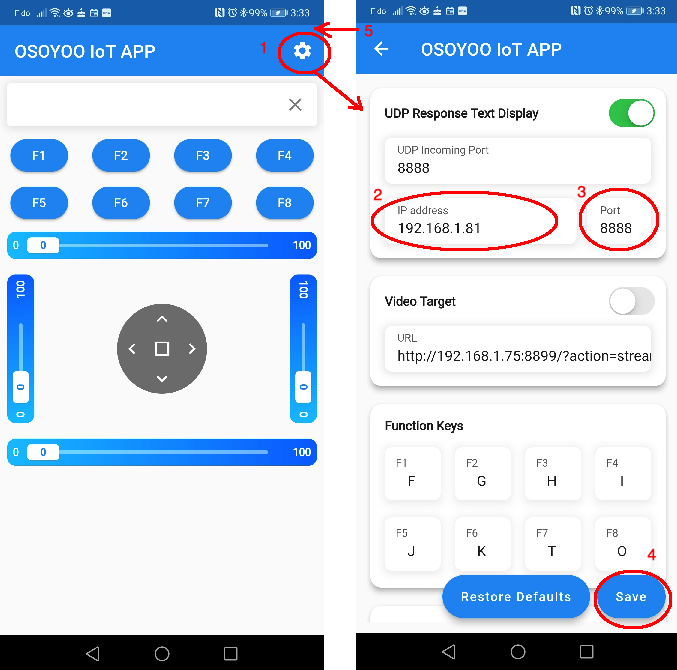
Step 2):Make sure your Cell phone is in the same Local Network of Arduino. Open the APP, click Settings, enter your Arduino IP address from Step F and Port to 8888 in settings:
Click the two links as showed in above picture, you will control the servo which is connected to your MEGA2560 through the IoT Shield.
Now your LCD will show “Input Passcode:”
Please input your passcode through the keypad. Your LCD will show a * when you type in each character.
Click “#” key to end the passcode input, if you made a mistake, you can click * key to re-enter the passcode
In our sketch code, we have set passcode “1234” for user Mary, and passcode “ABCD” for user David line line 15 and 16.
So when you press 1234# in keypad you will open the door (rotate servo for 1 second). LCD will show “Welcome Mary” which means Arduino detected that the user is Mary.
If you key in “ABCD#”, then Arduino will know the passcode is from David and show Welcome David message.
Whenever, door is open, LED in D12 will turn on and when door is close, LED will turn off.
If passcode does not match any record in line 15,16, LCD will show “Wrong Passcode” and the door won’t open.
Each user’s welcome message will be sent to APP text field and let remote APP who opens the door.
APP user can press F8 key to open the door at any time.