Introduction
In this lesson, we will show how to use OSOYOO Wifi UDP APP to control LED.

Description:
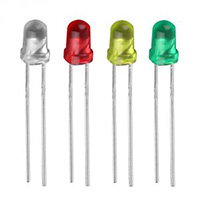
LEDs – those blinky things. A must have for power indication, pin status, opto-electronic sensors, and fun blinky displays.
This is a pack of basic red, yellow, white and green 5mm LEDs (6 of each) all conveniently packaged in a nice reusable ESD safe bag.
TECHNICAL DETAILS
- Size: 5mm
- Current: 20mA
- Material: Plastic
- View Angle: 45-50°
- Forward voltage: Red/Yellow DC 1.8-2.3V;White/Green/Blue DC 2.8-3.6V
- Current: 20mA
- Wavelength Range:Red: 620-630nm; Yellow: 580-590nm; Green: 520-530nm; Bule/White: 460-470nm
- Luminous Intensity:Red/Yellow: 2000-3000mcd; Green/Blue: 3000-4000mcd; White: 6000-8000mcd
Preparation
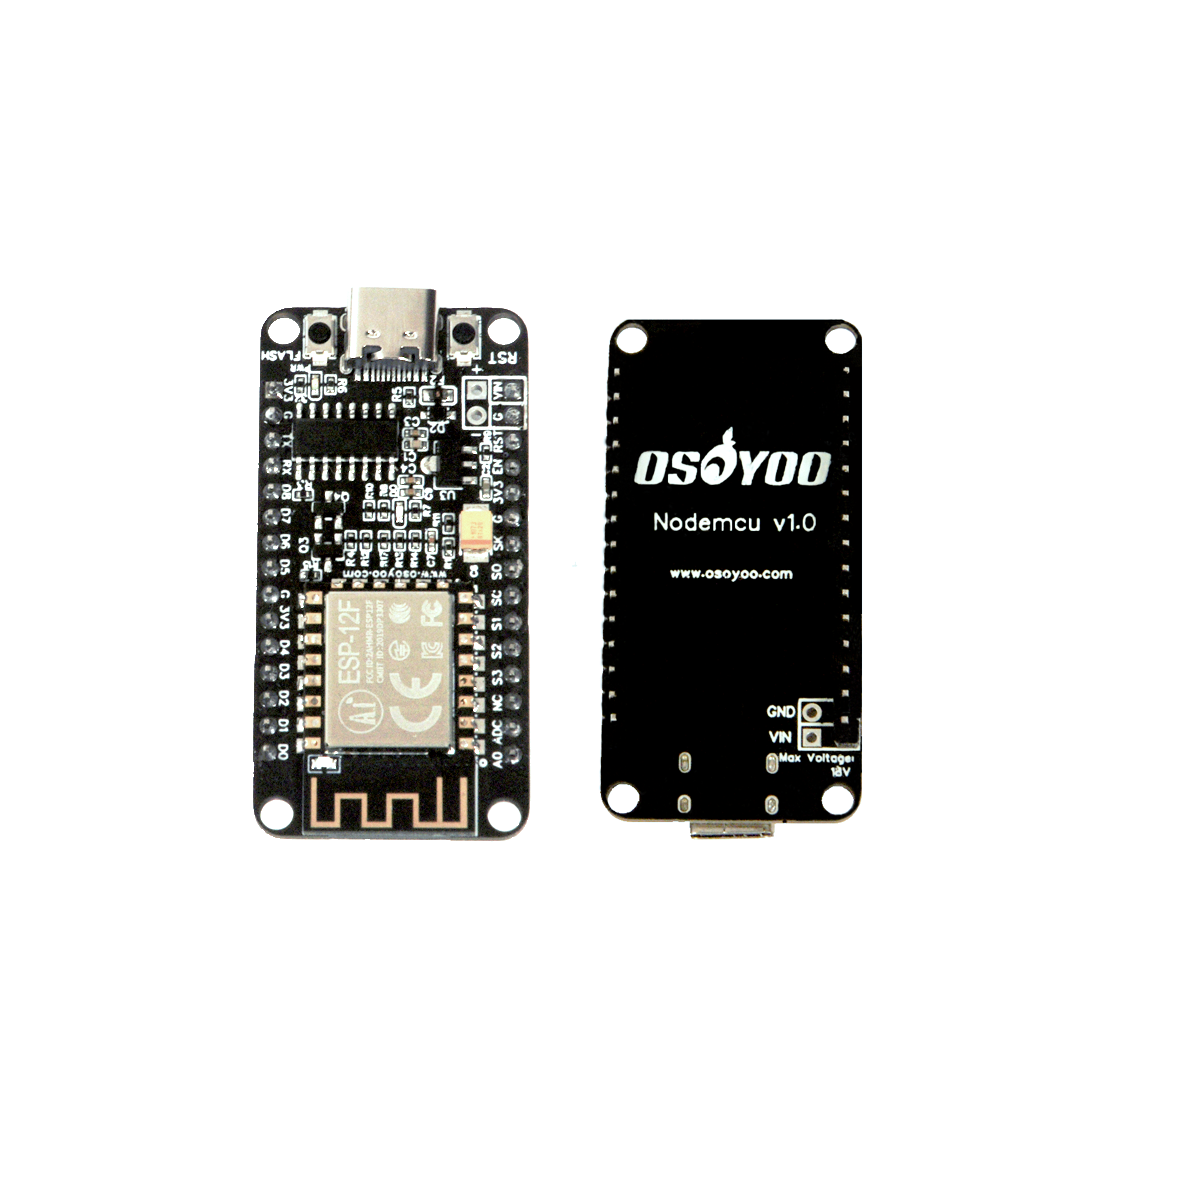
Hardware:
Connection
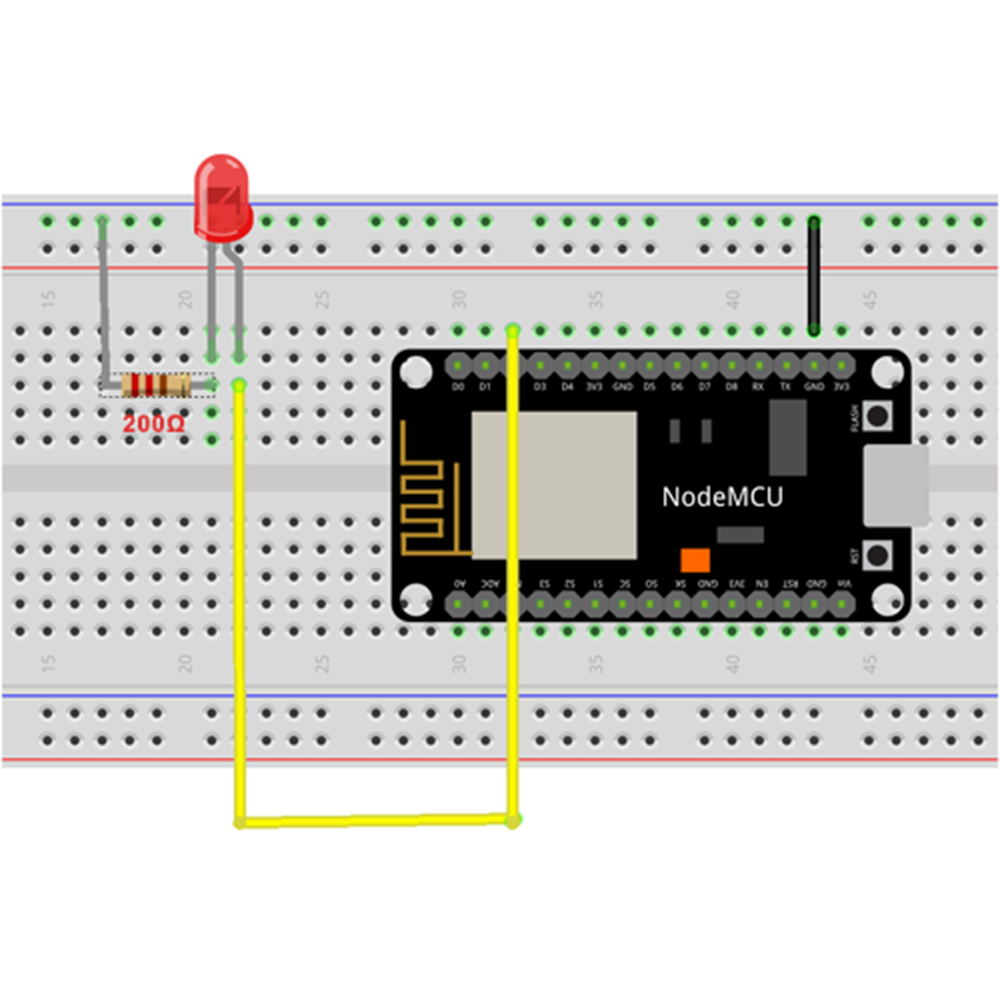
In this lesson,we use D2(GPIO4) to control the led,the connection is as below:
Software:
Software Installation
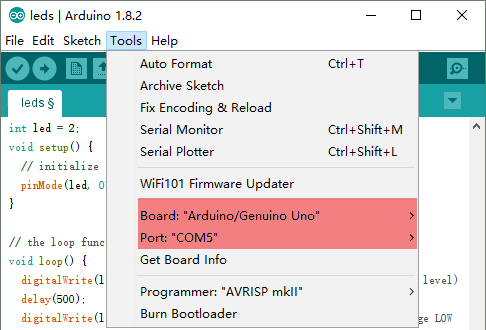
Upload Sketch
Connect the OSOYOO Basic board to your computer using the USB cable. The green power LED (labelled PWR) should go on. Open the Arduino IDE and select corresponding board type and port type for your OSOYOO Basic board.
Download the sketch file from https://osoyoo.com/driver/nodemcu/nodemcu-led.zip
Unzip above file, replace Line 18,19 with your own wifi SSID and password
Then upload the sketch code to Arduino IDE, you will see the IP address of your NodeMCU board.
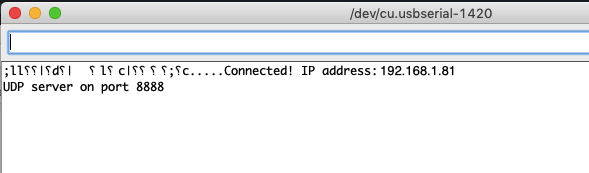
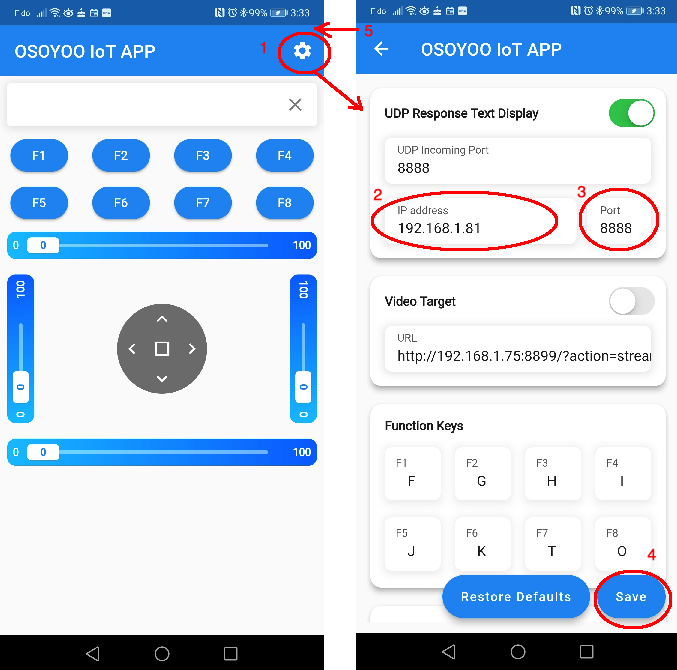
In above example, the NodeMCU IP is 192.168.1.81 , please Write down the IP address of your NodeMCU.
APP Installation and Setting
Download OSOYOO IoT APP by searching OSOYOO iot udp robot car app from Apple Store(iPhone/iPad) or Google Play Store(Android device)
Save NodeMCU IP address into the APP Setting :
1)Open APP, click Setting button in upper right corner
2)Use the NodeMCU IP address to replace default IP 192.168.1.255
3)keep default port number 8888 without changing
4)Click Save button to save the changes you just made
5)Click Back Arrow to go back APP front UI
Running Result
Now Go back to Home Page of your APP
Press F1 button, the LED will turn ON
In the same time , your Arduino IDE serial monitor will show something similar to following:
Received packet of size 1 from 192.168.1.100:44544
(to 192.168.0.103:8888, free heap = 42072 B)
Contents:
F
Press F2 button, the LED will turn OFF
Received packet of size 1 from 192.168.0.100:44544
    (to 192.168.0.103:8888, free heap = 42072 B)
Contents:
G
Part details
SKU: DKRK100700