The OSOYOO Espro board is a credit-card-sized, mini ALL-IN-ONE Motor Control Board. It integrates an ESP32 MCU and an L293DD H-Bridge dual-channel motor control module, allowing users to program two sets of motors directly via the Arduino IDE to control a robot car’s movement.
In this project, we will show how to use OSOYOO Wifi UDP APP to control robot car. We will also show how to use a web browser to control the robot car.
Pre-Connected GPIO pins between ESP32 and I/O devices Same as Lesson 1
| L293 Pin |
ESP32 GPIO |
Function |
| IN1 |
23 |
Motor A Direction 1 |
| IN2 |
25 |
Motor A Direction 2 |
| IN3 |
26 |
Motor B Direction 1 |
| IN4 |
27 |
Motor B Direction 2 |
| ENA |
16 |
Motor A Speed (PWM) |
| ENB |
17 |
Motor B Speed (PWM) |
Software Installation:
Install ESP32 Arduino Board
Connect the Espro Board to Desktop or Laptop computer with Type-C USB cable.
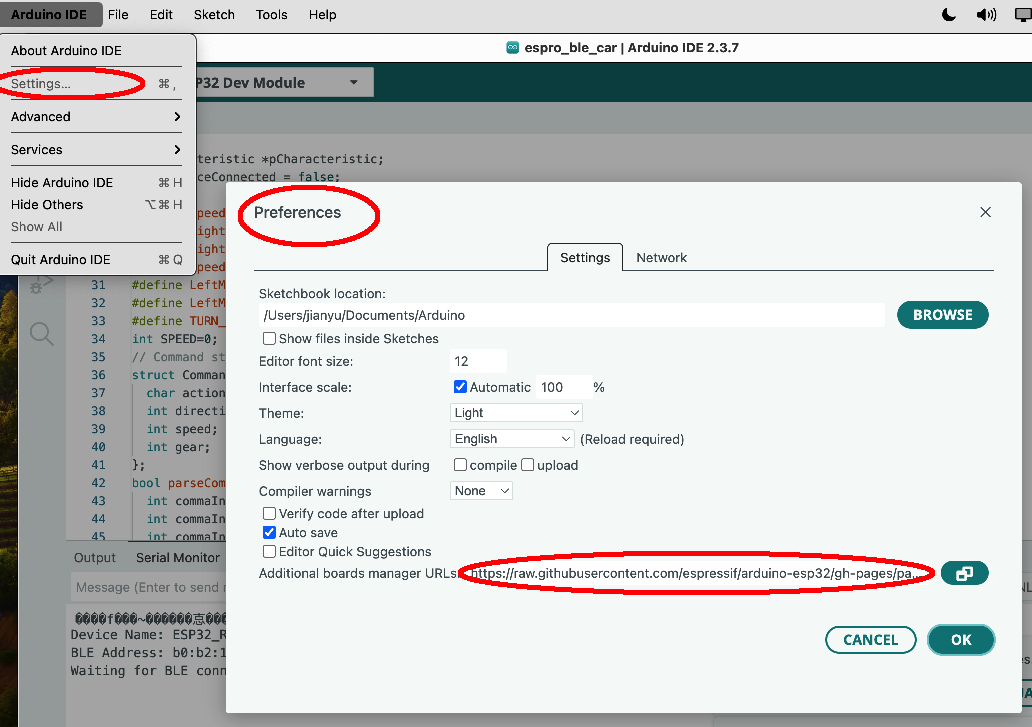
In Arduino Setting->Preference, please copy and past following link into Board Manager Url field:
https://raw.githubusercontent.com/espressif/arduino-esp32/gh-pages/package_esp32_index.json
After you select OK, then in Tool->Board->board Manager, Search ESP32 and Add ESP32 into Board Manager.
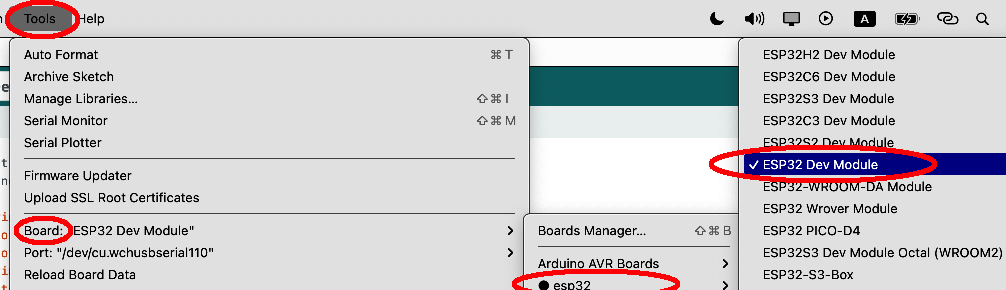
then in Tool->Board, select esp32 ->ESP32 Dev Module
Then Select correct port which matches ESP32 board.
Project A: Using OSOYOO Wifi UDP APP
Step 1) Download OSOYOO Wifi UDP APP to Control Robot Car Sample Code:
| Osoyoo WIFI Robot APP |
 |
search “Osoyoo IoT UDP Robot APP” in
Google Play or Apple Store(If you can not find this APP in Google Play,
you can directly download the APP from following link:
https://osoyoo.com/driver/udp-app.apk) |
Step 2) Download Arduino code
https://osoyoo.com/download/esp32-udp.zip
Change the SSID and Password to match your wifi router setting
Upload the code to Arduino IDE
Step 3) Upload the sketch to your board. Finally, click the Serial monitor window in upper right corner of IDE, you will see following result:
.................................................................................................................................................................������....
WiFi connected!
IP address: 192.168.0.107
UDP server started on port: 8888
Write down the IP address in a paper(in above example, 192.168.0.107)
Open OSOYOO Wifi UDP APP, Set the IP address into the APP as following:
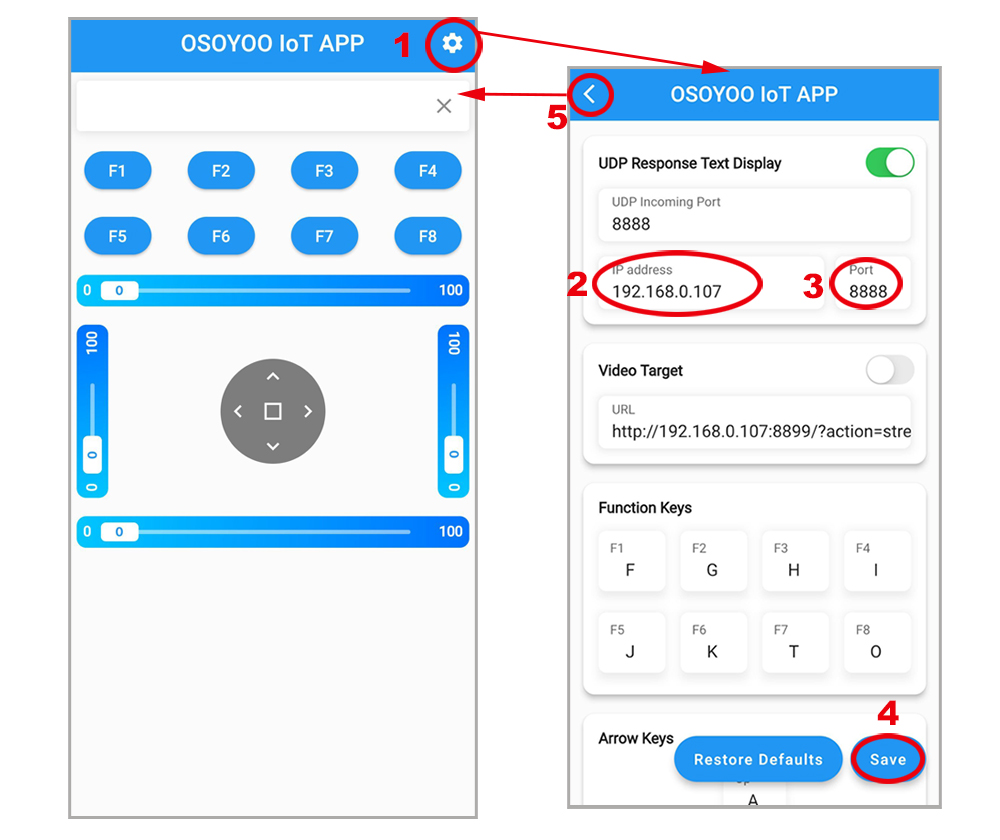
Save the setting . Now put the car on the ground, turn on battery. You can use arrow keys to control the car, use the [] key to stop the car.
Project B: Use Web Browser to Control Robot Car Sample Code:
Step 1)Download Arduino Code and upload the code to Arduino IDE.
https://osoyoo.com/download/esp32-http.zip
Unzip the code file and change the wifi SSID and Password in the code , then upload it to Arduino IDE, Open Serial monitor , you will see something like this:
IP address: 192.168.0.155
HTTP server started on port: 8888
Access web interface at: http://192.168.0.155:8888
Now You can use your browser to visit the web url (in above example, http://192.168.0.155:8888) , you will see the control page. Use Arrows to control the robot car movement and use red square button to stop the car.