In this lesson we will learn how a PIR Sensor works and how to program OSOYOO Basic Board for Arduino to get data from motion sensor. An LED will light up when movement is detected by PIR sensor.
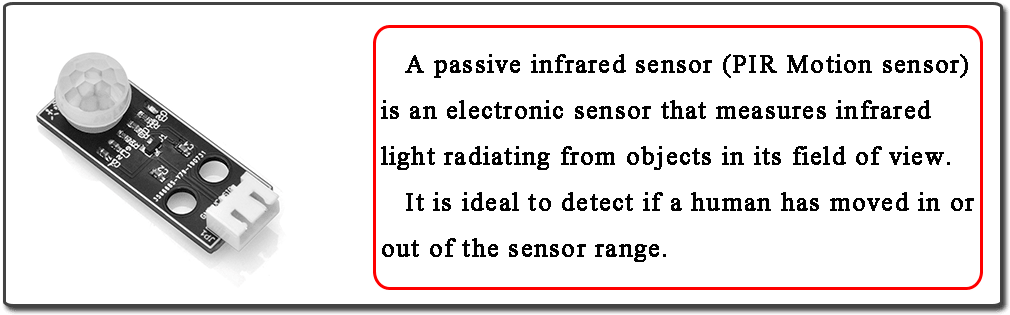
A passive infrared sensor (PIR Motion sensor) is an electronic sensor that measures infrared (IR) light radiating from objects in its field of view. They are most often used in PIR-based motion detectors. So, it can detect motion based on changes in infrared light in the environment. It is ideal to detect if a human has moved in or out of the sensor range.
OSOYOO Basic Board for Arduino (Fully compatible with Arduino UNO rev.3) x 1
OSOYOO Magic I/O Shield for Arduino x 1
OSOYOO PIR Motion sensor x 1
OSOYOO 3-Pin PNP Cable x 1
USB Cable x 1
PC x 1
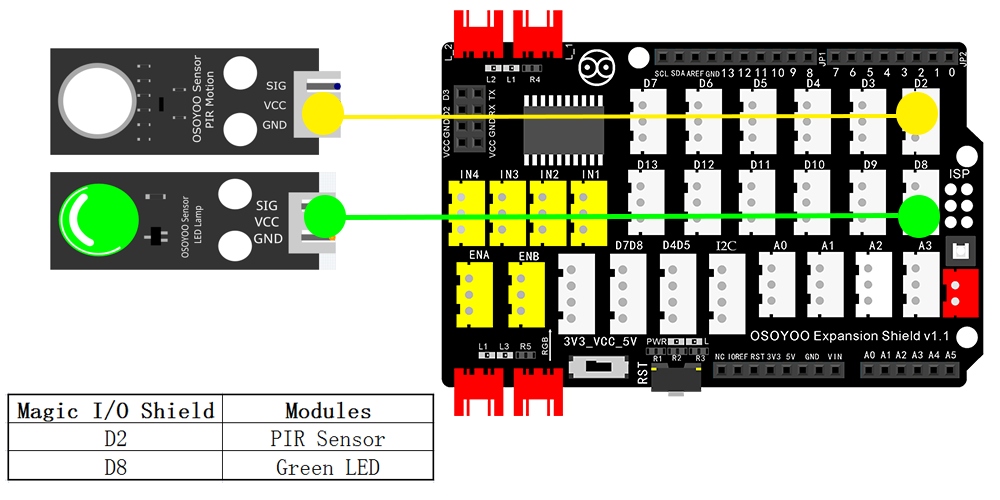
Connection:
First, please plug Osoyoo Magic I/O shield into UNO board. Then connect the PIR sensor module to the D2 port of the Magic I/O shield with a 3-pin PNP cable as below:
Notice: Shut off your battery or Unplug your power adapter when upload sketch code to OSOYOO Basic Board for Arduino.
You can download the code directly, then click “Open” in Mixly to choose the code you download:
After above installations are completed, connect the OSOYOO Basic Board for Arduino to your computer using the USB cable. The green power LED (labelled PWR) should turn on. Open the Graphical Programming softwareMixly and do following graphic operations:
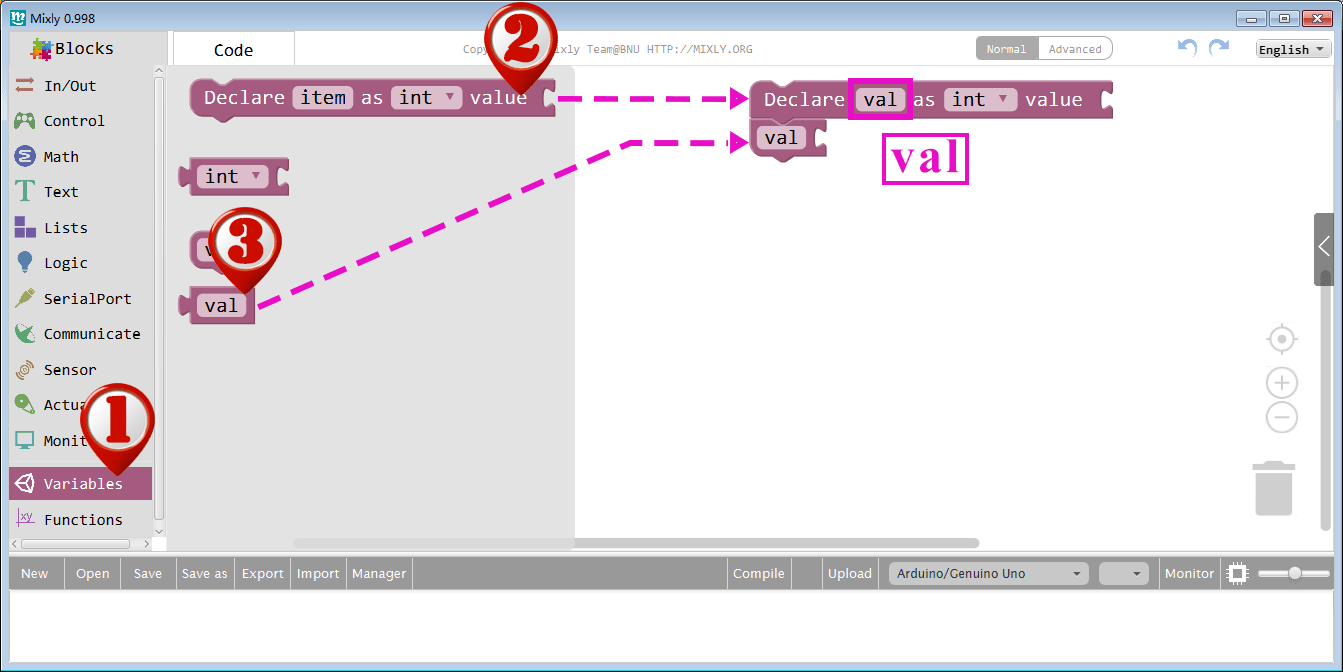
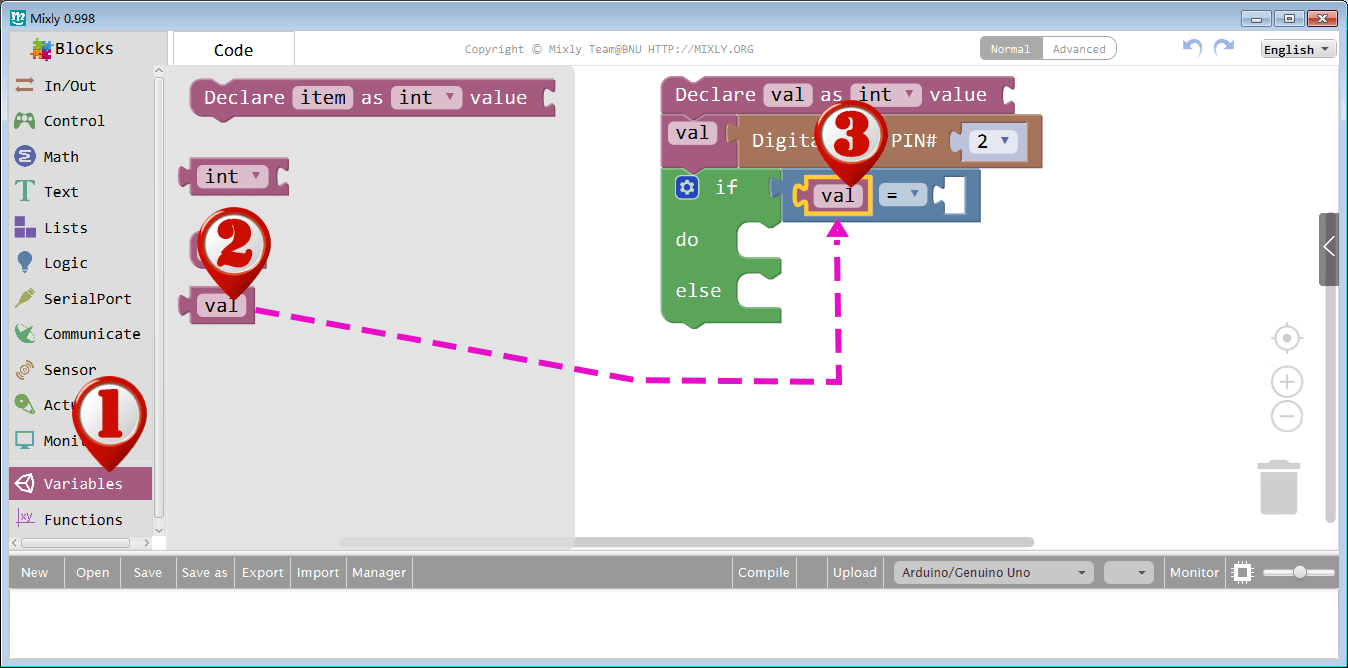
Drag out the Declare block from the Variable category and rename variable to val as int value.Then drag a small val block under Declare block as following:
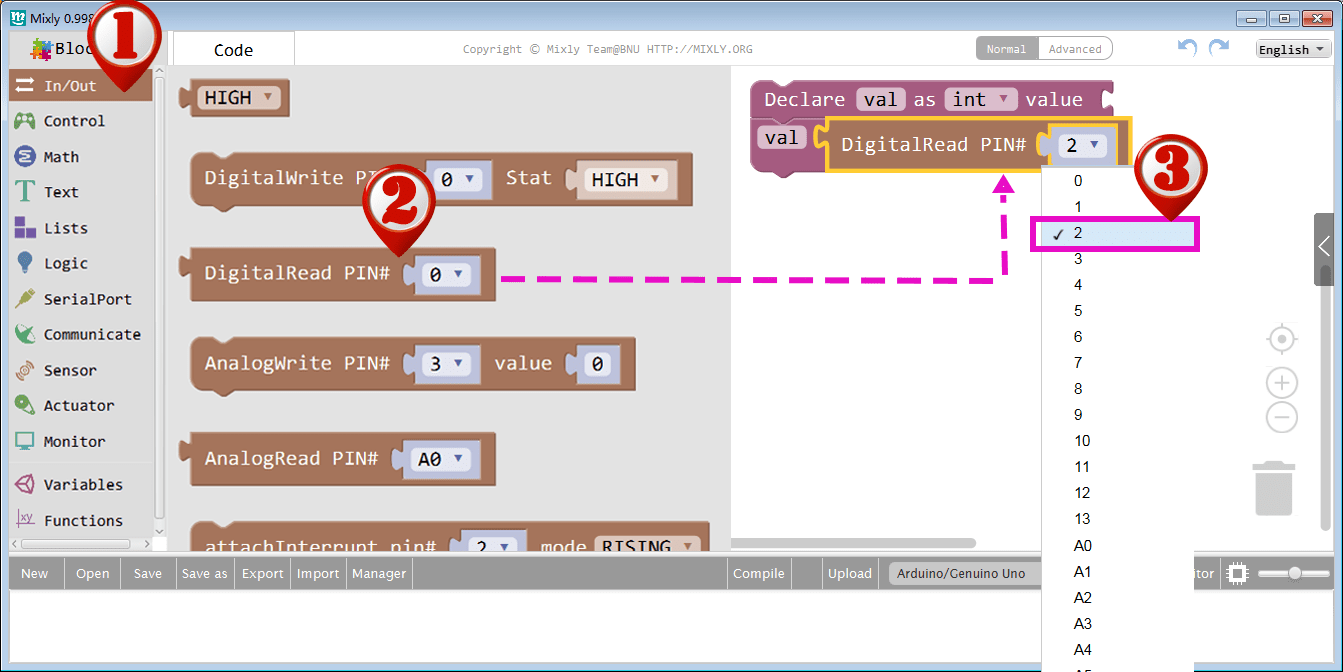
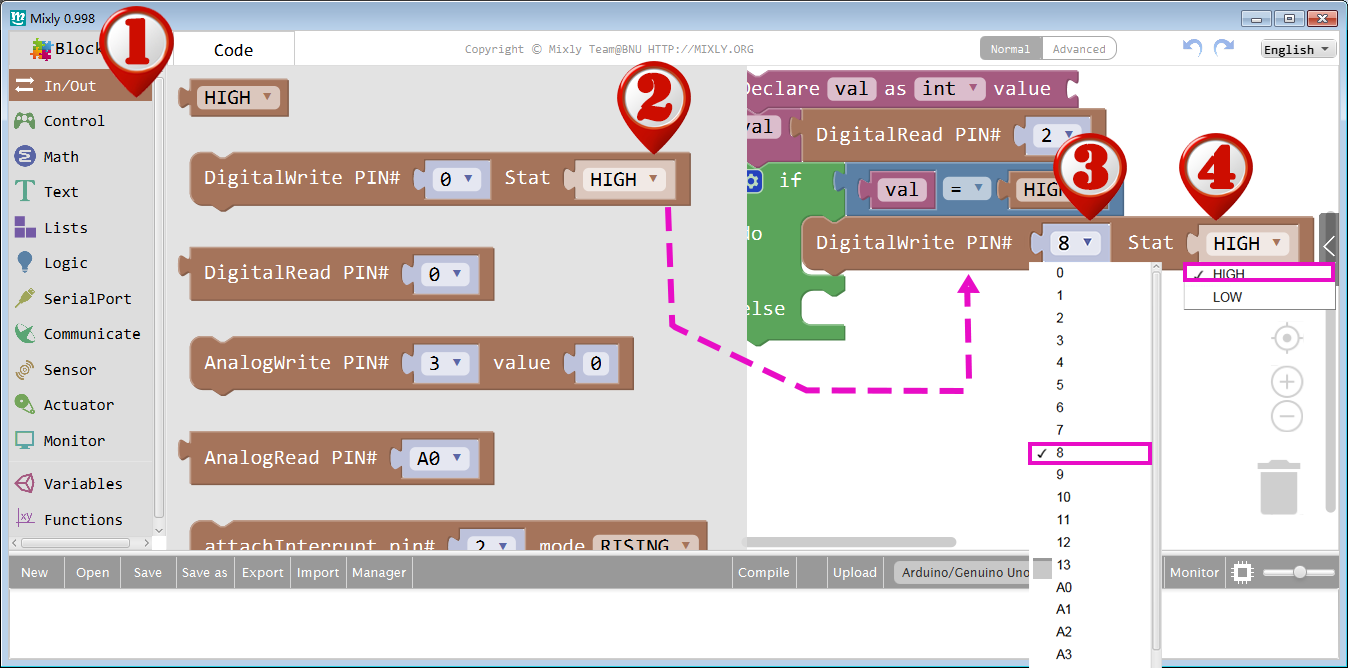
Drag out the DigitalRead PIN# block from the In/Out category ,set pin 2 as input.
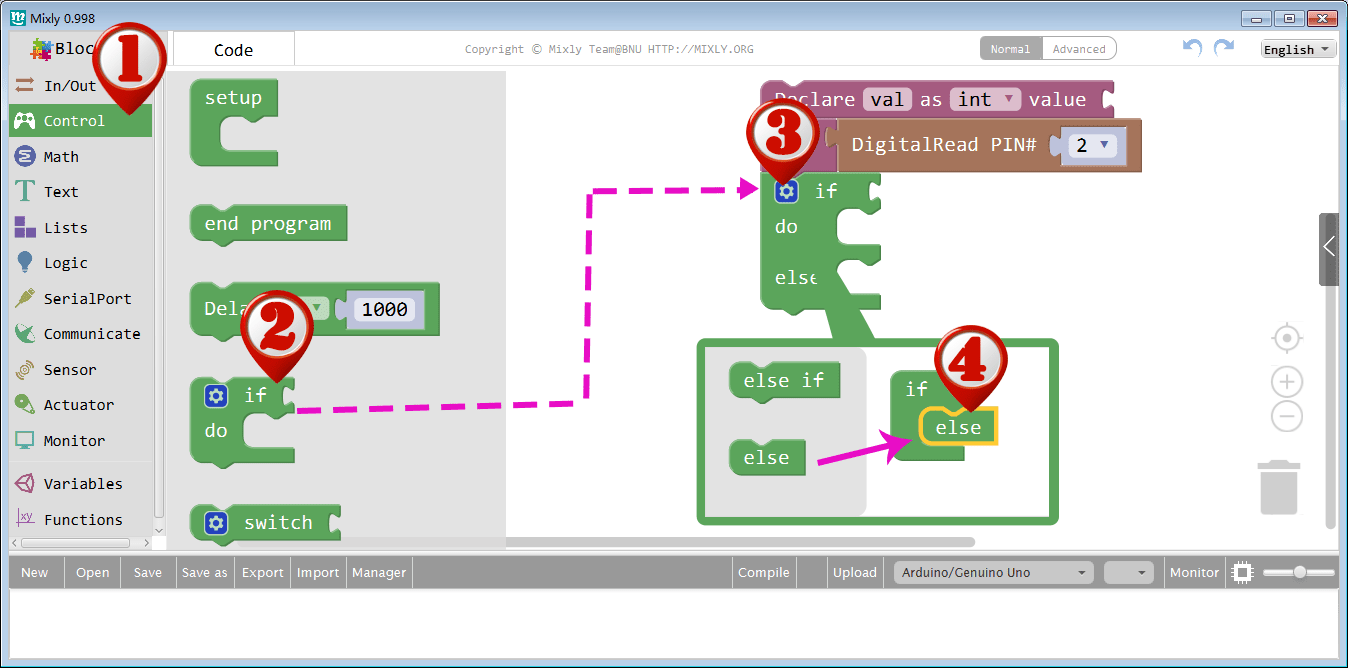
Drag out the if block from the Control category.We also need add an else sub-block to this if do block. To do this, just click the setting icon inside if do block, drag out an else sub-block and connect it to if block, then Click setting again to turn off the setting window.
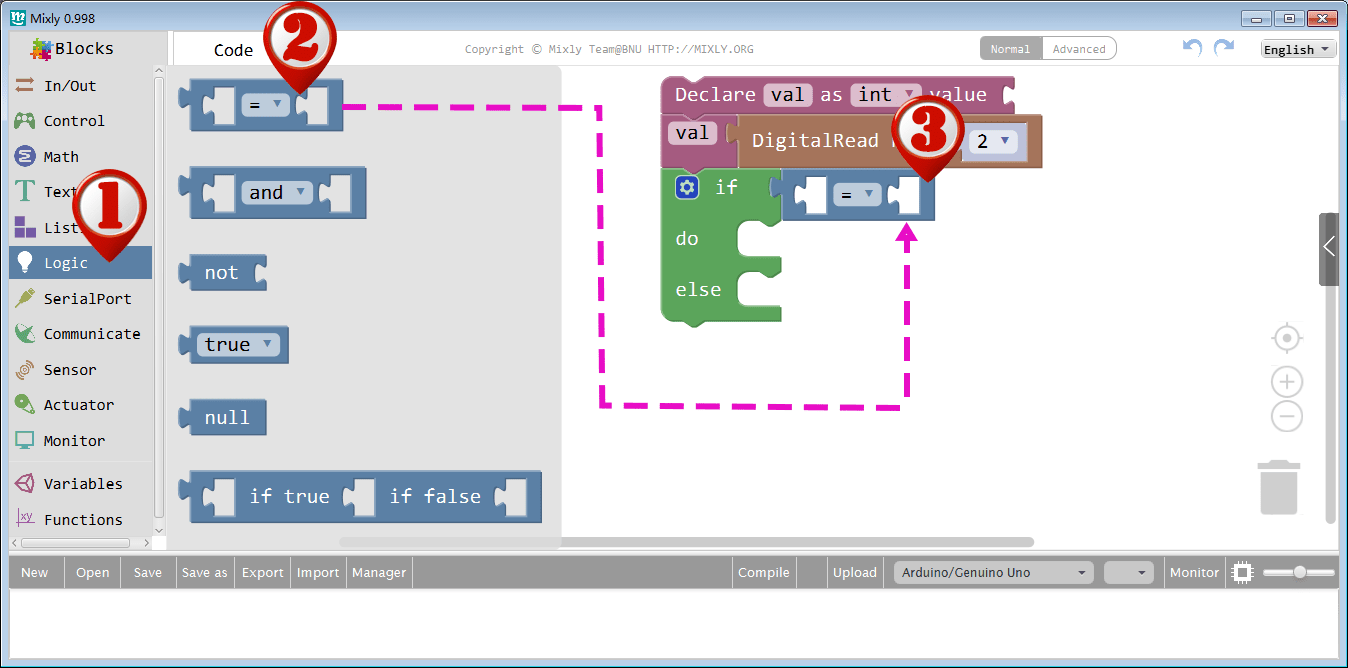
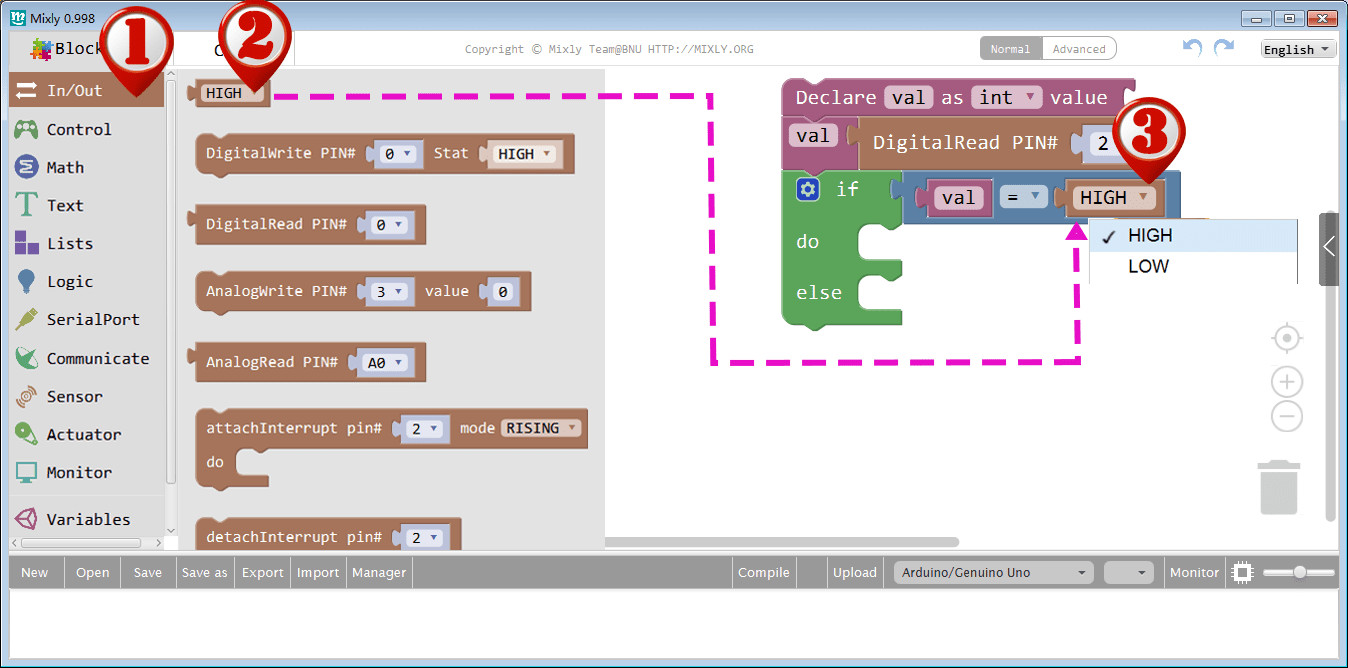
Drag out the first block from Logic category,then drag out val block and HIGH block as per picture.
Drag out the DigitalWrite PIN# block from the In/Out category ,set pin 13 as input and HIGH as stat.
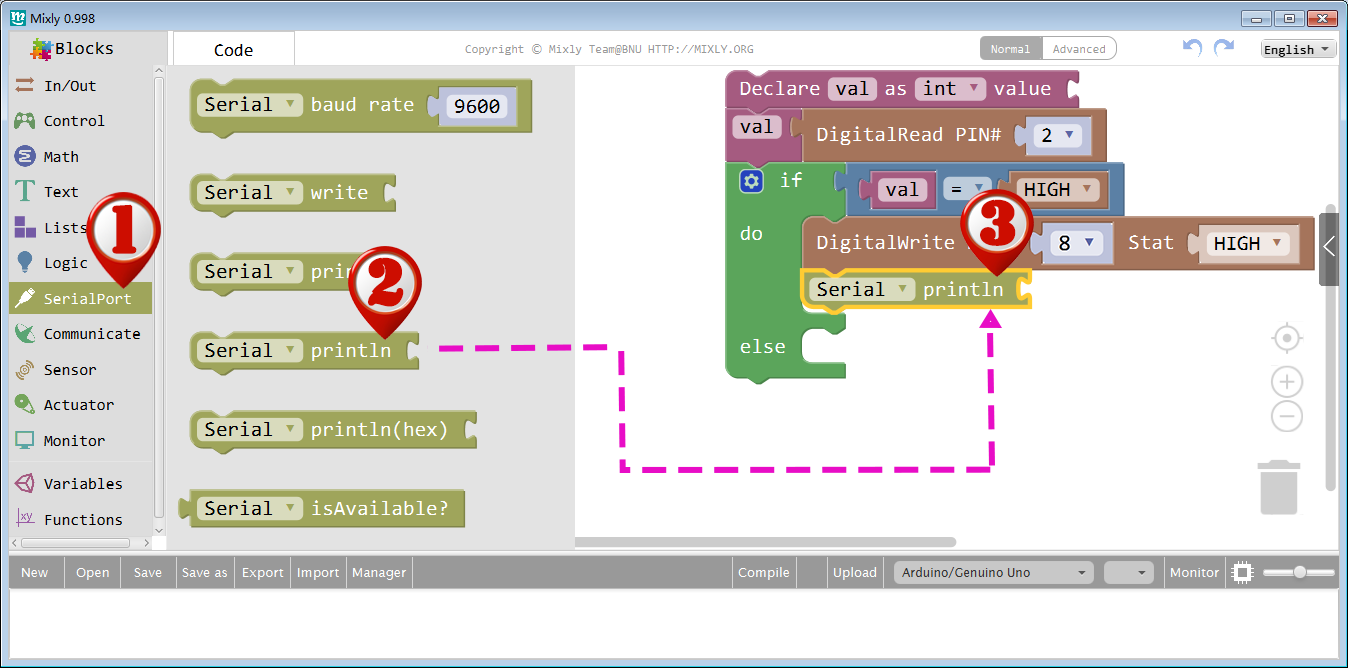
Drag out Serial PrintIn block from SerialPort category.
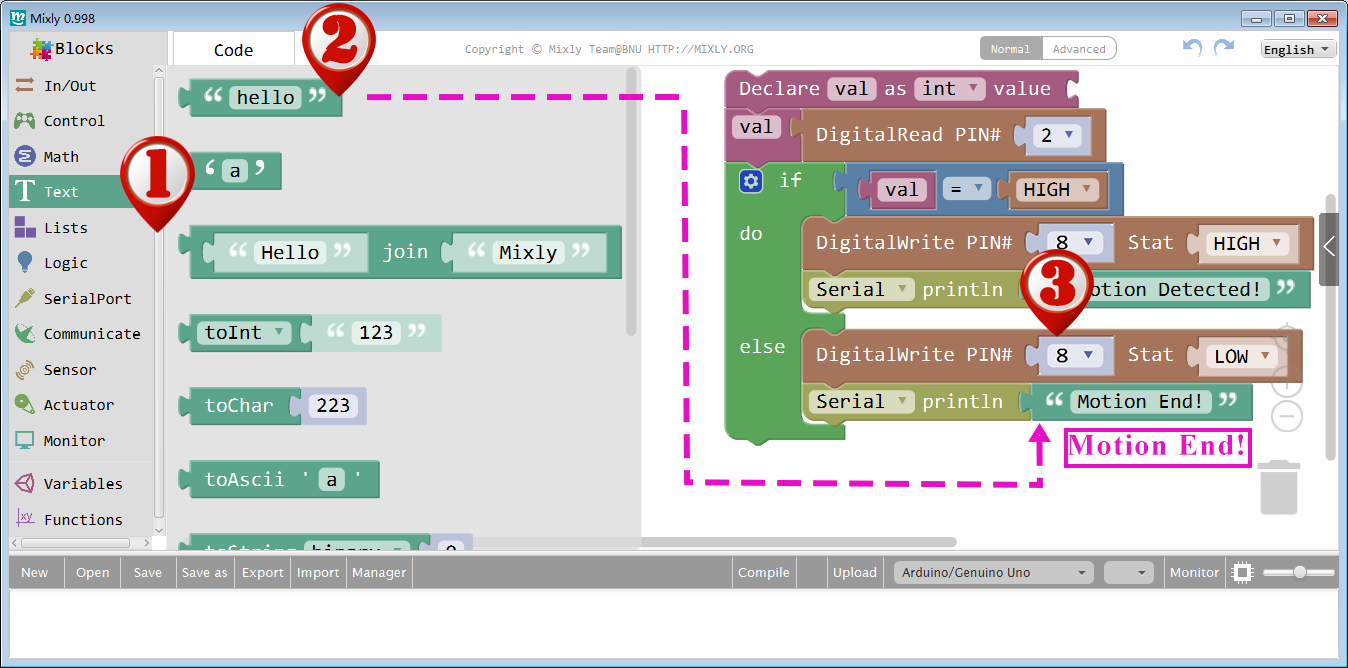
Drag out Hello block from Text category and set text as Motion Detected!
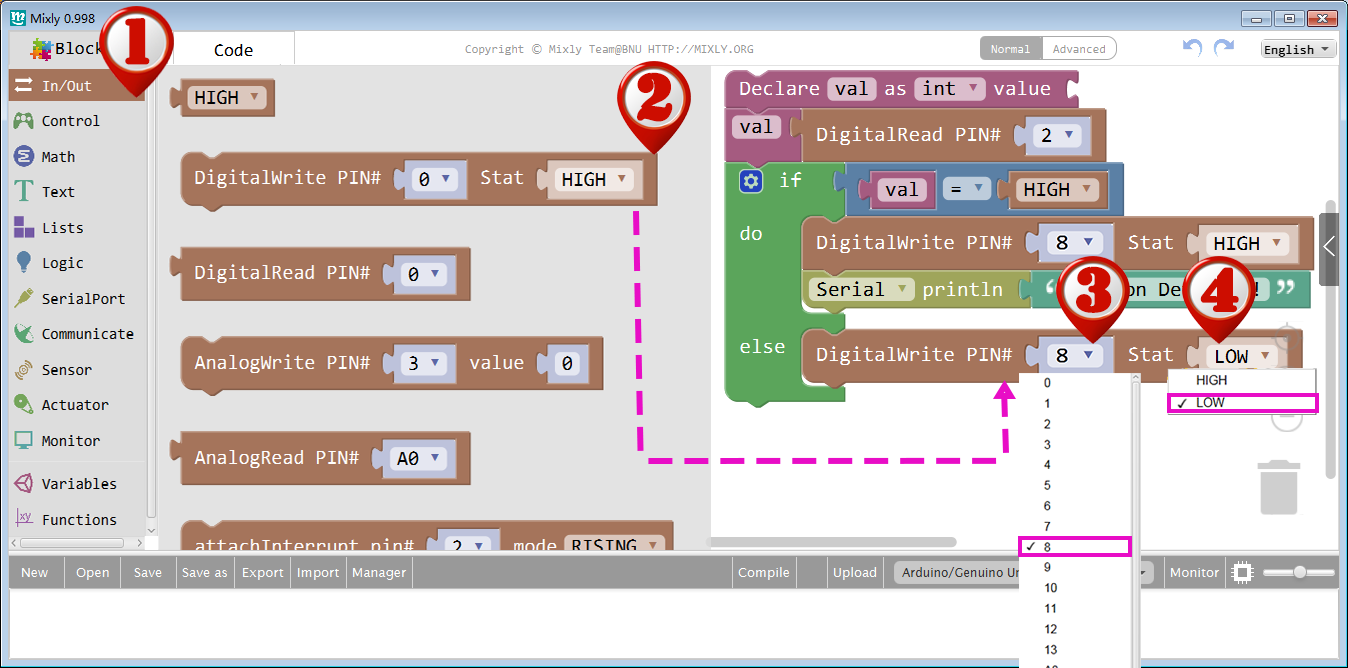
Drag out the DigitalWrite PIN# block from the In/Out category ,set pin 13 as input and LOW as stat.
Drag out Serial PrintIn block from SerialPort category.
Drag out Hello block from Text category and set text as Motion End!
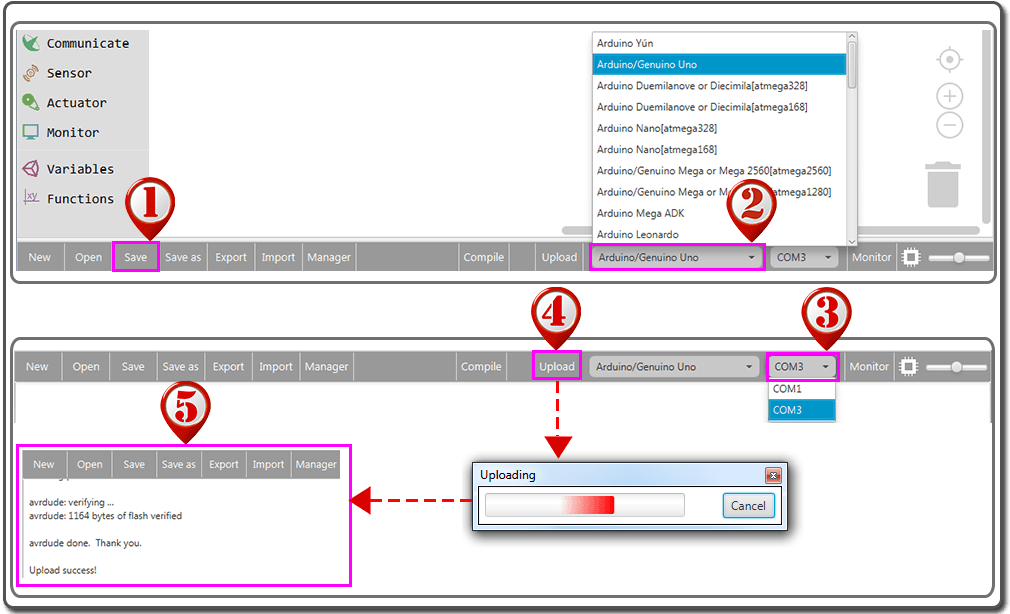
Save and upload program to OSOYOO Basic Board for Arduino.
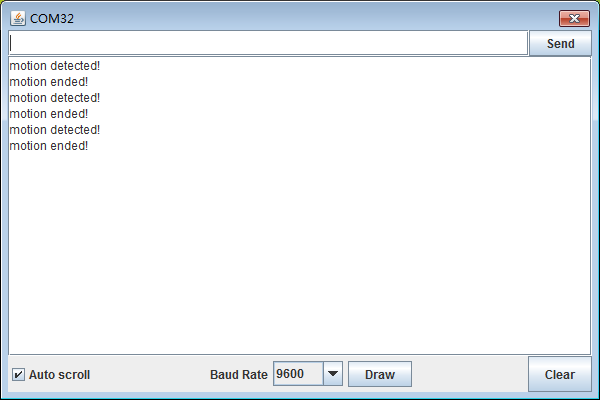
A few seconds after the upload finishes, have a look at your board’s pin 13 LED. You can also open your serial monitor, and set the baud rate to 9600 bps, you may see the following:
The PIR sensor requires a couple seconds of motion-free activity, while it gets a “snapshot” of it’s viewing area. Try not to move until the pin 13 LED turns off, then wave your hands, jump in the air, go crazy!
You will also notice that there is a delay associated with the motion sensor after each detection. Depending on the sensor, you may be able to adjust this delay.
The PIR (Motion) Sensor allows you to sense motion, it is commonly used to detect whether a human has moved in or out of the sensors range. They are small, inexpensive, low-power, easy to use and don’t wear out. For that reason they are commonly found in appliances and gadgets used in homes or businesses. They are often referred to as PIR, “Passive Infrared”, “Pyroelectric”, or “IR motion” sensors.
This PIR (Motion) Sensor can detect the infrared signals from human body or other animals and triggers with movement. So it can be applied to a variety of scenarios which require motion detection. Conventional pyroelectric infrared sensors require body pyroelectric infrared detector, integrated chipsets, complex peripheral circuit. So the size is slightly big, circuit is complex, and reliability is slightly lower. We bring this new pyroelectric infrared motion sensor which is specially designed for your Arduino projects, an integrated digital body pyroelectric and infrared sensor, with small size, high reliability, low power consumption, and simple peripheral circuit. Very simple to use in any project.
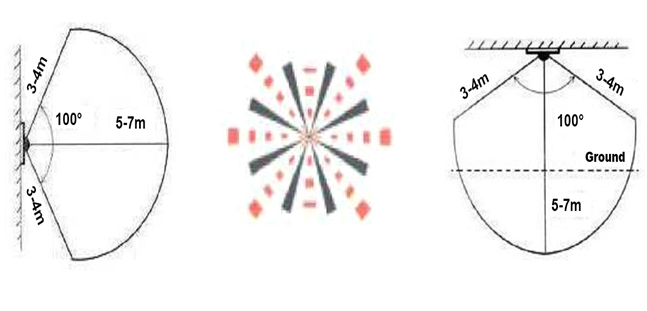
PIR Sensor Angle Diagram :
Along with the pyroelectic sensor is a bunch of supporting circuitry, resistors and capacitors. It seems that most small hobbyist sensors use the BISS0001 (“Micro Power PIR Motion Detector IC”), undoubtedly a very inexpensive chip. This chip takes the output of the sensor and does some minor processing on it to emit a digital output pulse from the analog sensor.
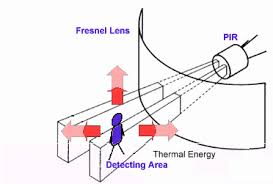
HOW DOES IT WORK?
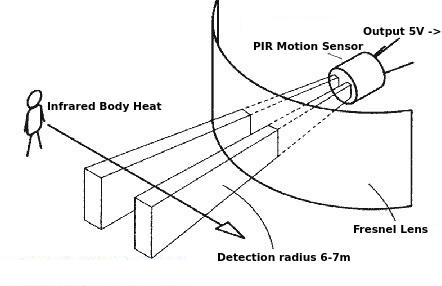
Here, we are using a PIR motion sensor. PIR stands for Passive InfraRed. This motion sensor consists of a fresnel lens, an infrared detector, and supporting detection circuitry. The lens on the sensor focuses any infrared radiation present around it towards the infrared detector. Our bodies generate infrared heat and as a result, this gets picked up by the motion sensor. The sensor outputs a 5V signal for a period of one minute as soon as it detects the presence of a person. It offers a tentative range of detection of about 6-7 m and is highly sensitive.
When the PIR motion sensor detects a person, it outputs a 5V signal to the OSOYOO Basic Board for Arduino. Thus, an interrupt on OSOYOO Basic Board for Arduino is triggered. We define what the OSOYOO Basic Board for Arduino should do as it detects an intruder.