The OSOYOO Magic I/O Shield for Arduino is a powerful board for the beginners. With this Magic board, we can easily connect various sensors and actuators much easier than before.
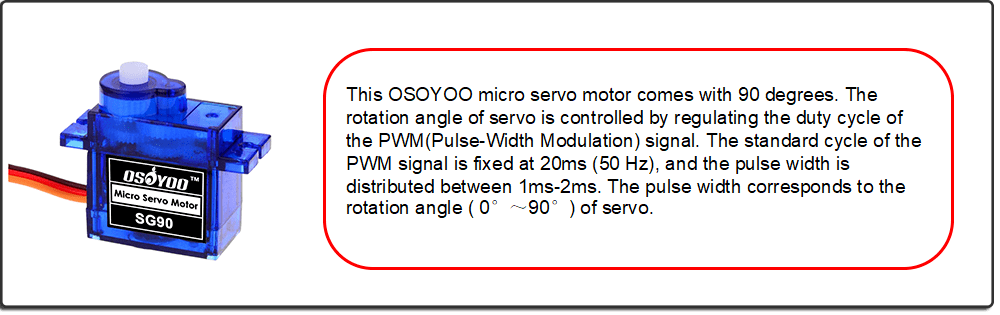
In this lesson, you will learn how to program OSOYOO Basic Board for Arduino and control a SG90 servo motor rotate back and forth.
OSOYOO Basic Board for Arduino (Fully compatible with Arduino UNO rev.3) x 1
OSOYOO Magic I/O Shield for Arduino x1
Servo Motor SG90 x 1
USB Cable x 1
PC x 1
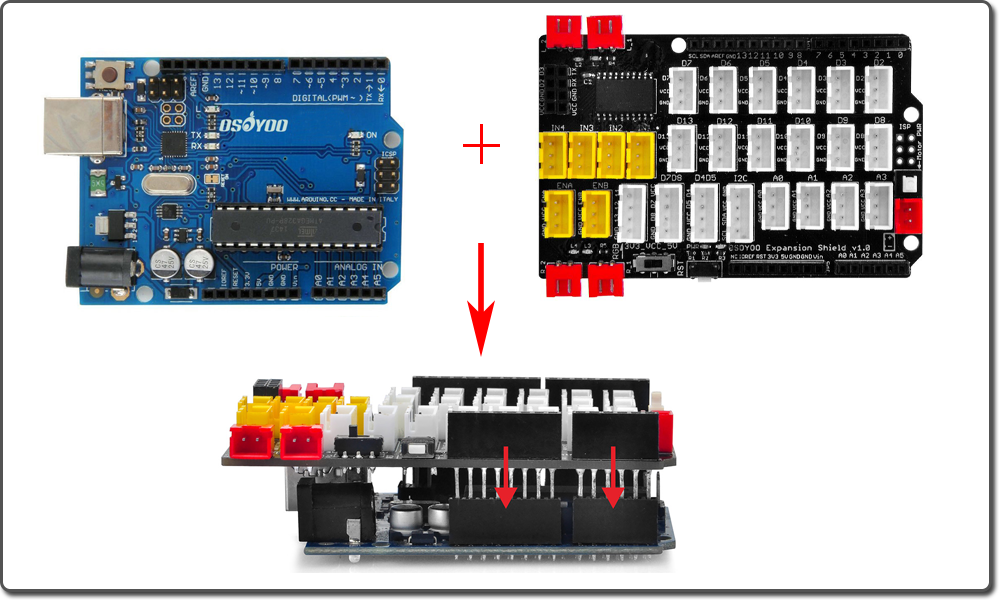
First, please plug Osoyoo Magic I/O shield into OSOYOO Basic Board for Arduino:
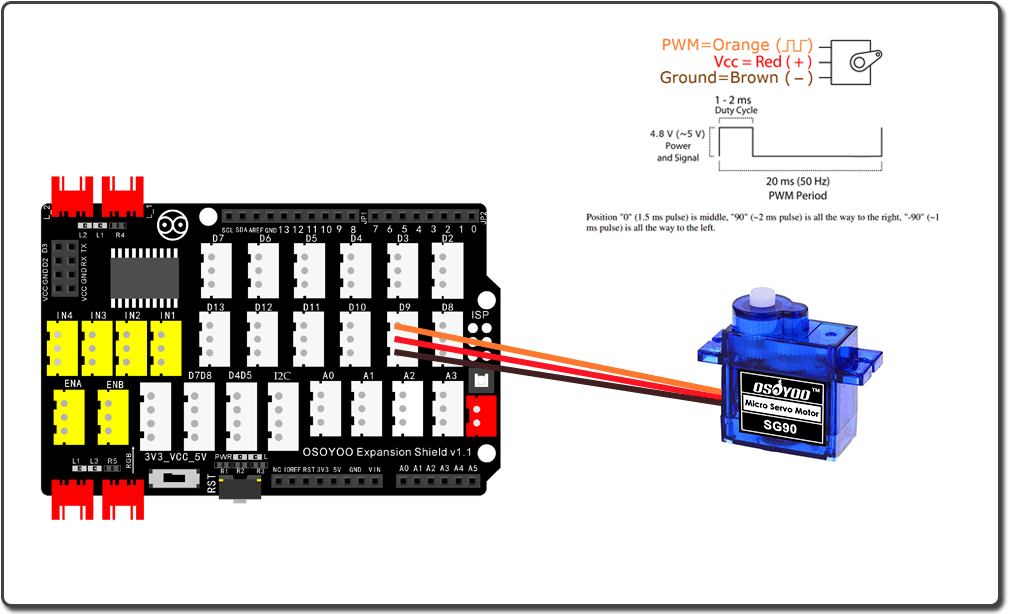
Then connect the servo motor to the D9 port of the Magic I/O shield (please move the switch on the board to 5V) as below:
Notice: Shut off your battery or Unplug your power adapter when upload sketch code to OSOYOO Basic Board for Arduino.
After above operations are completed, connect the OSOYOO Basic Board for Arduino to your computer using the USB cable. The green power LED (labelled PWR) should go on.
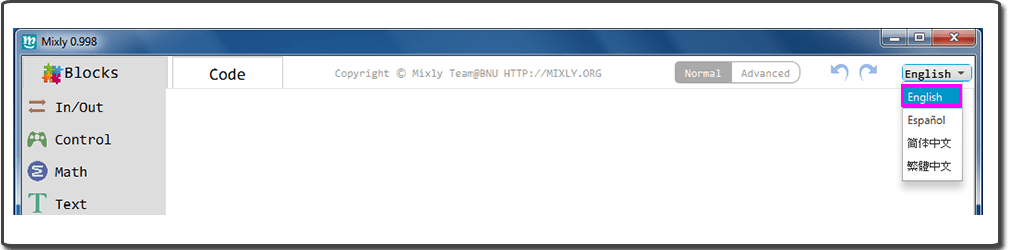
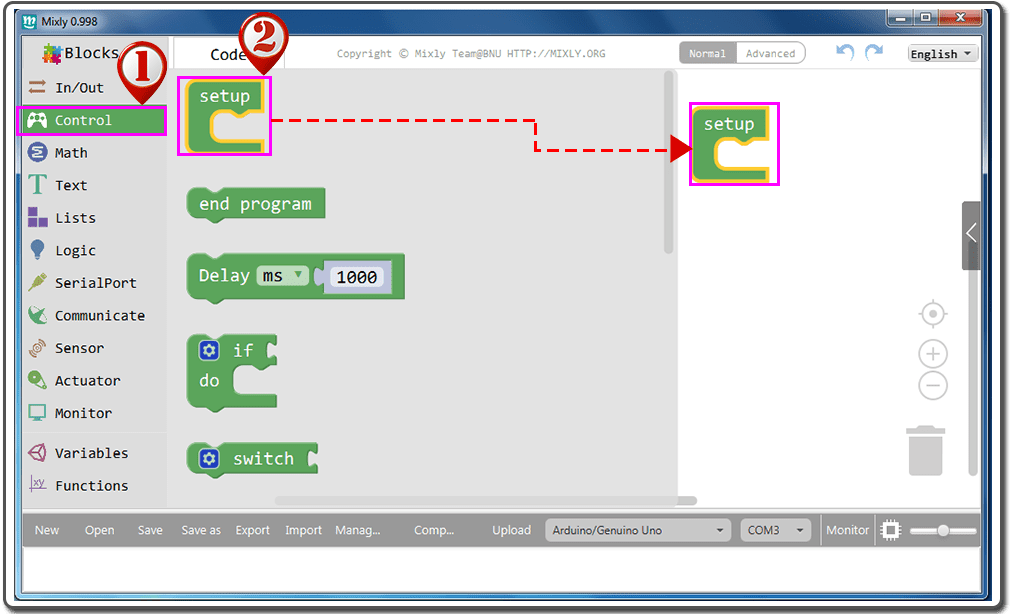
Open the Graphical Programming softwareMixly, if Mixly is not English, you should change the language first:
You can download the code directly, then click “Open” in Mixly to choose the code you download:
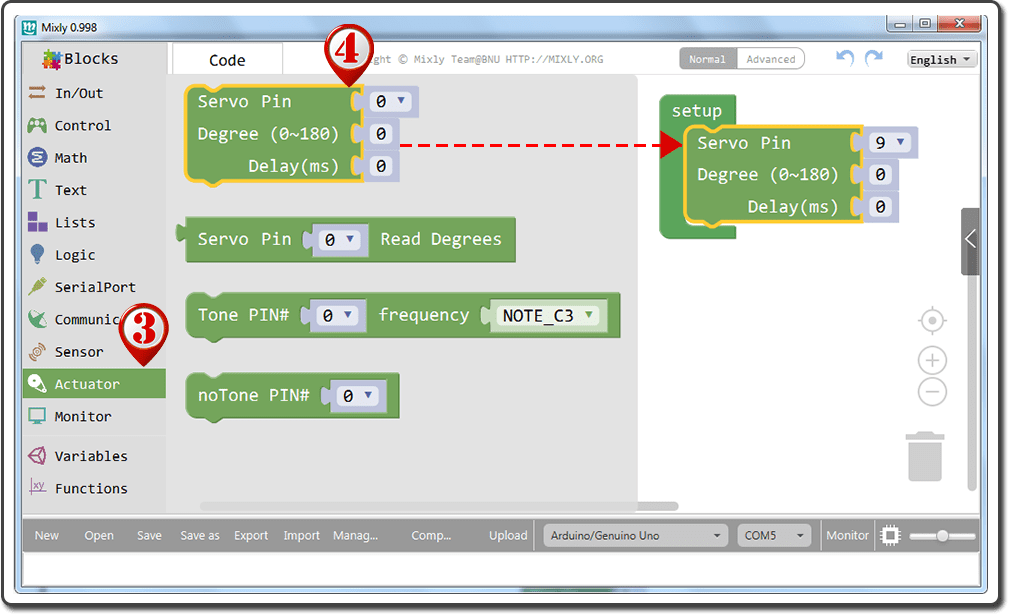
Drag out the servo control module from “Actuator”, and fit with “setup” block.
“Servo Control Module” description:
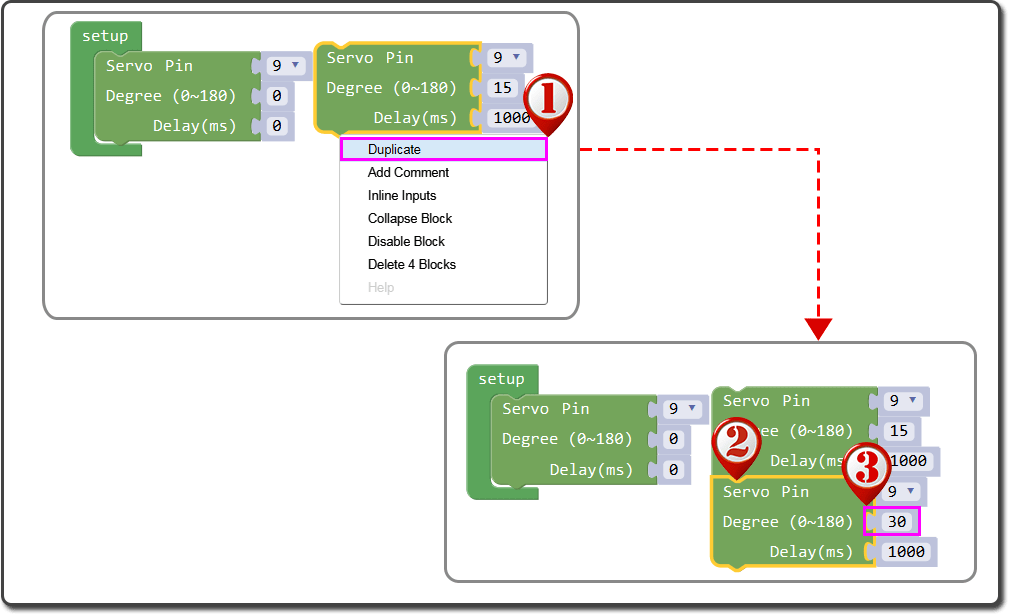
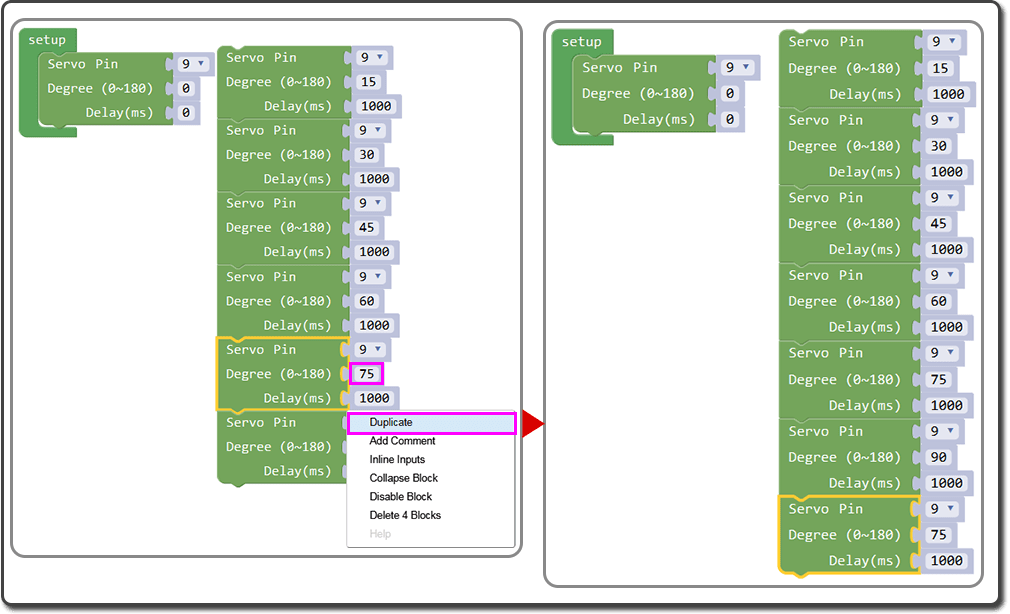
Drag out the servo control module from “Actuator”, edit the parameter as the picture shows:
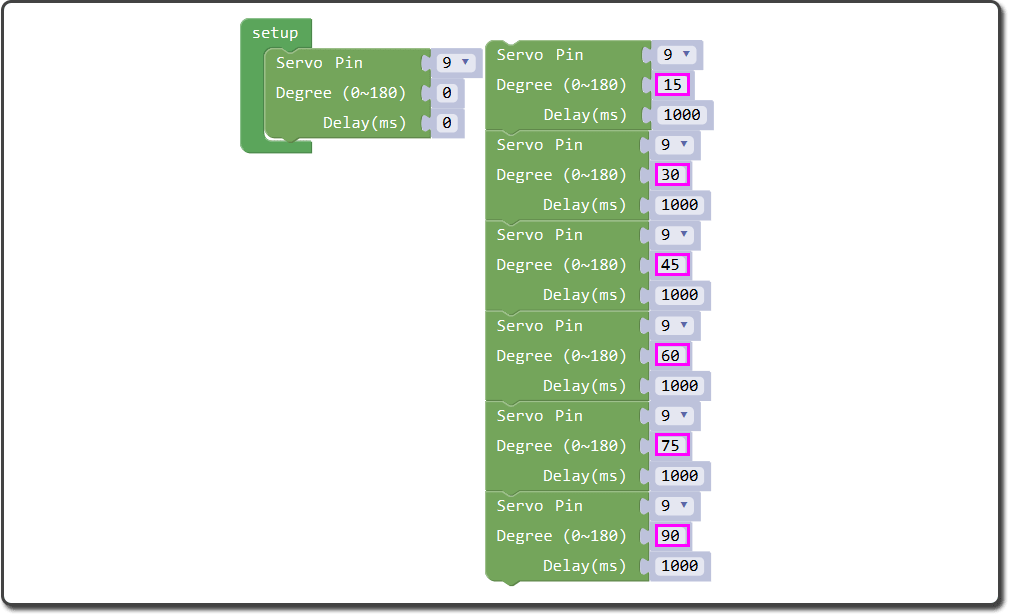
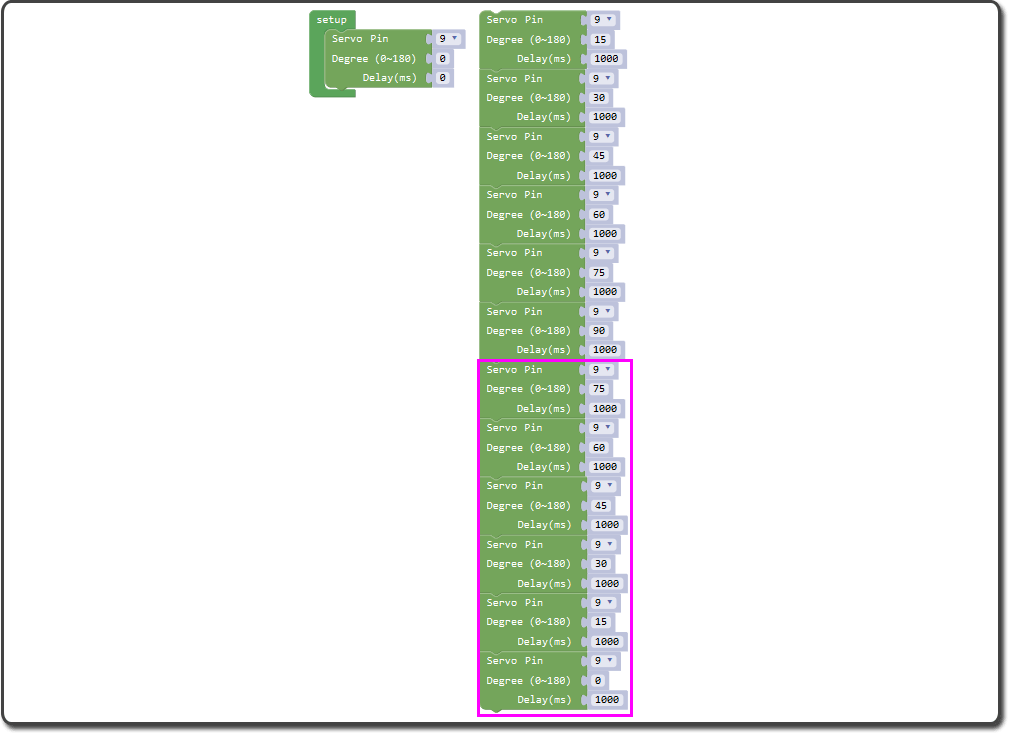
Make the servo rotate to a certain angle. At this part, we control the servo motor rotate 90 degrees (rotate once every 15 degrees).
And then rotate in the opposite direction.
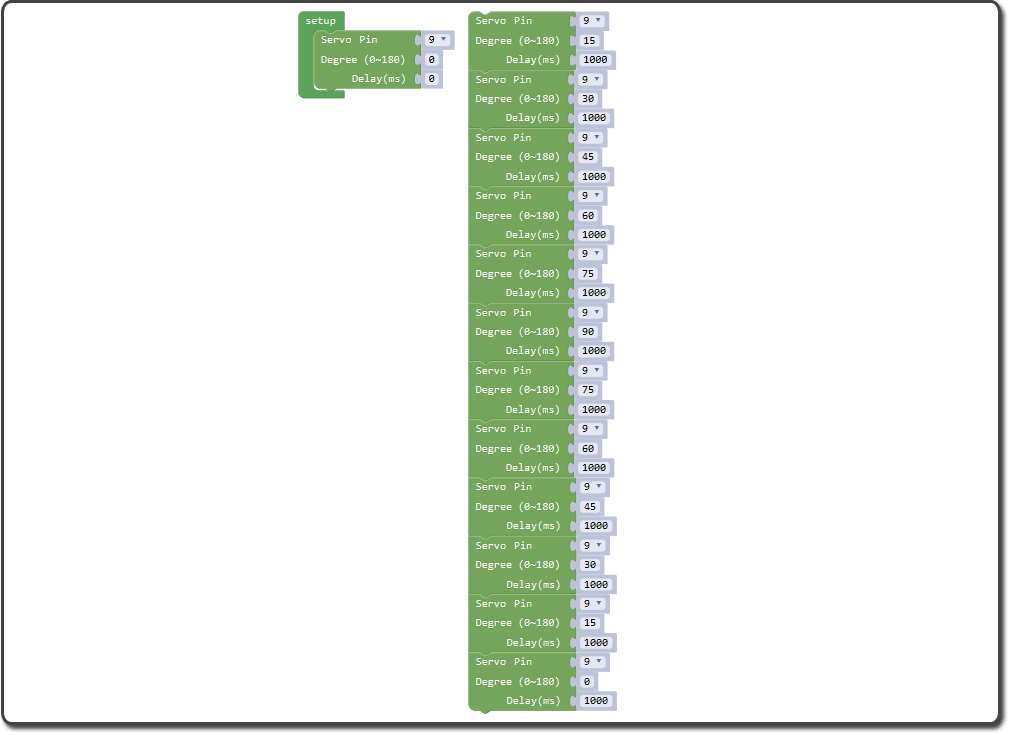
The whole program blocks are as following:
After programming, you can click the “<” button to check the corresponding code on the right bar. After above operations are completed, do as follows:
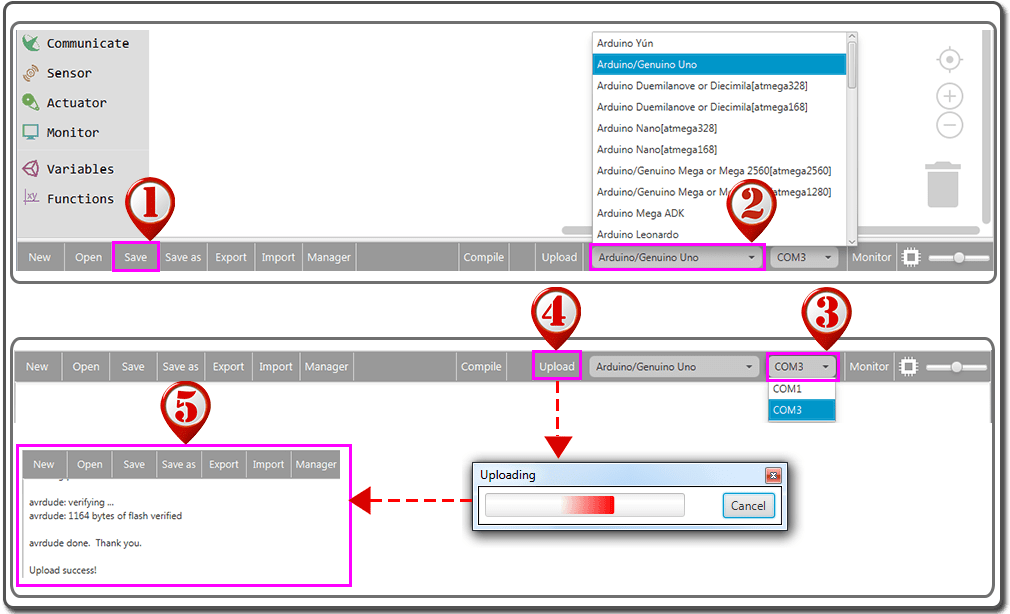
Click Save after programming is done.
Select the board type and serial port before uploading. For instause an UNO board, just select Arduino/Genuino Uno: if you use a Mega2560, select Arduino/Genuino Mega or Mega2560.
Select the serial device of the OSOYOO Basic Board for Arduino from the COM menu. This is likely to be COM3 or higher (COM1 and COM2 are usually reserved for hardware serial ports). To find out, you can disconnect your OSOYOO Basic Board for Arduino and re-open the menu; the entry that disappears should be the OSOYOO Basic Board for Arduino. Reconnect the board and select that serial port.
Next,upload the code. If the uploading fails, check and correct the code according to the prompts.
Finally, the status will change to ‘Upload success!’.
A few seconds after the upload finishes, you should now see the servo motor rotate 90 degrees (rotate once every 15 degrees). And then rotate in the opposite direction.