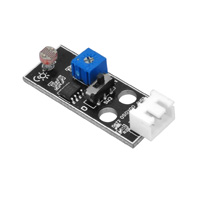
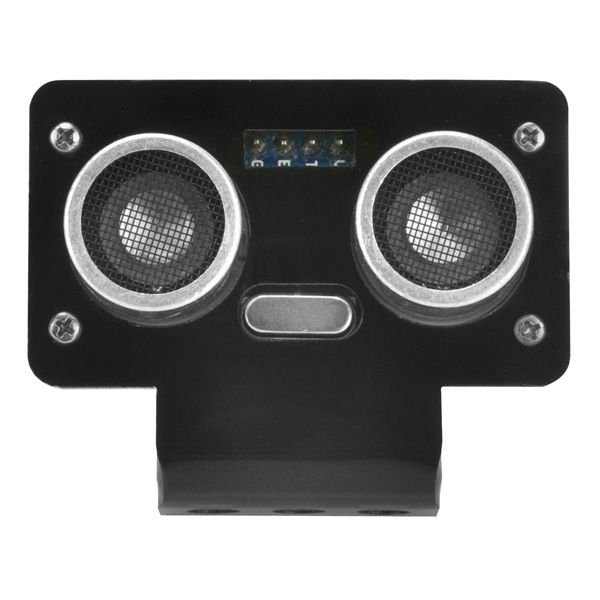
In this project, we will use obstacle sensor(ultrasonic distance detector) to detect obstacles ,avoid collision and auto-drive.
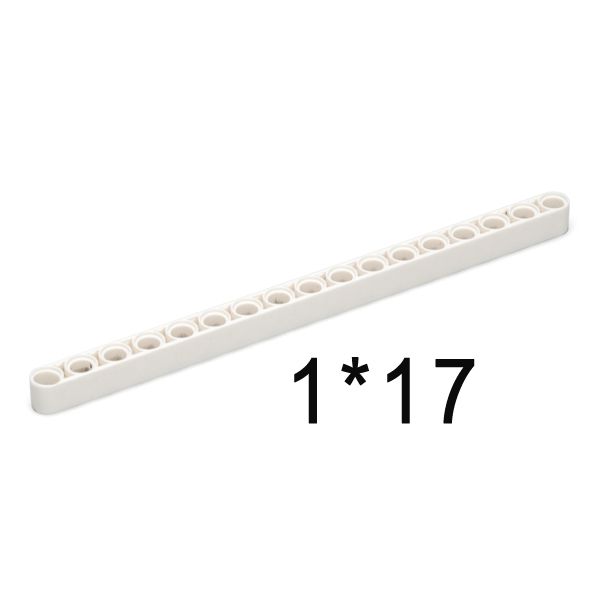
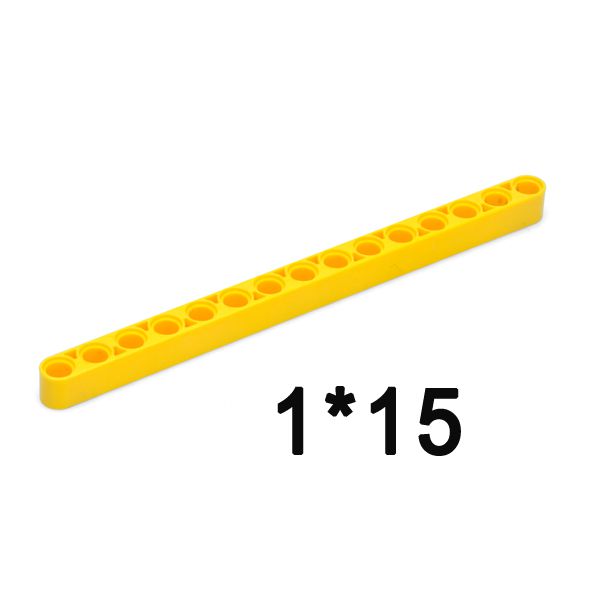
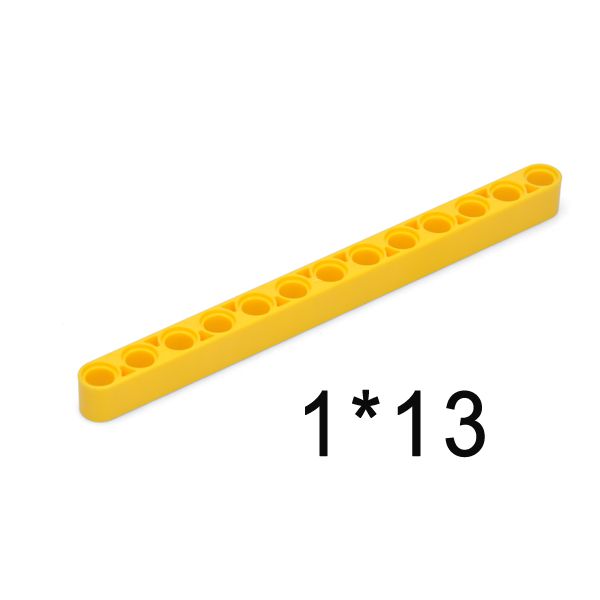
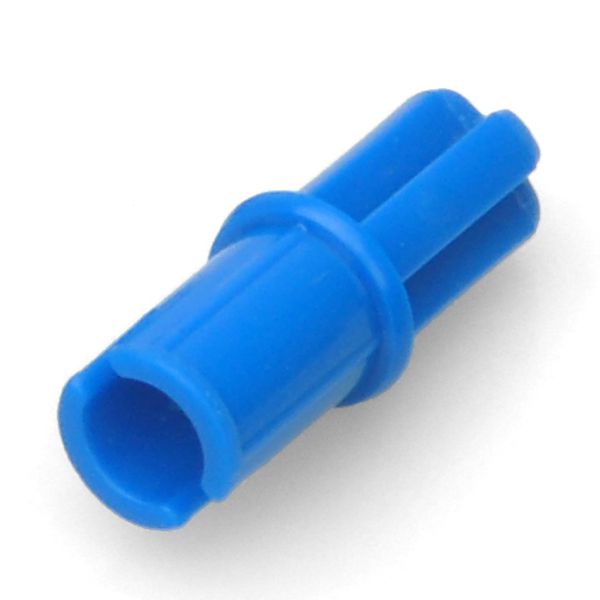
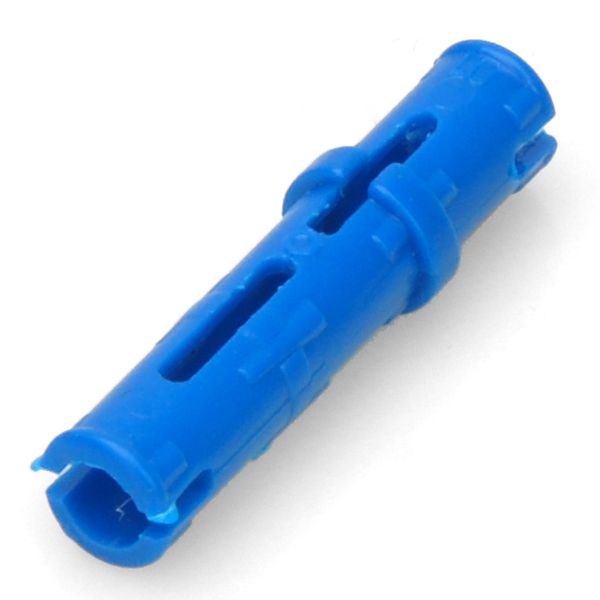
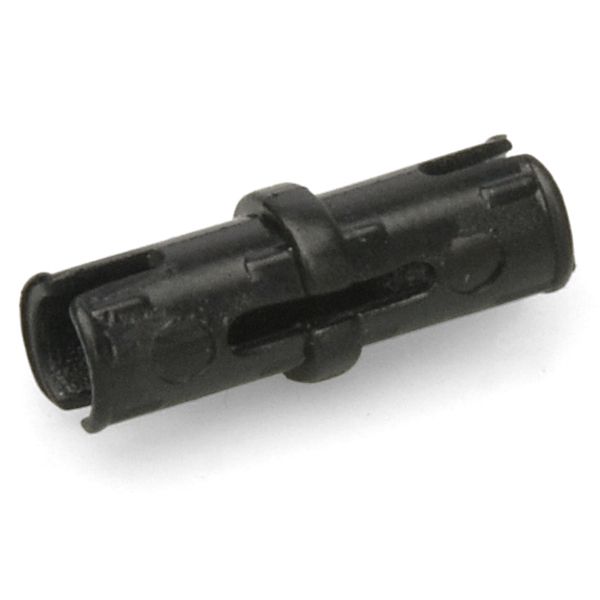
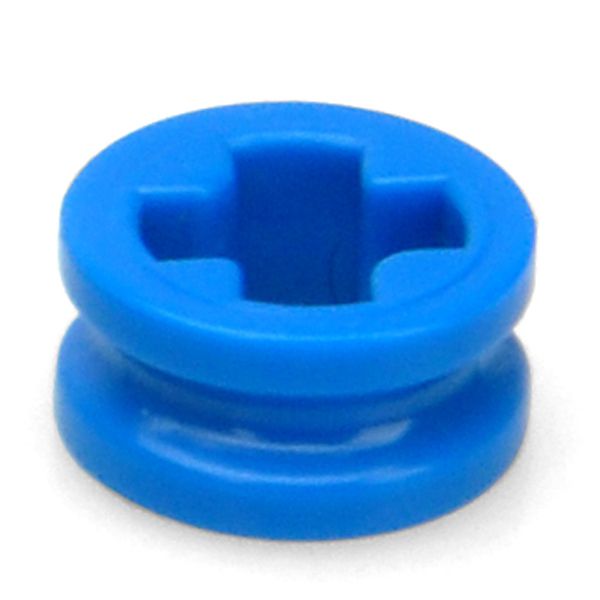
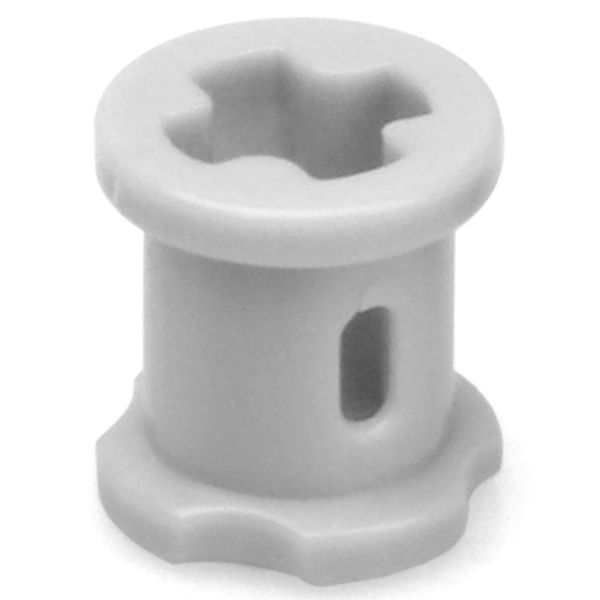
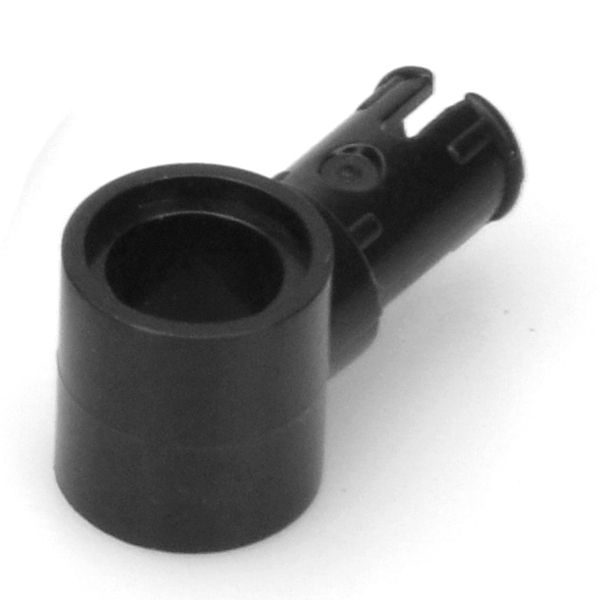
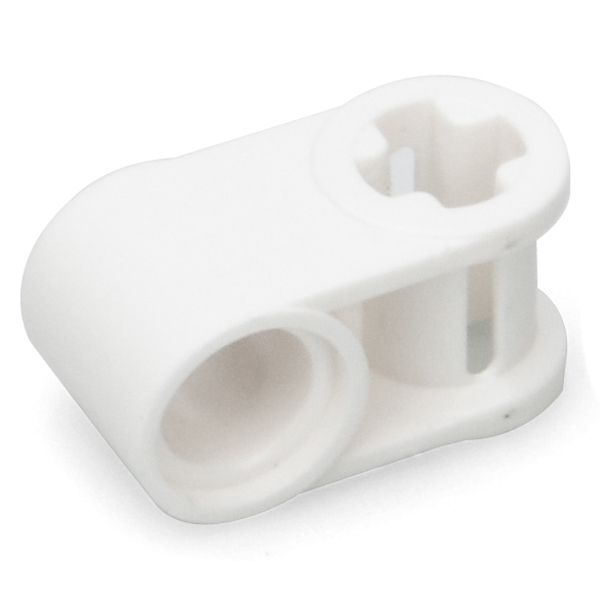
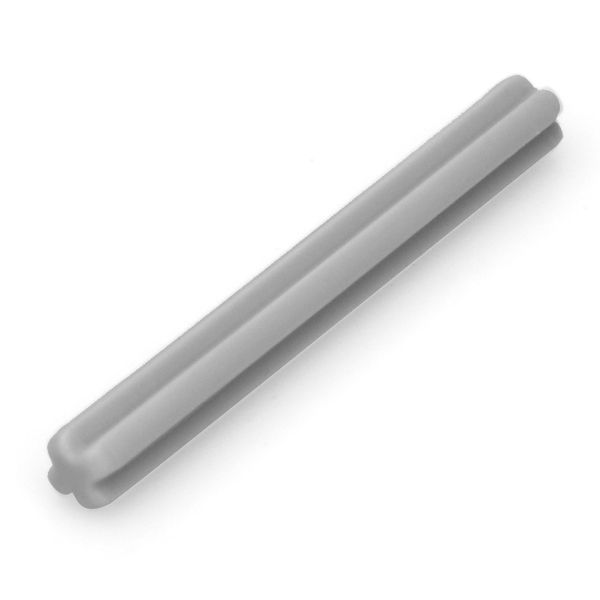
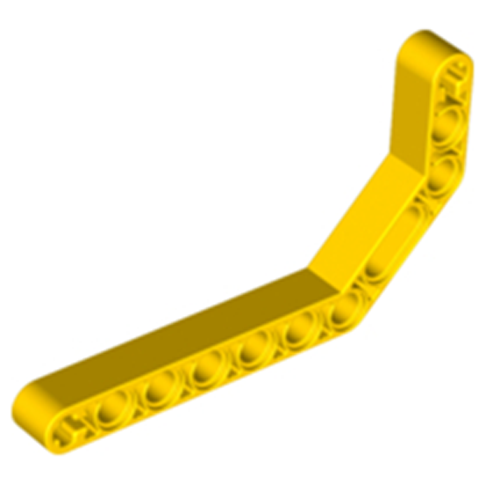
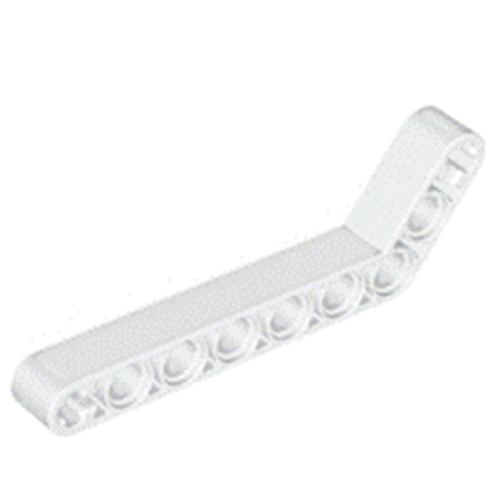
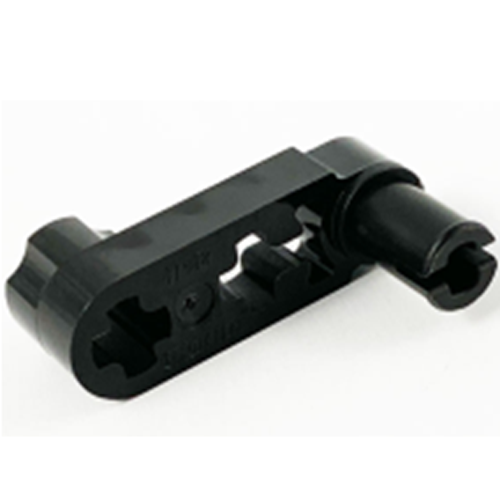
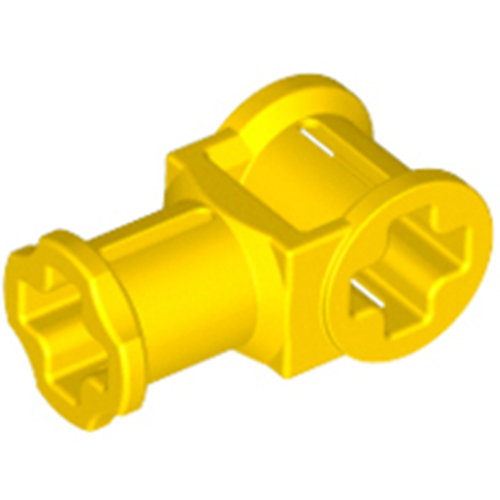
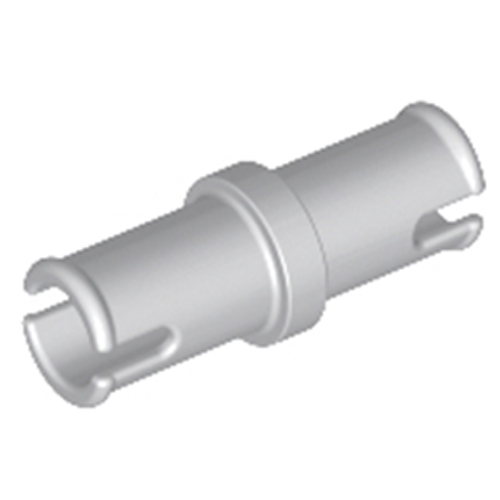
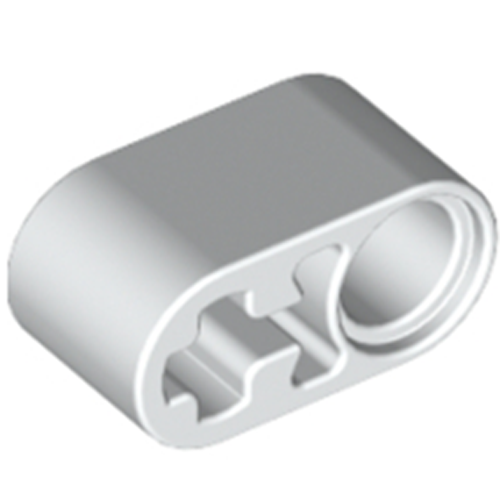
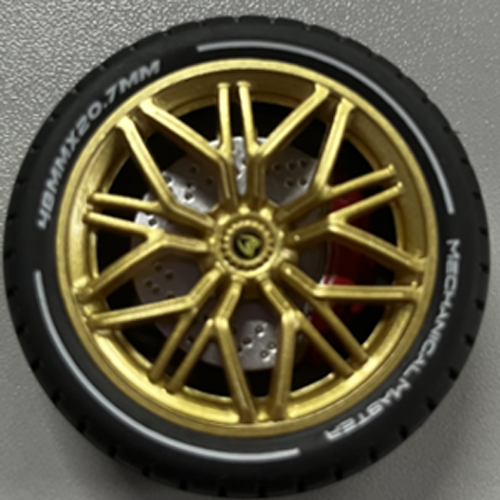
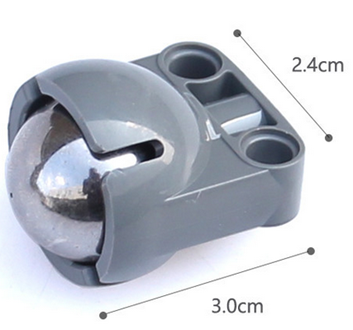
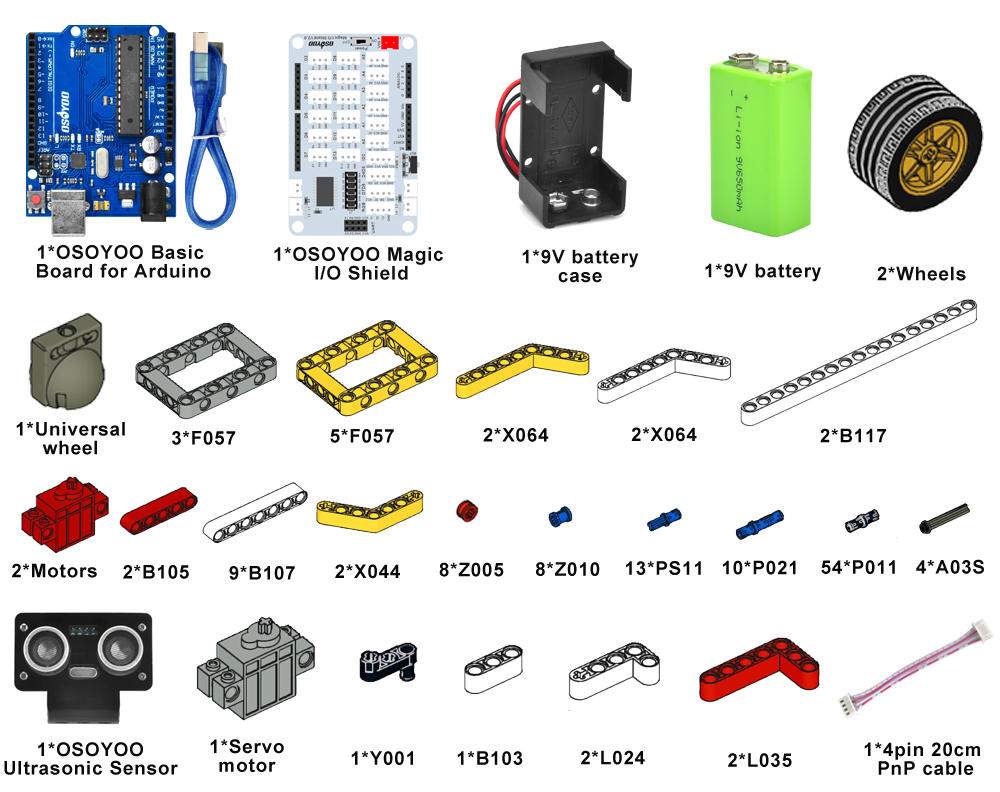
Please prepare the following parts to complete this project NOTE: 1.the color of the building block is subject to the actual product, which does not affect the use. 2. ALL OSOYOO PRODUCTS FOR ARDUINO ARE THIRD PARTY BOARD WHICH IS FULLY COMPATIBLE WITH ARDUINO
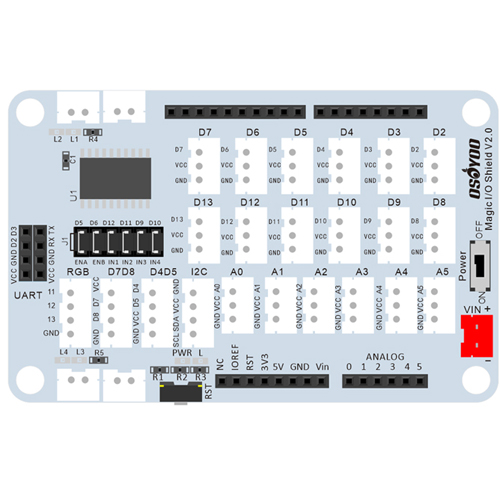
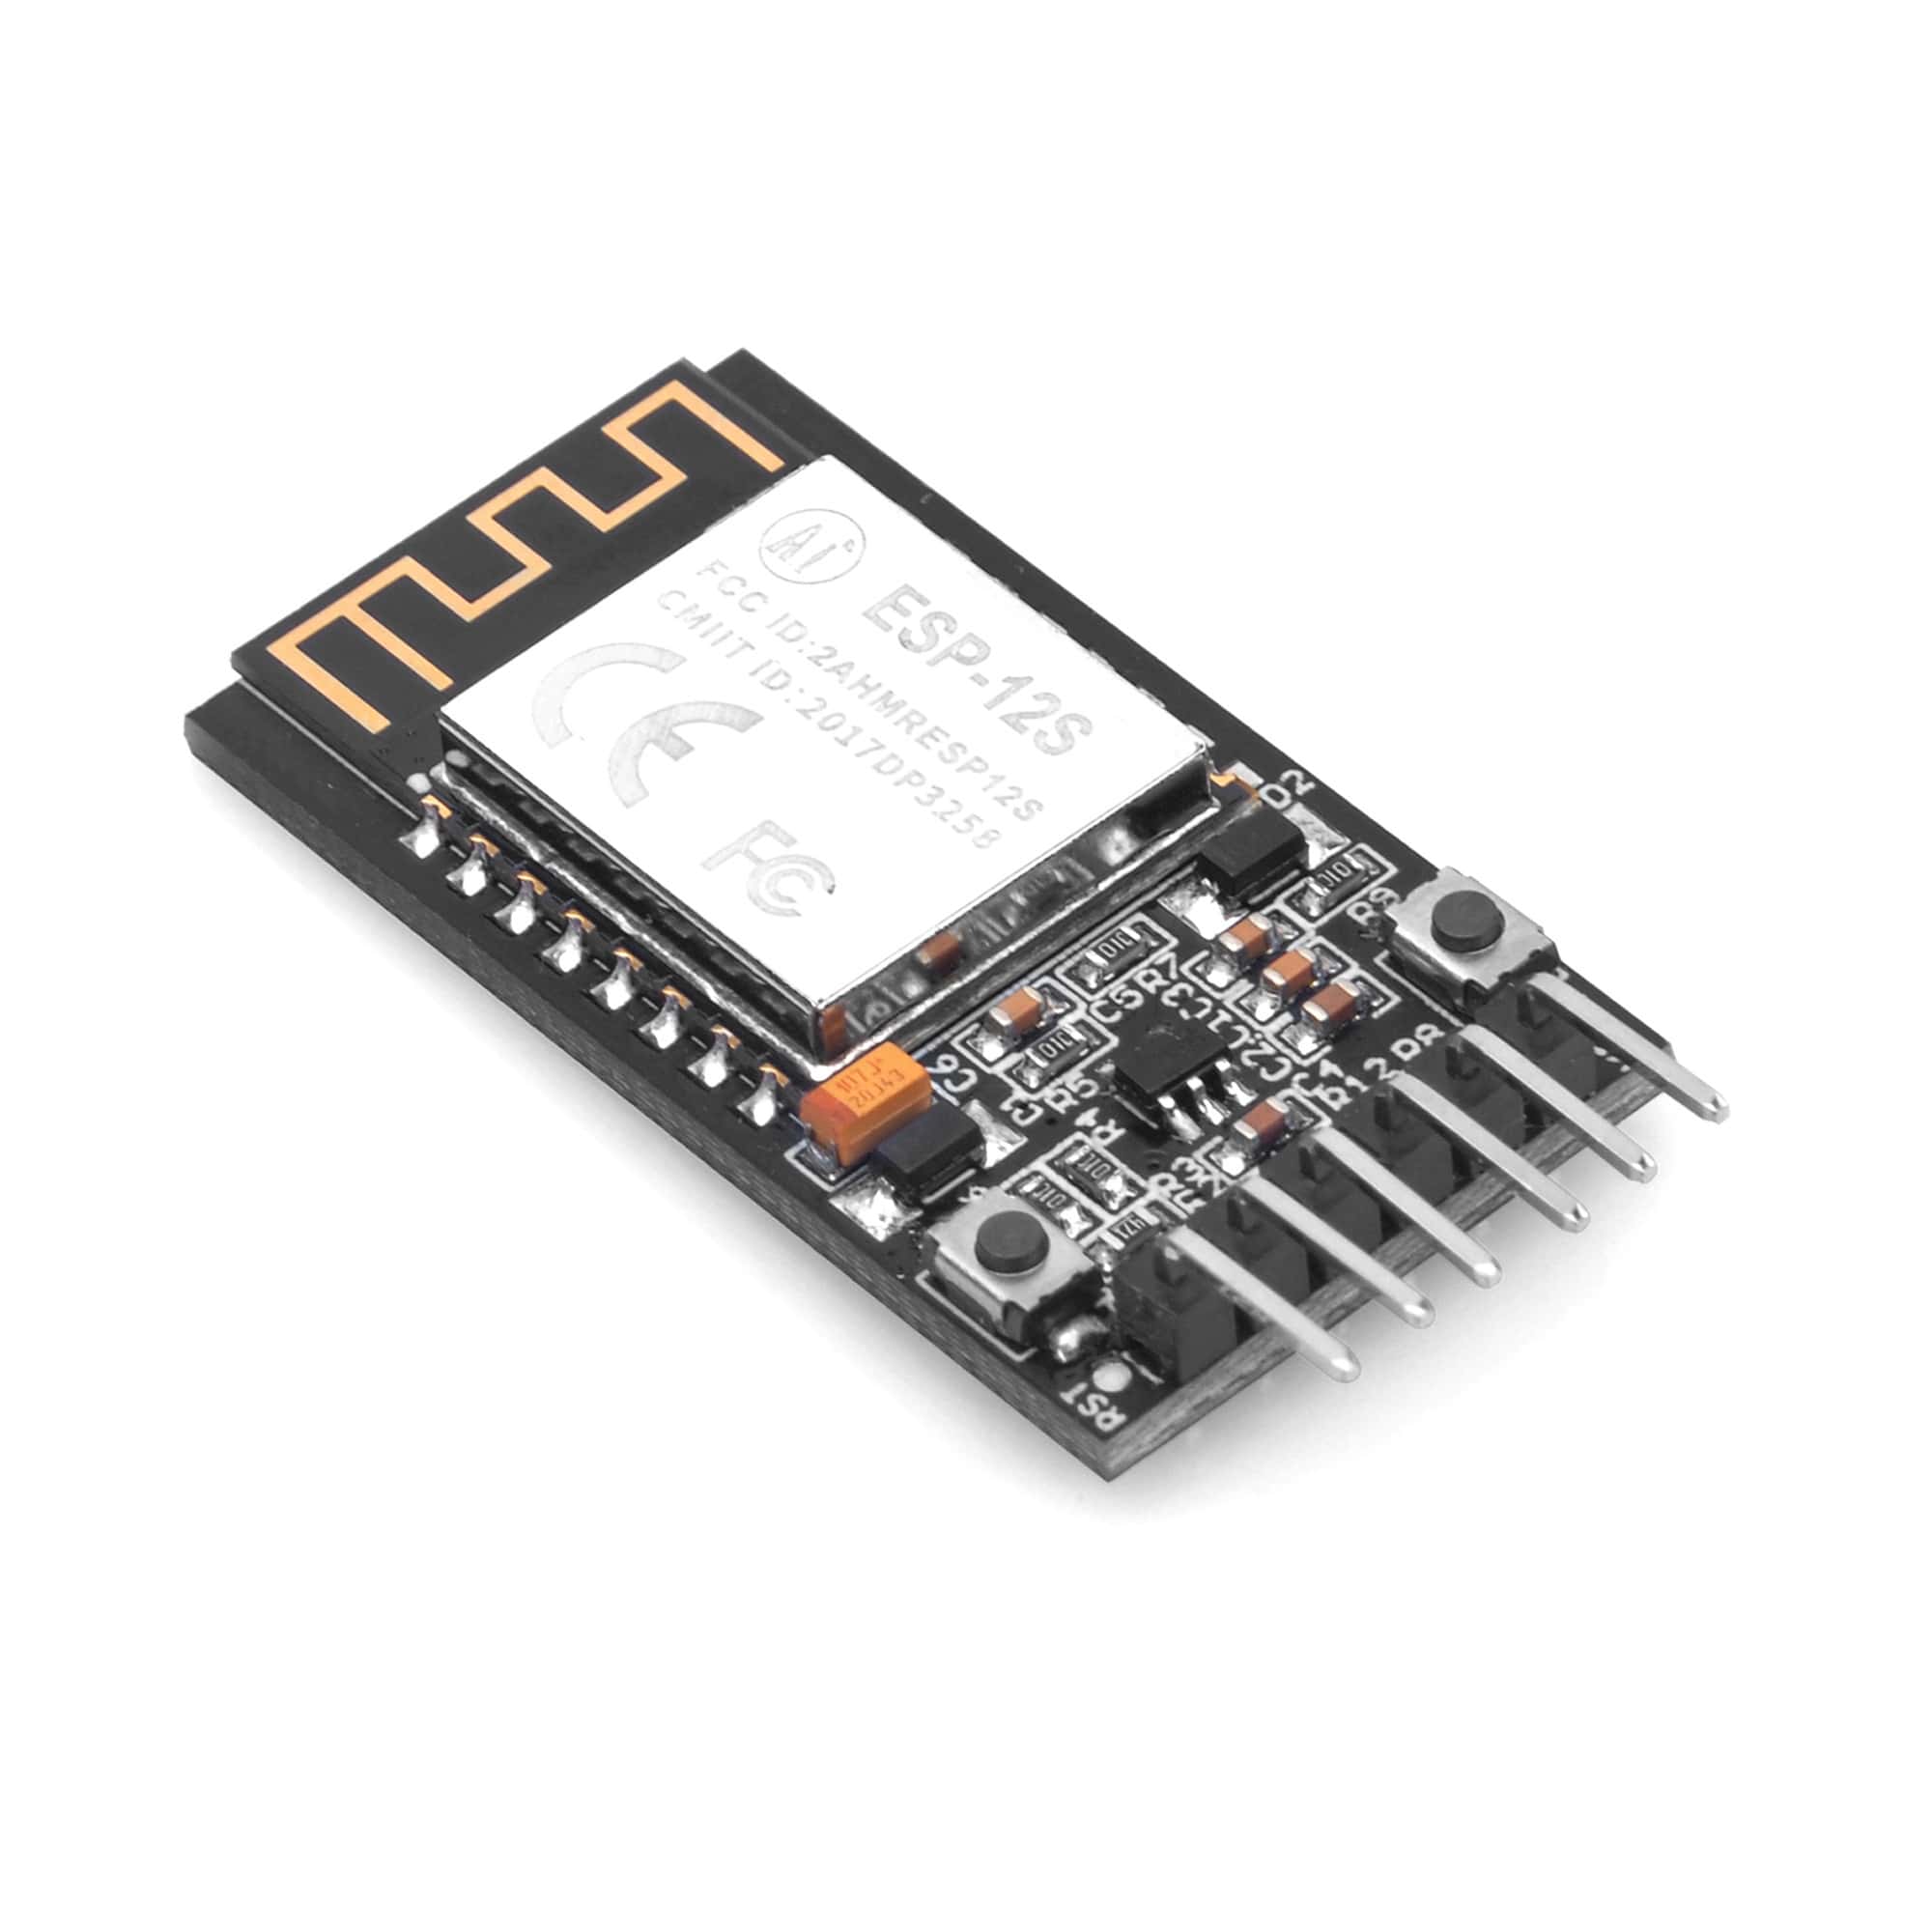
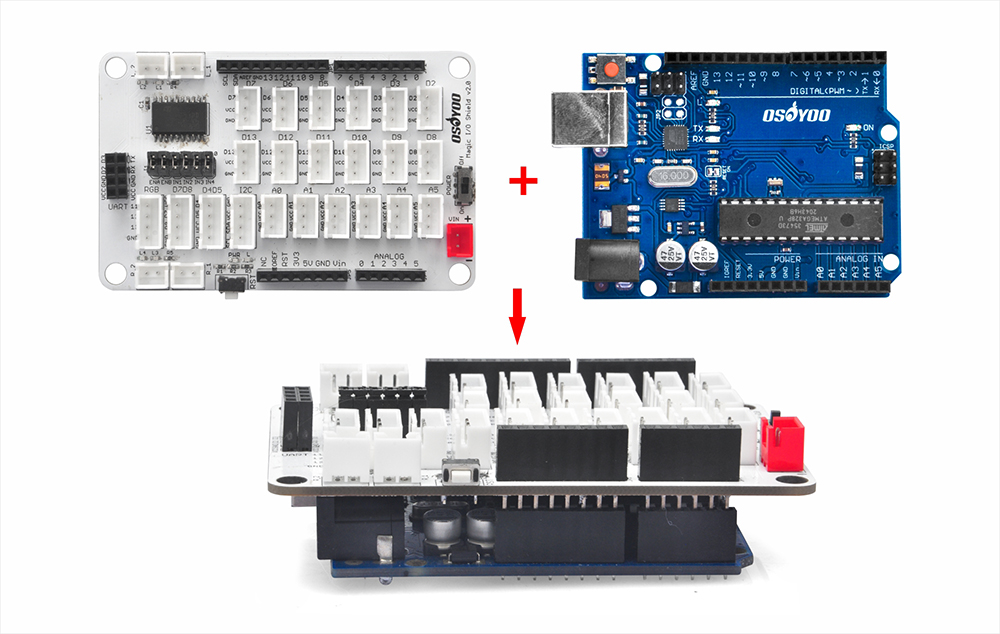
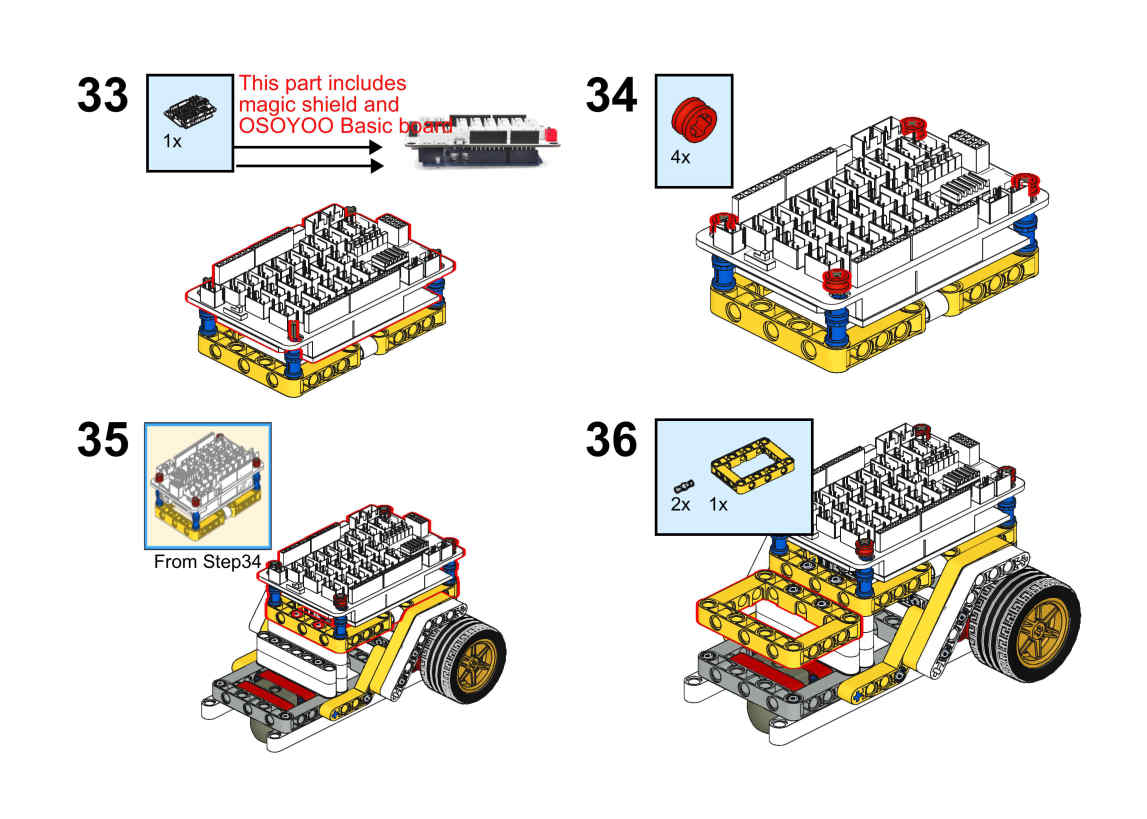
Before you build this robot car with blocks, please install OSOYOO basic board for Arduino under OSOYOO Magic I/O shield as following (Attention please : the pins of I/O shield is aligned with the port of basic the board firstly, then press the shield tightly on the board).
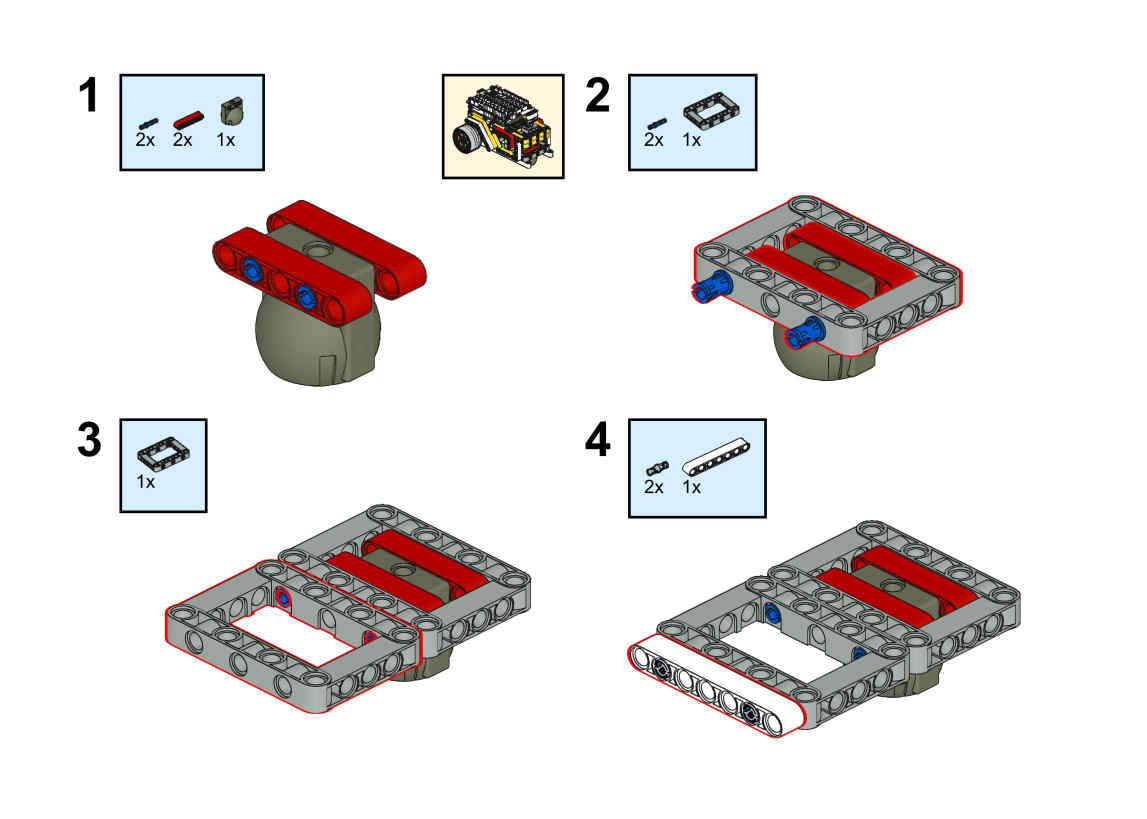
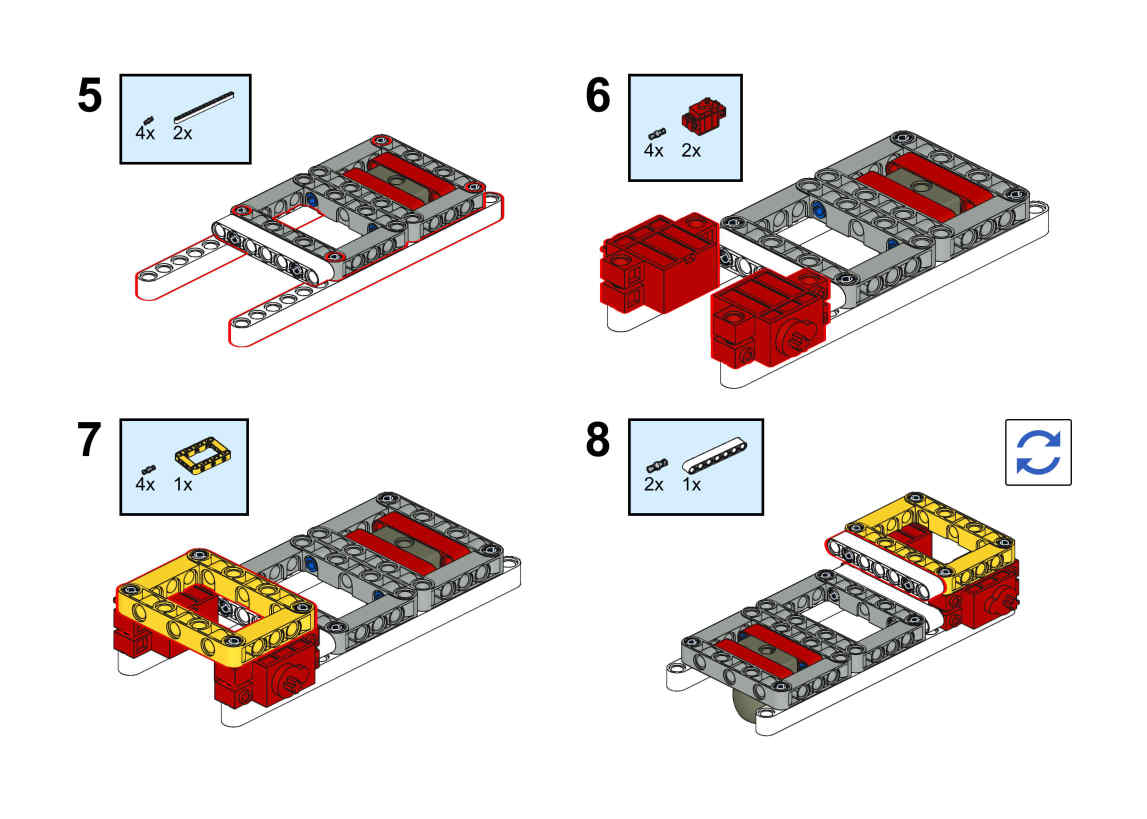
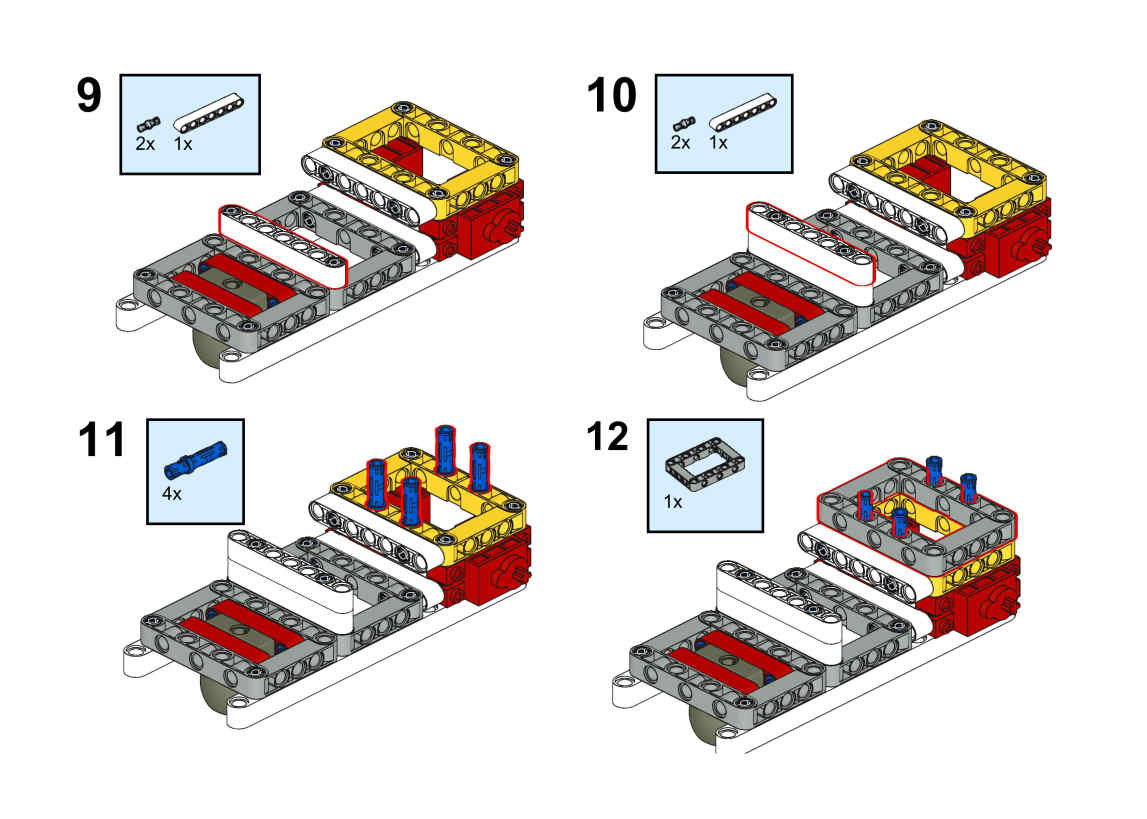
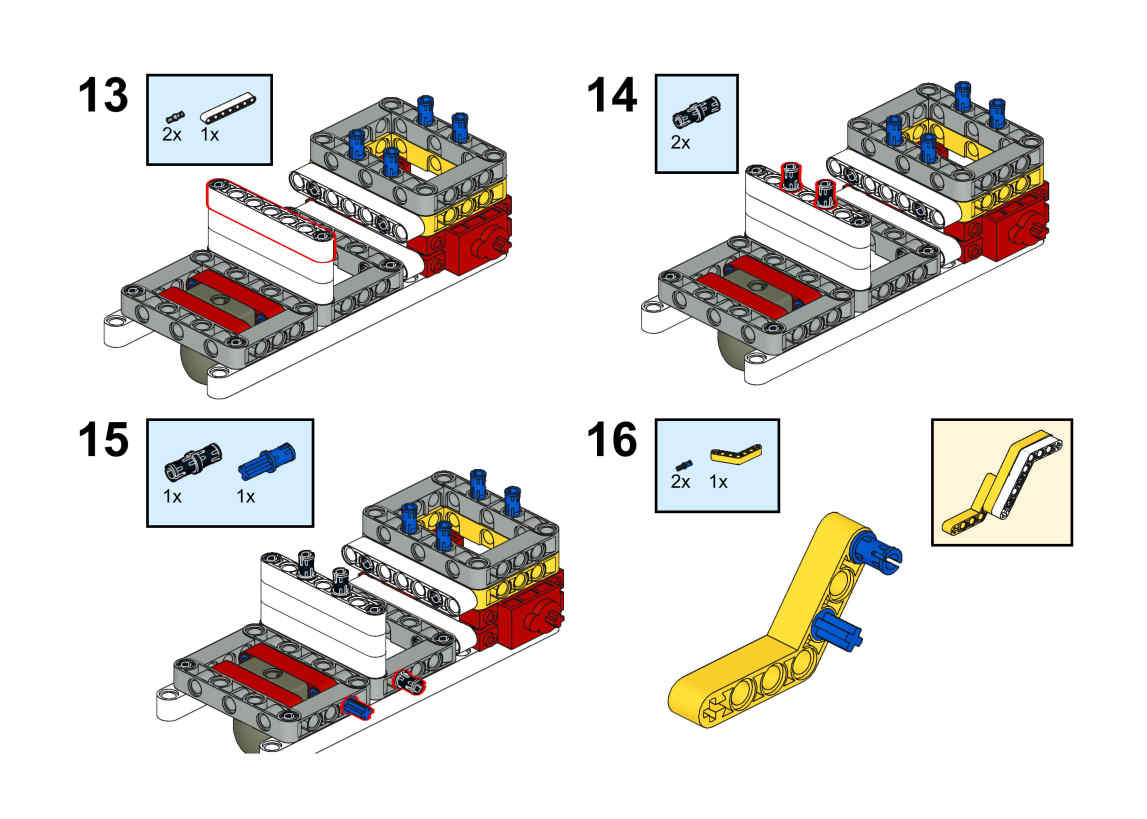
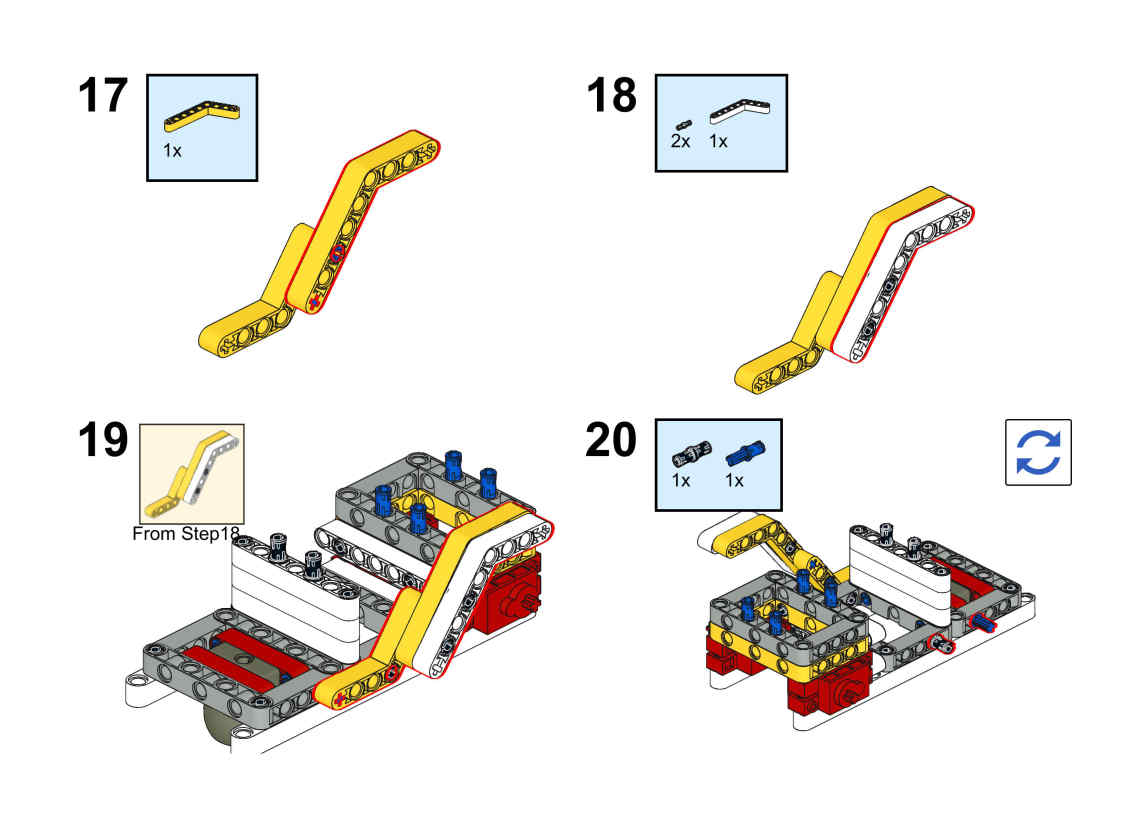
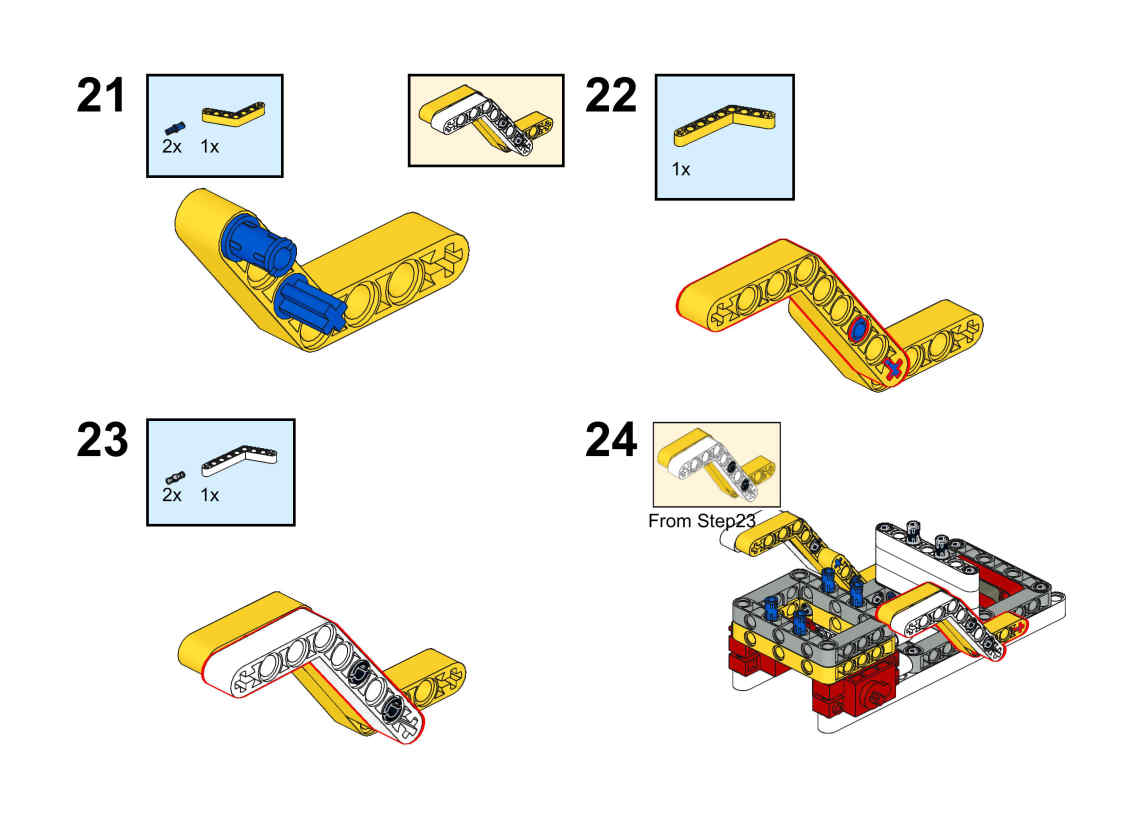
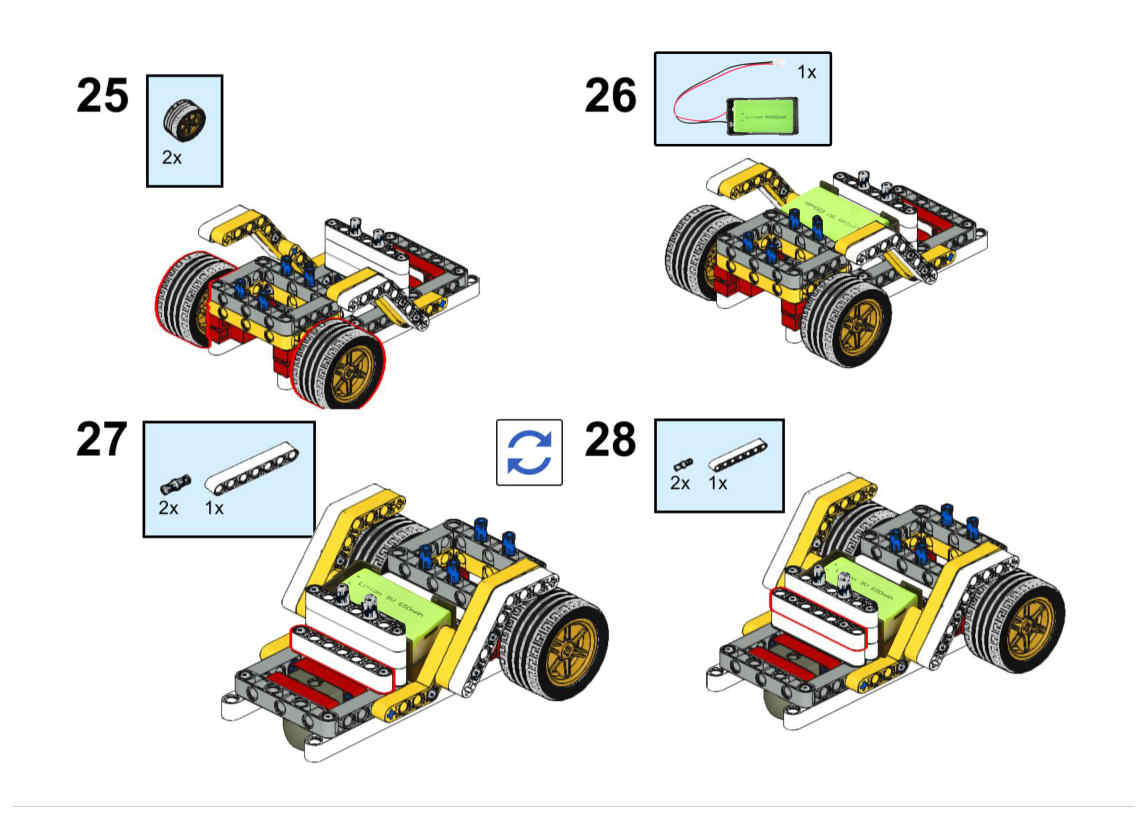
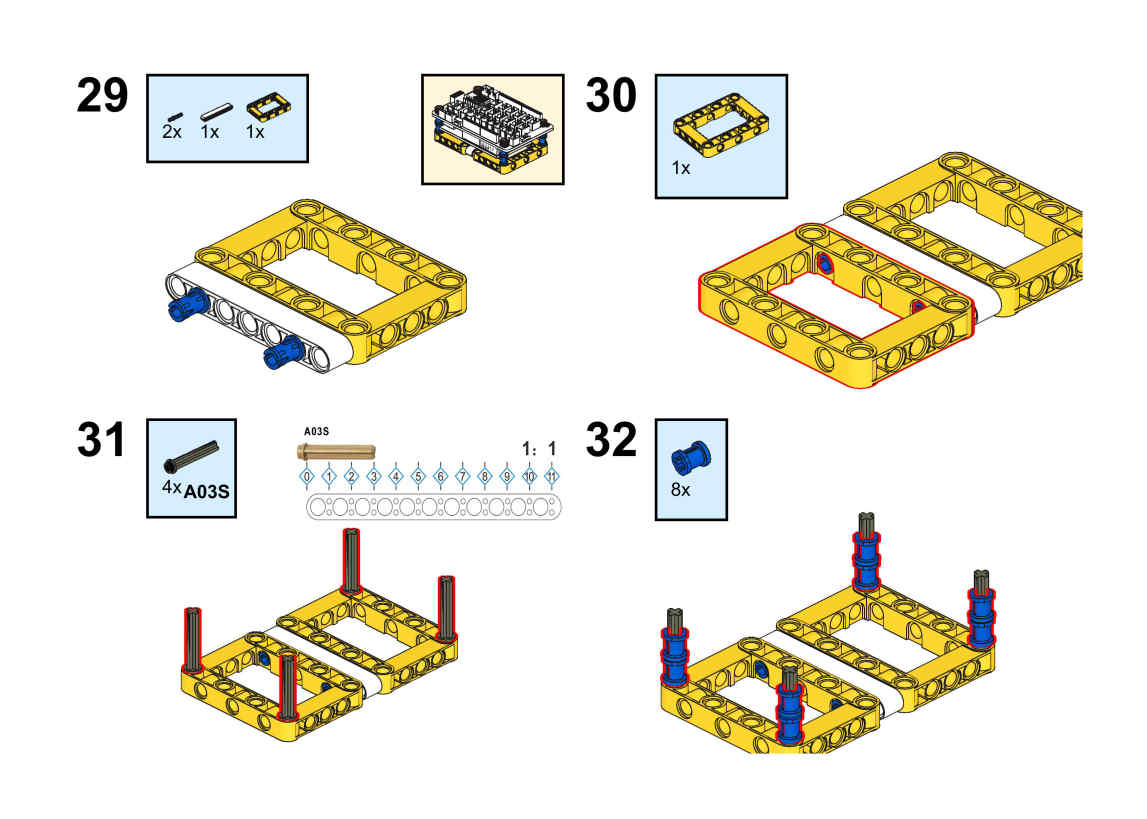
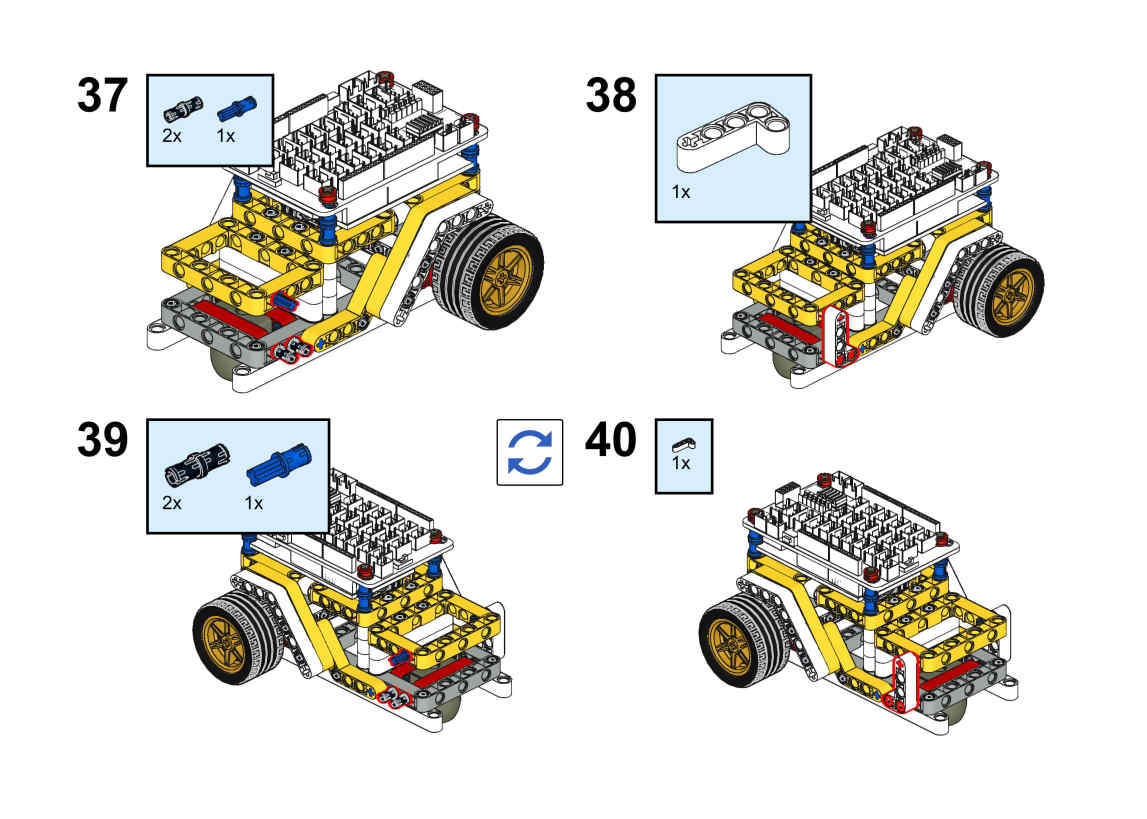
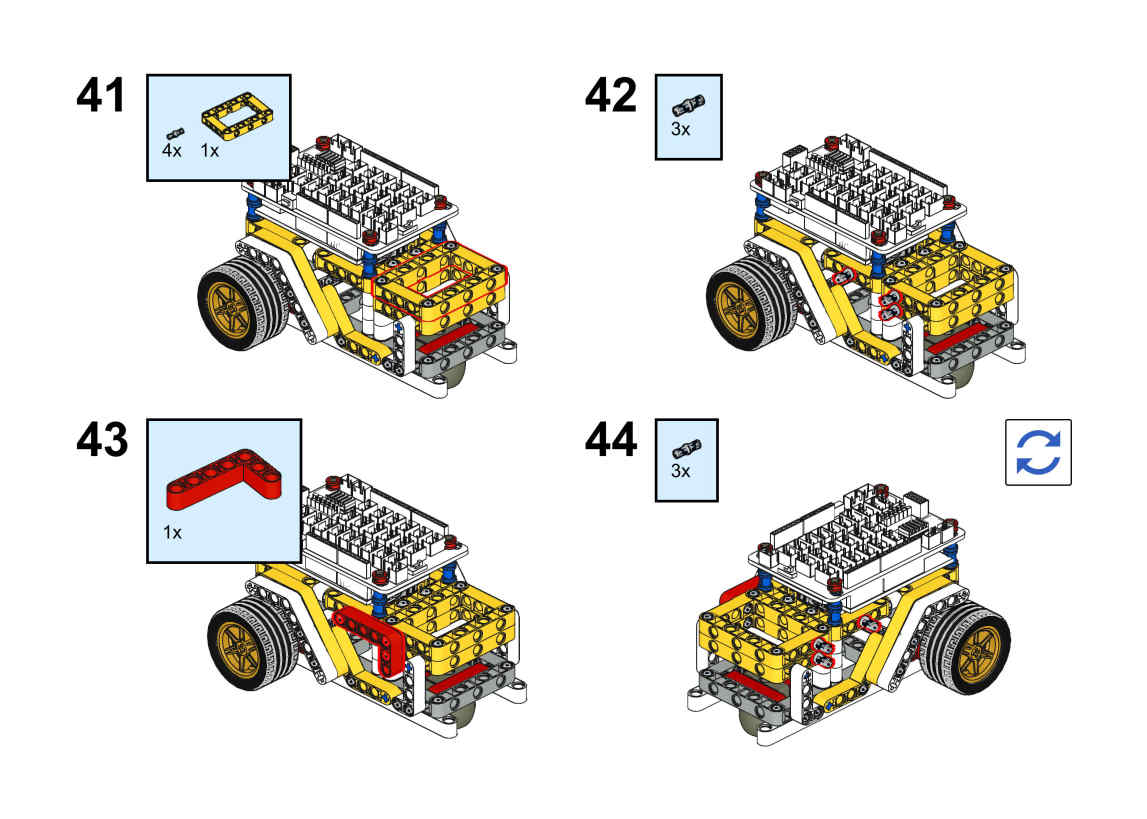
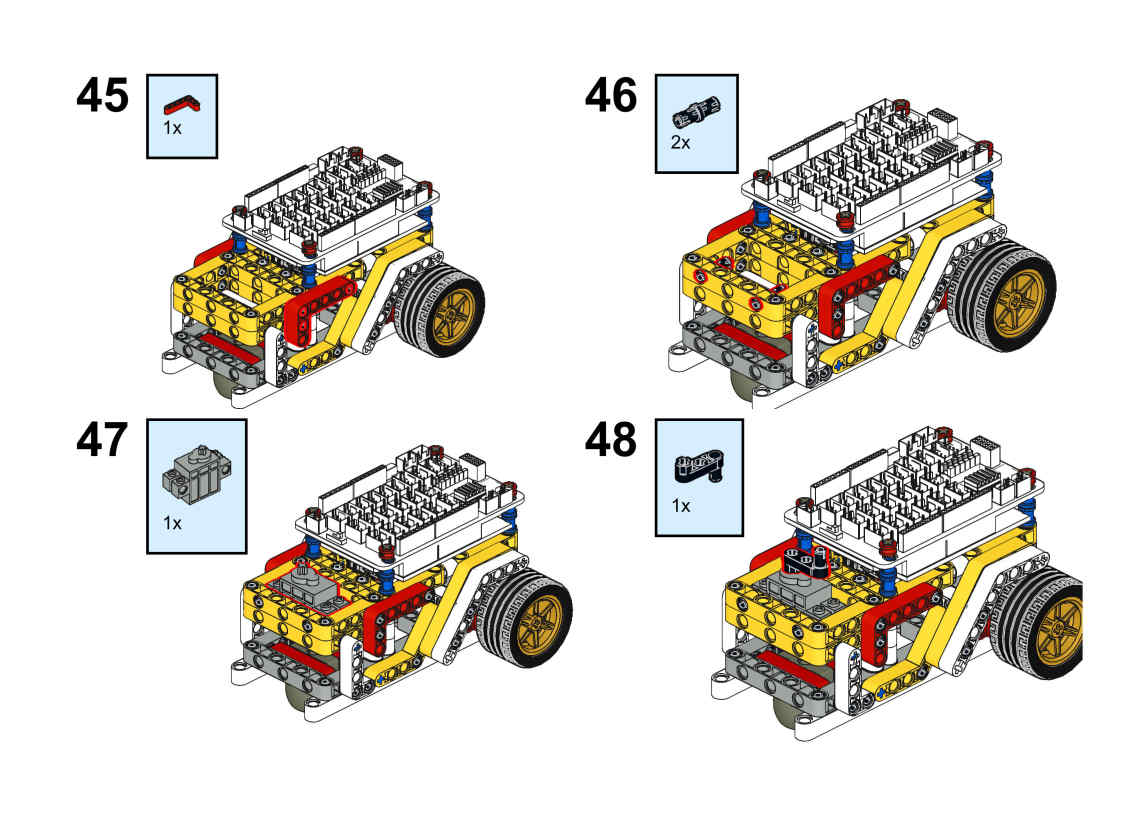
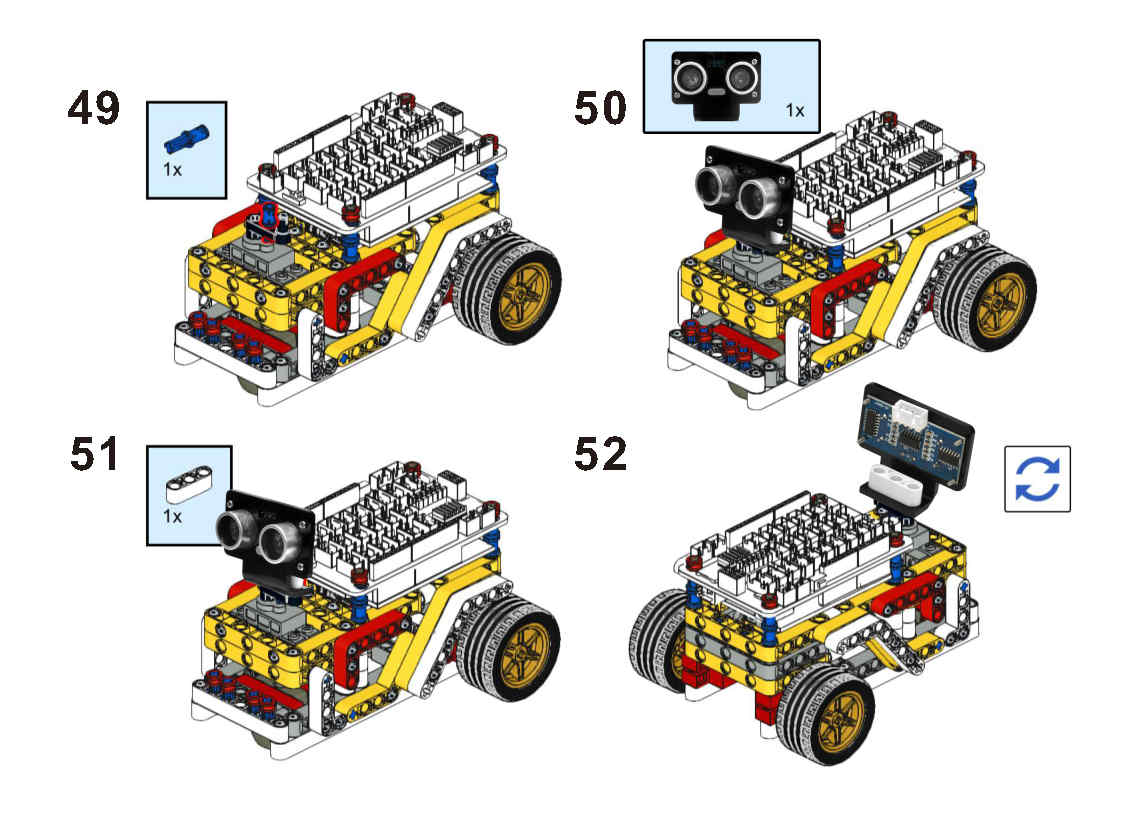
Please follow the building steps to build this robot car, If you want to get clear PDF building steps, please download from https://osoyoo.com/picture/Building_Robot_Car/lesson4/LESSON4.pdf
Note: If you have built the robot car for lesson1, please skip to the step35 in this PDF.
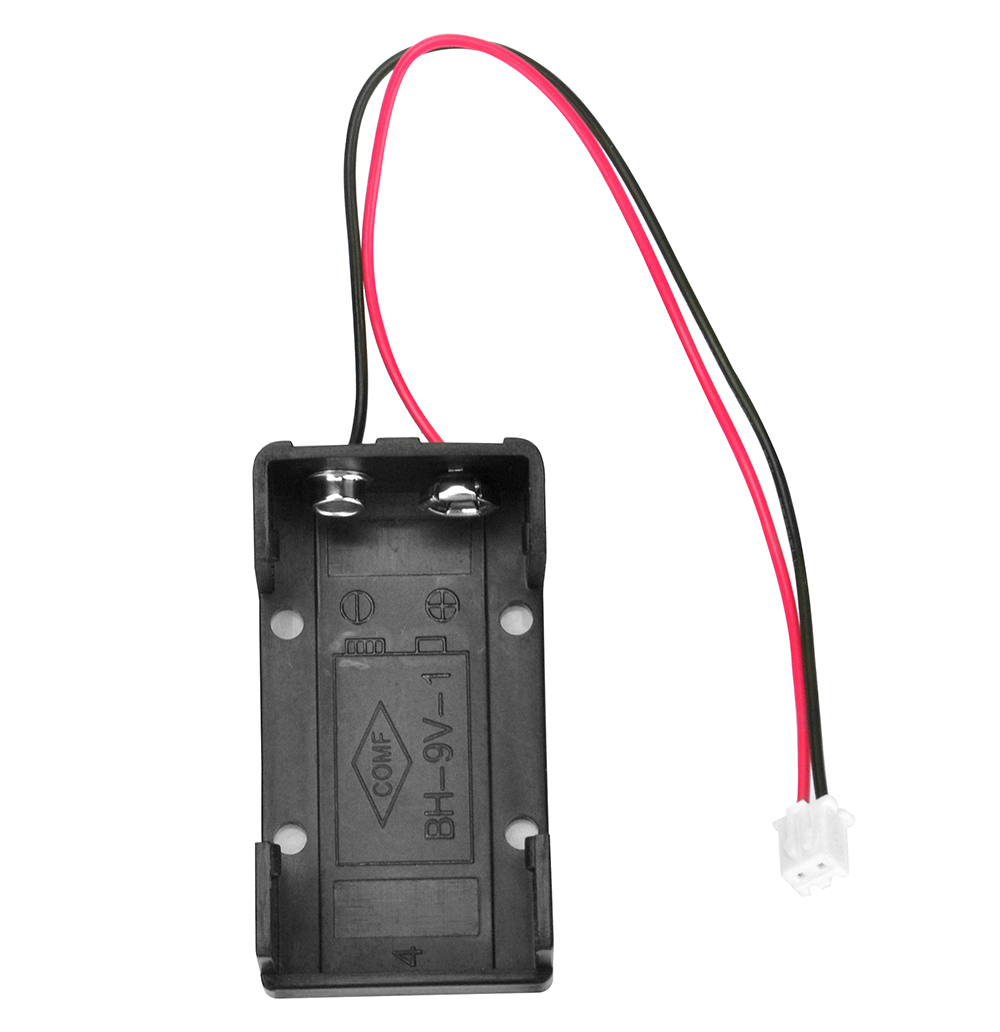
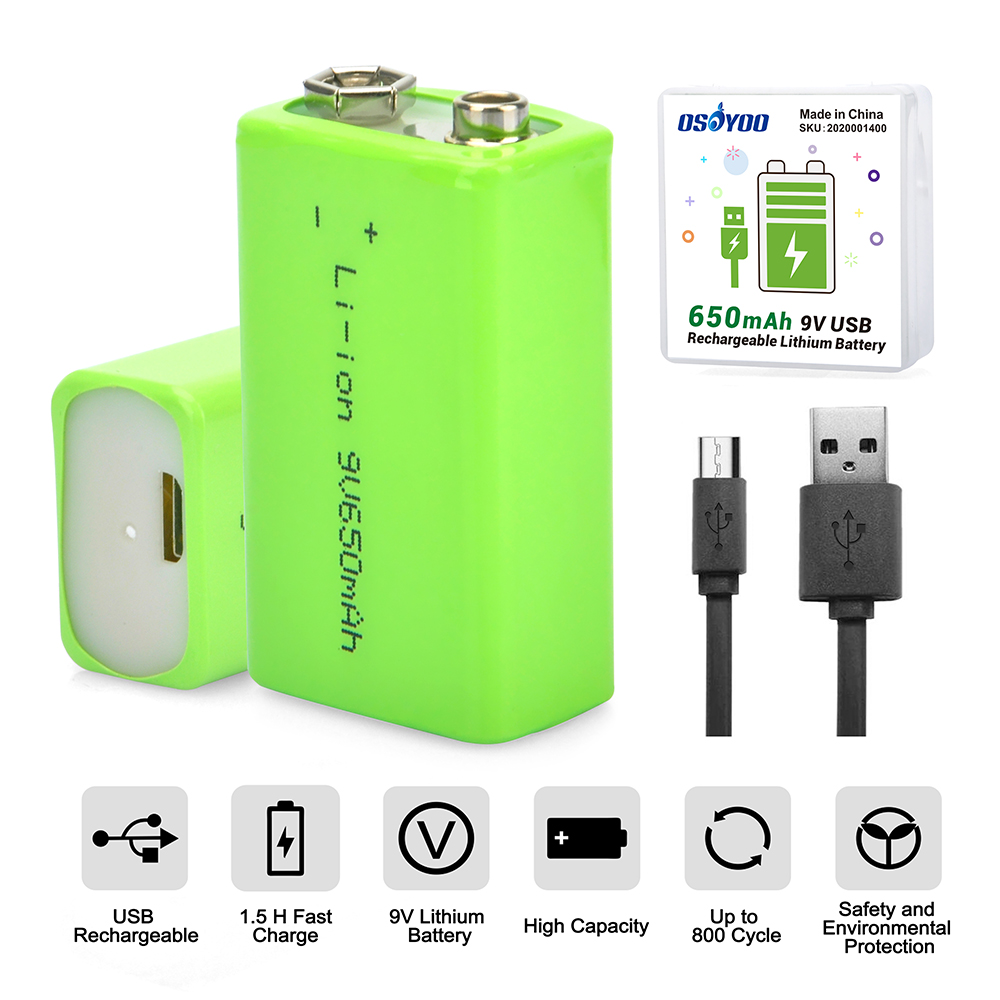
Please connect motors and 9V battery case as lesson1.
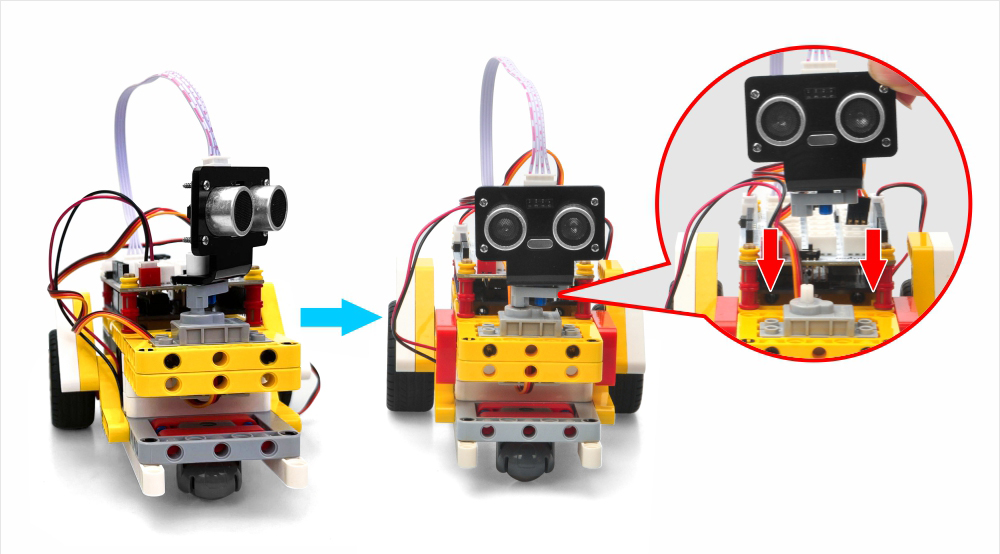
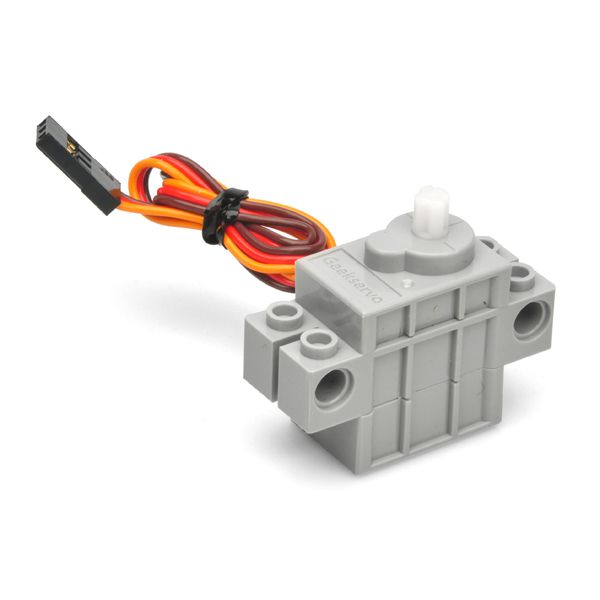
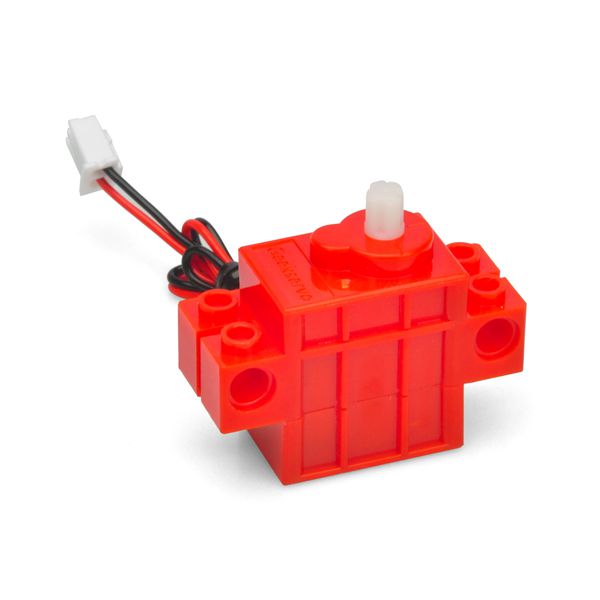
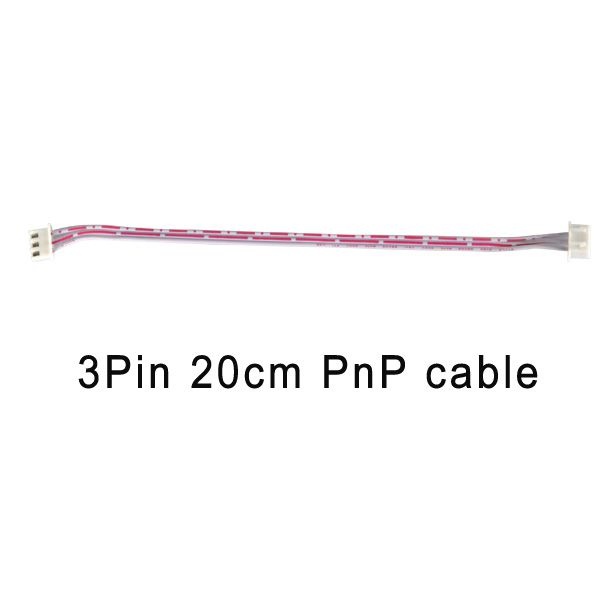
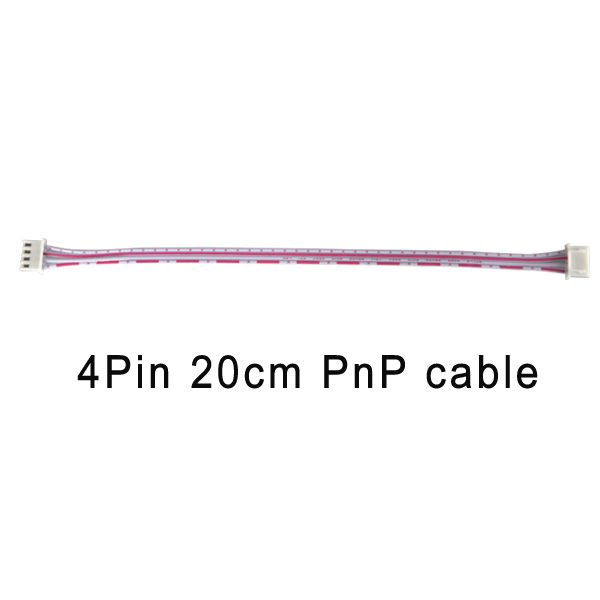
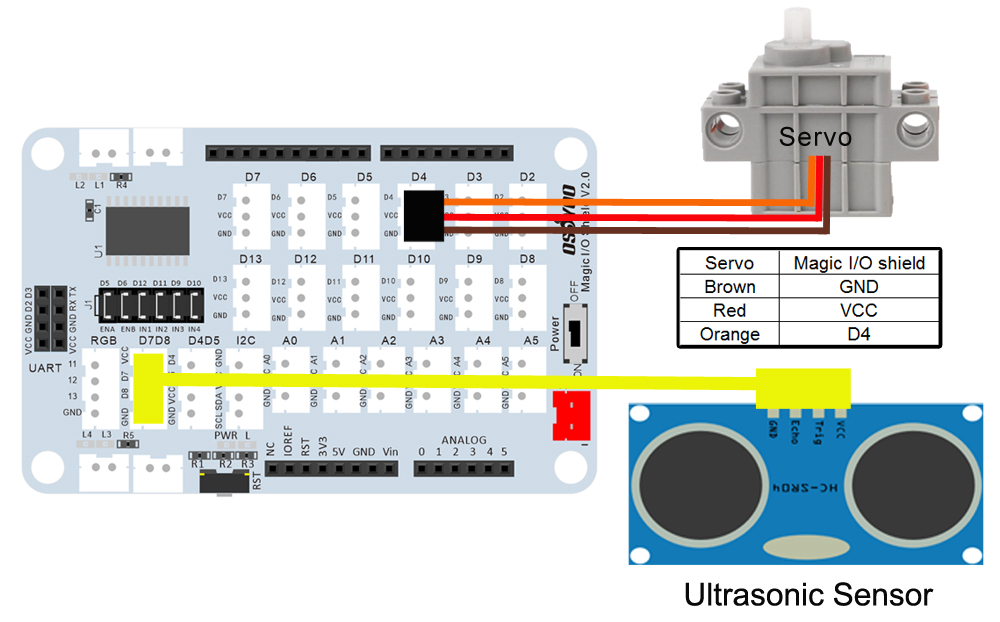
Then Connect SG90 servo motor to D4 port of OSOYOO Magic I/O shield, Ultrasonic module sensor to the D7D8 port of the Magic I/O shield with a 4-pin PNP cable as below:
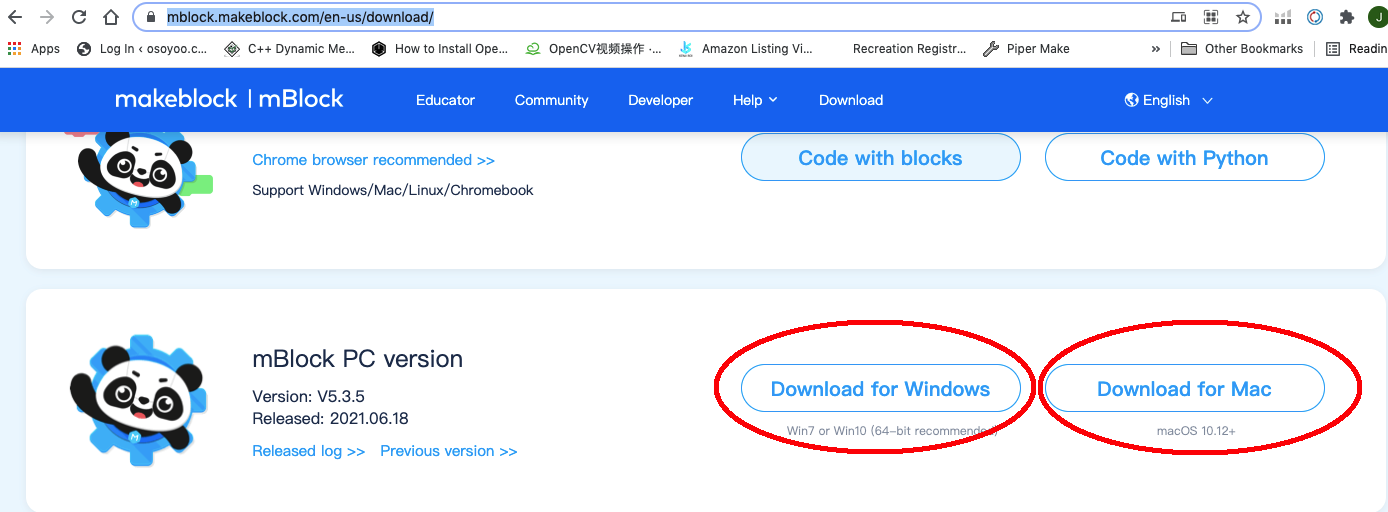
Step 3) Run the mBlock PC software by double click the lovely Panda icon. you will see mBlock UI as following picture. Please delete the default device CyberPi by click the cross in the red circle.
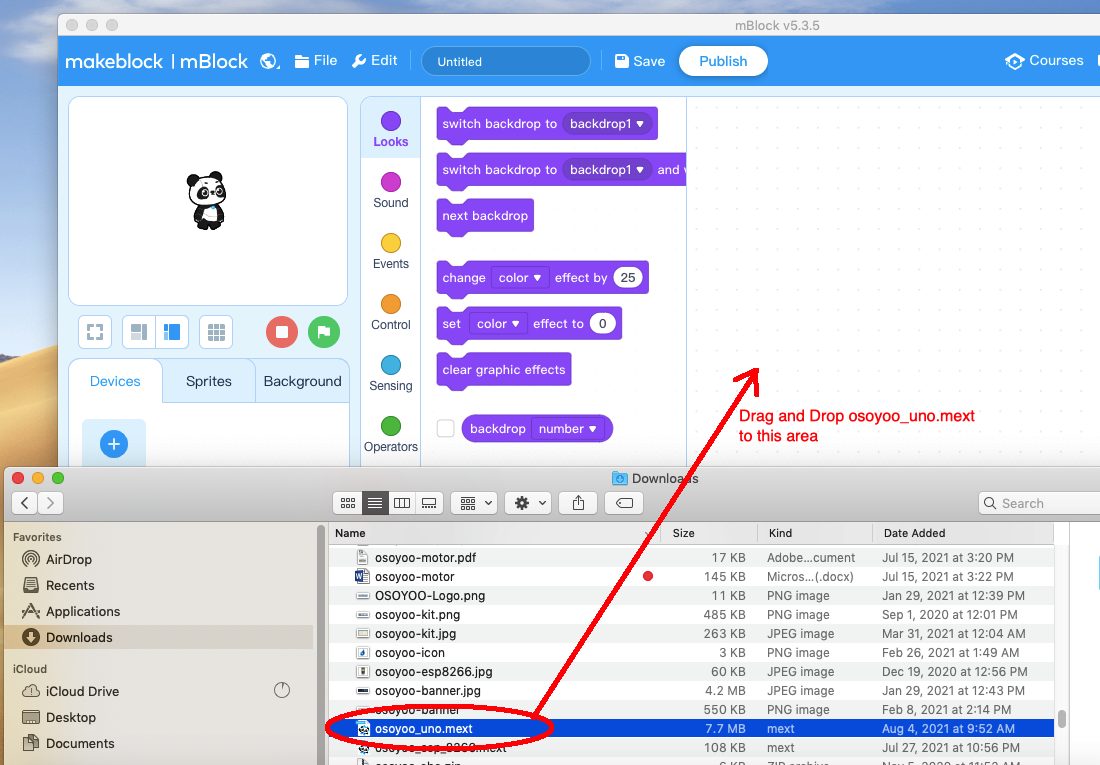
Step 4) Drag and Drop osoyoo_uno_mext file(downloaded in Step 2) to mBlock software as following:
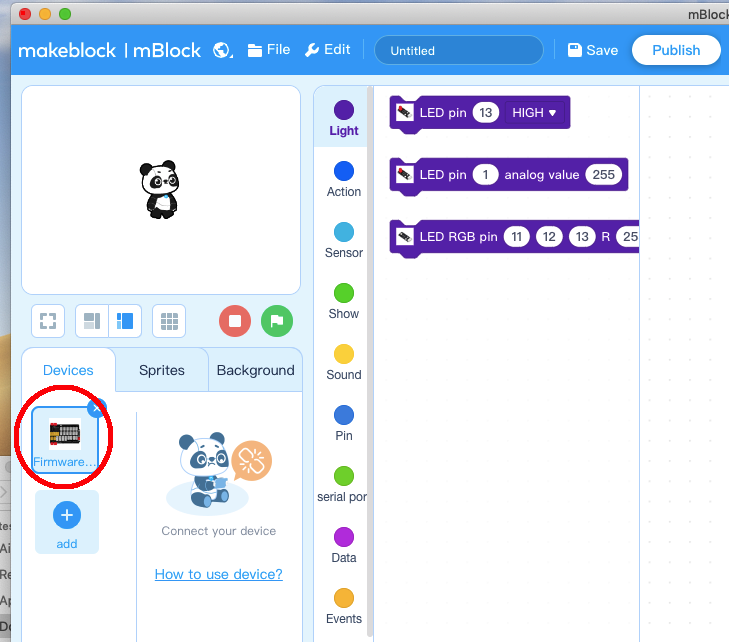
Now you will see a new device firmware in mBlock, see following picture:
Now mBlock software and OSOYOO_UNO device firmware have been successfully installed in our PC!
Now we will show you how to use blocks to turn above idea into reality.
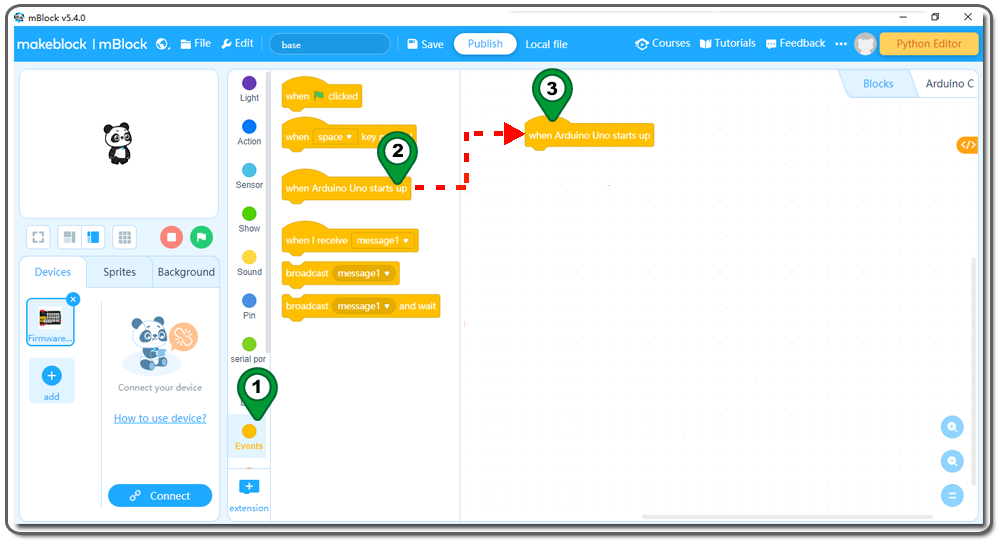
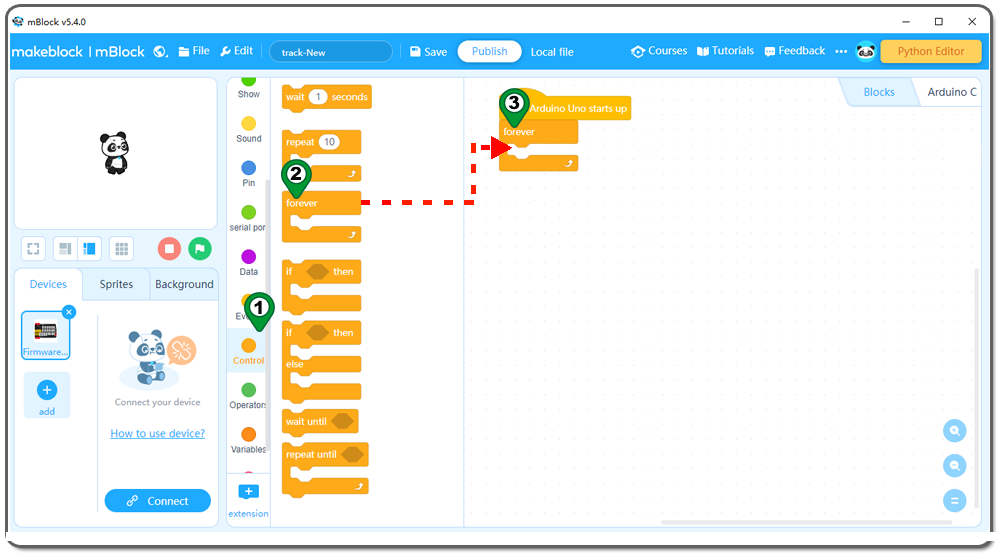
Step 5: Click Events, add when Arduino Uno starts upblock to the top:
Step 6: Click Control, then Drag and drop Forever block to programming area as following:
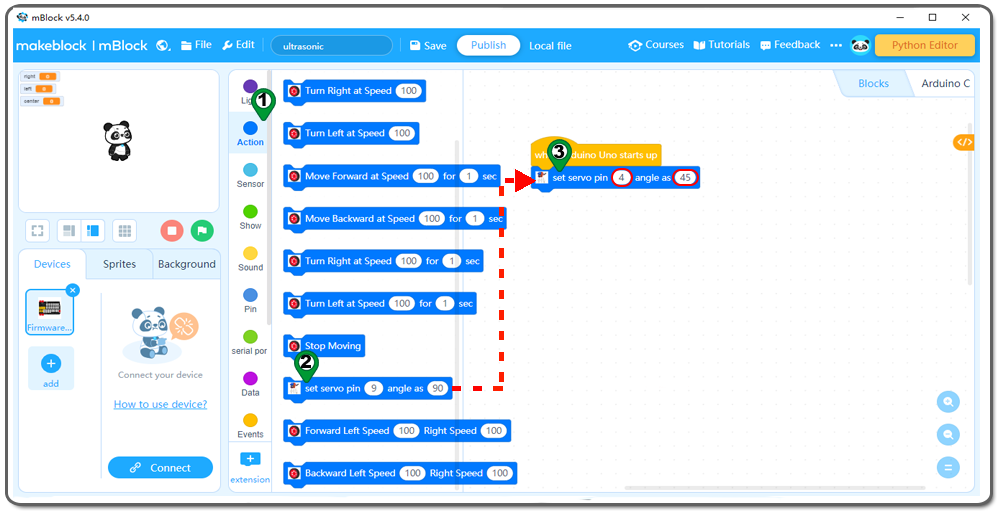
Step 7: Click Action, then Drag and drop set servo pin angle as block to programming area as following
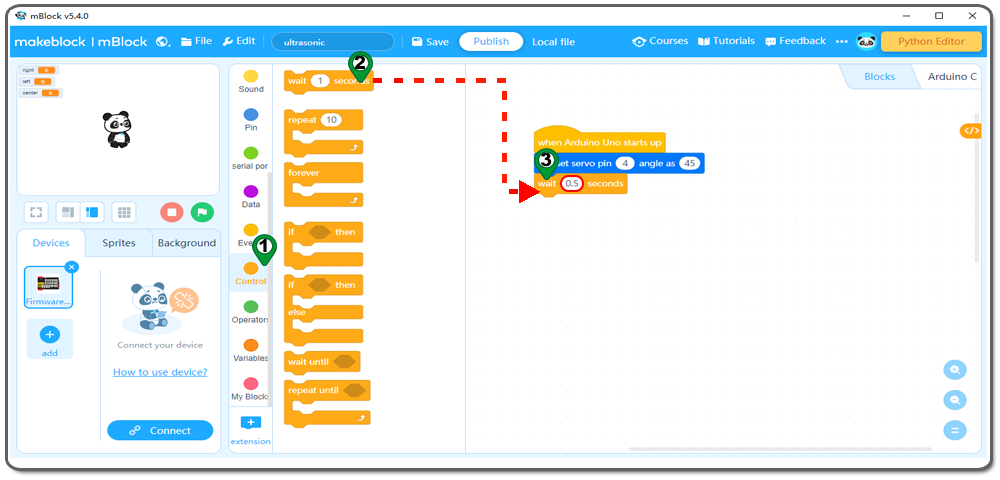
Step 8: Click Control, then Drag and drop wait seconds block to programming area ,set value to 0.5 seconds as following:
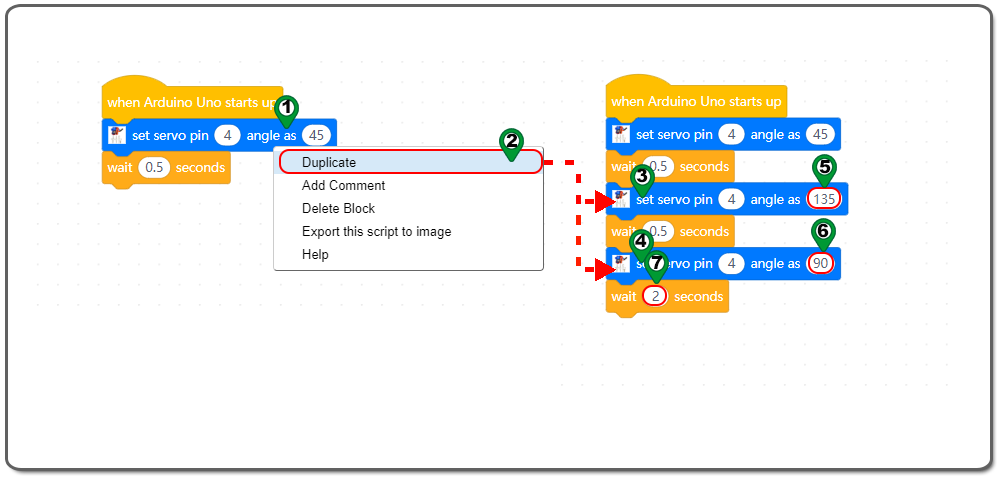
Step 9: Right click set servo pin angle as block ,Click duplicate from the dropdown manual . You will get a duplicated block ,and place it behind the wait seconds block .set the 45 to 135 and 90 value as following figure..
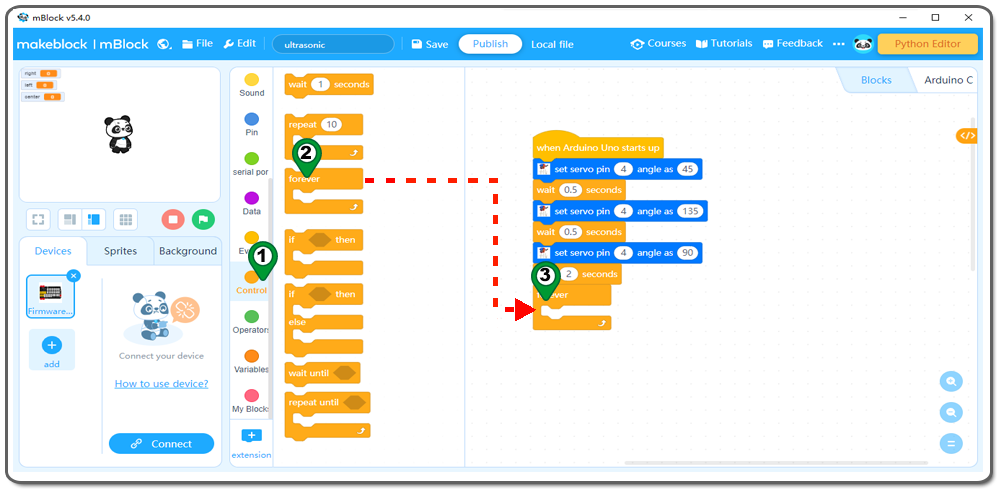
Step 10: Click Control, then Drag and drop forever block to programming area as following:
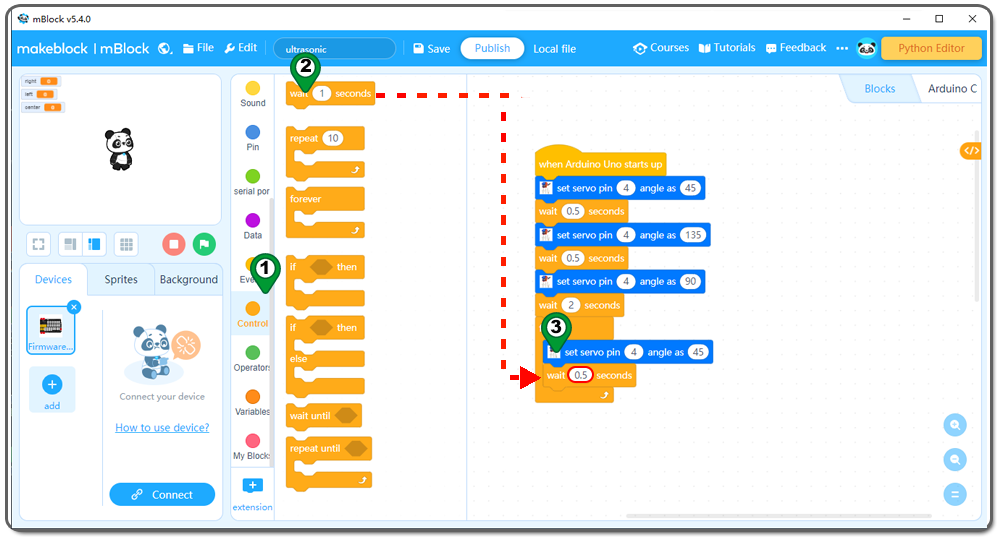
Step 11: Click Action, then Drag and drop set servo pin angle as block to programming area,change the 90 to 45 value as following;
Step 12: Click Control, then Drag and drop wait seconds block to programming area ,set value to 0.5 seconds as following:
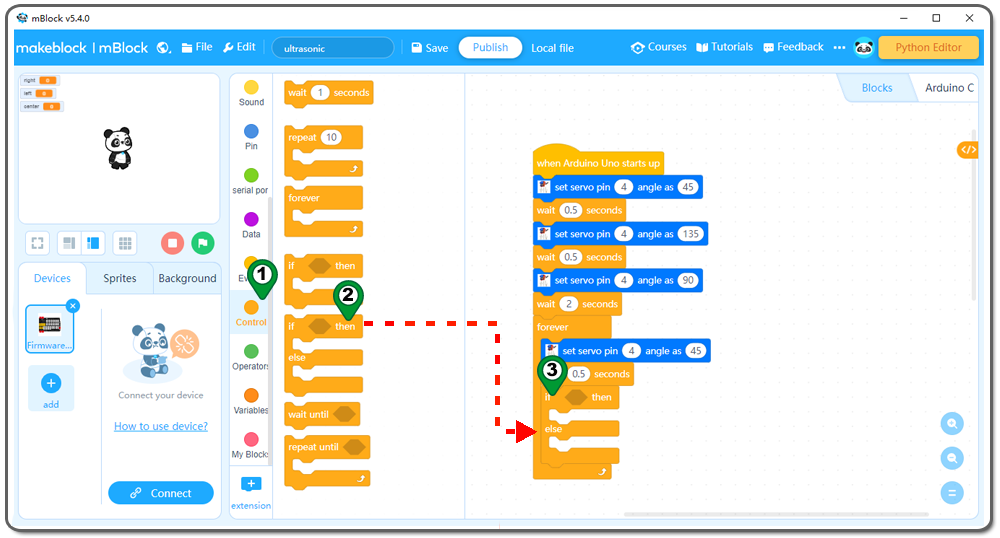
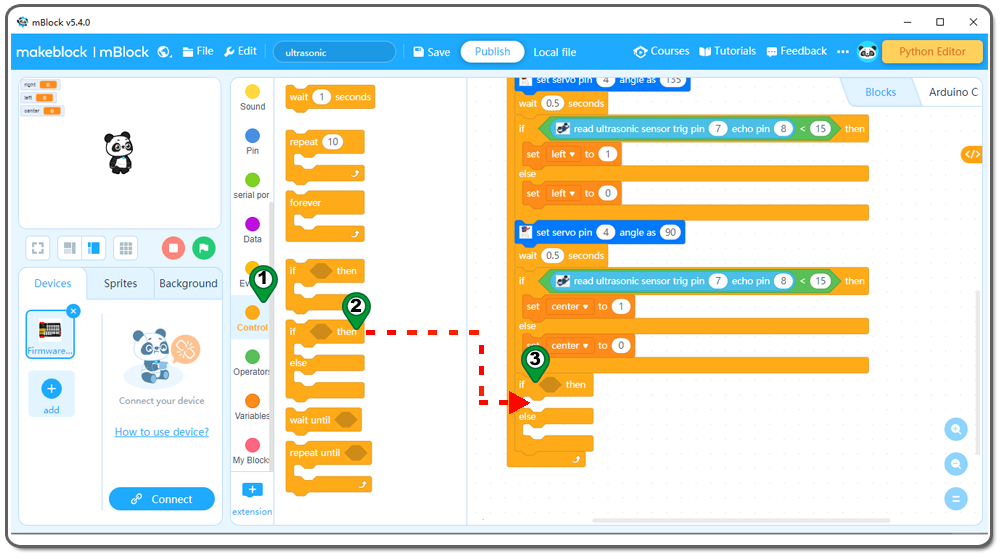
Step 13: Click Control, then Drag and drop if then else block to programming area as following:
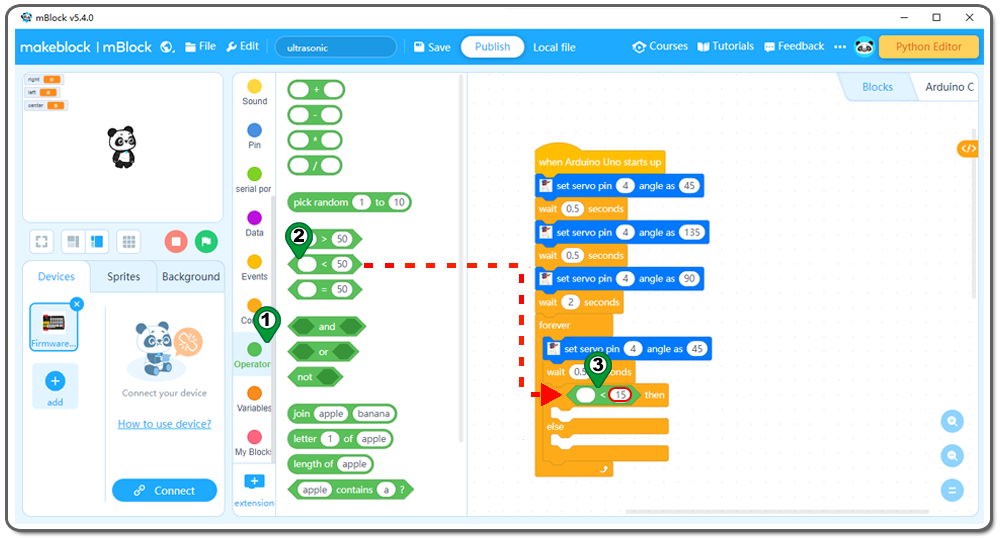
Step 14: Click Operation, then Drag and drop 0<0 block to programming area ,change the 0 to 15 as following:
Step 15:Click Sensor, then Drag and drop read ultrasonic sensor trig pin echo pin block to programming area ,Pin number set to pin 7 and pin 8 as following;
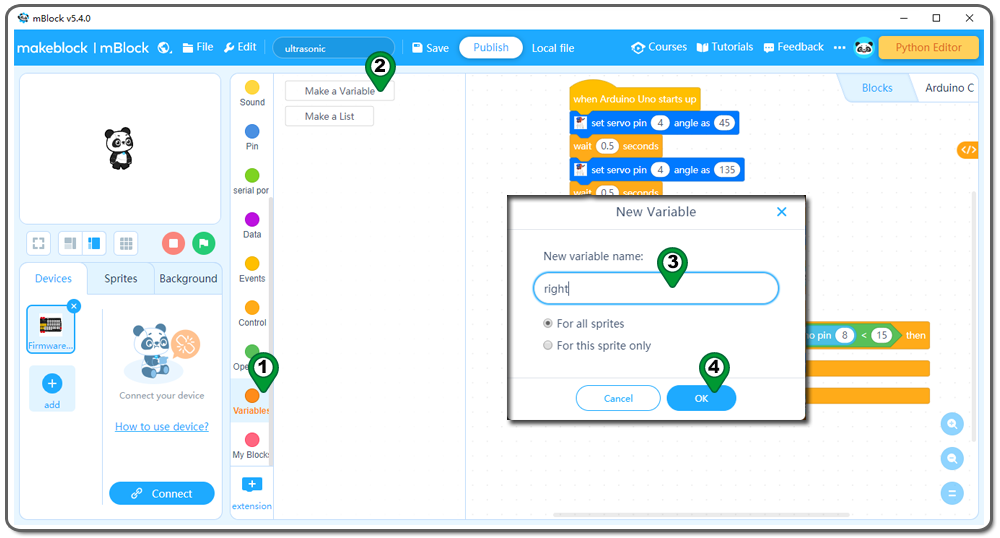
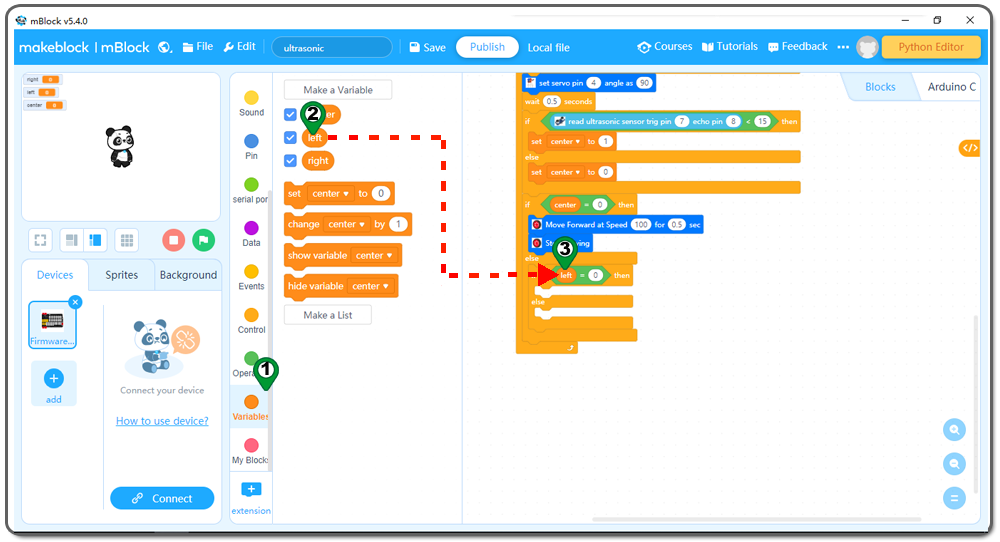
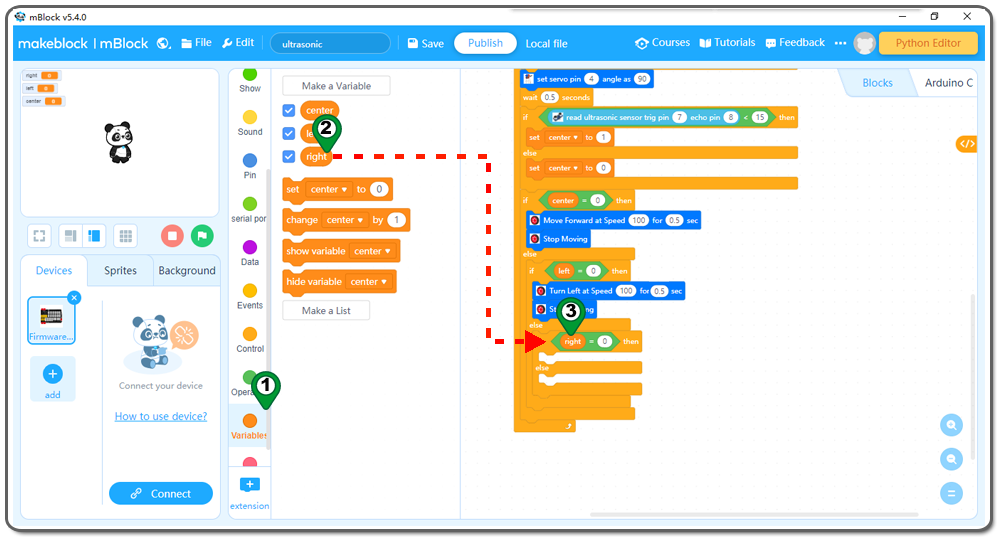
Step 16:Click Variable , then click the make a Variable block ,variable name set to right in the dialog box blank as following. Create left and center variables in the same way;
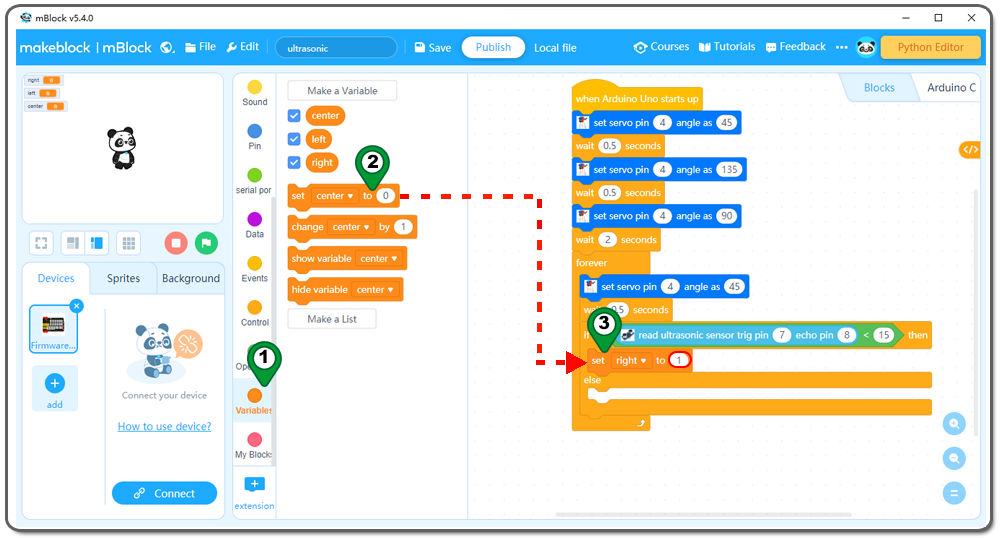
Step 17: Click Variable, then Drag and drop set center to block to programming area ,change the center to right , change value from 0 to 1 , as following:
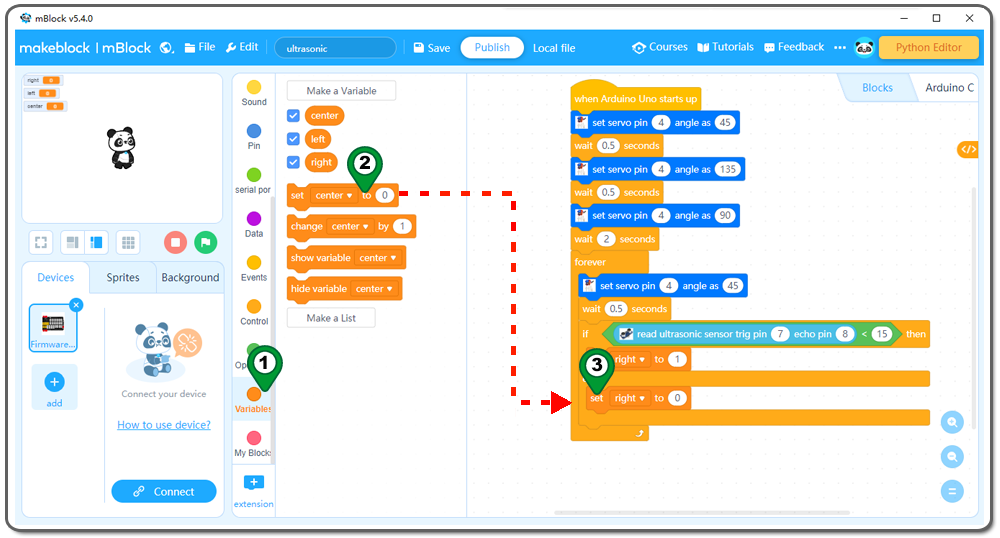
Step 18:Repeat the previous step,change the 1 to 0 as following:
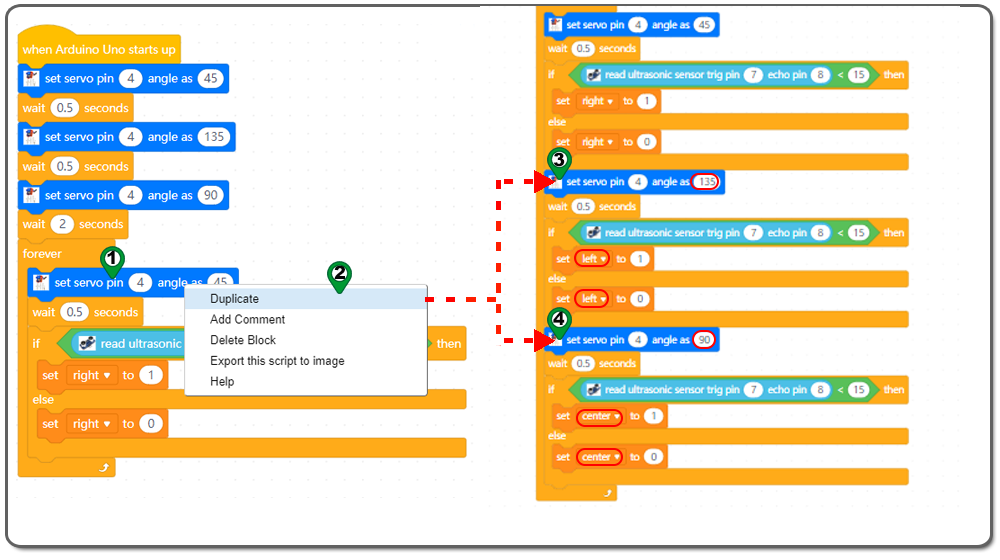
Step 19: Right click set servo pin angle as block ,Click duplicate from the digital write pin to block over . You will get a duplicated block ,and place it behind the wait seconds block .set the 45 to 135 and 90 value,change the right to left and center as following figure.
Step 20: Click Control, then Drag and drop if then else block to programming area as following:
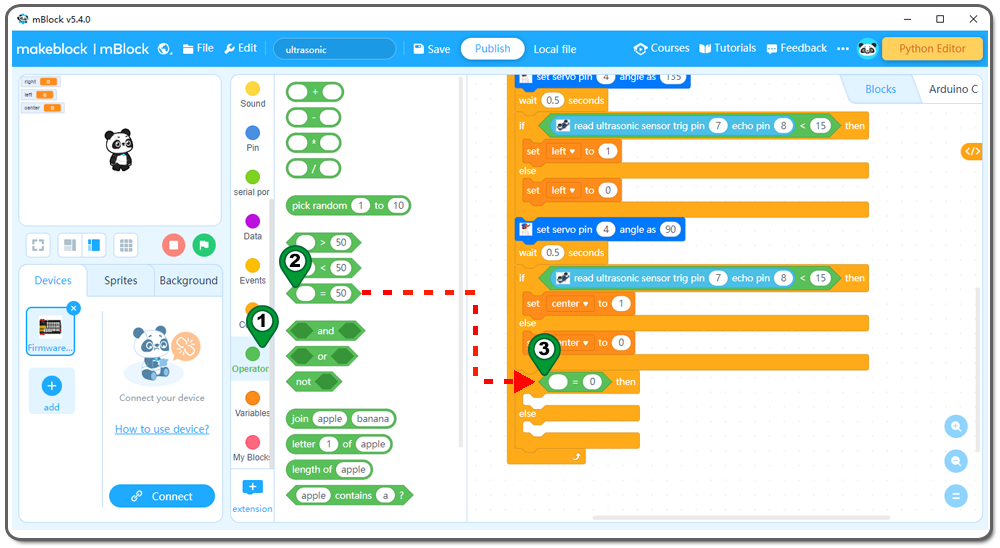
Step 21: Click Operation, then Drag and drop 0=0 block to programming area ,change the 50 to 0 as following:
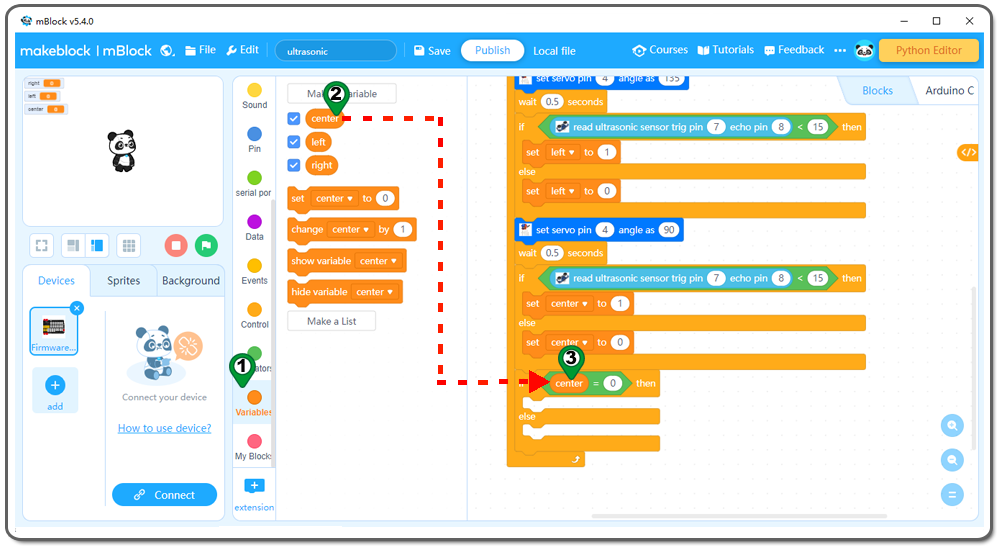
Step 22: Click Variable, then Drag and drop center block to programming area as following:
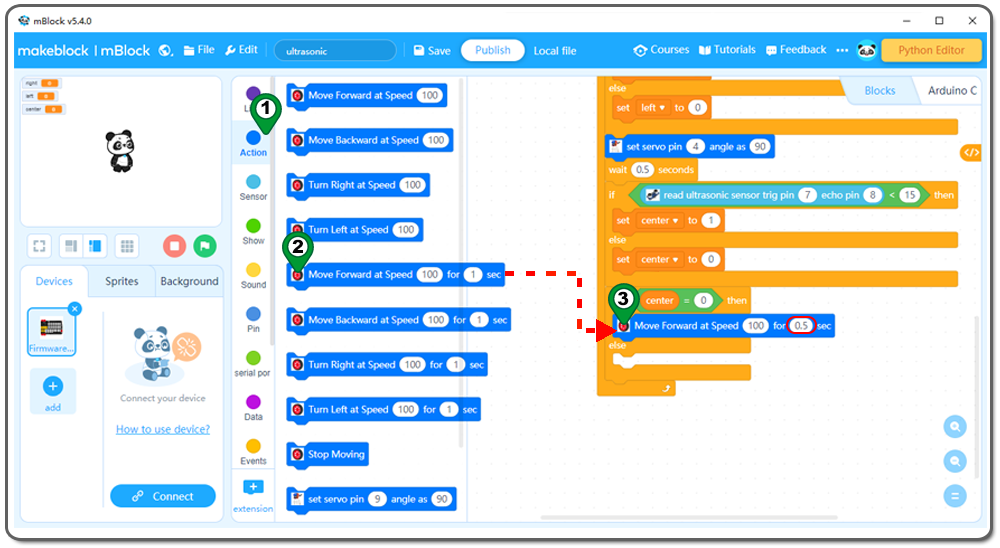
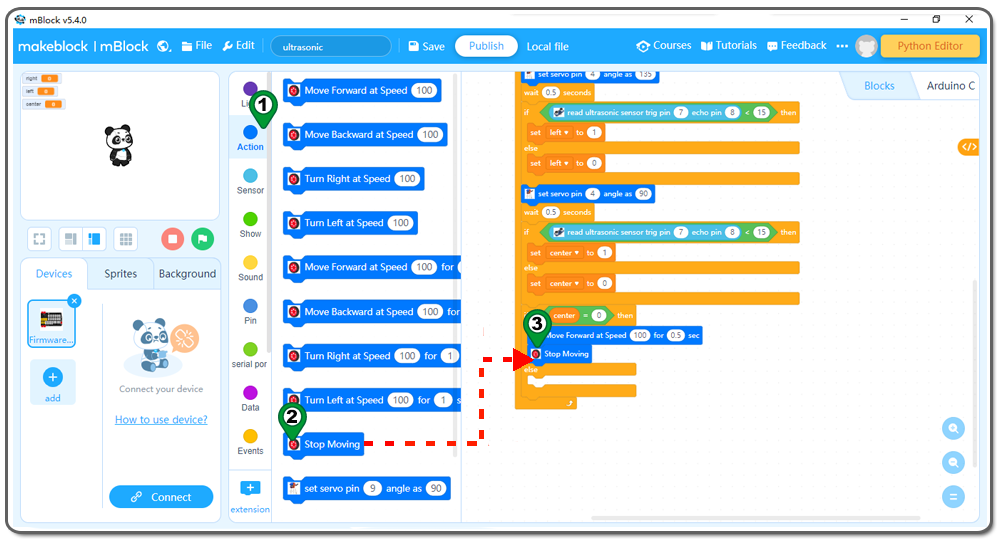
Step 23: Click Action, then Drag and drop Move forward at speed for block to programming area,change the 1 sec to 0.5 sec as following;
Step 24: Click Action again, then Drag and drop Stop Moving block to programming area as following;
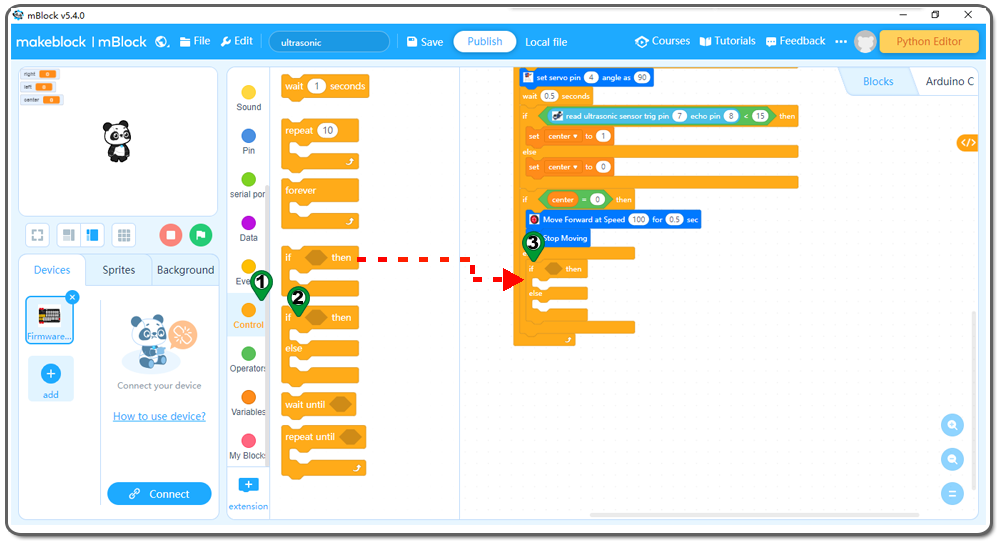
Step 25:Click Control, then Drag and drop if then else block to programming area as following.
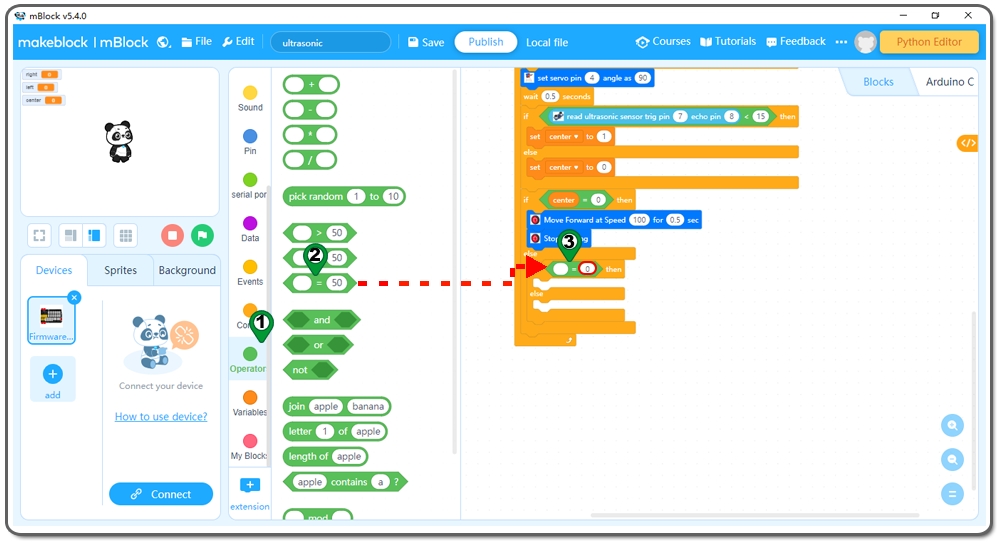
Step 26:Click Operation, then Drag and drop 0=0 block to programming area ,change the 50 to 0 as following;
Step 27: Click Variable, then Drag and drop left block to programming area as following:
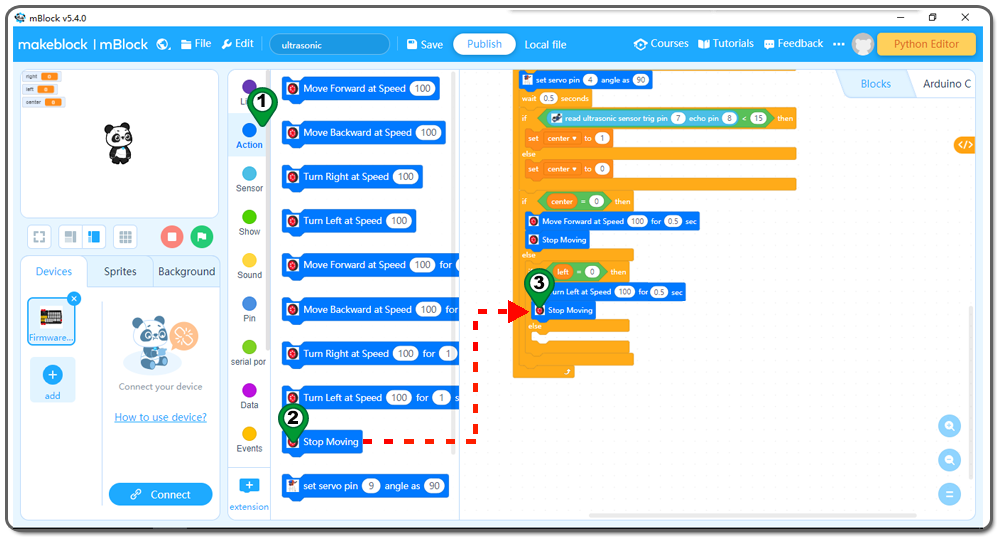
Step 28: Click Action, then Drag and drop Turn Left at speed for block to programming area,change the 1 sec to 0.5 sec as following;
Step 29: Click Action again, then Drag and drop Stop Moving block to programming area as following;
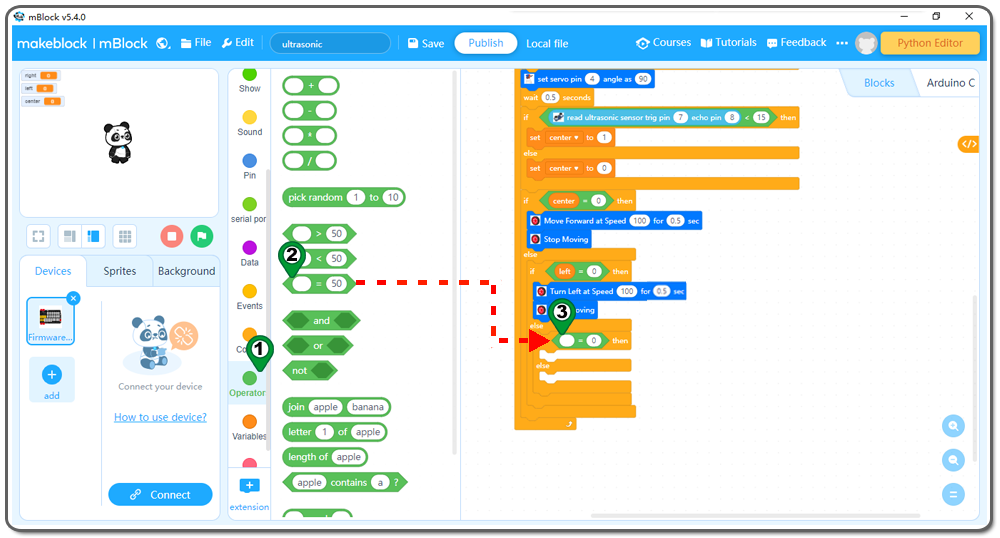
Step 30: Click Control, then Drag and drop if then else block to programming area as following.
Step 31:Click Operation, then Drag and drop 0=0 block to programming area ,change the 50 to 0 as following;
Step 32: Click Variable, then Drag and drop right block to programming area as following:
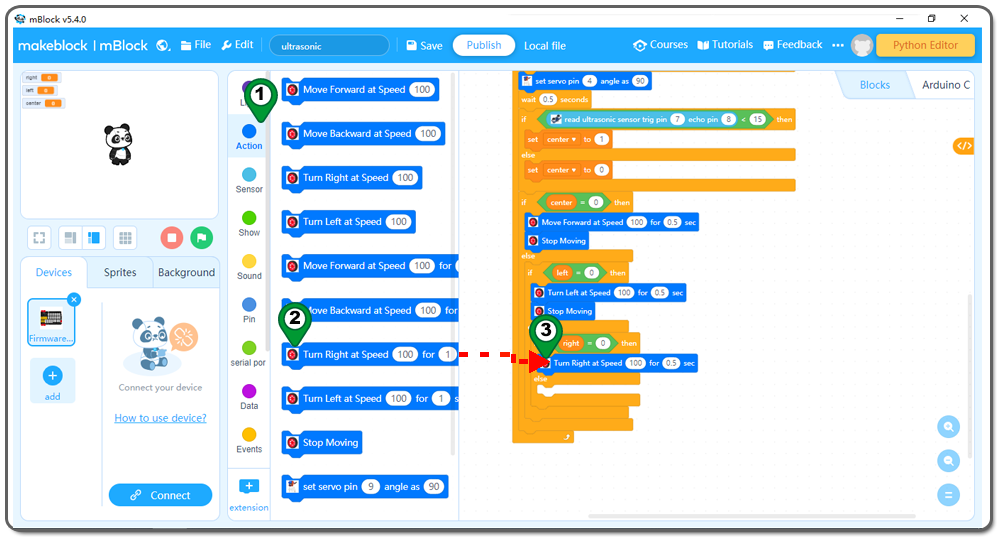
Step 33: Click Action, then Drag and drop Turn Right at speed for block to programming area,change the 1 sec to 0.5 sec as following;
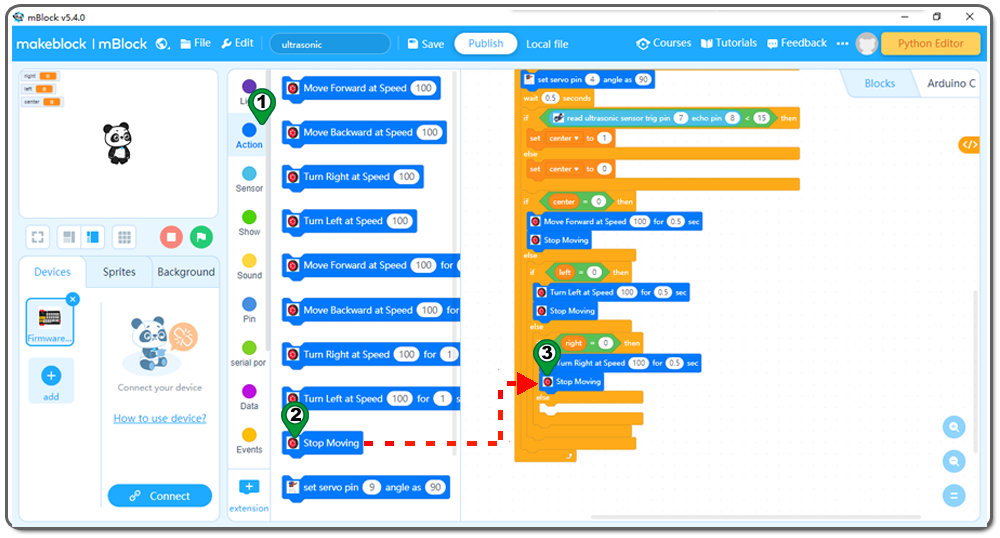
Step 34: Click Action again, then Drag and drop Stop Moving block to programming area as following;
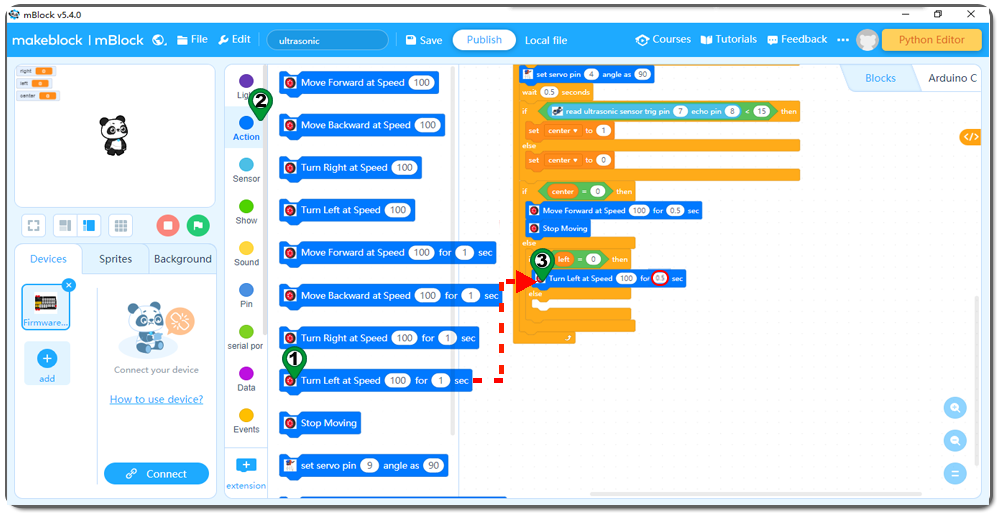
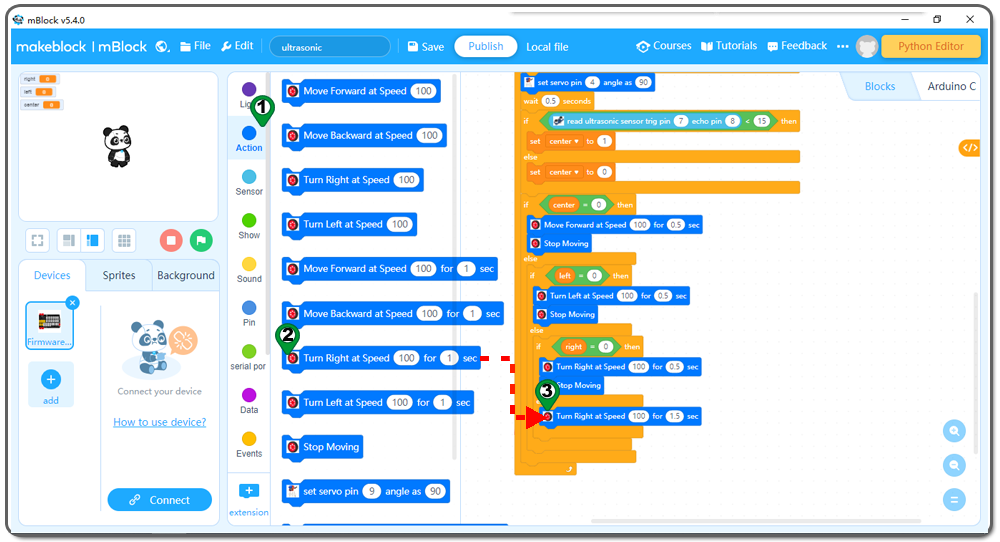
Step 35: In Action, then Drag and drop Turn Right at speed for block to programming area,change the 1 sec to 1.5 sec as following;
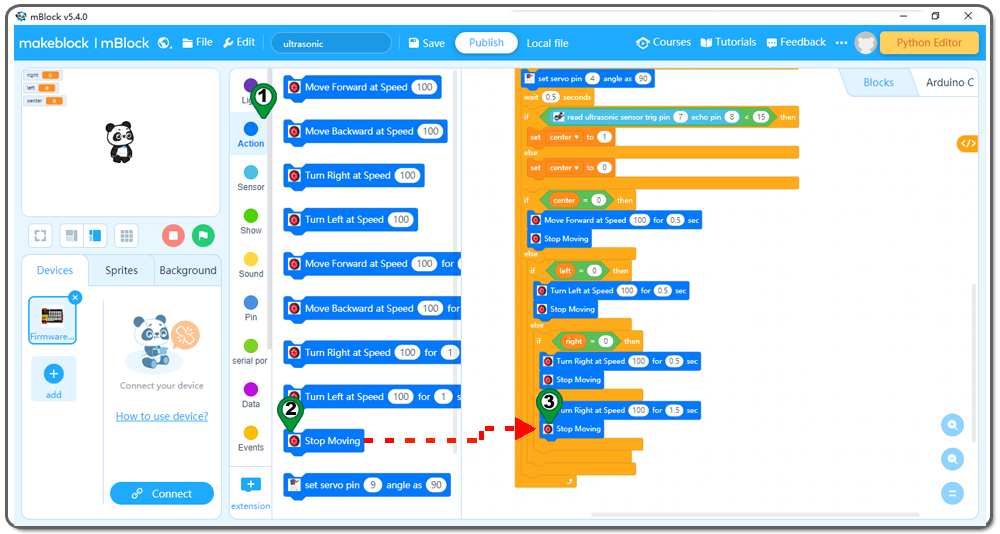
Step 36: In Action, then Drag and drop Stop Moving block to programming area as following;
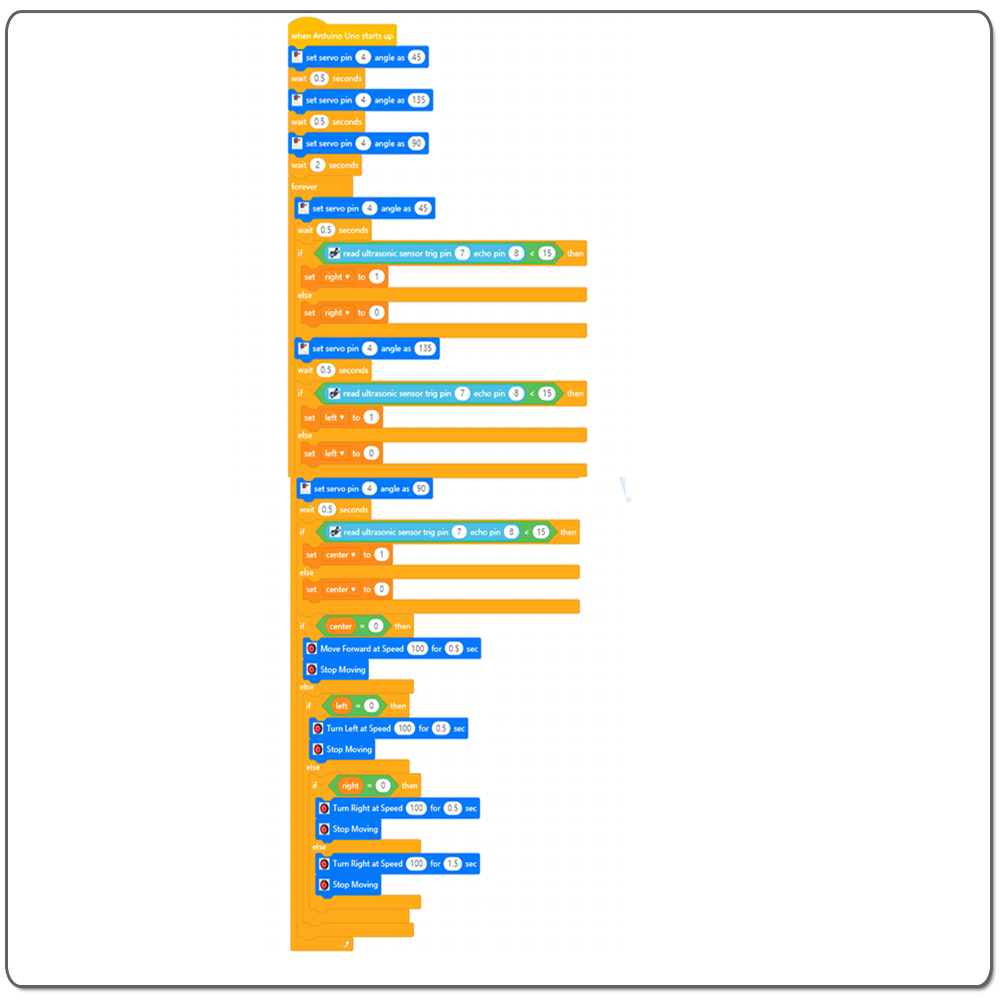
Now we have completed the block programming. The final blocks look like following:
Now all the programming blocks have been completed! From above picture, the logic is pretty straight forward:
When Arduino is started, computer will enter a dead loop which will check the button status, when button is not pressed, the servo will stop at original position (in my servo 0 degree ) and elevator is in the ground , when button is pressed, the servo arm will rotate from 0 degree position to 180 degree position and the elevator is lifted to the air.
Step 37 Upload the program to OSOYOO basic board
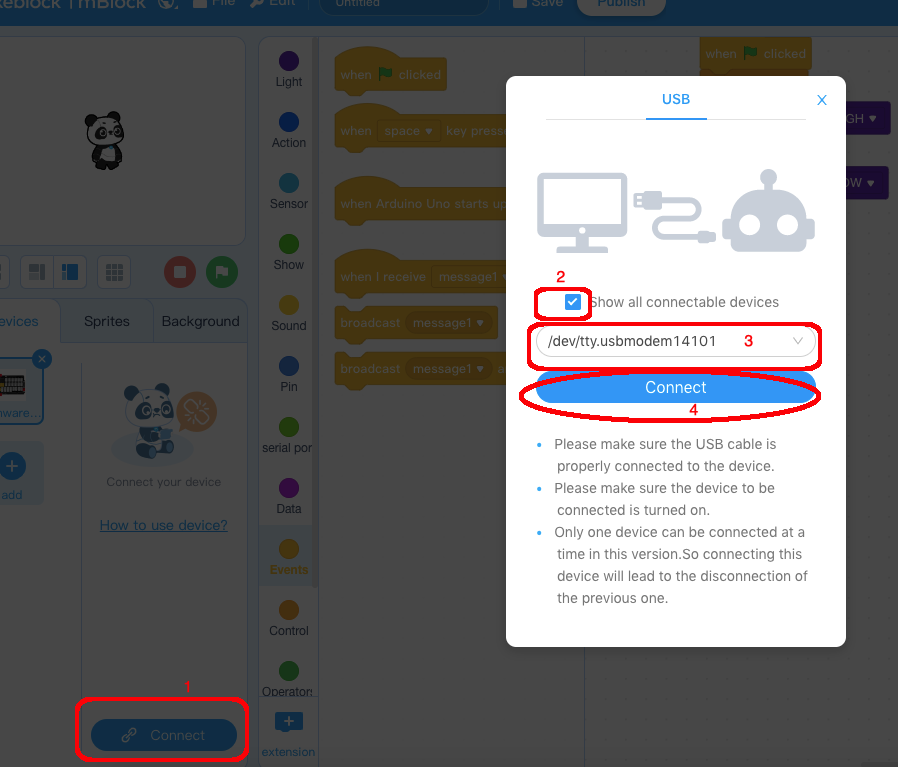
1) Please connect your OSOYOO basic board to your PC with USB cable firstly. Then click the Connect button in the bottom of the mBlock software, you will see a USB window pop up,
2) select Show all connectable device check box , then a device drop-down menu will show up,
3) select your port from device drop-down menu
4) click Connect button to connect your PC to OSOYOO basic board.
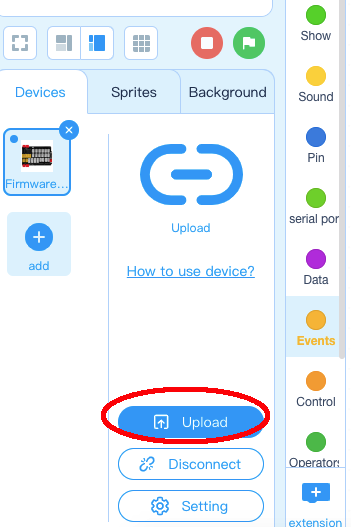
5)After you PC is connected toOSOYOO basic board, please click Upload button in the bottom of your software, then the code will be uploaded to OSOYOO basic board:
In this lesson, we will learn some new program block as following:
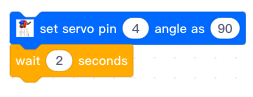
i)Set Servo angle block in Action category:
This block will control a servo in specific Digital port to a specific angle.
Take Above block as example, it will rotate servo in D4 pin to the angle of 90 degree which will make the Ultrasonic sensor facing front. In this case, the sensor will detect if the front side has obstacle.
If you change the angle value from 90 to 45, the sensor will rotate 45 degree to the left and ultrasonic sensor will test left side obstacles.
If you change the angle value from 90 to 135, the sensor will rotate 45 degree to the right and ultrasonic sensor will test right side obstacles.
ii)Yellow Wait Block from Control Category
This block will keep current status for a specific time period before execute next program block
In above example, servo in D4 rotates to 90 degree direction, then stops there for 2 seconds.
iii)Read Ultrasonic Sensor Block from Sensor Section
This block will read distance value from Ultrasonic Sensor
In the above example , the block will read obstacle distance value to an ultrasonic sensor whose trig pin in D7 and echo pin in D8.
If ultrasonic sensor detects obstacle, it will return distance value (integer).
iv)Compare block in Operator category
Compare block will return True or False based on compare value
In the above example, when Ultrasonic Sensor distance value less than the 15 (threshold value), it will return True which means obstacle is detected
Otherwise it will return false which means no obstacle in this direction. You can change the threshold to other value. The bigger the value, the more sensitive your car will act.
The whole programming logic :
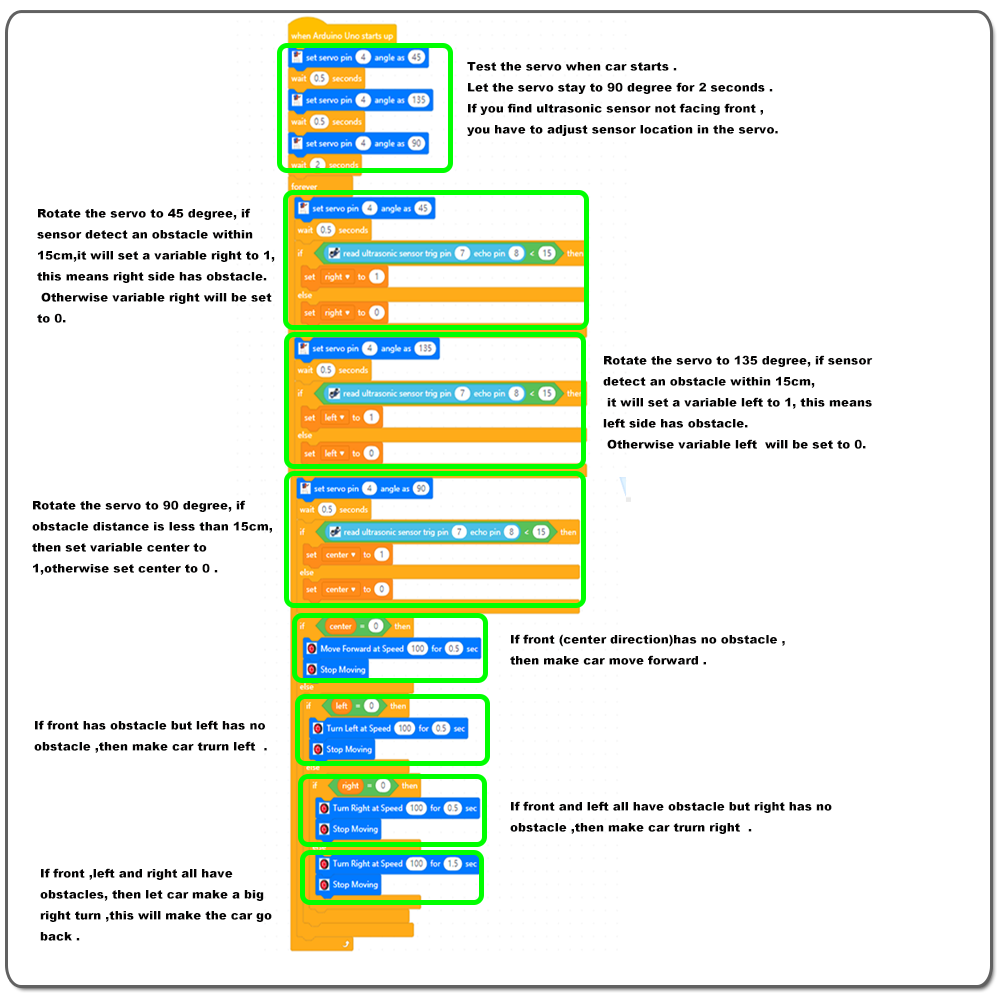
First, program will make ultrasonic sensor to rotate from 45 degree to 135 degree and then stop at 90 degree for 2 seconds. This will give you a chance to make servo direction alignment. If sensor doesn’t face front during the 2 seconds at 90 degree, you need to adjust the sensor location in servo and make it face to 90 degree.
Then the sensor enter into a forever loop which make the car run in obstacle avoidance mode.
The program rotate the servo to 45 degree, if sensor detect an obstacle within 15cm, it will set variable right to 1, this means right side has obstacle. Otherwise variable right will be set to 0.
Then program rotates the servo to 135 degree and 90 degree to test left side obstacle and center direction obstacle. If left side has obstacle within 15 cm, variable left will be set to 1 , If center direction has obstacle within 15 cm, variable center will be set to 1. If no obstacle, then these variables are set to 0.
Now we have known the obstacle status in three variables left, right and center. The program will decide car movement based on these values.
If center direction has NO obstacle (center=0), then car move forward.
If center direction has obstacle but left side has NO obstacle (center=1 but left=0), then car turn left.
If center direction, left side all have obstacle but right side has NO obstacle (center=1 and left=1 but right=0 ), then car turn right.
If center direction, left and right side all have obstacle (center=1 and left=1 right=1 ), then car turn right for long time, this will make the car turn back.
Following picture shows above programming logic in the program blocks.
Adjust the Ultrasonic Sensor direction:
After the code is loaded into robot car, unplug the USB cable from the UNO board and turn on the power switch on the Magic I/O board. Then the ultrasonic sensor will rotate to face the straight forward direction for 5 seconds. If the Ultrasonic sensor is not facing the front position, please turn off the power. Please use a screw driver to adjust the ultrasonic sensor direction and make it facing straight ahead , then turn on the power again and during the early 5 seconds, the sensor should be facing front direction.
After the 5 seconds , the robot car will start to drive and change direction to avoid obstacles automatically.


 Now we have completed the block programming. The final blocks look like following: