
We learned how to install Blynk Local server and Blynk Legacy APP in Blynk lesson 2 . In this lesson, we will use a Blynk legacy APP to turn On/Off an LED in IDE remotely through UDP protocol.

HARDWARE
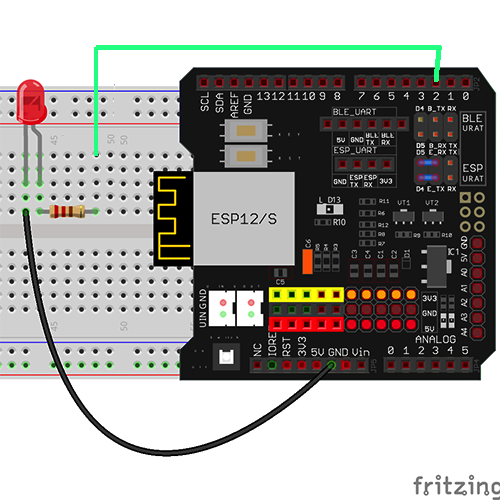
- OSOYOO Basic board x 1OSOYOO ESP8266 WIFI Shield x 1USB cablex 1LED x 1200 ohm resistor x 1
SOFTWARE

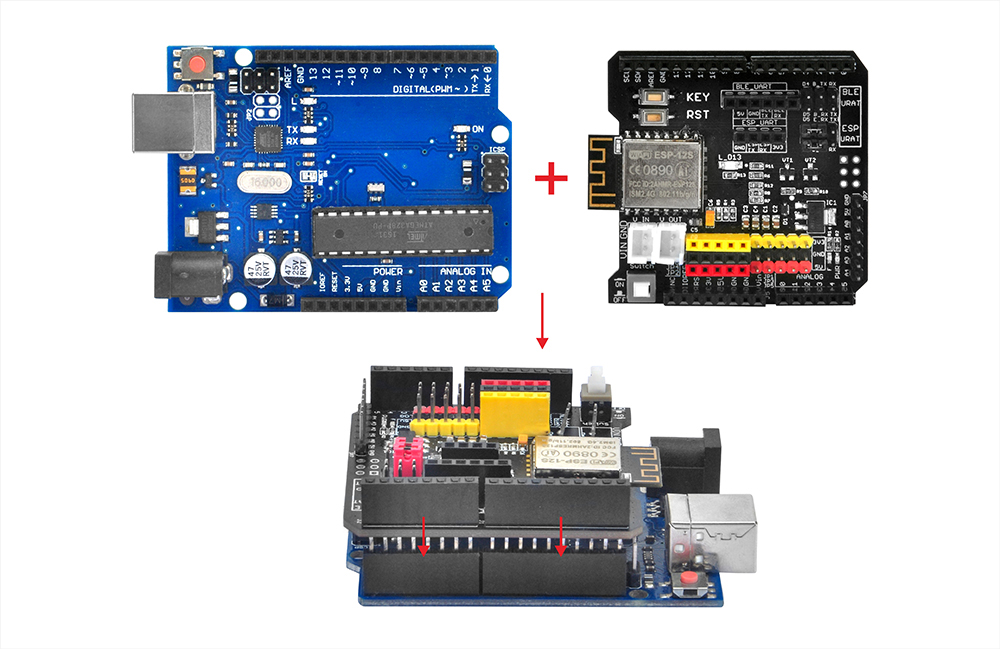
First, please insert the ESP8266 wifi Shield into your baisic board
Connect the LED Module to the D2 port as below:

Prerequisite:
To install above two zip files, please need go to Arduino IDE ->Sketch ->Include Library ->Add ,Zip library to load above zip files into Arduino IDE.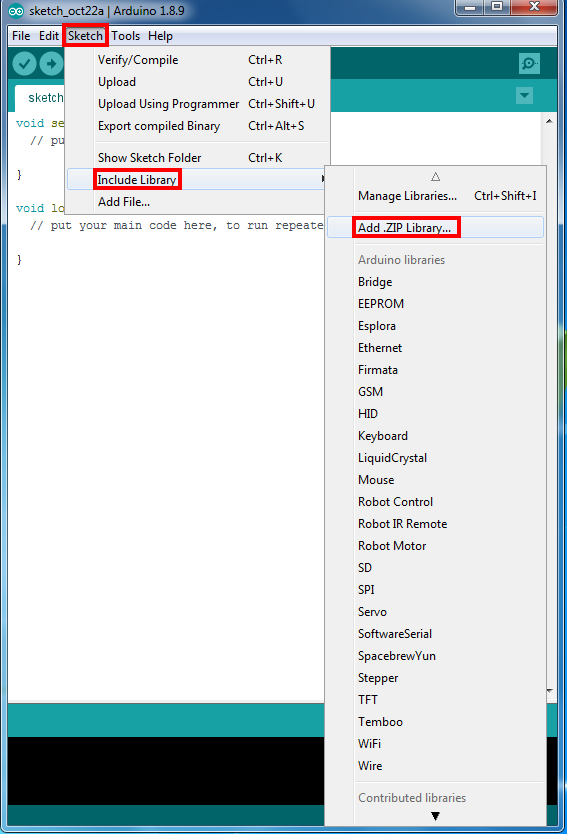
Install Arduino sketch file
Step 1) Connect the OSOYOO Basic board to computer via USB cable,
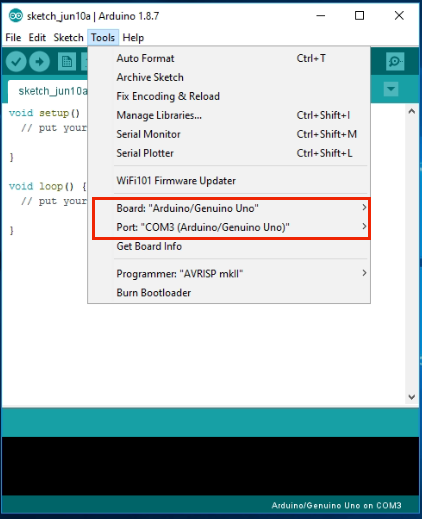
Step 2) Open the IDE and choose corresponding board type and port type for you project.
- Board:”Arduino/Genuino UNO”
- Port: Choose your own Serial Port for your mainboard
Step 3) Please download the code from following link:
https://osoyoo.com/driver/blynk/blynk3.zip
Unzip the download file and enter the folder blynk3 and double click blynk3.ino file to open the sketch.
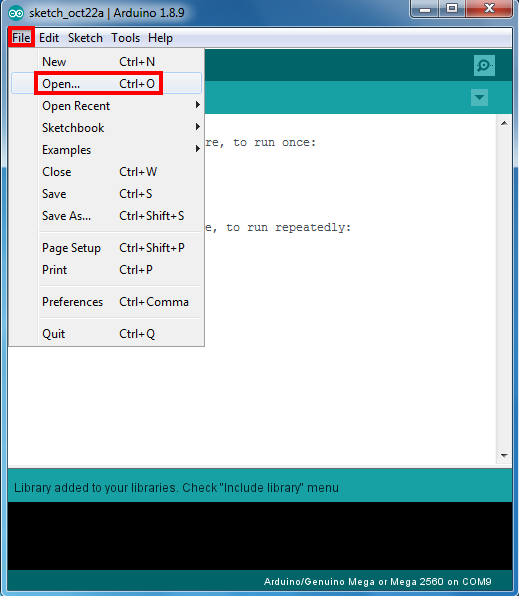
You can also open the sketch file by Clicking file – Open, then choose code in the folder, load up the sketch onto your Arduino.
Note: In the sketch, find following lines:
char auth[] =”sM1i_rSJjDlQxesfuhOzrL0h9NiivJkn”;
Replace sM1i_rSJjDlQxesfuhOzrL0h9NiivJkn with your local Blynk Token. If you don’t know how to get token, read this article.
Then find following lines and replace your wifi ssid/password and your blynk server IP address
char ssid[] = "***";//replace this line with your wifi ssid
char pass[] = "***"; //replace this line with your wifi password
char server_ip[]="192.168.1.81"; // replace this line with your Blynk Server IP address

Upload the sketch to the board. Wait until you see something like this:
Done uploading
Now open Serial monitor in the upper right corner, you should see your Arduino IP address and Ready message as following:
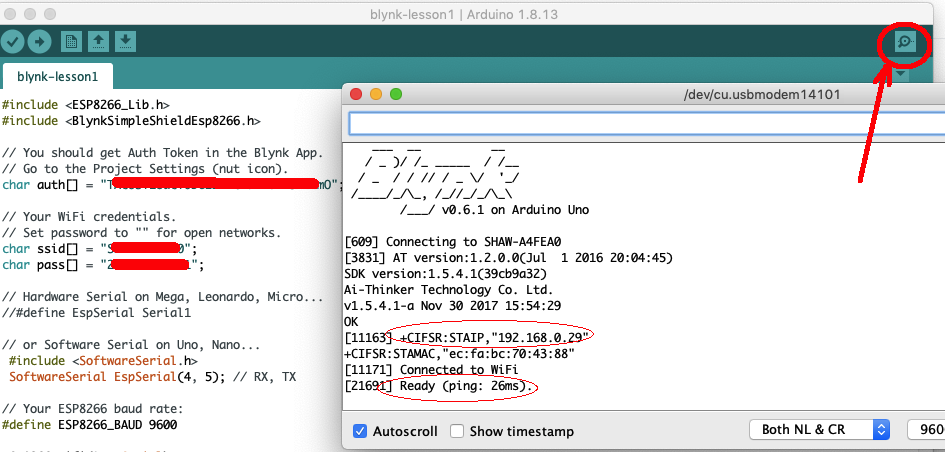
Congratulations! You are all ready! Your hardware is now connected to the Blynk cloud!
If you can’t see your IP address, please check your WIFI SSID/Password setting in your code, If you can see IP address but no Ready message, please check your Blynk Token and Local Server IP address are correctly updated in your code file.
Blynk(legacy) App project setup
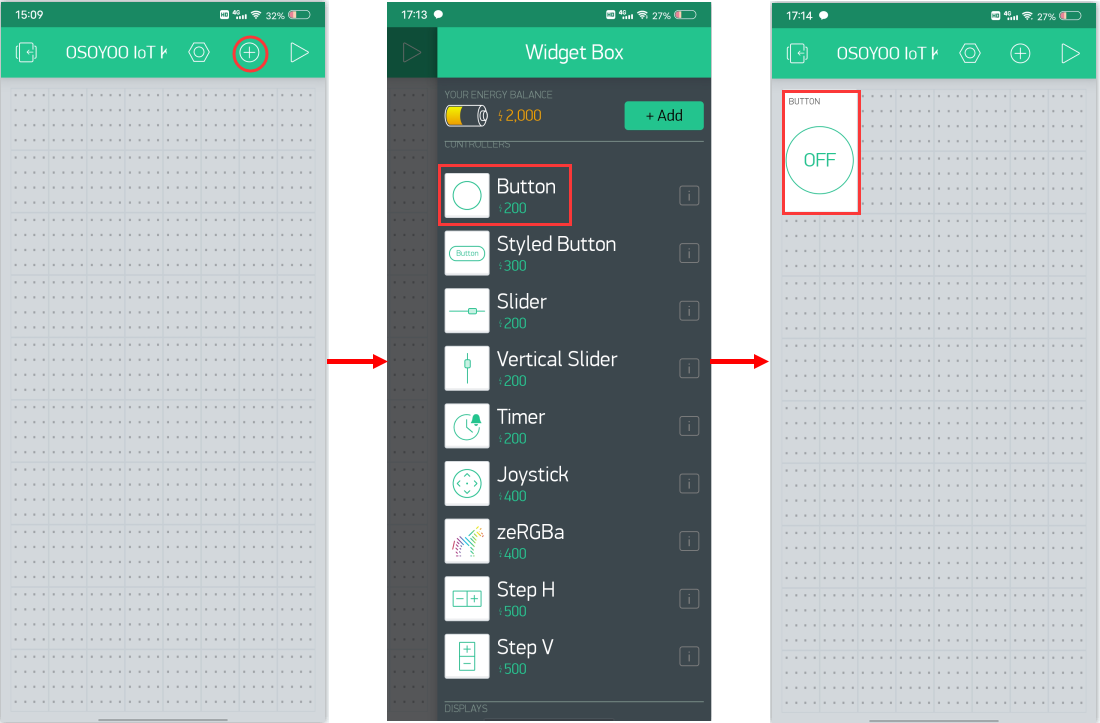
Open your project page and press the “+” button to add the “Button” Widget.
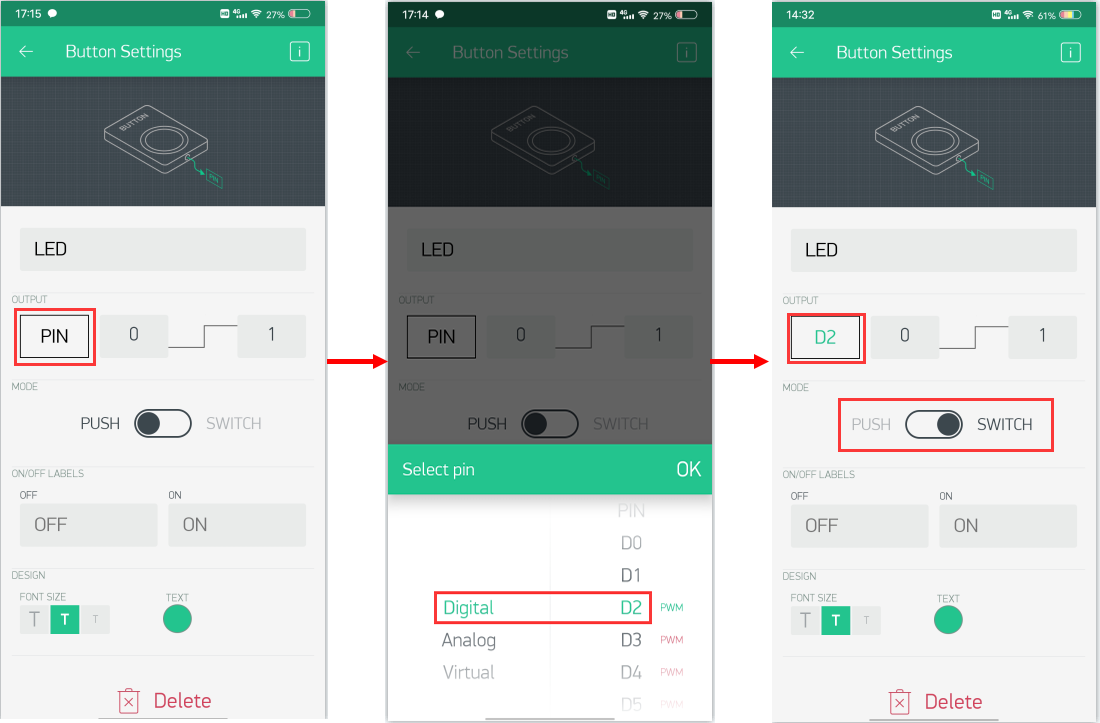
Button Widget settings:
Name Column: You can name your button widget, whatever you like.
OUTPUT: D2 | 0-1
MODE: We choose the Switch mode here.
You can modify other options according to your own habits or keep them as default.
Then back to the project page. and press the “▷” button to start your project.
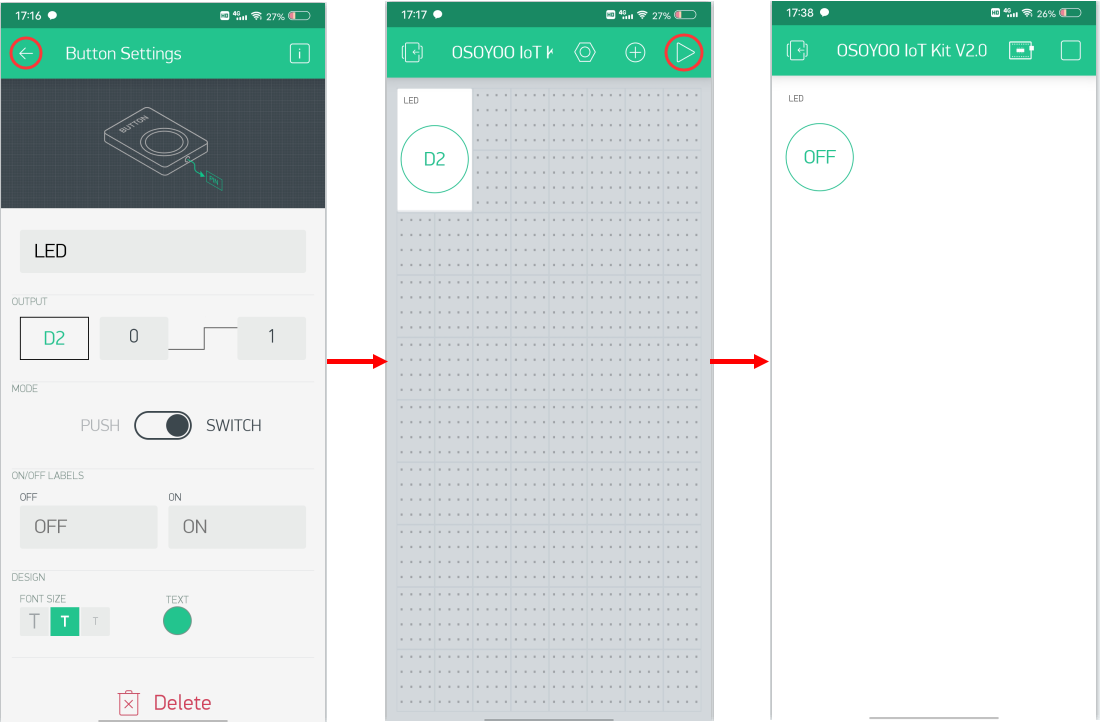

Press the Button on the project page and you will find that the LED connected to D2 has been lit.
Press the Button again, the LED will be extinguished.
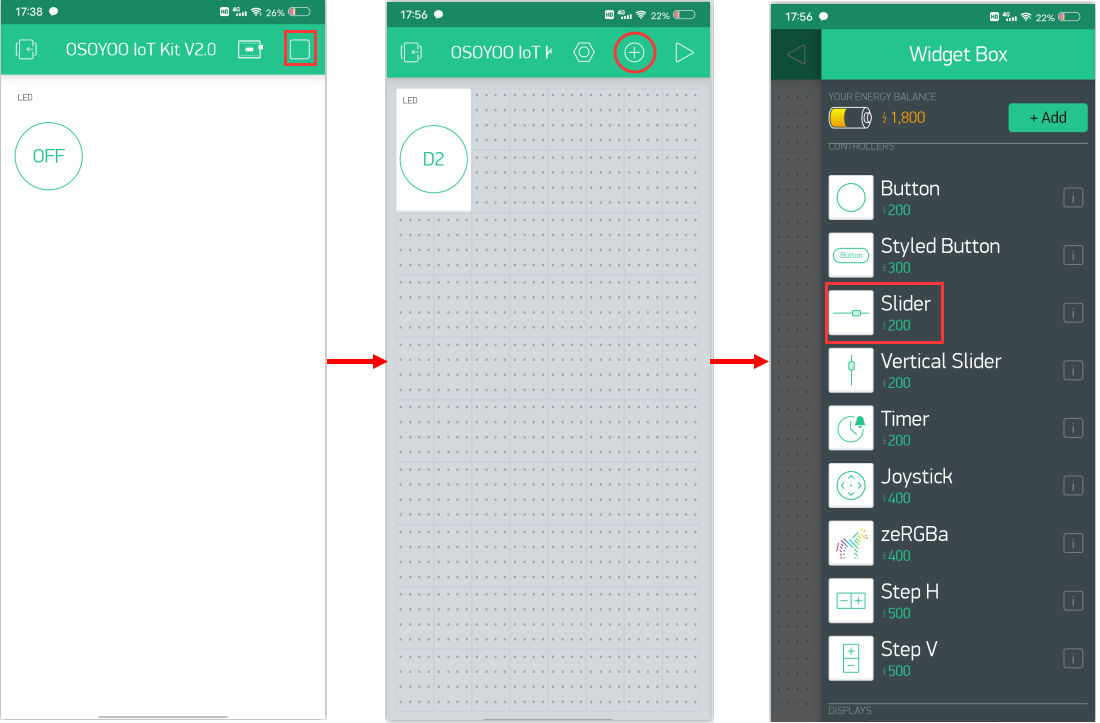
While in PLAY mode, you won’t be able to drag or set up new widgets, press “□” and get back to EDIT mode.
If you find the device is offline, please check your code, wiring and app settings, and try again.

Remotely control the brightness of the LED
In this section we will introduce how to control the brightness of the light through this kit and Blynk APP.
The wiring and code of this experiment are the same as the previous part, we only need to add a new widget.
App project setup
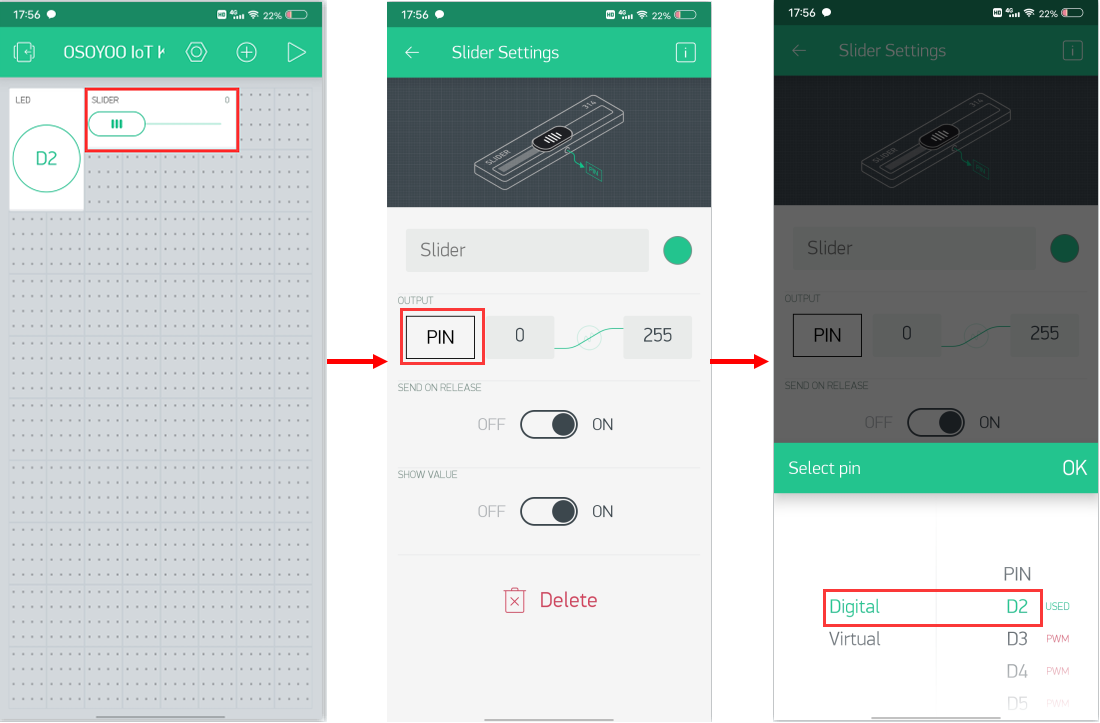
Open your project page and press the “+” button to add the “Slider” Widget.
Slider Widget settings:
Name Column: You can name your button widget, whatever you like.
OUTPUT: D2 | 0-255
You can modify other options according to your own habits or keep them as default.
Running Result
After you finished all above operations,open the Serial Monitor and you will see the connection situation,then open the Blynk APP, press the PLAY button “▷“. This will switch you from EDIT mode to PLAY mode where you can interact with the hardware.
While in PLAY mode, you won’t be able to drag or set up new widgets, press “□” and get back to EDIT mode.
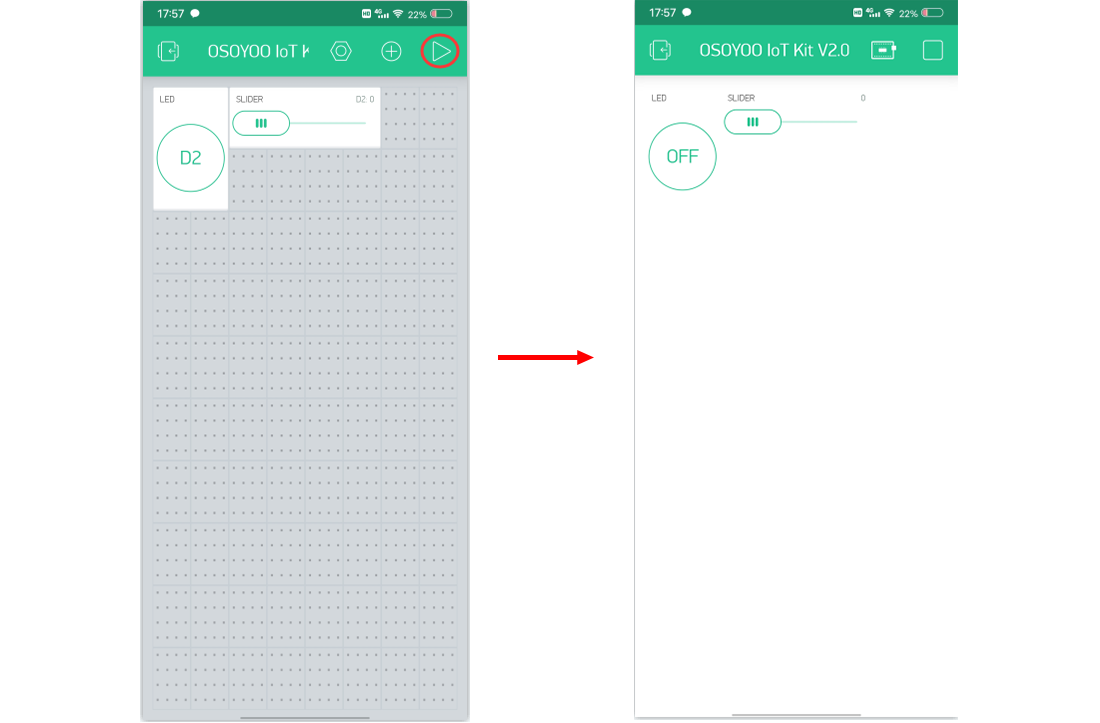
Slide the slider to change the brightness of the LED module connected to D2. When the slider is on the far left, the LED is off, and when the slider is on the far right, the LED is brightest.
If you find the device is offline, please check your code, wiring and app settings, and try again.


