In dieser Lektion werden wir 2 Stück IR-Abstandssensoren auf einem Roboter-Auto installieren und das Auto programmieren, um Objektbewegungen zu verfolgen. Das Auto empfängt das Signal von den IR-Abstandssensoren und das Programm steuert das Auto, um entsprechende Aktionen auszuführen.
Du musst Lektion 1 (das Zusammenbauen des Autos) abschließen, bevor du mit dieser Lektion beginnst.
OSOYOO Mecanum-Rad-Roboter-Chassis x1
OSOYOO Räder und Motoren x4 (linke Räder x2/rechte Räder x2)
OSOYOO Mega2560 Board, vollständig kompatibel mit Arduino UNO/Mega2560 x1
OSOYOO Uart Wi-Fi Shield x1
OSOYOO Modell Y Treiberplatine x1
OSOYOO Spannungsmesser x1
OSOYOO IR-Abstandssensoren x2
OSOYOO Batteriebox x1
OSOYOO 3-poliges Jumper-Kabel (weiblich zu weiblich) x1
OSOYOO 6-poliges Jumper-Kabel (männlich zu weiblich) x2
OSOYOO 10-poliges Jumper-Kabel (männlich zu weiblich) x1
OSOYOO 2-poliger XH.25-Stecker (weiblich zu weiblich) x1
18650 Batterien (3,7V) x2
Batterieladegerät x1
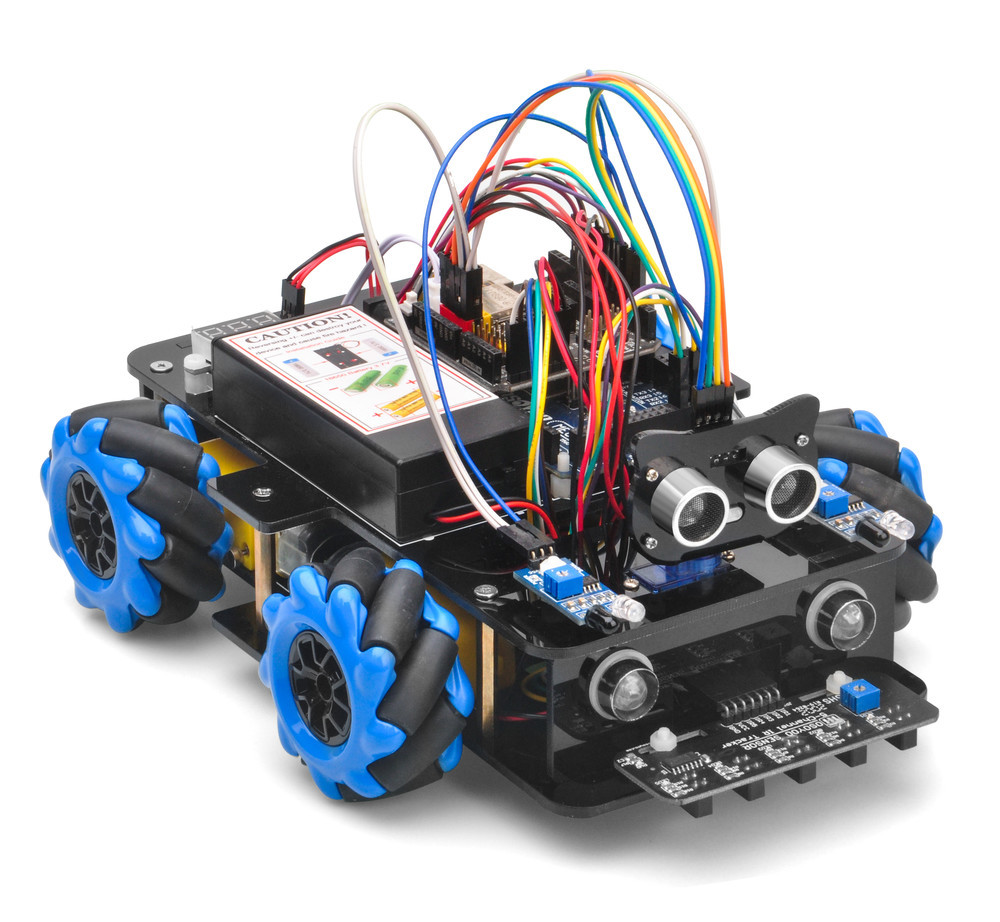
Schritt 1: Installiere das Grundgerüst des intelligenten Autos gemäß Smart Car Lektion 1. Wenn du die Installation bereits in Lektion 1 abgeschlossen hast, belasse es wie es ist.
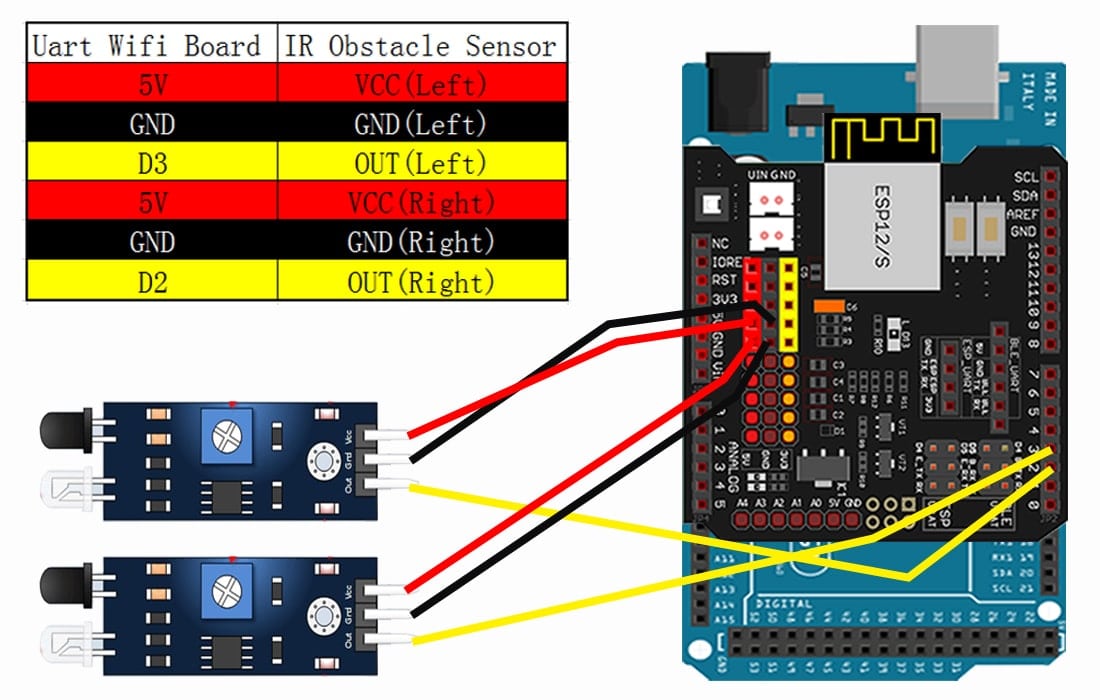
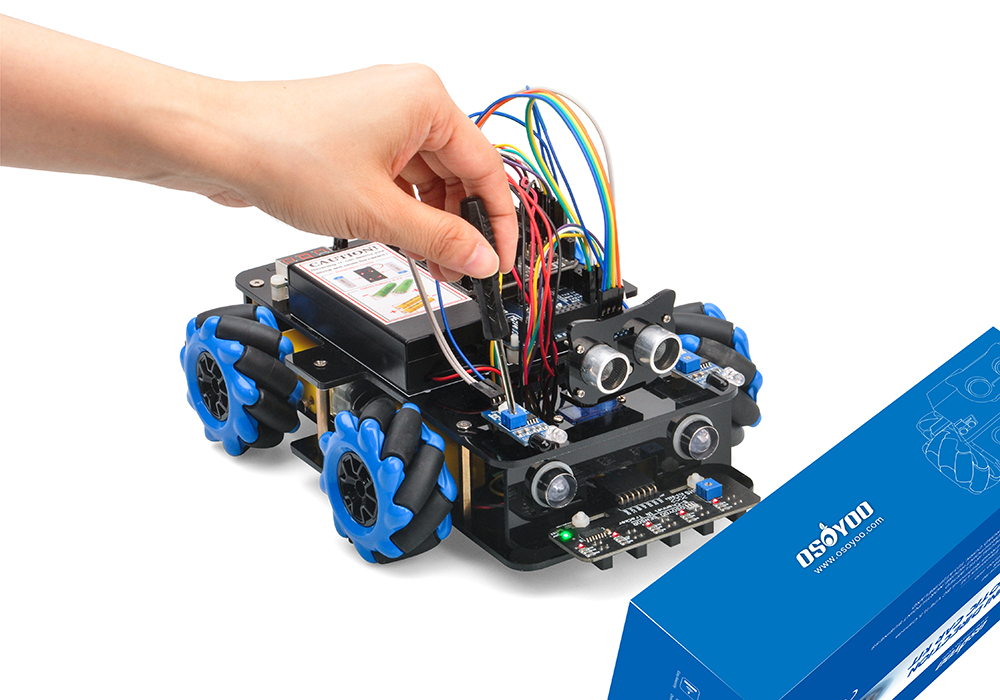
Schritt 2: Verbinde 2 Stück IR-Abstandssensormodule gemäß dem folgenden Anschlussdiagramm. (Denke daran: Entferne keine bereits in Lektion 1 installierten Kabel 1).
Schritt 1: Installiere die neueste Version der Arduino IDE (Wenn du bereits eine Arduino IDE-Version nach 1.1.16 hast, überspringe diesen Schritt bitte). Lade die Arduino IDE von https://www.arduino.cc/en/Main/Software?setlang=en, herunter und installiere die Software.
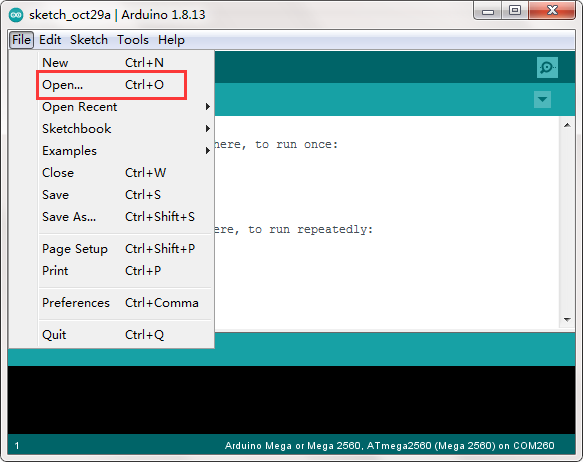
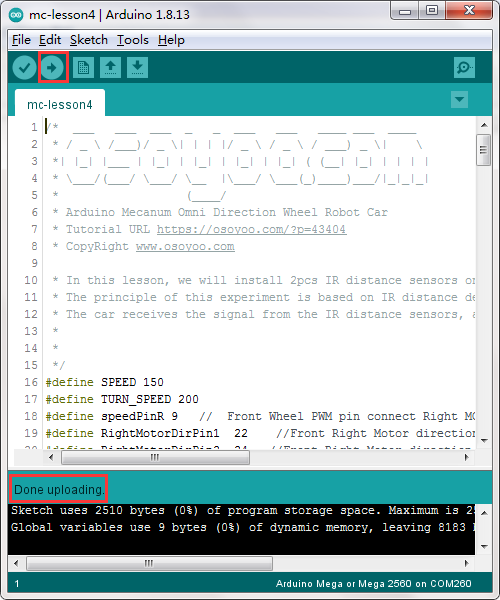
Step 3: Connect Mega2560 board to PC with USB cable, Open Arduino IDE → click file → click Open → choose code “lesson4.ino” in lesson4 folder, load the code into Arduino.
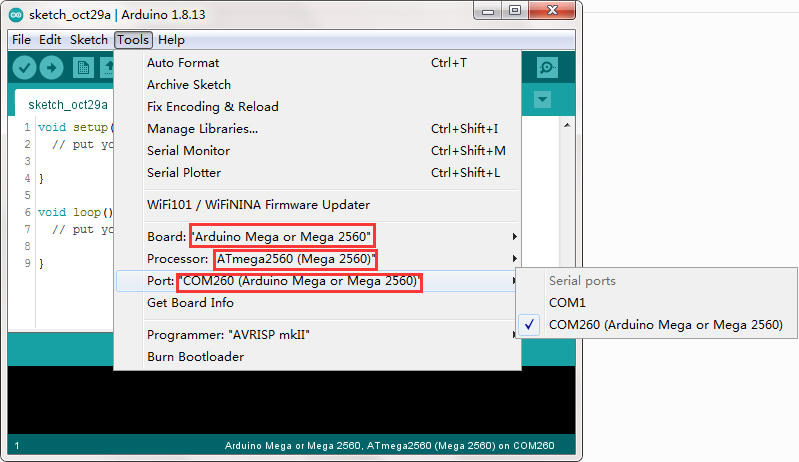
Step 4: Choose corresponding board/port for your project, upload the sketch to the board.
Step 5: Turn on the car, put object about 10 cm ahead of each IR distance sensors and adjust potentiometer on IR distance sensors to detect object or your hand.
Note: When these IR modules detect objects, both the power indicator and signal indicator are on. When No object is detected, only power indicator is on, signal indicator is off. If the signal indicator is always on even though there is no obstacle in front of the sensor, you need to adjust the potentiometer.
Turn on the car, place your hand ahead of the car, then the car will move towards your hand as if you pull it. It goes forward when both IR Obstacle Avoidance modules detect your hand; it turns right if only the right IR Obstacle Avoidance module detects object; it turns left if only the left IR distance sensor detects object.
When your hand is over 10 cm ahead, it will stop.
yes. all the 6 example lessons related to this V2.0 Mecanum car use the same parts in the package box. No need buy extra parts. But you might need to change some wire connection. Please read the tutorial carefully.


yes. all the 6 example lessons related to this V2.0 Mecanum car use the same parts in the package box. No need buy extra parts. But you might need to change some wire connection. Please read the tutorial carefully.