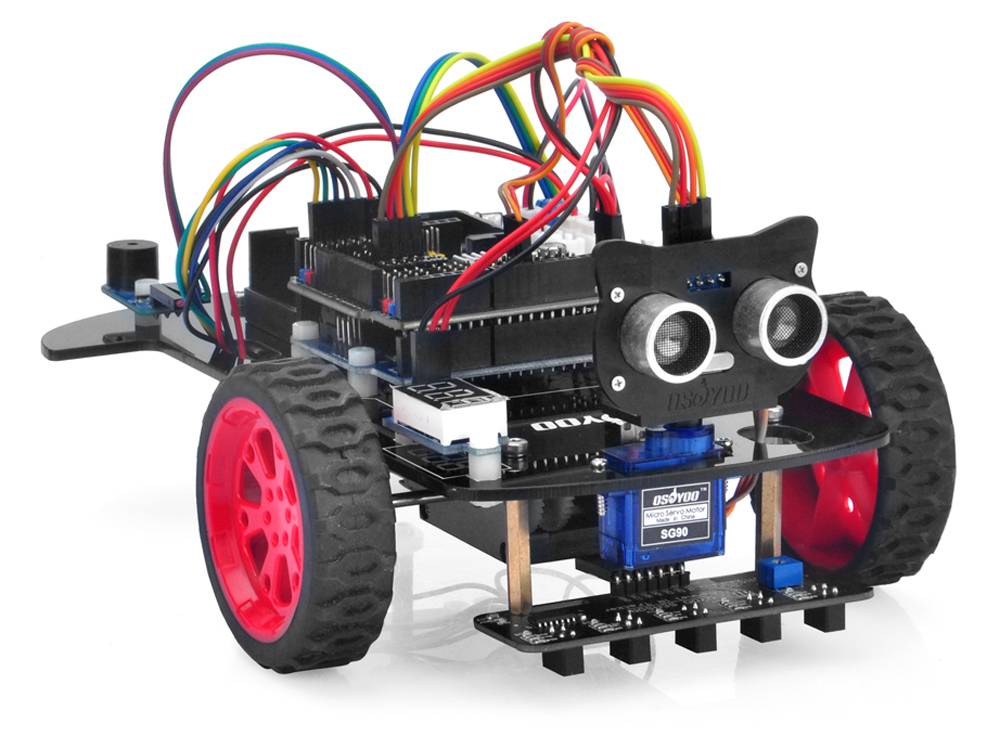
En esta lección, instalaremos un sensor ultrasónico en el coche robot y programaremos el coche para que mantenga cierta distancia del objeto para moverse.
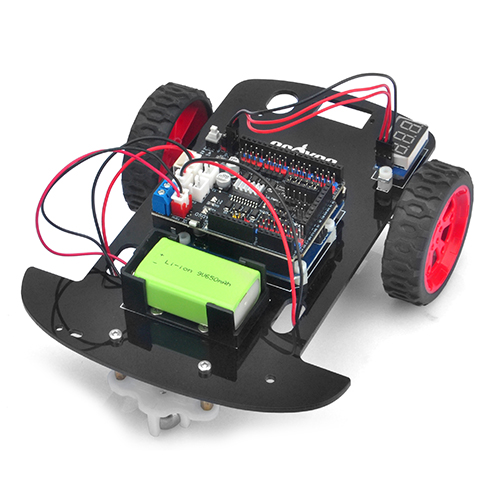
Pasos 1: Instale el marco básico del coche inteligente según la Lección 1. Si ya ha completado la instalación en la Lección 1, déjelo tal como está.
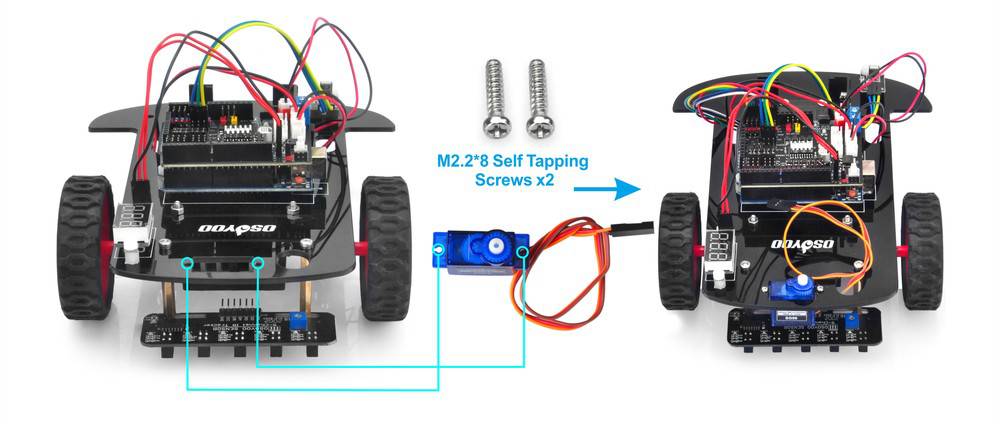
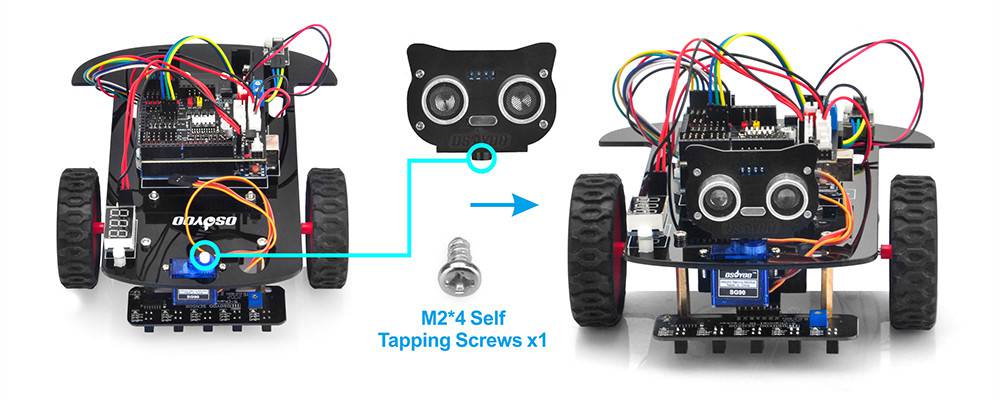
Pasos 2: Instale el motor del servo en la parte delantera del chasis del coche con 2 tornillos autorroscantes M2.2 * 8 como sigue:
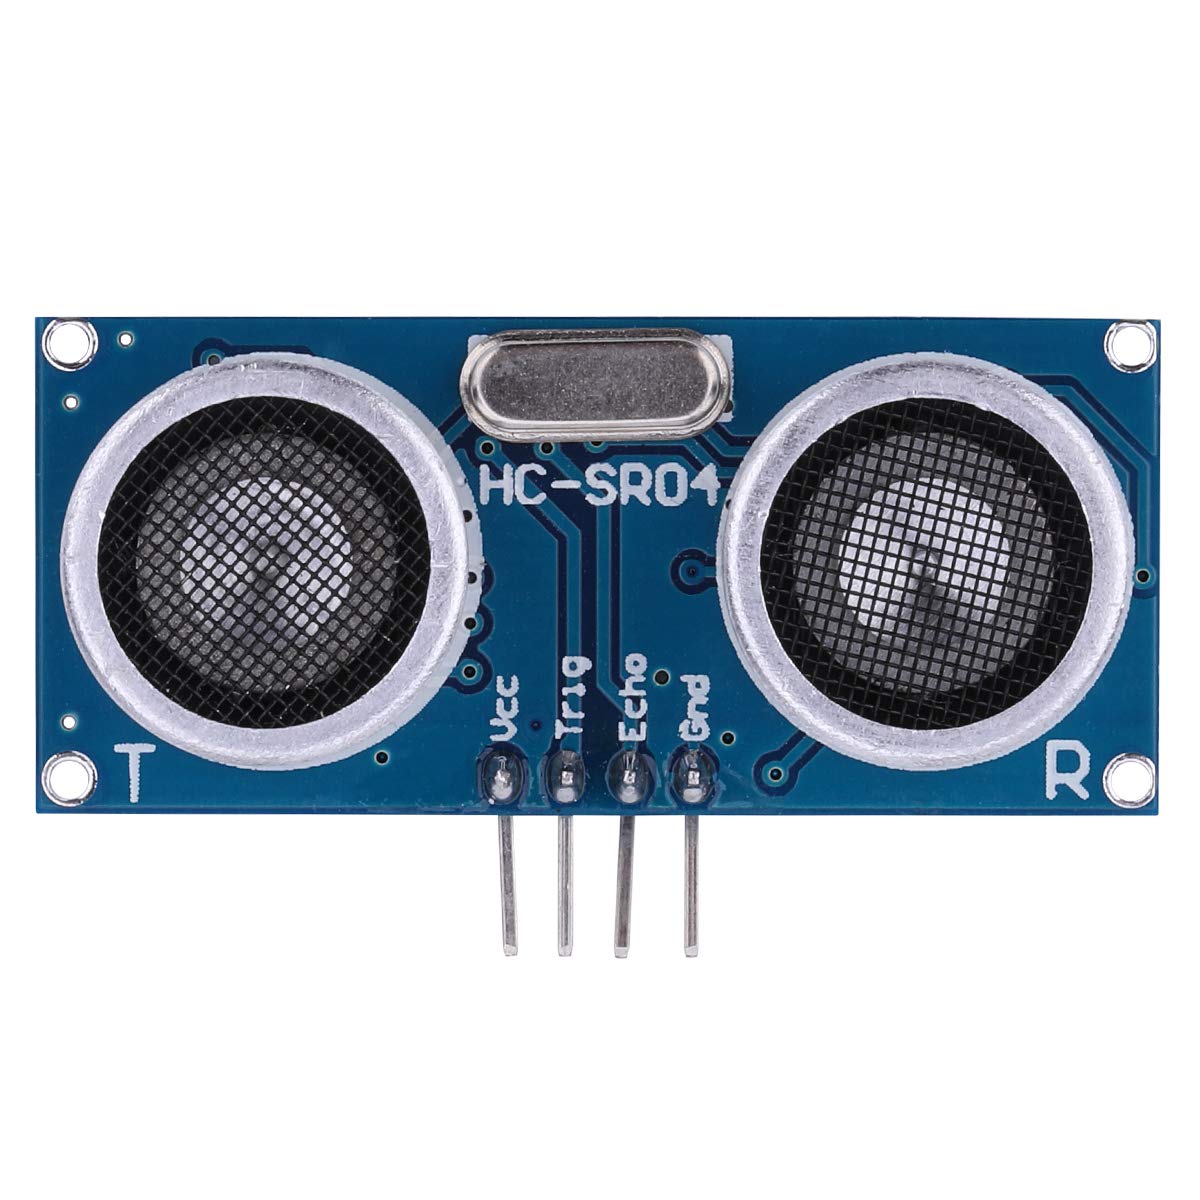
Pasos 3: Instale el módulo ultrasónico en el soporte de montaje con 4 tornillos M1.5 * 8 y tuercas M1.5.
Pasos 4: Instale el soporte de montaje para el módulo ultrasónico en el motor del servo con tornillos autorroscantes M2 * 4.
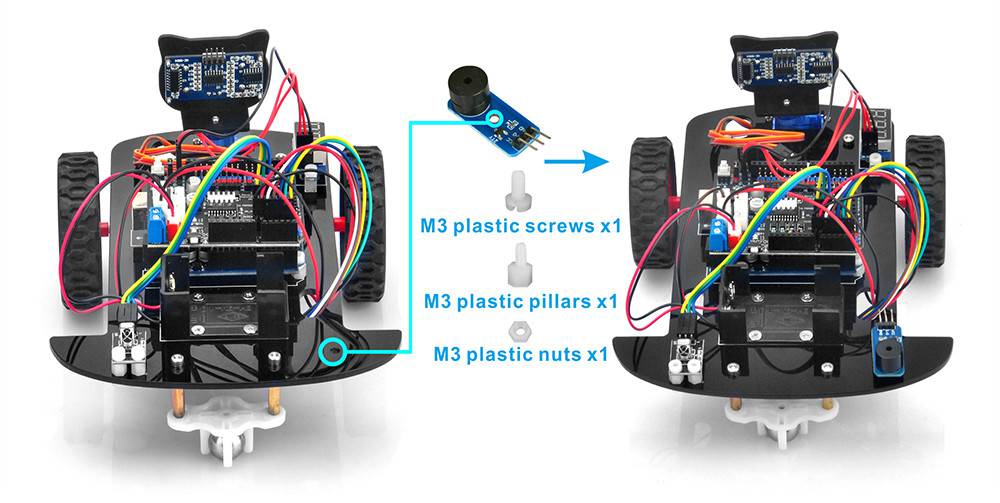
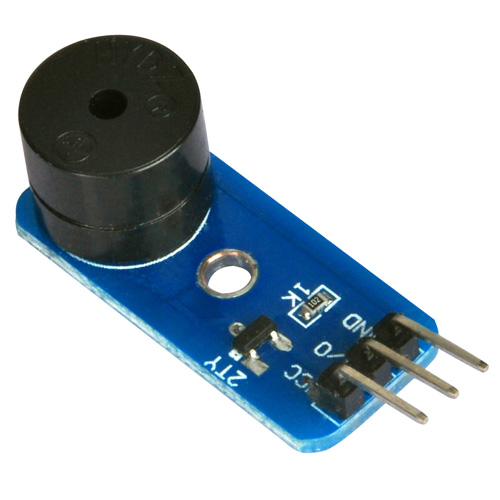
Pasos 5: Instale el módulo de zumbador en el chasis del coche con 1 tornillo de plástico M3, un pilar de plástico M3 y una tuerca de plástico M3.
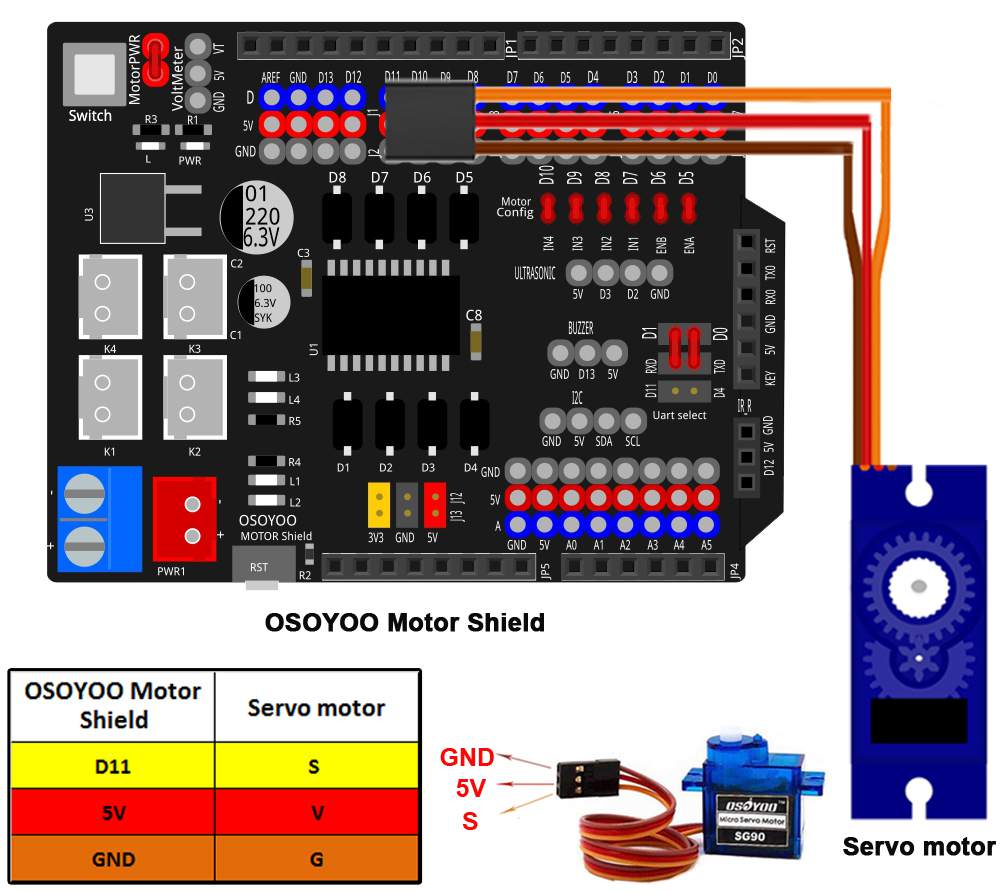
Pasos 6: Conecte el motor del servo SG90 a la placa de control del motor OSOYOO como se muestra en el siguiente diagrama (Recuerde: NO retire ningún cable existente instalado en la Lección 1):
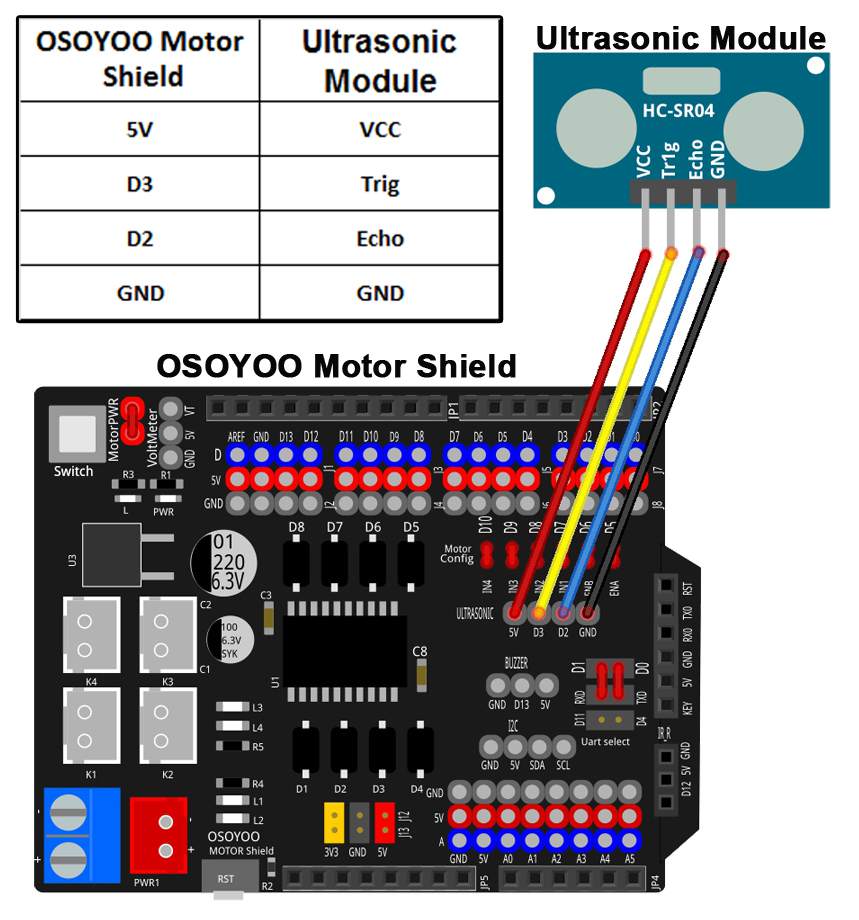
Pasos 7: Conecte el módulo ultrasónico a la placa de control del motor OSOYOO como se muestra en el siguiente diagrama:
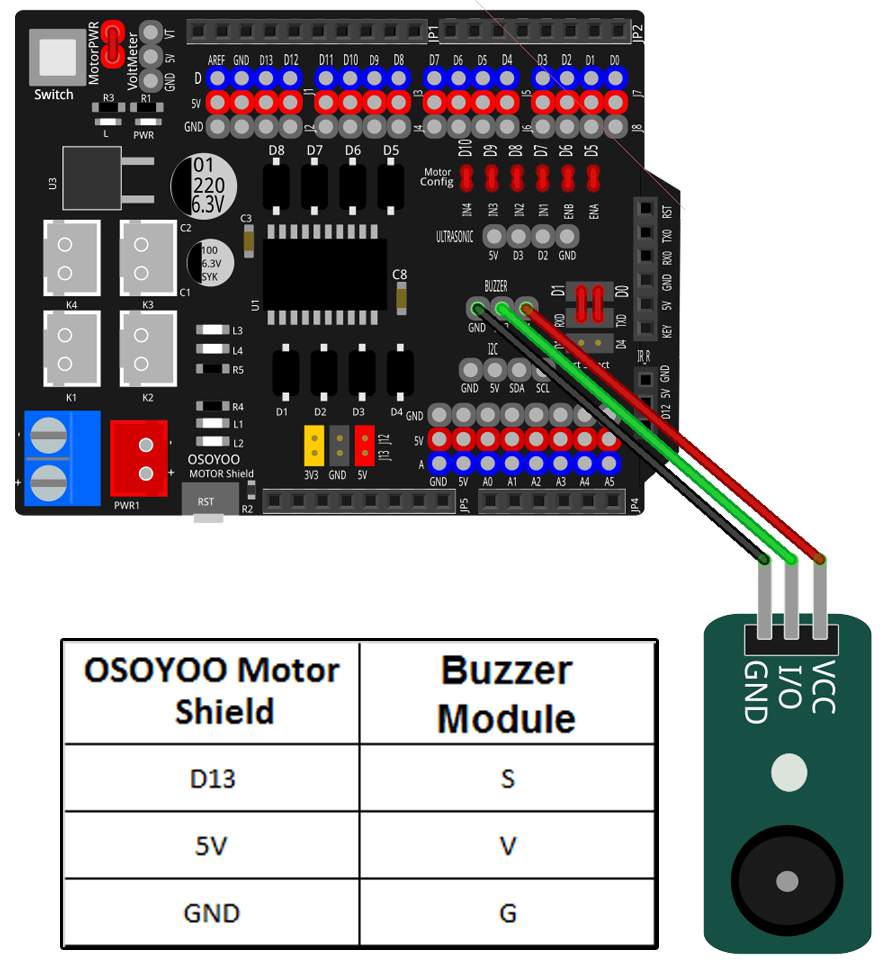
Pasos 8: Conecte el módulo de zumbador a la placa de control del motor OSOYOO como se muestra en el siguiente diagrama:
Descarga Lesson 4 sample code , y descomprime el archivo zip descargado lesson4.zip, verás una carpeta llamada lesson4.
Paso 3:
Conecte la placa básica OSOYOO para Arduino a la PC con un cable USB, abra el IDE -> haga clic en Archivo -> haga clic en Abrir -> elija el código “lesson4.ino” en la carpeta lesson4, cargue el código en la placa.
Aviso: Apague la batería o desconecte el adaptador de energía al cargar el código de programa en la Placa Básica OSOYOO para Arduino.
Paso 4:
Elija la placa y el puerto correspondientes para su proyecto, cargue el bosquejo en la placa.
Paso 5:
Alineación inicial de la dirección del servo del sensor ultrasónico
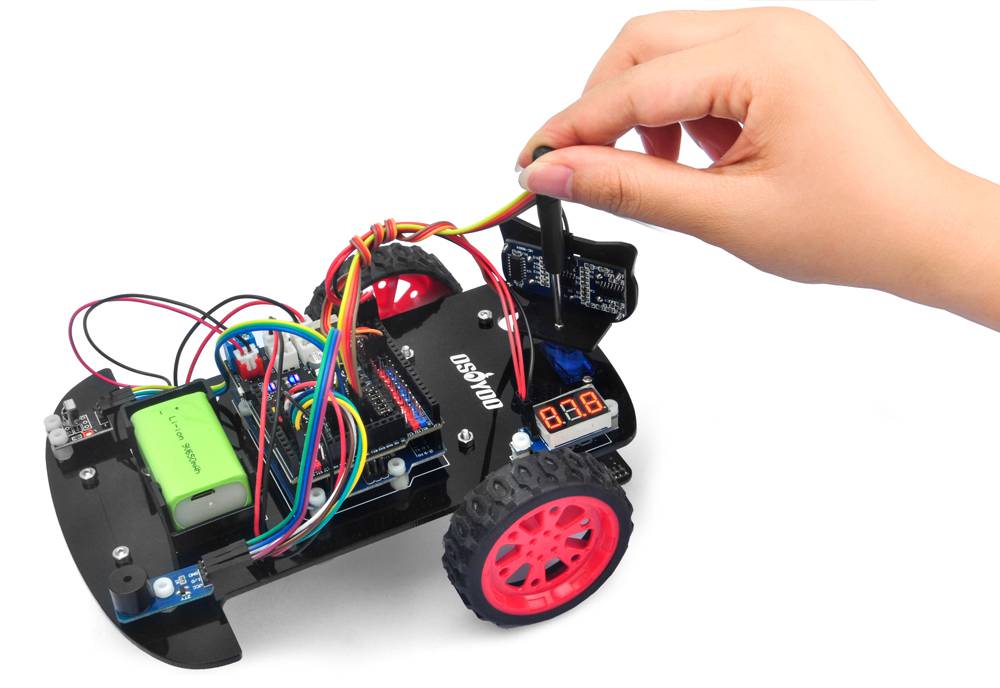
Después de encender el coche, escucharás un sonido de pitido largo, luego el servo hará algún movimiento y finalmente se detendrá en una dirección durante 2 segundos. Durante estos primeros 2 segundos, debes asegurarte de que el sensor ultrasónico (dos ojos) esté mirando hacia adelante.
Si no está mirando hacia adelante, debes apagar el coche inmediatamente y quitar el sensor del servo, volverlo a instalar y hacer que mire hacia la dirección recta hacia adelante como en la siguiente imagen.
De lo contrario, el programa de evitación de obstáculos no funcionará correctamente. Después de ajustar la dirección del sensor, enciende el coche de nuevo. Después de escuchar el pitido largo, el sensor debe mirar hacia adelante igual que en la siguiente imagen. Si su dirección no es recta hacia adelante, apaga el coche y realinea la dirección de nuevo.
Final Testing :
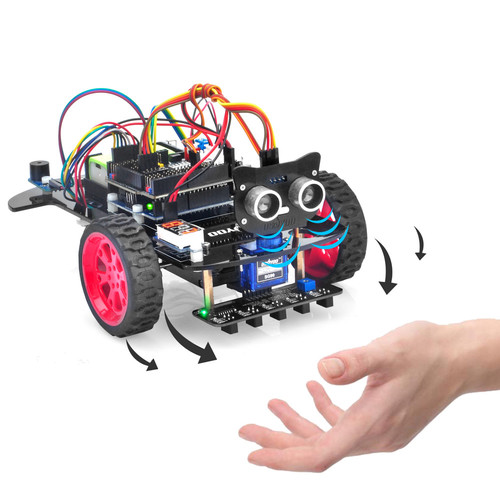
Enciende el coche, mueve un objeto o tu mano frente al módulo ultrasónico, y luego el coche se moverá a cierta distancia del objeto o de tu mano. Cuando te acerques al coche, éste retrocederá, como si dijera “no me toques”. Cuando el objeto o tu mano se alejen del módulo ultrasónico, el coche dejará de moverse.
Piezas y dispositivos:
No.
Dispositivo
Imagen
Cant.
Accesorios
1
Placa Básica OSOYOO (totalmente compatible con Arduino UNO R3)
I had a similar problem with Lesson 2: IR remote controller. In the end, I removed the OSOYOO motor shield from the Arduino Uno. I was then able to load the sketch without any errors. After I reattached the OSOYOO motor shield, it worked with the IR remote controller. I’m currently having problems with Lesson 3, just like one or two others that have reported the robot car will not move, but with a little thinking and ingenuity given time, I’m hoping to solve that problem too!
The message I had for Lesson 2 was the same as Lausofia “stk500_recv(): programmer is not responding”. What I’ve discovered for Lesson 3 is that you need a full charge of the 9v battery to power the robot. The 9V ASDA battery that I was using was not run down a bit, so very little happened on the black line, Sometimes the robot moved forward a little, sometimes in circles as only one of the wheels responded. When I fully charged the Lithium Battery provided with the kit (by the way, an excellent idea to directly charge the battery now with a cable to a charging plug), I got a more solid reaction, and I viewed forward movement after it followed the black line, but some circulating motions too, which were not required. This did not last long though, so the battery required charging again. In my case, there is a direct relation between the weight of the robot and the battery charge to move it when coupled to the sensor. This may not be the case with other students following this course, as they might be able to run the robot car over a smoother surface than mine, hence less friction.
I’m also following the Udemy “Hands-On Robotics with Arduino, Build 13 Robot Projects” course. The instructor’s robot, which is similar to your robot car (but the course is not as sophisticated), is powered by two 9V batteries. Did the instructor decide to include two powered batteries as a result of previous experimentation? https://www.udemy.com/course/robotics-for-beginners-build-time-control-robot-from-scratch/
With Lesson 4 I switched off the battery (removing it). But I had the message “stk500_recv(): programmer is not responding” again, on downloading the sketch.
I removed the OSOYOO motor shield from the Arduino Uno and I was then able to download the sketch without any errors. After I reattached the OSOYOO motor shield, the robot car operated a little erratically at first, but then after several attempts of switching ON, observing, switching OFF again, and repeating the procedure, then, on switching ON, the electronics and sketch behaved as described in the FINAL TESTING section. Thank you!
based on your description, we believe your motor shield might be burned. please email us your order number and address to [email protected], we will send you replacement.
Hello, whenever I turn on the robot it moves forward continuously without doing anything. It also doesn’t ever stop.
Everything is plugged in the right ports the the wires are firm. What can I do to fix this?


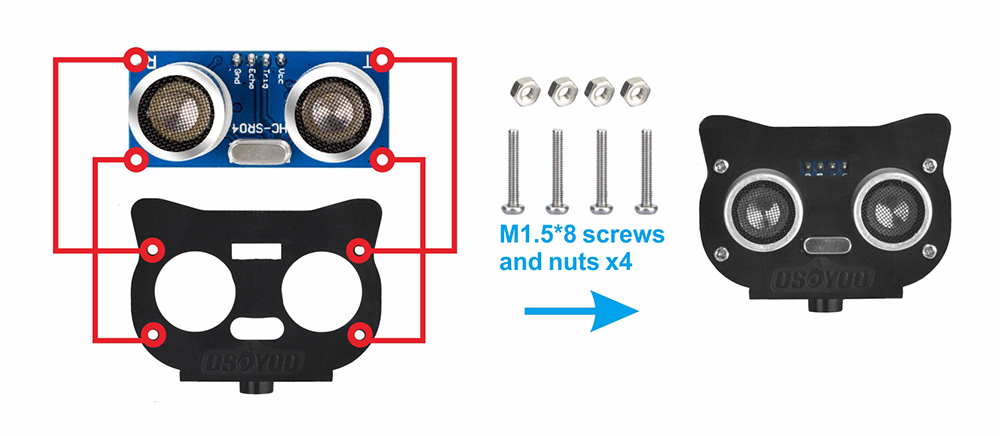


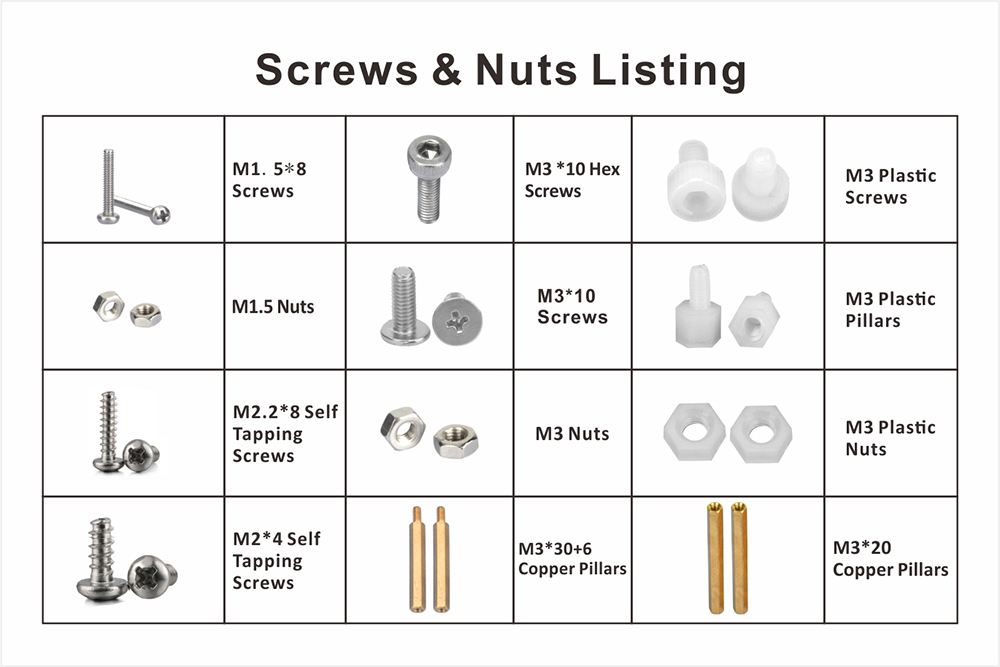
What kind of nuts do you need to fasten the mount holder onto the ultrasonic sensor?
It uses M1.5 nuts to fasten the mount holder onto the ultrasonic sensor. It is packed with M1.5*8 screws.
Would M.16 or M.14 nuts work as well?
I’m asking because these nuts loosen over time, and they’re very hard to find when they fall.
Is it possible to find these online as replacements?
Hi, please provide your order No. and address.
I’ll send the replacement to you ASAP.
702-4109202-2332257
****
Missisauga, Ontario LPX 1P7
Canada
By the way, Is the replacement free?
and when can I expect these to arrive?
OK, I’ll send the replacement to you ASAP for free.
It will take 10-25 days to reach your side.
Elaine
everytime i try to upload the code to the basic board it say:savrdude: stk500_recv(): programmer is not responding
I had a similar problem with Lesson 2: IR remote controller. In the end, I removed the OSOYOO motor shield from the Arduino Uno. I was then able to load the sketch without any errors. After I reattached the OSOYOO motor shield, it worked with the IR remote controller. I’m currently having problems with Lesson 3, just like one or two others that have reported the robot car will not move, but with a little thinking and ingenuity given time, I’m hoping to solve that problem too!
hi, Alan,
do you mean that your lesson 2 works well but lesson 3 not working? Do you have any error message when you upload lesson 3 code?
The message I had for Lesson 2 was the same as Lausofia “stk500_recv(): programmer is not responding”. What I’ve discovered for Lesson 3 is that you need a full charge of the 9v battery to power the robot. The 9V ASDA battery that I was using was not run down a bit, so very little happened on the black line, Sometimes the robot moved forward a little, sometimes in circles as only one of the wheels responded. When I fully charged the Lithium Battery provided with the kit (by the way, an excellent idea to directly charge the battery now with a cable to a charging plug), I got a more solid reaction, and I viewed forward movement after it followed the black line, but some circulating motions too, which were not required. This did not last long though, so the battery required charging again. In my case, there is a direct relation between the weight of the robot and the battery charge to move it when coupled to the sensor. This may not be the case with other students following this course, as they might be able to run the robot car over a smoother surface than mine, hence less friction.
I’m also following the Udemy “Hands-On Robotics with Arduino, Build 13 Robot Projects” course. The instructor’s robot, which is similar to your robot car (but the course is not as sophisticated), is powered by two 9V batteries. Did the instructor decide to include two powered batteries as a result of previous experimentation? https://www.udemy.com/course/robotics-for-beginners-build-time-control-robot-from-scratch/
With Lesson 4 I switched off the battery (removing it). But I had the message “stk500_recv(): programmer is not responding” again, on downloading the sketch.
I removed the OSOYOO motor shield from the Arduino Uno and I was then able to download the sketch without any errors. After I reattached the OSOYOO motor shield, the robot car operated a little erratically at first, but then after several attempts of switching ON, observing, switching OFF again, and repeating the procedure, then, on switching ON, the electronics and sketch behaved as described in the FINAL TESTING section. Thank you!
based on your description, we believe your motor shield might be burned. please email us your order number and address to [email protected], we will send you replacement.
It seems that the UNO board has some problem. Please send your order number and address to [email protected], we will give you solution.
Hello, whenever I turn on the robot it moves forward continuously without doing anything. It also doesn’t ever stop.
Everything is plugged in the right ports the the wires are firm. What can I do to fix this?
are you talking about lesson 1 or lesson 4? check if your wires on the two sensors connect properly.